-
RabbitMQ(七)延迟队列
7.1延迟队列的概念
延时队列,队列内部是有序的,最重要的特性就体现在他的延迟属性上,延时队列中的元素时希望在指定时间到了以后或之前取出和处理,简单来说,延时队列就是用来存放需要在指定时间被处理的元素的队列
7.2延时队列使用场景
- 订单在十分钟内未支付自动取消
- 新创建的店铺,如果在十天之内未上传过商品,则自动发消息提醒
- 用户注册之后,如果三天内没有登录,则进行短信提醒
- 用户发起退款,如果三天内没有得到处理则通知相关运营人员
- 预定会议后,需要在预定的时间点前十分钟通知各个入会人员参加
这些场景都有一个特点,需要在某个事件发生之后或者之前的指定时间点完成某一项任务,如:发生订单生成事件,在十分钟之后检查该订单支付状态,然后将未支付的订单进行天团,看起米似乎使用定时任务,一直轮询数据,每秒查一次,取出需要被处理的数据,然后处理个就元事了哨的9来数据量比较少,确实可以这样做,比如:对于“如果账单一周内未支付则进行自动结算”这样的需求,
如果对于时间不是严格限制,而是宽松意义上的一周,那么每天晚上跑个定时任务检查一下所有未支付的账单,确实也是一个可行的方案。但对于数据量比较大,并且时效性较强的场景,如:“订单十分钟内未支付则关闭“,短期内未支付的订单数据可能会有很多,活动期间甚至会达到百万甚至千万级别,对这么庞大的数据量仍旧使用轮询的方式显然是不可取的,很可能在一秒内无法完成所有订单的检查,同时会给数据库带来很大压力,无法满足业务要求而且性能低下。7.4整合springboot
Springboot-rabbitmq依赖
<dependency> <groupId>org.springframework.bootgroupId> <artifactId>spring-boot-starter-amqpartifactId> dependency> <dependency> <groupId>org.springframework.amqpgroupId> <artifactId>spring-rabbit-testartifactId> <scope>testscope> dependency>- 1
- 2
- 3
- 4
- 5
- 6
- 7
- 8
- 9
- 10
- 11
7.5yaml文件
spring: rabbitmq: host: ip port: 5672 username: guest password: guest- 1
- 2
- 3
- 4
- 5
- 6
7.5队列TTL
7.5.1代码架构图
创建两个队列QA和QB,两者队列TTL分别设置为10s和40s,然后在创建一个交换机X和死信交换机Y,他们的类型都是direct,创建一个死信队列QD,他们的绑定关系如下:

7.5.2配置文件类代码
package com.example.demo.config; import org.springframework.amqp.core.*; import org.springframework.beans.factory.annotation.Qualifier; import org.springframework.context.annotation.Bean; import org.springframework.context.annotation.Configuration; import java.util.HashMap; import java.util.Map; /** * @author 我见青山多妩媚 * @date Create on 2022/8/22 15:18 * TTL队列,配置文件类代码 */ @Configuration public class TTLQueueConfig { //普通交换机 private static final String X_EXCHANGE = "X"; //死信交换机 private static final String Y_DEAD_EXCHANGE = "Y"; //普通队列QA private static final String A_QUEUE = "QA"; private static final String B_QUEUE = "QB"; //死信队里名称 private static final String D_DEAD_QUEUE = "QD"; //声明普通交换机,相当于起别名 @Bean("xExchange") public DirectExchange xExchange(){ return new DirectExchange(X_EXCHANGE); } @Bean("yDeadExchange") public DirectExchange yDeadExchange(){ return new DirectExchange(Y_DEAD_EXCHANGE); } //声明队列 ttl 10s @Bean("aQueue") public Queue aQueue(){ //初始map长度 Map<String, Object> arguments = new HashMap<>(3); //设置死信交换机 arguments.put("x-dead-letter-exchange",Y_DEAD_EXCHANGE); //设置死信routingKey: YD arguments.put("x-dead-letter-routing-key","YD"); //设置ttl 10s = 10000ms arguments.put("x-message-ttl",10000); return QueueBuilder.durable(A_QUEUE).withArguments(arguments).build(); } //声明队列 ttl 40s @Bean("bQueue") public Queue bQueue(){ //初始map长度 Map<String, Object> arguments = new HashMap<>(3); //设置死信交换机 arguments.put("x-dead-letter-exchange",Y_DEAD_EXCHANGE); //设置死信routingKey: YD arguments.put("x-dead-letter-routing-key","YD"); //设置ttl 10s = 10000ms arguments.put("x-message-ttl",40000); return QueueBuilder.durable(B_QUEUE).withArguments(arguments).build(); } //死信队列 @Bean("dQueue") public Queue dQueue(){ return QueueBuilder.durable(D_DEAD_QUEUE).build(); } //绑定 @Bean public Binding queueABindXExchange(@Qualifier("aQueue")Queue aQueue, @Qualifier("xExchange")DirectExchange xExchange){ return BindingBuilder.bind(aQueue).to(xExchange).with("XA"); } @Bean public Binding queueBBindXExchange(@Qualifier("bQueue")Queue bQueue, @Qualifier("xExchange")DirectExchange xExchange){ return BindingBuilder.bind(bQueue).to(xExchange).with("XB"); } @Bean public Binding queueDBindYExchange(@Qualifier("dQueue")Queue dQueue, @Qualifier("yDeadExchange")DirectExchange yDeadExchange){ return BindingBuilder.bind(dQueue).to(yDeadExchange).with("YD"); } }- 1
- 2
- 3
- 4
- 5
- 6
- 7
- 8
- 9
- 10
- 11
- 12
- 13
- 14
- 15
- 16
- 17
- 18
- 19
- 20
- 21
- 22
- 23
- 24
- 25
- 26
- 27
- 28
- 29
- 30
- 31
- 32
- 33
- 34
- 35
- 36
- 37
- 38
- 39
- 40
- 41
- 42
- 43
- 44
- 45
- 46
- 47
- 48
- 49
- 50
- 51
- 52
- 53
- 54
- 55
- 56
- 57
- 58
- 59
- 60
- 61
- 62
- 63
- 64
- 65
- 66
- 67
- 68
- 69
- 70
- 71
- 72
- 73
- 74
- 75
- 76
- 77
- 78
- 79
- 80
- 81
- 82
- 83
- 84
- 85
- 86
- 87
- 88
- 89
- 90
- 91
- 92
- 93
- 94
- 95
- 96
- 97
- 98
7.5.3生产者代码
package com.example.demo.controller; import lombok.extern.slf4j.Slf4j; import org.springframework.amqp.rabbit.core.RabbitTemplate; import org.springframework.beans.factory.annotation.Autowired; import org.springframework.web.bind.annotation.GetMapping; import org.springframework.web.bind.annotation.PathVariable; import org.springframework.web.bind.annotation.RequestMapping; import org.springframework.web.bind.annotation.RestController; import java.util.Date; /** * @author 我见青山多妩媚 * @date Create on 2022/8/22 15:42 * 发送延迟消息 */ @RestController @RequestMapping("/rabbitmq-ttl") @Slf4j public class SendMsgController { @Autowired private RabbitTemplate rabbitTemplate; //发消息 @GetMapping("/sendMsg/{message}") public void sendMsg(@PathVariable String message){ log.info("时间:{},发送给两个队列的消息:{}",new Date().toString(),message); rabbitTemplate.convertAndSend("X","XA","消息来自ttl为10s:"+message); rabbitTemplate.convertAndSend("X","XB","消息来自ttl为40s:"+message); } }- 1
- 2
- 3
- 4
- 5
- 6
- 7
- 8
- 9
- 10
- 11
- 12
- 13
- 14
- 15
- 16
- 17
- 18
- 19
- 20
- 21
- 22
- 23
- 24
- 25
- 26
- 27
- 28
- 29
- 30
- 31
- 32
7.5.4消费者代码
package com.example.demo.consumer; import com.rabbitmq.client.Channel; import lombok.extern.slf4j.Slf4j; import org.springframework.amqp.core.Message; import org.springframework.amqp.rabbit.annotation.RabbitListener; import org.springframework.stereotype.Component; import java.util.Date; /** * @author 我见青山多妩媚 * @date Create on 2022/8/22 15:48 * ttl消费者队列 */ @Component @Slf4j public class DeadLetterQueueConsumer { //接收消息 @RabbitListener(queues = "QD") public void receiveD(Message message, Channel channel) throws Exception{ String msg = new String(message.getBody()); log.info("当前时间:{},收到死信队列的消息:{}",new Date().toString(),msg); //手动确认,否则会在消息队列中一直存在,启动一次项目发出一次 channel.basicAck(message.getMessageProperties().getDeliveryTag(),false); } }- 1
- 2
- 3
- 4
- 5
- 6
- 7
- 8
- 9
- 10
- 11
- 12
- 13
- 14
- 15
- 16
- 17
- 18
- 19
- 20
- 21
- 22
- 23
- 24
- 25
- 26
- 27
- 28
7.5.5测试
- 启动springboot项目,打开swagger
- 输入发出的消息进行测试
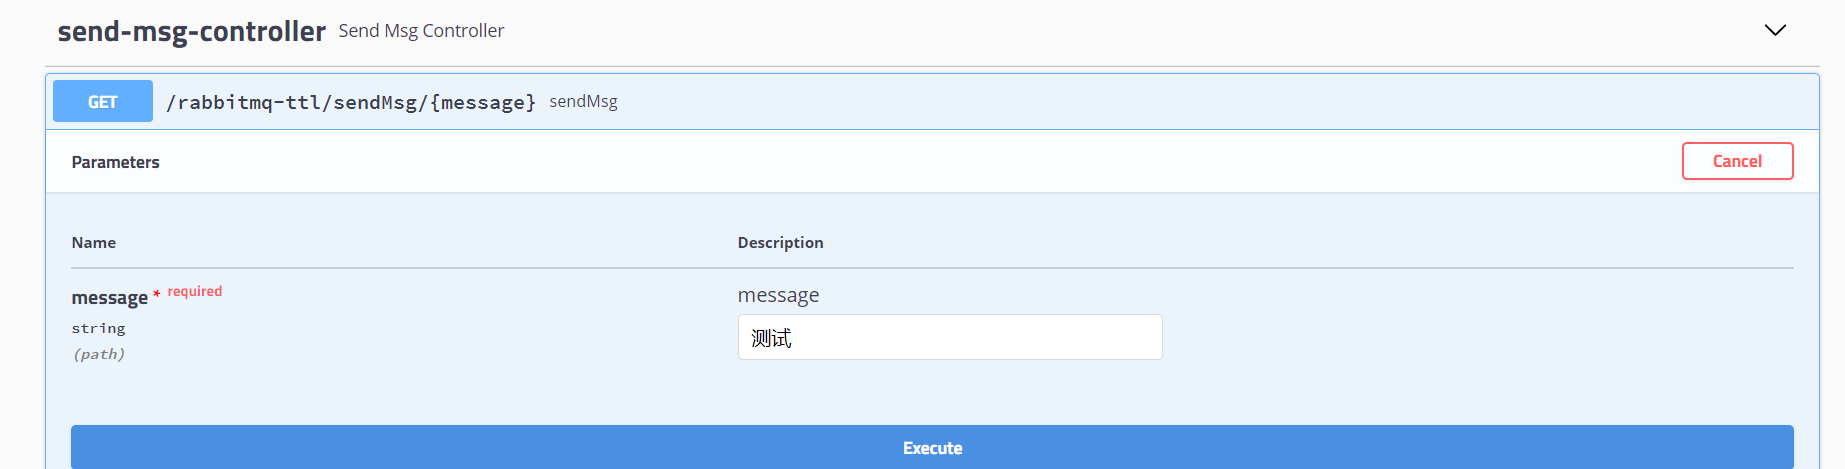
- 控制台消息
时间:Mon Aug 22 17:31:58 CST 2022,发送给两个队列的消息:测试 //10s后收到 当前时间:Mon Aug 22 17:32:08 CST 2022,收到死信队列的消息:消息来自ttl为10s:测试 //40s后收到 当前时间:Mon Aug 22 17:32:38 CST 2022,收到死信队列的消息:消息来自ttl为40s:测试- 1
- 2
- 3
- 4
- 5
可以看见,消息的时间间隔是准确的,这样就构造了一个延时队列。
不过,如果这样使用的话,岂不是每增加一个新的时间需求,就要新增一个队列,这里只有10S和40S两个时间选项,如果需要一个小时后处理,那么就需要增加TTL为一个小时的队列,如果是预定会议室然后提前通知这样的场景,岂不是要增加无数个队列才能满足需求?7.6延时队列优化
7.6.1代码架构图
这里新增一个队列QC,绑定关系如下,该队列不设置TTL时间

7.6.2配置文件类
在上面的配置文件类追加QC
@Configuration public class TTLQueueConfig { //新增普通队列QC private static final String C_QUEUE = "QC"; @Bean("cQueue") public Queue cQueue(){ //初始map长度 Map<String, Object> arguments = new HashMap<>(3); //设置死信交换机 arguments.put("x-dead-letter-exchange",Y_DEAD_EXCHANGE); //设置死信routingKey: YD arguments.put("x-dead-letter-routing-key","YD"); return QueueBuilder.durable(C_QUEUE).withArguments(arguments).build(); } @Bean public Binding queueCBindXExchange(@Qualifier("cQueue")Queue cQueue, @Qualifier("xExchange")DirectExchange xExchange){ return BindingBuilder.bind(cQueue).to(xExchange).with("XC"); } }- 1
- 2
- 3
- 4
- 5
- 6
- 7
- 8
- 9
- 10
- 11
- 12
- 13
- 14
- 15
- 16
- 17
- 18
- 19
- 20
- 21
- 22
- 23
7.6.3生产者
新追加
@RestController @RequestMapping("/rabbitmq-ttl") @Slf4j public class SendMsgController { @Autowired private RabbitTemplate rabbitTemplate; //发消息,自定义过期时间,消息TTL @GetMapping("sendExpirationMsg/{message}/{ttlTime}") public void sendMsg(@PathVariable String message,@PathVariable String ttlTime){ log.info("时间:{},发送的消息:{},过期时间{}",new Date().toString(),message,ttlTime); rabbitTemplate.convertAndSend("X","XC",message,msg -> { //发送消息的时候 延迟时长 msg.getMessageProperties().setExpiration(ttlTime); return msg; }); } }- 1
- 2
- 3
- 4
- 5
- 6
- 7
- 8
- 9
- 10
- 11
- 12
- 13
- 14
- 15
- 16
- 17
- 18
消费者代码不需要修改,进行swagger测试。
分别发送你好1,时间为20000ms、你好2,时间2000ms,查看控制台运行结果
时间:Mon Aug 22 22:48:20 CST 2022,发送的消息:你好2,过期时间2000ms 当前时间:Mon Aug 22 22:48:40 CST 2022,收到死信队列的消息:你好1 当前时间:Mon Aug 22 22:48:40 CST 2022,收到死信队列的消息:你好1- 1
- 2
- 3
明明第二个是2s的延迟,但是为什么跟着也是20s才出来呢?因为这时用的是同一个队列,进行这先进先出的原则,1进入之后还没出来,所以2会等1出来之后再出来,怎么解决呢?只能通过插件弥补
7.7Rabbitmq插件实现延迟队列
7.7.1插件的安装
-
插件下载地址:https://www.rabbitmq.com/community-plugins.html
-
下载
rabbitmq_delayed_message_exchange-3.8.17.8f537ac.ez或其他版本 -
将插件放在rabbitmq安装目录下:
/usr/lib/rabbitmq/lib/rabbitmq_server-3.8.29/plugins -
之后进入该文件夹下,进行以下命令进行插件的安装:
rabbitmq-plugins enable rabbitmq_delayed_message_exchange,不需要指定版本号,安装成功之后:

- 重启rabbitmq:
systemctl restart rabbitmq-server,rabbitmq-server是在安装时起的名字 - 查看是否安装成功,进入rabbitmq后台页面,新增交换机,查看下拉框是否有延迟队列,说明是否安装成功

7.7.2代码架构图
这里我们新增一个队列,delayed.queue,一个自定义的交换机delayed.exchange,绑定关系如下

7.7.3配置文件类代码
在我们自定义的交换机中,这是一种新的交换机类型,该类型消息支持延迟队列投递机制,消息传递后并不会立即投递到目标队列中,而是存储在mnesla(一个分布式数据库系统)表中,当到达投递时间,才会投递到目标队列下
package com.example.demo.consumer; import com.example.demo.config.DelayedQueueConfig; import com.rabbitmq.client.Channel; import lombok.extern.slf4j.Slf4j; import org.springframework.amqp.core.Message; import org.springframework.amqp.rabbit.annotation.RabbitListener; import org.springframework.stereotype.Component; import java.io.IOException; import java.util.Date; /** * @author 我见青山多妩媚 * @date Create on 2022/8/22 23:39 * 消费者 基于插件 */ @Component @Slf4j public class DelayedConsumer { @RabbitListener(queues = DelayedQueueConfig.DELAYED_QUEUE_NAME) public void receiveDelayedQueueMessage(Message message, Channel channel) throws IOException { String msg = new String(message.getBody()); log.info("当前时间:{},收到死信队列的消息:{}",new Date().toString(),msg); channel.basicAck(message.getMessageProperties().getDeliveryTag(),false); } }- 1
- 2
- 3
- 4
- 5
- 6
- 7
- 8
- 9
- 10
- 11
- 12
- 13
- 14
- 15
- 16
- 17
- 18
- 19
- 20
- 21
- 22
- 23
- 24
- 25
- 26
- 27
- 28
- 29
7.7.4生产者代码
@RestController @RequestMapping("/rabbitmq-ttl") @Slf4j public class SendMsgController { //发送消息,基于插件 延迟消息 @GetMapping("sendDelayedMsg/{message}/{delayedTime}") public void sendDelayedMsg(@PathVariable String message,@PathVariable Integer delayedTime){ log.info("时间:{},发送的消息:{},过期时间{}ms",new Date().toString(),message,delayedTime); rabbitTemplate.convertAndSend(DelayedQueueConfig.DELAYED_EXCHANGE_NAME, DelayedQueueConfig.DELAYED_ROUTING_KEY,message, msg -> { //发送消息的时候 延迟时长 //注意此处是setDelay,并且delayedTime为Integer类型 msg.getMessageProperties().setDelay(delayedTime); return msg; }); } }- 1
- 2
- 3
- 4
- 5
- 6
- 7
- 8
- 9
- 10
- 11
- 12
- 13
- 14
- 15
- 16
- 17
7.7.5消费者代码
package com.example.demo.consumer; import com.example.demo.config.DelayedQueueConfig; import com.rabbitmq.client.Channel; import lombok.extern.slf4j.Slf4j; import org.springframework.amqp.core.Message; import org.springframework.amqp.rabbit.annotation.RabbitListener; import org.springframework.stereotype.Component; import java.io.IOException; import java.util.Date; /** * @author 我见青山多妩媚 * @date Create on 2022/8/22 23:39 * 消费者 基于插件 */ @Component @Slf4j public class DelayedConsumer { @RabbitListener(queues = DelayedQueueConfig.DELAYED_QUEUE_NAME) public void receiveDelayedQueueMessage(Message message, Channel channel) throws IOException { String msg = new String(message.getBody()); log.info("当前时间:{},收到死信队列的消息:{}",new Date().toString(),msg); channel.basicAck(message.getMessageProperties().getDeliveryTag(),false); } }- 1
- 2
- 3
- 4
- 5
- 6
- 7
- 8
- 9
- 10
- 11
- 12
- 13
- 14
- 15
- 16
- 17
- 18
- 19
- 20
- 21
- 22
- 23
- 24
- 25
- 26
- 27
- 28
- 29
7.7.6测试
分别发送两个消息
http://localhost:8080/rabbitmq-ttl/sendDelayedMsg/HELLO1/20000 http://localhost:8080/rabbitmq-ttl/sendDelayedMsg/HELLO2/2000- 1
- 2
运行结果:
时间:Tue Aug 23 00:21:53 CST 2022,发送的消息:HELLO1,过期时间20000ms 时间:Tue Aug 23 00:21:57 CST 2022,发送的消息:HELLO2,过期时间2000ms 当前时间:Tue Aug 23 00:21:59 CST 2022,收到死信队列的消息:HELLO2 当前时间:Tue Aug 23 00:22:13 CST 2022,收到死信队列的消息:HELLO1- 1
- 2
- 3
- 4
可以看到,此处2s的先运行完毕
7.8总结
延时队列在需要延时处理的场景下非常有用,使用RabbitMQ.来实现延时队列可以很好的利用RabbitMQ 的特性,如:消息可靠发送、消息可靠投递、死信队列来保障消息至少被消费一次以及未被正确处理的消息不会被丢弃。另外,通过RabbitMQ集群的特性,可以很好的解决单点故障问题,不会因为单个节点挂掉导致延时队列不可用或者消息丢失。
当然,延时队列还有很多其它选择,比如利用Java的DelayQueue,利用Redis的zset,利用Quartz或者利用kafka.的时间轮,这些方式各有特点,看需要适用的场景 -
相关阅读:
面经-并发-对ThreadLocal(线程隔离)的理解
HK32F030MF4P6 TM1650驱动
视频抽帧转图片,opencv和ffmpeg效果测评
【动态规划】647. 回文子串、516. 最长回文子序列
数据化管理洞悉零售及电子商务运营——销售中的数据化管理
数据库常用指令
leetcode-754-(每日一题)-到达终点数字-(中等,数学问题)
Java 锁种类
4、android 中级控件(1)(图形定制)
接口开发知识点整理三
- 原文地址:https://blog.csdn.net/YSecret_Y/article/details/126776492
