-
基于Istio服务治理网格的SpringCloud大型微服务项目部署流程
基于Istio网格部署SpringCloud微服务并实现灰度发布
文章目录
1.微服务项目部署在Istio网格的思路
在Istio中部署的SpringCLoud微服务项目曾经使用Deployment控制器在K8S集群中部署过,文章地址:SpringCloud微服务电商系统在Kubernetes集群中上线详细教程。
如果微服务项目没有必要进行流量的控制、灰度发布等等,可以不考虑将微服务部署到Istio服务网格中,过程繁琐。
1.1.SpringCLoud电商微服务项目简介
用户请求首先到portal前端页面,也就是程序的首页,在首页的各项功能操作都会由Gateway网关服务转发到各自的微服务程序上,比如请求一个订单服务,订单服务会事先注册到Eureka中,由Gateway将请求发送给Eureka,再由Eureka转发给具体的微服务程序,这些微服务程序都有自己单独的数据库服务。
微服务程序的门户网站会配置Gateway网关服务的地址,门户网站用户请求的微服务信息,会转发给Gateway网关程序,所有的微服务都会注册在Eureka注册中心中,Gateway网关会将请求通过注册中心转发给对应的微服务程序。

电商微服务包含的微服务列表
微服务 功能 端口号 镜像地址 eureka 微服务注册中心 8888 jiangxlrepo/ms-eureka:v1 gateway 微服务网关程序 9999 jiangxlrepo/ms-gateway:v1 portal 商城前端首页 8080 jiangxlrepo/ms-portal:v1 product 商品服务 8010 jiangxlrepo/ms-product:v1 order 订单服务 8020 jiangxlrepo/ms-order:v1 stock 库存服务 8030 jiangxlrepo/ms-stock:v1 mysql 数据库 3306 jiangxlrepo/ms-mysql 1.2.在Istio中部署微服务以及灰度发布的思路
在Istio服务网格中部署微服务项目的流程
- 1.创建微服务所在的命名空间并设置自动注入sidecar。
- 2.编写微服务各程序在K8S集群中部署的资源编排文件,并在YAML中增加识别程序版本的标签,这个标签可以配合灰度发布使用。
- 3.使用kubectl命令在K8S集群中创建各个微服务,并观察是否增加了istio-proxy,无误后成功接入Istio服务网格。
- 4.为需要通过域名访问的微服务程序配置Gateway以及VirtualService资源,通过Istio的IngressGateway将应用程序发布在互联网。
微服务程序基于Istio服务网格实现灰度发布的流程
- 1.首先部署新版本的微服务程序(使用deployment控制器直接部署一个新的资源,即现有程序和新版本的程序共存),部署好新版本的程序会自动被Service资源所管理。
- 2.配置DestinationRule资源的路由规则,增加不同版本所对应的Pod标签。
- 3.配置VirtualService资源将流量转发到指定的路由集。
2.将微服务程序部署在Istio服务网格
资源编排文件与在K8S集群部署的文件内容基本一致,只是将可能会更新的程序,在它们的资源编排文件中为Pod增加了
version :v*的标签,通过版本标签可以做到流量控制以及灰度发布。2.1.创建微服务程序所在的命名空间
创建微服务程序使用的Namespace并配置Sidecar自动注入。
1.创建namespace [root@k8s-master microservices]# kubectl create ns ms namespace/ms created 2.设置sidecar自动注入 [root@k8s-master microservices]# kubectl label ns ms istio-injection=enabled namespace/ms labeled- 1
- 2
- 3
- 4
- 5
- 6
- 7
2.2.编写Eureke注册中心的资源编排文件
资源编排文件中包含Service资源和Statefulset资源,Eureka注册中心以集群方式部署因此采用Statefulset控制器部署。
资源编排文件的解释可以浏览之前的文章。
[root@k8s-master microservices]# vim eureka.yaml apiVersion: v1 kind: Service metadata: name: eureka namespace: ms spec: clusterIP: None ports: - port: 8888 name: eureka selector: project: ms app: eureka --- apiVersion: apps/v1 kind: StatefulSet metadata: name: eureka namespace: ms spec: replicas: 3 selector: matchLabels: project: ms app: eureka serviceName: "eureka" template: metadata: labels: project: ms app: eureka spec: imagePullSecrets: - name: registry-pull-secret containers: - name: eureka image: jiangxlrepo/ms-eureka:v1 ports: - protocol: TCP containerPort: 8888 env: - name: MY_POD_NAME valueFrom: fieldRef: fieldPath: metadata.name resources: requests: cpu: 0.2 memory: 256Mi limits: cpu: 1 memory: 1Gi readinessProbe: tcpSocket: port: 8888 initialDelaySeconds: 60 periodSeconds: 10 livenessProbe: tcpSocket: port: 8888 initialDelaySeconds: 60 periodSeconds: 10- 1
- 2
- 3
- 4
- 5
- 6
- 7
- 8
- 9
- 10
- 11
- 12
- 13
- 14
- 15
- 16
- 17
- 18
- 19
- 20
- 21
- 22
- 23
- 24
- 25
- 26
- 27
- 28
- 29
- 30
- 31
- 32
- 33
- 34
- 35
- 36
- 37
- 38
- 39
- 40
- 41
- 42
- 43
- 44
- 45
- 46
- 47
- 48
- 49
- 50
- 51
- 52
- 53
- 54
- 55
- 56
- 57
- 58
- 59
- 60
- 61
- 62
- 63
2.3.编写Gateway微服务网关的资源编排文件
Gateway网关程序有时候可能会更新,但是更新相对较少,只要涉及更新的程序我们都可以为其配置一个体现版本的Pod标签,通过这个标签就可以实现流量控制和灰度发布,在Pod模板中声明版本标签,在Deployment以及Service资源中引用。
[root@k8s-master microservices]# vim gateway.yaml apiVersion: v1 kind: Service metadata: name: gateway namespace: ms spec: ports: - port: 9999 name: gateway selector: project: ms app: gateway version: v1 #关联pod的version标签 --- apiVersion: apps/v1 kind: Deployment metadata: name: gateway namespace: ms spec: replicas: 1 selector: matchLabels: project: ms app: gateway version: v1 #关联pod的version标签 template: metadata: labels: project: ms app: gateway version: v1 #添加一个version标签,声明当前程序使用的版本号 spec: imagePullSecrets: - name: registry-pull-secret containers: - name: gateway image: jiangxlrepo/ms-gateway:v1 imagePullPolicy: IfNotPresent ports: - protocol: TCP containerPort: 9999 resources: requests: cpu: 0.2 memory: 256Mi limits: cpu: 1 memory: 1Gi readinessProbe: tcpSocket: port: 9999 initialDelaySeconds: 40 periodSeconds: 10 livenessProbe: tcpSocket: port: 9999 initialDelaySeconds: 40 periodSeconds: 10- 1
- 2
- 3
- 4
- 5
- 6
- 7
- 8
- 9
- 10
- 11
- 12
- 13
- 14
- 15
- 16
- 17
- 18
- 19
- 20
- 21
- 22
- 23
- 24
- 25
- 26
- 27
- 28
- 29
- 30
- 31
- 32
- 33
- 34
- 35
- 36
- 37
- 38
- 39
- 40
- 41
- 42
- 43
- 44
- 45
- 46
- 47
- 48
- 49
- 50
- 51
- 52
- 53
- 54
- 55
- 56
- 57
- 58
- 59
- 60
2.4.编写MySQL数据库的资源编排文件
[root@k8s-master microservices]# vim mysql.yaml apiVersion: apps/v1 kind: Deployment metadata: name: mysql namespace: ms spec: selector: matchLabels: project: ms app: mysql template: metadata: labels: project: ms app: mysql spec: containers: - name: db image: jiangxlrepo/ms-mysql resources: requests: cpu: 200m memory: 512Mi limits: cpu: 500m memory: 512Mi --- apiVersion: v1 kind: Service metadata: name: mysql namespace: ms spec: ports: - port: 3306 protocol: TCP targetPort: 3306 selector: project: ms app: mysql- 1
- 2
- 3
- 4
- 5
- 6
- 7
- 8
- 9
- 10
- 11
- 12
- 13
- 14
- 15
- 16
- 17
- 18
- 19
- 20
- 21
- 22
- 23
- 24
- 25
- 26
- 27
- 28
- 29
- 30
- 31
- 32
- 33
- 34
- 35
- 36
- 37
- 38
- 39
- 40
- 41
2.5.编写Portal前端首页的资源编排文件
portal是前端首页项目,这个微服务一定会频繁的更新,基于原来部署的资源编排文件,需要在Pod模板中添加version的标签,用于声明当前部署的程序的版本号,只需在Deployment控制器中关联Pod版本的标签,Service资源不需要关联,否则就相当于写死了只让这一个版本提供服务,灰度发布时,新版本部署后,多个版本同时都接入到一个Service进行管理,然后由VirtualService处理流量控制。
[root@k8s-master microservices]# vim portal-v1.yaml apiVersion: v1 kind: Service metadata: name: portal namespace: ms spec: ports: - port: 8080 name: portal selector: #service关联pod标签时不引用version的标签 project: ms app: portal --- apiVersion: apps/v1 kind: Deployment metadata: name: portal-v1 namespace: ms spec: replicas: 1 selector: matchLabels: project: ms app: portal version: v1 #在deployment控制器中关联pod时引用version的标签 template: metadata: labels: project: ms app: portal version: v1 #添加version:v1的标签,声明当前程序是v1版本 spec: imagePullSecrets: - name: registry-pull-secret containers: - name: portal image: jiangxlrepo/ms-portal:v1 imagePullPolicy: IfNotPresent ports: - protocol: TCP containerPort: 8080 resources: requests: cpu: 0.2 memory: 256Mi limits: cpu: 1 memory: 1Gi readinessProbe: tcpSocket: port: 8080 initialDelaySeconds: 40 periodSeconds: 10 livenessProbe: tcpSocket: port: 8080 initialDelaySeconds: 40 periodSeconds: 10- 1
- 2
- 3
- 4
- 5
- 6
- 7
- 8
- 9
- 10
- 11
- 12
- 13
- 14
- 15
- 16
- 17
- 18
- 19
- 20
- 21
- 22
- 23
- 24
- 25
- 26
- 27
- 28
- 29
- 30
- 31
- 32
- 33
- 34
- 35
- 36
- 37
- 38
- 39
- 40
- 41
- 42
- 43
- 44
- 45
- 46
- 47
- 48
- 49
- 50
- 51
- 52
- 53
- 54
- 55
- 56
- 57
- 58
- 59
2.6.编写Product商品系统的资源编排文件
同理也是和portal商品服务一样需要频繁的更新,为资源添加上版本号的标签。
[root@k8s-master microservices]# vim product.yaml apiVersion: v1 kind: Service metadata: name: product namespace: ms spec: ports: - port: 9999 name: product selector: project: ms app: product --- apiVersion: apps/v1 kind: Deployment metadata: name: product namespace: ms spec: replicas: 1 selector: matchLabels: project: ms app: product version: v1 #在deployment控制器中关联pod时引用version的标签 template: metadata: labels: project: ms app: product version: v1 #添加version:v1的标签,声明当前程序是v1版本 spec: imagePullSecrets: - name: registry-pull-secret containers: - name: product image: jiangxlrepo/ms-product:v1 imagePullPolicy: IfNotPresent ports: - protocol: TCP containerPort: 8010 resources: requests: cpu: 0.2 memory: 256Mi limits: cpu: 1 memory: 1Gi readinessProbe: tcpSocket: port: 8010 initialDelaySeconds: 40 periodSeconds: 10 livenessProbe: tcpSocket: port: 8010 initialDelaySeconds: 40 periodSeconds: 10- 1
- 2
- 3
- 4
- 5
- 6
- 7
- 8
- 9
- 10
- 11
- 12
- 13
- 14
- 15
- 16
- 17
- 18
- 19
- 20
- 21
- 22
- 23
- 24
- 25
- 26
- 27
- 28
- 29
- 30
- 31
- 32
- 33
- 34
- 35
- 36
- 37
- 38
- 39
- 40
- 41
- 42
- 43
- 44
- 45
- 46
- 47
- 48
- 49
- 50
- 51
- 52
- 53
- 54
- 55
- 56
- 57
- 58
- 59
2.7.编写Order订单系统的资源编排文件
[root@k8s-master microservices]# vim order.yaml apiVersion: v1 kind: Service metadata: name: order namespace: ms spec: ports: - port: 9999 name: order selector: project: ms app: order --- apiVersion: apps/v1 kind: Deployment metadata: name: order namespace: ms spec: replicas: 1 selector: matchLabels: project: ms app: order version: v1 #在deployment控制器中关联pod时引用version的标签 template: metadata: labels: project: ms app: order version: v1 #添加version:v1的标签,声明当前程序是v1版本 spec: imagePullSecrets: - name: registry-pull-secret containers: - name: order image: jiangxlrepo/ms-order:v1 imagePullPolicy: IfNotPresent ports: - protocol: TCP containerPort: 8020 resources: requests: cpu: 0.2 memory: 256Mi limits: cpu: 1 memory: 1Gi readinessProbe: tcpSocket: port: 8020 initialDelaySeconds: 40 periodSeconds: 10 livenessProbe: tcpSocket: port: 8020 initialDelaySeconds: 40 periodSeconds: 10- 1
- 2
- 3
- 4
- 5
- 6
- 7
- 8
- 9
- 10
- 11
- 12
- 13
- 14
- 15
- 16
- 17
- 18
- 19
- 20
- 21
- 22
- 23
- 24
- 25
- 26
- 27
- 28
- 29
- 30
- 31
- 32
- 33
- 34
- 35
- 36
- 37
- 38
- 39
- 40
- 41
- 42
- 43
- 44
- 45
- 46
- 47
- 48
- 49
- 50
- 51
- 52
- 53
- 54
- 55
- 56
- 57
- 58
- 59
2.8.编写Stock库存系统的资源编排文件
[root@k8s-master microservices]# vim stock.yaml apiVersion: v1 kind: Service metadata: name: stock namespace: ms spec: ports: - port: 9999 name: stock selector: project: ms app: stock --- apiVersion: apps/v1 kind: Deployment metadata: name: stock namespace: ms spec: replicas: 1 selector: matchLabels: project: ms app: stock version: v1 #在deployment控制器中关联pod时引用version的标签 template: metadata: labels: project: ms app: stock version: v1 #添加version:v1的标签,声明当前程序是v1版本 spec: imagePullSecrets: - name: registry-pull-secret containers: - name: stock image: jiangxlrepo/ms-stock:v1 imagePullPolicy: IfNotPresent ports: - protocol: TCP containerPort: 8030 resources: requests: cpu: 0.2 memory: 256Mi limits: cpu: 1 memory: 1Gi readinessProbe: tcpSocket: port: 8030 initialDelaySeconds: 40 periodSeconds: 10 livenessProbe: tcpSocket: port: 8030 initialDelaySeconds: 40 periodSeconds: 10- 1
- 2
- 3
- 4
- 5
- 6
- 7
- 8
- 9
- 10
- 11
- 12
- 13
- 14
- 15
- 16
- 17
- 18
- 19
- 20
- 21
- 22
- 23
- 24
- 25
- 26
- 27
- 28
- 29
- 30
- 31
- 32
- 33
- 34
- 35
- 36
- 37
- 38
- 39
- 40
- 41
- 42
- 43
- 44
- 45
- 46
- 47
- 48
- 49
- 50
- 51
- 52
- 53
- 54
- 55
- 56
- 57
- 58
- 59
2.9.部署所有的微服务项目
微服务项目是有部署的先后顺序的,一但顺序有问题会影响系统的使用。
eureka—>gateway—>mysql—>portal—>product—>order—>stock
先部署eureka然后部署gateway,其余的没有先后顺序。
微服务部署完成后,当我们看到每个Pod都运行两个容器时,就表示我们的微服务已经接入Istio服务网格了。
1.部署eureka注册中心 [root@k8s-master microservices]# kubectl apply -f eureka.yaml service/eureka created statefulset.apps/eureka created 2.部署gateway微服务网关 [root@k8s-master microservices]# kubectl apply -f gateway.yaml service/gateway created deployment.apps/gateway created 3.部署mysql数据库 [root@k8s-master microservices]# kubectl apply -f mysql.yaml deployment.apps/mysql created service/mysql created 4.部署其余微服务程序 [root@k8s-master microservices]# kubectl apply -f portal-v1.yaml -f product.yaml -f order.yaml -f stock.yaml service/portal created deployment.apps/portal-v1 created service/product created deployment.apps/product created service/order created deployment.apps/order created service/stock created deployment.apps/stock created 4.查看部署的资源 [root@k8s-master microservices]# kubectl get all -n ms NAME READY STATUS RESTARTS AGE pod/eureka-0 2/2 Running 2 172m pod/eureka-1 2/2 Running 2 171m pod/eureka-2 2/2 Running 2 169m pod/gateway-759f5d7dcf-cds7g 2/2 Running 2 118m pod/mysql-6b57489488-6nhs2 2/2 Running 0 117m pod/order-68bf45599-z5zv2 2/2 Running 2 117m pod/portal-v1-657744ddf5-rsh8x 2/2 Running 2 117m pod/product-7dd6b88c67-fw4p4 2/2 Running 2 117m pod/stock-7fd6cdd6fb-g2vvz 2/2 Running 0 117m NAME TYPE CLUSTER-IP EXTERNAL-IP PORT(S) AGE service/eureka ClusterIP None8888/TCP 172m service/gateway ClusterIP 10.111.34.32 9999/TCP 118m service/mysql ClusterIP 10.107.30.38 3306/TCP 117m service/order ClusterIP 10.105.140.4 9999/TCP 117m service/portal ClusterIP 10.110.18.105 8080/TCP 117m service/product ClusterIP 10.100.201.113 9999/TCP 117m service/stock ClusterIP 10.98.91.61 9999/TCP 117m - 1
- 2
- 3
- 4
- 5
- 6
- 7
- 8
- 9
- 10
- 11
- 12
- 13
- 14
- 15
- 16
- 17
- 18
- 19
- 20
- 21
- 22
- 23
- 24
- 25
- 26
- 27
- 28
- 29
- 30
- 31
- 32
- 33
- 34
- 35
- 36
- 37
- 38
- 39
- 40
- 41
- 42
- 43
- 44
- 45
- 46
- 47
3.配置Istio的IngressGateway将微服务发布在互联网
电商微服务项目已经在Istio网格中部署完成了,接下来通过配置IngressGateway将微服务项目发布在互联网环境中。
电商微服务中的Portal首页前端系统对外提供访问,需要将Portal系统通过IngressGateway发布在互联网环境,另外我们的微服务程序都是注册在Eureka中的,也可以将Eureka暴露在集群外部,便于我们查看注册信息,Gateway网关服务需要被Portal系统镜像调用,也需要发布在互联网环境。
istio中的IngressGateway是Gateway+VirtualService资源的结合体,Gateway资源类似于Nginx的server{}块,而VirtualServer就是Nginx中的location块,Istio中将这一块的配置进行了解耦,充分发挥各自的作用。
3.1.编写Gateway资源编排文件
[root@k8s-master microservices]# vim ms-gateway.yaml apiVersion: networking.istio.io/v1alpha3 kind: Gateway metadata: name: portal-gw namespace: ms spec: selector: istio: ingressgateway #将转发规则写入到istio的ingressgateway中 servers: #定义服务列表 - port: #定义使用的端口号、名称、协议 number: 80 name: http protocol: HTTP hosts: #绑定应用系统的域名,这个gateway只为这个域名提供服务 - "portal.jiangxl.com" --- apiVersion: networking.istio.io/v1alpha3 kind: Gateway metadata: name: gateway-gw namespace: ms spec: selector: istio: ingressgateway servers: - port: number: 80 name: http protocol: HTTP hosts: - "gateway.jiangxl.com" --- apiVersion: networking.istio.io/v1alpha3 kind: Gateway metadata: name: eureka-gw namespace: ms spec: selector: istio: ingressgateway servers: - port: number: 80 name: http protocol: HTTP hosts: - "eureka.jiangxl.com"- 1
- 2
- 3
- 4
- 5
- 6
- 7
- 8
- 9
- 10
- 11
- 12
- 13
- 14
- 15
- 16
- 17
- 18
- 19
- 20
- 21
- 22
- 23
- 24
- 25
- 26
- 27
- 28
- 29
- 30
- 31
- 32
- 33
- 34
- 35
- 36
- 37
- 38
- 39
- 40
- 41
- 42
- 43
- 44
- 45
- 46
- 47
- 48
3.2.编写VirtualService资源编排文件
[root@k8s-master microservices]# vim ms-virtualservice.yaml apiVersion: networking.istio.io/v1alpha3 kind: VirtualService metadata: name: portal-vs namespace: ms spec: hosts: #绑定应用程序的域名与gateway中的保持一致 - "portal.jiangxl.com" gateways: #关联使用的gateway资源 - portal-gw http: #定义http流量路由规则的有序列表 - route: #默认的规则声明,可以是转发也可以是重定向 - destination: #定义流量的转发目标端 host: portal #将流量转发到哪一个service资源,这里是portal port: #指定service资源的端口号 number: 8080 --- apiVersion: networking.istio.io/v1alpha3 kind: VirtualService metadata: name: gateway-vs namespace: ms spec: hosts: - "gateway.jiangxl.com" gateways: - gateway-gw http: - route: - destination: host: gateway port: number: 9999 --- apiVersion: networking.istio.io/v1alpha3 kind: VirtualService metadata: name: eureka-vs namespace: ms spec: hosts: - "eureka.jiangxl.com" gateways: - eureka-gw http: - route: - destination: host: eureka port: number: 8888- 1
- 2
- 3
- 4
- 5
- 6
- 7
- 8
- 9
- 10
- 11
- 12
- 13
- 14
- 15
- 16
- 17
- 18
- 19
- 20
- 21
- 22
- 23
- 24
- 25
- 26
- 27
- 28
- 29
- 30
- 31
- 32
- 33
- 34
- 35
- 36
- 37
- 38
- 39
- 40
- 41
- 42
- 43
- 44
- 45
- 46
- 47
- 48
- 49
- 50
- 51
3.3.创建Gateway以及VirtualService资源
1.创建gw以及virtualservice资源 [root@k8s-master microservices]# kubectl apply -f ms-gateway.yaml -f ms-virtualservice.yaml gateway.networking.istio.io/portal-gw created gateway.networking.istio.io/gateway-gw created gateway.networking.istio.io/eureka-gw created virtualservice.networking.istio.io/portal-vs created virtualservice.networking.istio.io/gateway-vs created virtualservice.networking.istio.io/eureka-vs created 2.查看创建的资源 [root@k8s-master microservices]# kubectl get gw,vs -n ms NAME AGE gateway.networking.istio.io/eureka-gw 18s gateway.networking.istio.io/gateway-gw 18s gateway.networking.istio.io/portal-gw 18s NAME GATEWAYS HOSTS AGE virtualservice.networking.istio.io/eureka-vs ["eureka-gw"] ["eureka.jiangxl.com"] 18s virtualservice.networking.istio.io/gateway-vs ["gateway-gw"] ["gateway.jiangxl.com"] 18s virtualservice.networking.istio.io/portal-vs ["portal-gw"] ["portal.jiangxl.com"] 18s- 1
- 2
- 3
- 4
- 5
- 6
- 7
- 8
- 9
- 10
- 11
- 12
- 13
- 14
- 15
- 16
- 17
- 18
- 19
- 20
4.配置LB将请求转发到Istio的IngressGateway
K8S集群中的80端口已经被Nginx服务或者Ingress占用了,Istio的IngressGateway无法再使用80端口,因此IngressGateway使用的是Nodeport方式暴露的,如果直接用绑定域名解析去访问Istio中的程序,就需要在浏览器中增加端口号,显然不太合理。
基于这种情况,我们可以配置一个LB负载均衡,由LB去代理Istio的IngressGateway地址,然后将所有的请求都转发到Istio的IngressGateway。
那么就有人产生疑问了,集群中不是都有Ingress或者Nginx了吗,为甚还要单独的LB产品?
那是因为即使我们使用的是Ingress或者Nginx暴露K8S中的服务,在Ingress的前面都会有一个LB负载均衡,不可能直接将Node节点的地址映射在互联网,这样做是非常不安全的,既然前面都有一个LB负载均衡了,那么为什么不直接在LB上代理IngressGateway,而是要从LB到Ingress再到Istio的IngressGateway呢?岂不是多了一层网络带宽。
LB产品可以使用阿里云的SLB或者负载均衡器亦或者Nginx,这里我们采用Nginx。
安装完Nginx之后,只需要简单的几行配置即可。 [root@harbor~]# cat /etc/nginx/conf.d/istio-ingressgateway.conf server { listen 80; server_name _; location / { proxy_http_version 1.1; proxy_set_header Host $host; proxy_pass http://192.168.20.10:31105; } }- 1
- 2
- 3
- 4
- 5
- 6
- 7
- 8
- 9
- 10
- 11
- 12
5.访问电商微服务程序
配置本地hosts解析,添加上电商微服务的域名解析记录。
192.168.20.13 eureka.jiangxl.com gateway.jiangxl.com portal.jiangxl.com- 1
5.1.访问微服务项目的Eureka

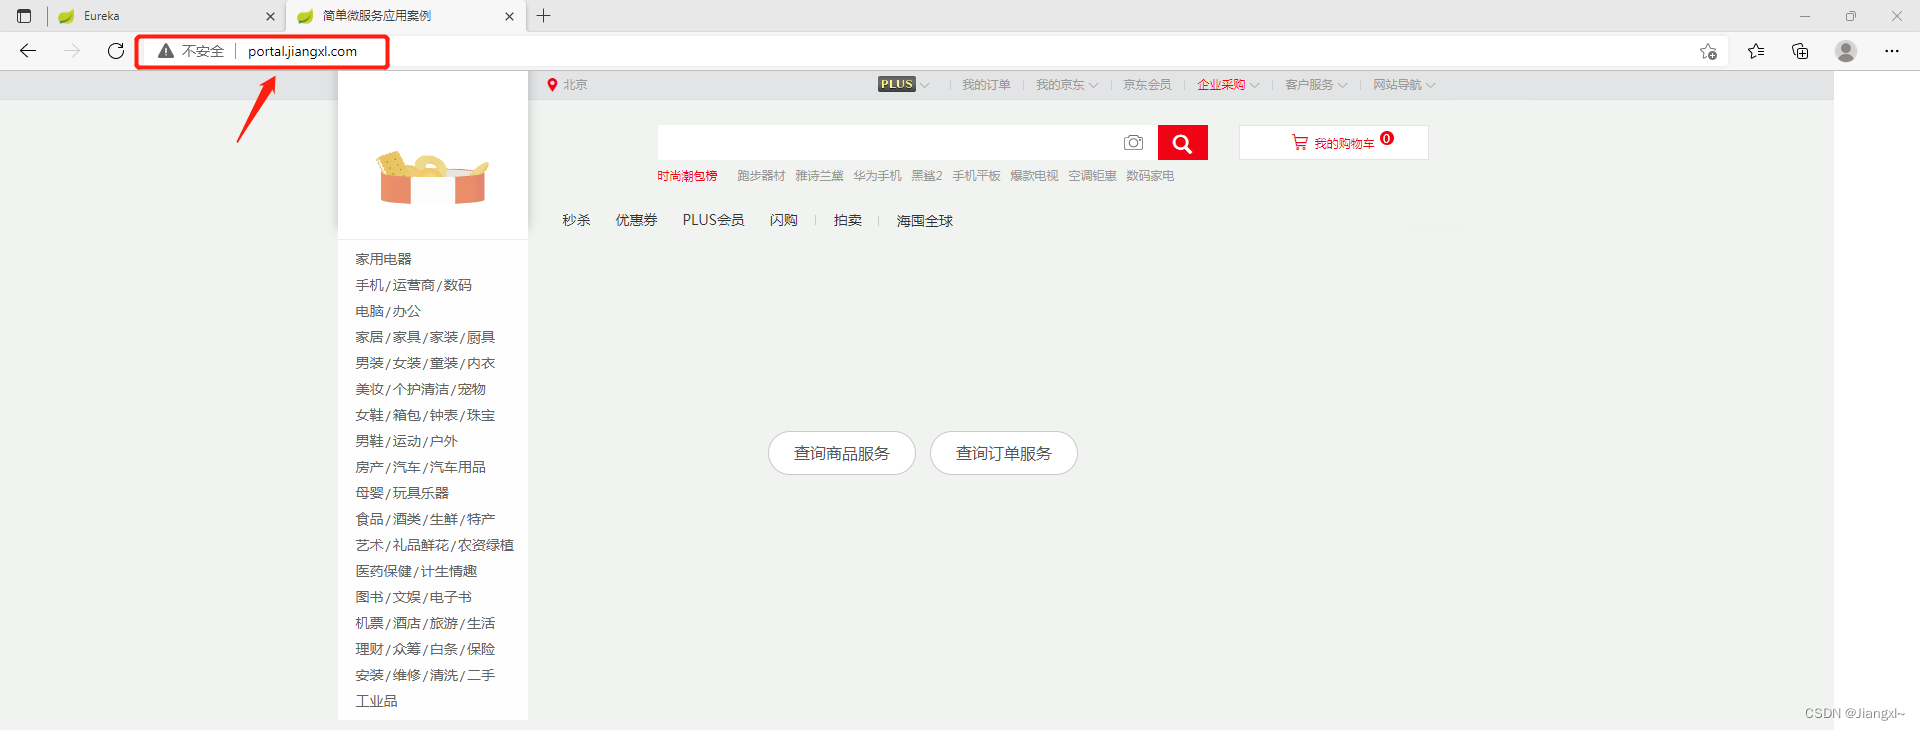
5.2.访问电商系统首页
-
相关阅读:
【C语言基础】Chap. 3. 操作符、关键字、#define和存储
如何用蓝牙实现无线定位(五)--双定位显示
RHCE---Shell基础 2
常见端口及服务
4. Go的流程控制
处理机调度与死锁--银行家算法
Qt的事件
C++语法2
改进的PSO-BP算法在工业机器人末端位姿误差补偿中的应用
【linux】操作系统的事件通知机制eventfd
- 原文地址:https://blog.csdn.net/weixin_44953658/article/details/126152935

- 最新文章
-
沪漂五周年了:我越来越迷茫了
Agentic Skill Routing 实战:别再把所有 Skill 塞进 AI Agent 上下文
MySQL-Seconds_behind_master的精度误差
[MAF预定义ChatClient中间件-03]CachingChatClient——利用缓存省钱省时间
AI的至暗历史:从万众期待到被政府撤资,AI的两次死亡徘徊
Agent OS :五种驯服不确定性的范式
PortSwigger SQL注入LAB11
数据库即时编译JIT
[Begin]AI Learn Data Day 0
深度学习进阶(二十七)现代 LLM 的核心架构设计其二:SwiGLU