-
使用Eclipse搭建SpringBoot项目
使用Eclipse搭建SpringBoot项目
一、创建项目过程
01、点击eclipse左上角file—new—other
02、选择 Maven Project,点击Next

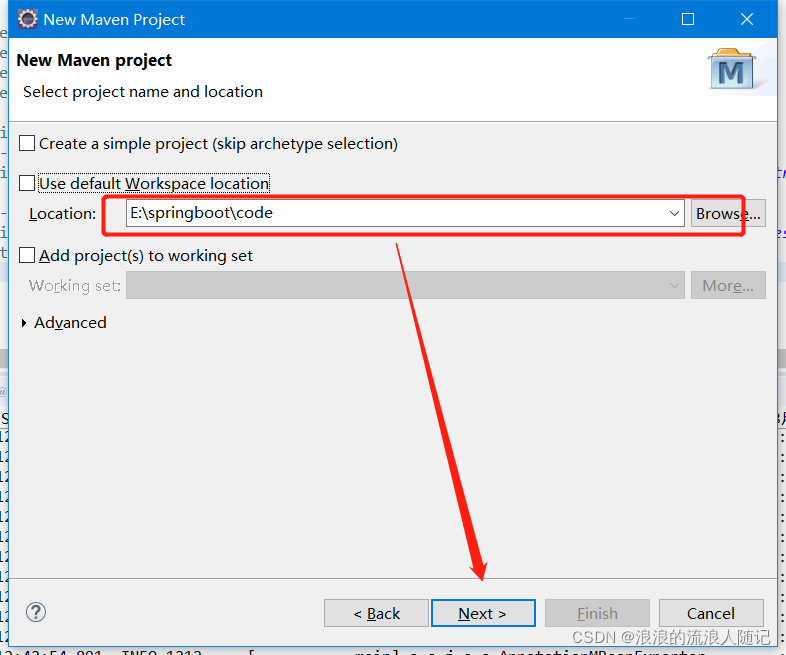
03、 选择项目存放位置,点击Next
04、选择以 quickstart 或者webapp结尾的点击Next

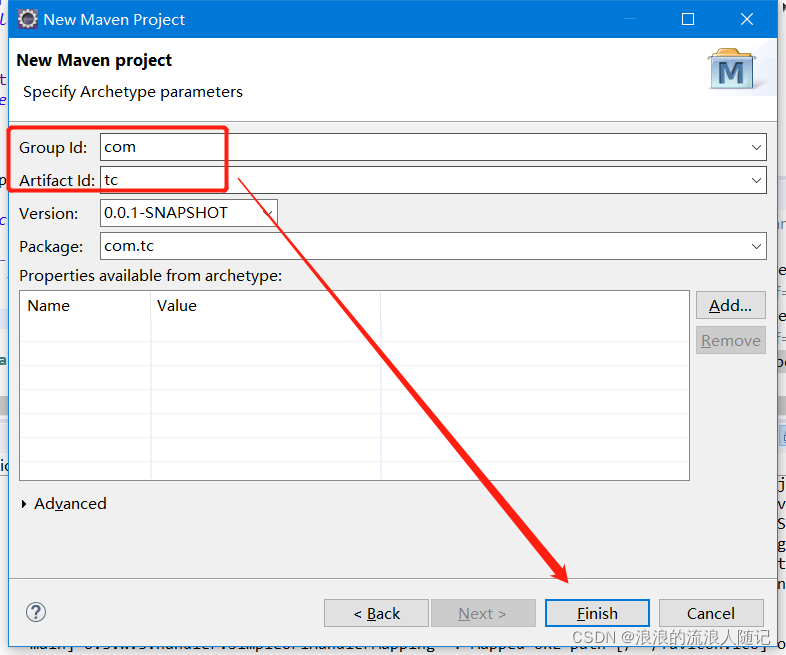
05、填写好Group Id、 Artifact Id , 填写好后,Package一栏会自动生成,这也就是项目中的包名,点击Finish
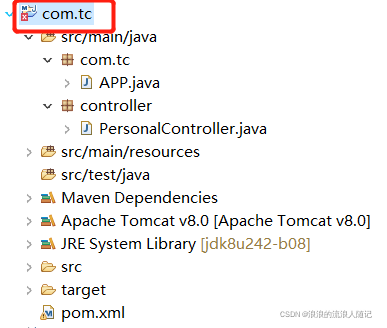
06、项目创建完成

第一次创建springboot项目时,创建完成后项目会有一个红叉(虽然不影响运行)
原因: maven默认编译版本与使用的jdk不匹配解决办法: 选中工程:右键单击–> Maven --> Update Project

什么都不用管,直接点击ok就行
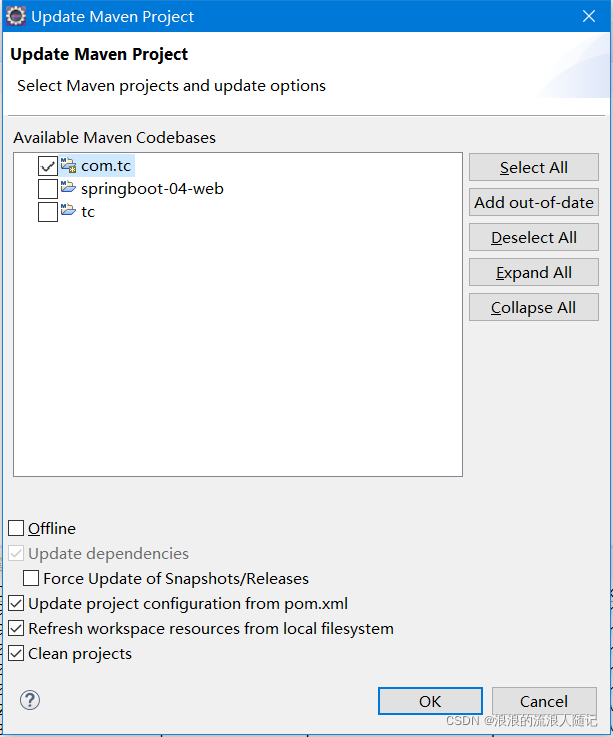
解决完成,小红叉消失了

二、加入相关依赖、配置
01、加入SpringBoot框架: 打开pom.xml文件
定义父类:springboot 所有jar包版本,我这里使用 2.0.5.RELEASE 版本

<!-- SpringBoot相关jar包 --> <parent> <groupId>org.springframework.boot</groupId> <artifactId>spring-boot-starter-parent</artifactId> <version>2.0.5.RELEASE</version> </parent>- 1
- 2
- 3
- 4
- 5
- 6
02、加入springboot核心包和web开发的一些必要的包

<!-- 相关的jar包 --> <dependencies> <!-- SpringBoot核心jar包 --> <dependency> <groupId>org.springframework.boot</groupId> <artifactId>spring-boot-starter</artifactId> </dependency> <!-- web开发包:包括了tomca和springmvc --> <dependency> <groupId>org.springframework.boot</groupId> <artifactId>spring-boot-starter-web</artifactId> </dependency> </dependencies>- 1
- 2
- 3
- 4
- 5
- 6
- 7
- 8
- 9
- 10
- 11
- 12
- 13
03、创建App类,用来启动项目(创建项目的时候已经生成有这个类了,只需要修改就行:这个类里就一个注释和一个程序启动方法)

04、创建controller(在com.tc下创建的controller)

编辑controller类

package com.tc.controller; import org.springframework.stereotype.Controller; import org.springframework.web.bind.annotation.RequestMapping; import org.springframework.web.bind.annotation.ResponseBody; @Controller public class UserController { @RequestMapping("/hello") @ResponseBody public String hello(){ return "你好 springboot"; } }- 1
- 2
- 3
- 4
- 5
- 6
- 7
- 8
- 9
- 10
- 11
- 12
- 13
- 14
- 15
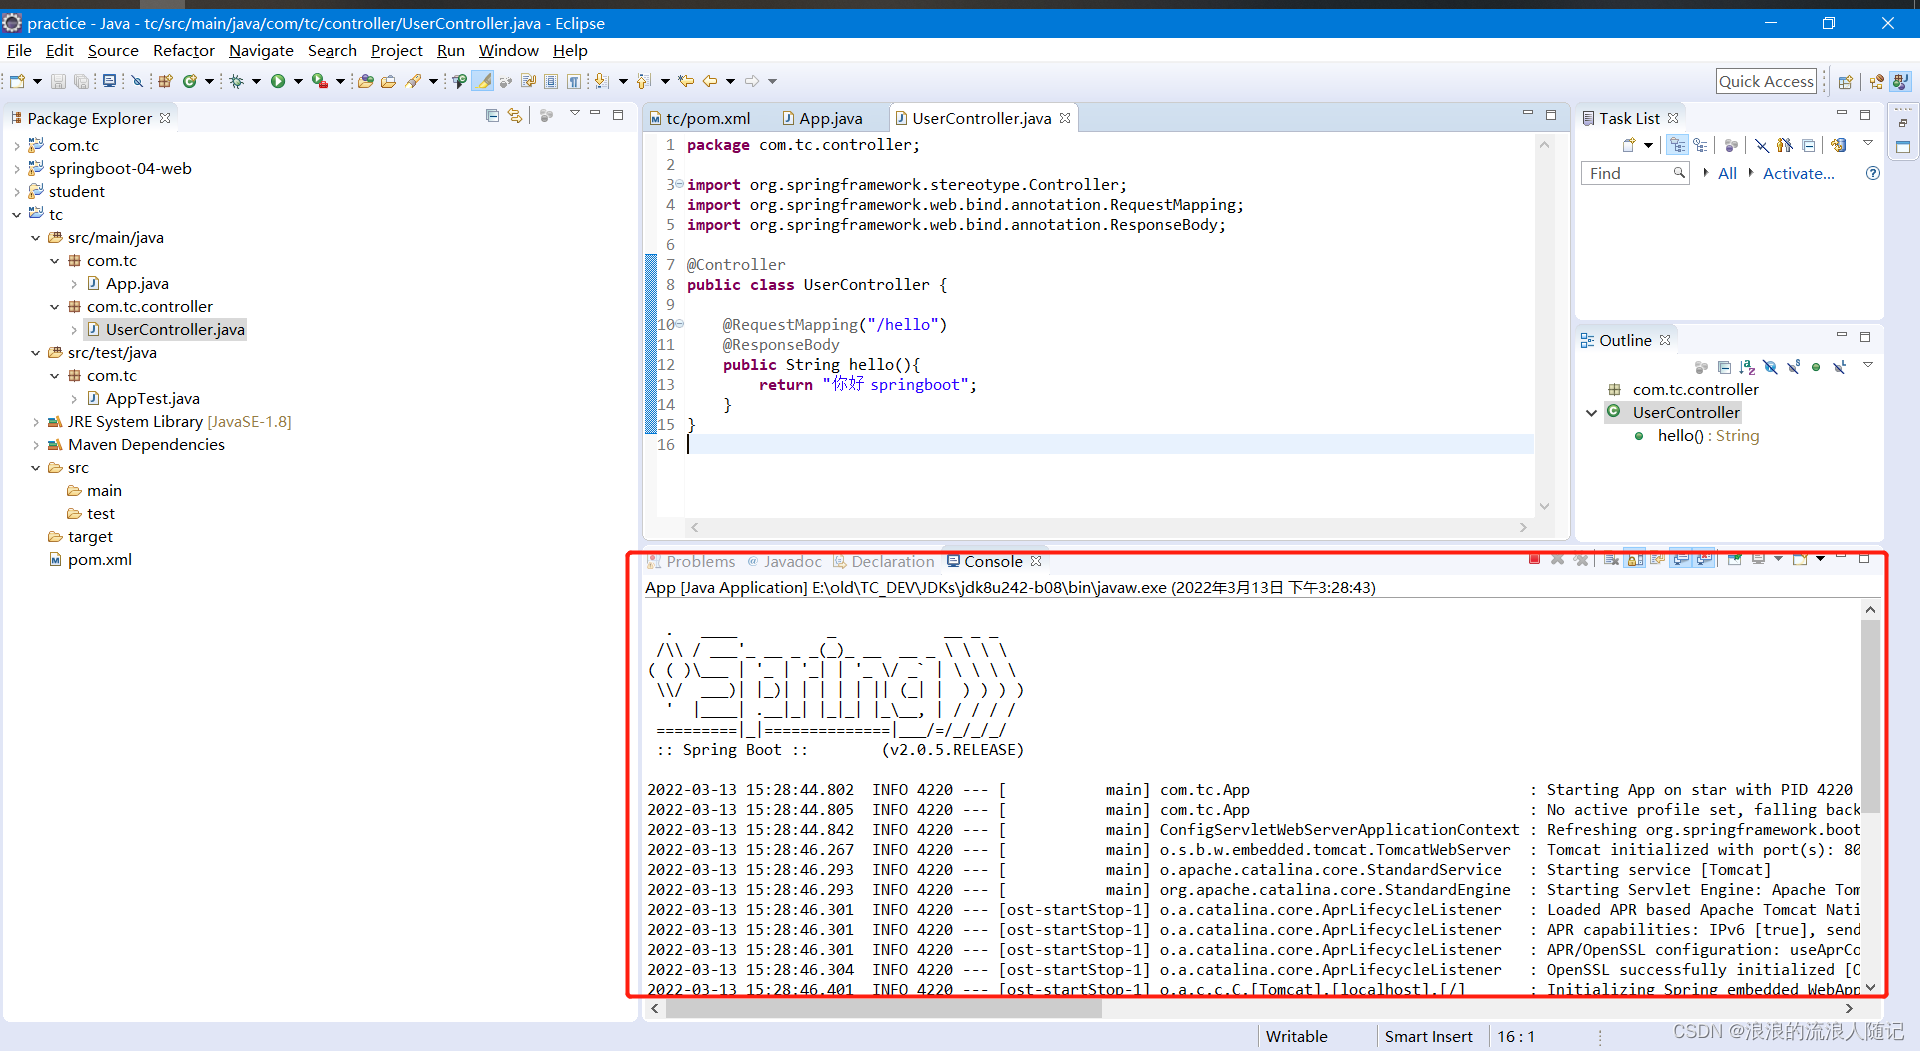
05、启动项目,查看控制台,控制台如果打印出,以下样式,则表明项目启动成功
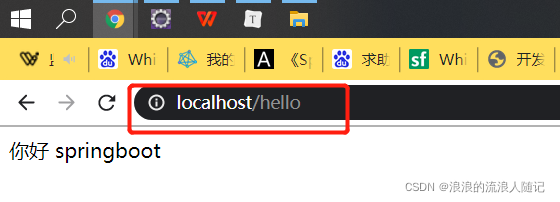
06、访问:打开浏览器,地址栏输入 localhost:8080/hello 进行访问,如果能看到“你好 springboot”字样,则说明项目springboot已经搭建成功了。三、常用配置设置
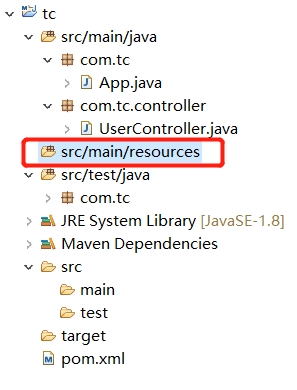
01、创建 resources文件夹 ,这个文件夹主要用来存放配置资源的,如果创建项目时已经存在则不需要再创建了,没有就手动创建一个
创建方式参照:创建的项目如果没有src/main/resources文件夹,如何解决?
02、创建yml文件(在刚刚创建的 src/main/java/resources/文件夹 上右键—new—other)

输入file后选择 General文件夹下的File,点击Next

名称填写为 application.yml,点击Finish。

03、打开 application.yml 文件进行服务器配置(注意:排版保持一致、冒号后都有一个空格)

这样配置完成后,重启访问项目就不需要输入端口号了
四、热部署:即有文件修改保存后,自动重启
01、打开pom.xml,加入springboot热部署依赖

<!-- springboot热部署 --> <dependency> <groupId>org.springframework.boot</groupId> <artifactId>spring-boot-devtools</artifactId> </dependency>- 1
- 2
- 3
- 4
- 5
02、验证:修改页面返回语句后保存,就会发现项目自动重启了且可以访问成功,说明热部署生效了


五、配置Thymeleaf
01、在pom.xml中加入 Thymeleaf

<!-- Thymeleaf --><dependency><groupId>org.springframework.boot</groupId><artifactId>spring-boot-starter-thymeleaf</artifactId></dependency>- 1
02、在 resoures 下创建 templates 文件夹和 static 文件夹,分别用例放html文件和css/js文件

03、在yml文件中配置 Thymeleaf
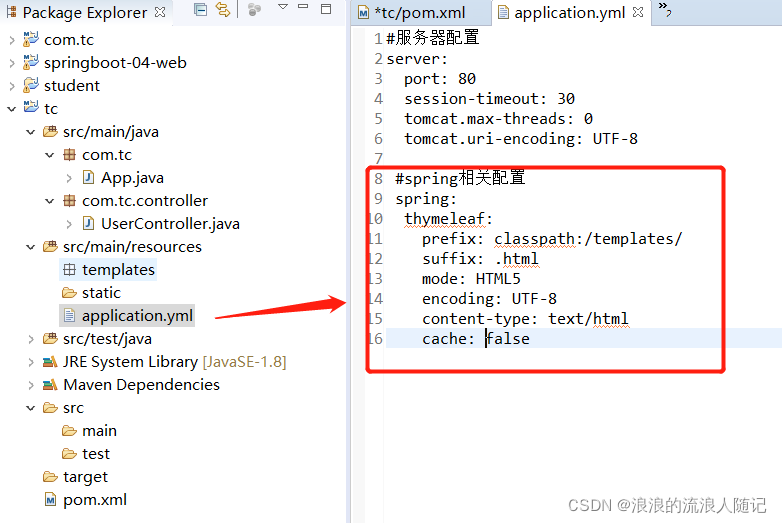
spring: thymeleaf: prefix: classpath:/templates/ suffix: .html mode: HTML5 encoding: UTF-8 content-type: text/html cache: false- 1
- 2
- 3
- 4
- 5
- 6
- 7
- 8
04、 UserController.java文件中加入如下代码,保存

@RequestMapping("/tc") public String tc(Model model){ model.addAttribute("name","tangcheng"); model.addAttribute("age",20); model.addAttribute("sex",'男'); return "tc"; }- 1
- 2
- 3
- 4
- 5
- 6
- 7
- 8
05、在 templates 文件夹下加入tc.html 页面

<!DOCTYPE html> <html> <head> <meta charset="UTF-8"> <title>Index</title> </head> <body> 姓名:<input type="text" th:value="${name}"><br/> 年龄:<input type="text" th:value="${age}"><br/> 性别:<input type="text" th:value="${info}"><br/> </body> </html>- 1
- 2
- 3
- 4
- 5
- 6
- 7
- 8
- 9
- 10
- 11
- 12
06、由于修改了配置文件,所以热部署就不生效了,这里需要重新启动项目一次,浏览器再访问:localhost/tc

现在前端、后端已经连接通了,最后一步连接数据库,将数据存入到数据库中,将下期更新。 -
相关阅读:
oracle使用rman备份实现异机数据恢复
Mybatis-Plus:配置
【设计模式】组合模式实现部门树实践
高企申报中的常见核心问题答疑
Redis docker 主从模式与哨兵sentinel
golang的垃圾回收算法之九写屏障
电力系统机组组合优化调度(IEEE14节点、IEEE30节点、IEEE118节点)(Matlab代码实现)
为什么要用scrapy爬虫库?而不是纯python进行爬虫?
六、vpp 流表+负载均衡
java实现html转pdf(node+puppeteer)
- 原文地址:https://blog.csdn.net/m0_67400972/article/details/125383645