现在我有个想法,就是希望通过外网能够远程连接到我的开发板。这里我们就需要使用到一种技术,内网穿透。
内网穿透是一种将内部网络中的设备通过外网进行访问的技术。在linux系统中,实现内网穿透有多种方式,其中最常见的方法是使用ngrok和frp。
以frp为例,frp是一个专注于内网穿透的高性能的反向代理应用,支持TCP、UDP、HTTP、HTTPS 等多种协议。 可以将内网服务以安全、便捷的方式通过具有公网IP节点的中转暴露到公网。
然而由于我自己并没有公网IP,因此这里采用了一款内网穿透软件cpolar,不限制流量,还可以永久免费使用。完成软件的配置后,会默认安装ssh隧道,只需要启动,就可以获取到ssh隧道,映射22端口的公网地址,比较简单。
一、内网穿透
1.1 注册免费的cpolar账号
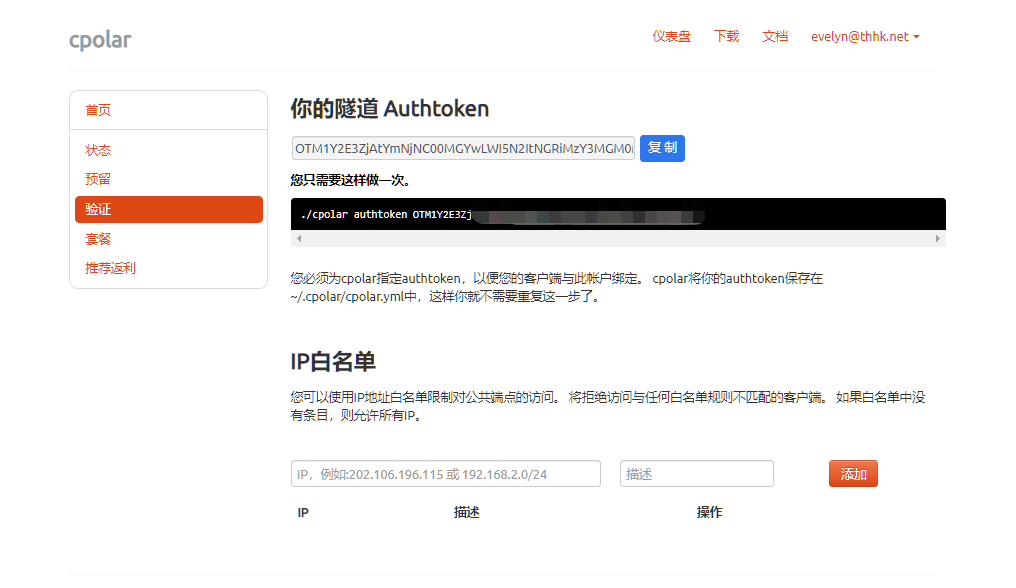
cpolar官网地址:https://i.cpolar.com/m/55wq,官网注册账号。账号注册号之后,点击右上角用户设置,进行重置AuthToken;

并保存自己的Authtoken;
1.2 安装cpolar客户端
下载cpolar安装脚本:
- root@rk3399:/data# mkdir cpolar
- root@rk3399:/data# wget https://www.cpolar.com/static/downloads/install-release-cpolar.sh
- root@rk3399:/data# mv install-release-cpolar.sh ./cpolar/
- root@rk3399:/data# mv install-release-cpolar.sh ./cpolar/
- root@rk3399:/data# cd cpolar/
- root@rk3399:/data/cpolar# ls -l
- total 24
- -rw-r--r-- 1 root root 21833 Apr 5 2023 install-release-cpolar.sh
- root@rk3399:/data/cpolar# chmod +x install-release-cpolar.sh
开始安装:
- root@rk3399:/data/cpolar# ./install-release-cpolar.sh
- % Total % Received % Xferd Average Speed Time Time Time Current
- Dload Upload Total Spent Left Speed
- 0 0 0 0 0 0 0 0 --:--:-- --:--:-- --:--:-- 0
- 100 21833 100 21833 0 0 61849 0 --:--:-- --:--:-- --:--:-- 61849
- info: Installing Cpolar 3.3.12 for aarch64
- Downloading Cpolar archive: http://static.cpolar.com/downloads/releases/3.3.12/cpolar-stable-linux-arm64.zip
- % Total % Received % Xferd Average Speed Time Time Time Current
- Dload Upload Total Spent Left Speed
- 100 6716k 100 6716k 0 0 9.7M 0 --:--:-- --:--:-- --:--:-- 9995k
- info: Extract the Cpolar package to /tmp/tmp.zNY8gPayfj and prepare it for installation.
- Downloading Cpolar demo config file: http://static.cpolar.com/downloads/cpolar.demo.yml
- % Total % Received % Xferd Average Speed Time Time Time Current
- Dload Upload Total Spent Left Speed
- 100 186 100 186 0 0 4650 0 --:--:-- --:--:-- --:--:-- 4650
- Downloading Cpolar service config file: http://static.cpolar.com/downloads/cpolar.service
- % Total % Received % Xferd Average Speed Time Time Time Current
- Dload Upload Total Spent Left Speed
- 100 384 100 384 0 0 11294 0 --:--:-- --:--:-- --:--:-- 11294
- Downloading Cpolar service@ config file: http://static.cpolar.com/downloads/cpolar@.service
- % Total % Received % Xferd Average Speed Time Time Time Current
- Dload Upload Total Spent Left Speed
- 100 380 100 380 0 0 11875 0 --:--:-- --:--:-- --:--:-- 11875
- rm: cannot remove '/etc/systemd/system/cpolar.service.d/10-donot_touch_multi_conf.conf': No such file or directory
- rm: cannot remove '/etc/systemd/system/cpolar@.service.d/10-donot_touch_multi_conf.conf': No such file or directory
- info: Systemd service files have been installed successfully!
- warning: The following are the actual parameters for the cpolar service startup.
- warning: Please make sure the configuration file path is correctly set.
- # /etc/systemd/system/cpolar.service
- [Unit]
- Description=Cpolar Service
- Documentation=https://www.cpolar.com/docs
- After=network.target nss-lookup.target
-
- [Service]
- User=nobody
- NoNewPrivileges=true
- ExecStart=/usr/local/bin/cpolar start-all -dashboard=on -daemon=on -config=/usr/local/etc/cpolar/cpolar.yml -log=/var/log/cpolar/access.log
- Restart=on-failure
- RestartPreventExitStatus=23
-
- [Install]
- WantedBy=multi-user.target
-
- installed: /usr/local/bin/cpolar
- installed link: /usr/bin/cpolar
- installed: /usr/local/etc/cpolar/cpolar.yml
- installed: /var/log/cpolar/
- installed: /var/log/cpolar/access.log
- installed: /var/log/cpolar/error.log
- installed: /etc/systemd/system/cpolar.service
- installed: /etc/systemd/system/cpolar@.service
- removed: /tmp/tmp.zNY8gPayfj
- info: Cpolar 3.3.12 is installed.
- You may need to execute a command to remove dependent software: apt purge curl unzip
- Please execute the command: systemctl enable cpolar; systemctl start cpolar

查看cpolar版本信息,如果正常显示,则安装成功:
- root@rk3399:/data/cpolar# cpolar version
- cpolar version 3.3.12
进行token认证:
- root@rk3399:/data/cpolar# cpolar authtoken 配置第一步中获取的Authtoken
- Authtoken saved to configuration file: /usr/local/etc/cpolar/cpolar.yml
配置cpolar开机自启动:
- root@rk3399:/data/cpolar# systemctl enable cpolar
- Created symlink /etc/systemd/system/multi-user.target.wants/cpolar.service → /etc/systemd/system/cpolar.service.
守护进程方式,启动cpolar:
root@rk3399:/data/cpolar# systemctl start cpolar查看cpolar守护进程状态;
- root@rk3399:/data/cpolar# systemctl status cpolar
- ● cpolar.service - Cpolar Service
- Loaded: loaded (/etc/systemd/system/cpolar.service; enabled; vendor preset: enabled)
- Active: active (running) since Sun 2023-11-12 21:21:04 CST; 17s ago
- Docs: https://www.cpolar.com/docs
- Main PID: 6768 (cpolar)
- Tasks: 22 (limit: 4569)
- Memory: 18.1M
- CGroup: /system.slice/cpolar.service
- ├─6768 cpolar: master process
- └─6779 cpolar: worker process
-
- Nov 12 21:21:04 rk3399 systemd[1]: Started Cpolar Service.
1.3 获取ssh隧道的公网地址
cpolar会默认安装两个样例隧道,一个是Website隧道指向http 8080端口,一个是ssh隧道,指向tcp 22端口;
在PC机器浏览器访问:http://192.168.0.102:9200,登录cpolar web UI管理界面;其中192.168.0.102是我的开发板的内网IP地址。
在状态—>在线隧道列表,就可以获取到ssh隧道的公网地址;

1.4 公网ssh远程linux服务
在外网设备上执行命令,就可以ssh远程内网的linux服务;
ssh ${linux用户名}@${cpolar所生成的公网地址} -p ${cpolar生成的端口号}其中:
linux用户名为开发板的用户名;cpolar所生成的公网地址:不包含上图公网地址列中的协议名和后面的端口号;
比如我这里运行命令:
[root@test2 ~]# ssh zhengyang@5.tcp.vip.cpolar.cn -p 14318注意:免费使用cpolar,所生成的公网地址是随机的,每24小时会变化,如果是需要后期长期使用,可以升级套餐,配置固定的域名地址,增大带宽,价格也不高,而且还支持21天退款保证。
参考文章
[1] cpolar入门指南