-
Windows 安装 Seata 1.6.1 并配置开机自启
环境声明
软件 版本 安装教程 操作系统 windows / Nacos 2.2.2 Windows 安装 Nacos 2.2 MySQL 8.0.27 Linux 安装 MySQL 8 Seata 安装
下载 Seata
下载 seata-server-1.6.1.zip (⬇️ 更多版本下载), 将文件解压到本地目录
D:\middleware\seata。
数据库创建
创建名为
seata的数据库 ,执行脚本seata\script\server\db\mysql.sql创建表结构的创建Seata 配置
参考
seata\conf\application-example.yml示例配置文件修改seata\conf\application.yml的配置中心和注册中心的方式为 nacos ,数据存储模式为 dbseata: # 配置中心-nacos config: # support: nacos, consul, apollo, zk, etcd3 type: nacos nacos: server-addr: 127.0.0.1:8848 namespace: group: SEATA_GROUP username: nacos password: nacos context-path: data-id: seataServer.properties # 注册中心-nacos registry: # support: nacos, eureka, redis, zk, consul, etcd3, sofa type: nacos nacos: application: seata-server server-addr: 127.0.0.1:8848 group: SEATA_GROUP namespace: # TC 集群名称,下文 Seata 客户端中配置事务分组名和集群名映射使用 cluster: default username: nacos password: nacos # 数据存储模式-db 数据库 store: # support: file 、 db 、 redis mode: db- 1
- 2
- 3
- 4
- 5
- 6
- 7
- 8
- 9
- 10
- 11
- 12
- 13
- 14
- 15
- 16
- 17
- 18
- 19
- 20
- 21
- 22
- 23
- 24
- 25
- 26
- 27
- 28
- 29
- 30
Nacos 配置
访问 Nacos 控制台,配置列表
public命名空间创建名为seataServer.properties的配置
复制
seata\script\config-center\config.txt内容至 seataServer.properties
修改
seataServer.properties的数据库连接信息# 修改数据库连接 store.db.url=jdbc:mysql://127.0.0.1:3306/seata?useUnicode=true&rewriteBatchedStatements=true store.db.user=username store.db.password=password- 1
- 2
- 3
- 4
启动 Seata
进入
seata\bin目录,鼠标双击seata-server.bat文件启动

启动成功之后,访问 Nacos 控制台查看服务是否注册成功

Seata 配置开机自启
WinSW(Windows Service Wrapper 是一个开源的 Windows 服务包装器,它可以帮助你将应用程序打包成系统服务,并实现开机自启动的功能。
下载 WinSW
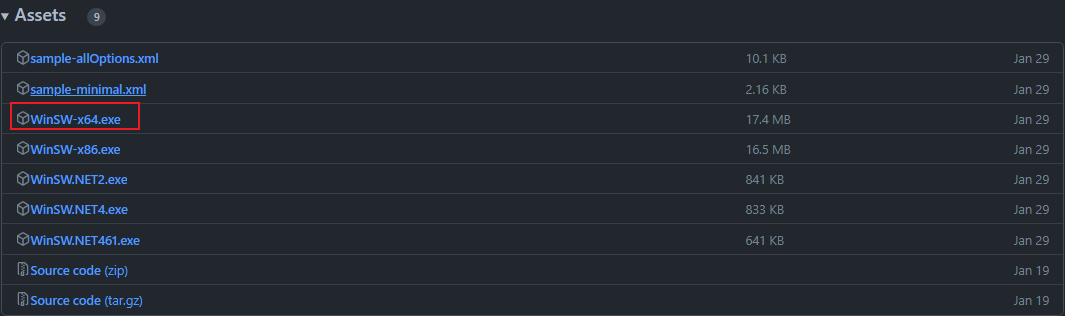
下载 WinSW-x64.exe v2.12.0 (⬇️ 更多版本下载) 和 sample-minimal.xml
配置 WinSW
-
重命名 WinSW-x64.exe 为
seata-service.exe, sample-minimal.xm 为seata-service.xml,将重命名后的文件放置在D:\middleware\seata\bin目录下
-
修改
seata-service.xml文件的配置如下:<service> <id>seataid> <name>Seata Servicename> <description>Seata 服务description> <logpath>D:\middleware\seata\bin\logslogpath> <logmode>rolllogmode> <executable>D:\middleware\seata\bin\seata-server.batexecutable> <startmode>Automaticstartmode> service>- 1
- 2
- 3
- 4
- 5
- 6
- 7
- 8
- 9
- 10
- 11
- 12
- 13
- 14
- 15
- 16
安装和启动服务
CMD 切换到
D:\middleware\seata\bin目录下,执行以下命令完成服务的安装和启动# 安装服务 seata-service.exe install # 启动服务 seata-service.exe start # 查看服务状态 seata-service.exe status- 1
- 2
- 3
- 4
- 5
- 6

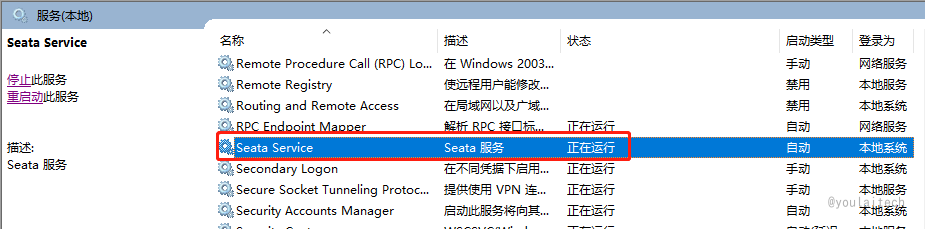
在 Windows 系统服务列表可以看到 Seata 服务(已验证可以开机自启动)
其他命令
# 卸载服务 seata-service.exe uninstall # 重启服务 seata-service.exe restart- 1
- 2
- 3
- 4
SpringBoot 整合 Seata
依赖 pom.xml
<dependency> <groupId>com.alibaba.cloudgroupId> <artifactId>spring-cloud-starter-alibaba-seataartifactId> <exclusions> <exclusion> <groupId>com.alibabagroupId> <artifactId>druidartifactId> exclusion> exclusions> dependency>- 1
- 2
- 3
- 4
- 5
- 6
- 7
- 8
- 9
- 10
配置 application.yml
seata: enabled: true # 事务分组名 tx-service-group: default_tx_group service: # 事务分组名和集群名映射(default_tx_group:default),default 是上文 seata server 配置的 TC 集群名 vgroup-mapping: default_tx_group: default # 注册中心 registry: type: nacos nacos: application: seata-server server-addr: localhost:8848 namespace: group: SEATA_GROUP username: nacos password: nacos- 1
- 2
- 3
- 4
- 5
- 6
- 7
- 8
- 9
- 10
- 11
- 12
- 13
- 14
- 15
- 16
- 17
- 18
实战应用
在需要开启全局事务的方法添加
@GlobalTransactional注解,项目完整源码 🔗 youlai-mall/** * 订单支付 */ @Override @GlobalTransactional public boolean payOrder(Long orderId) { OmsOrder order = this.getById(orderId); Assert.isTrue(order != null, "订单不存在"); Assert.isTrue(OrderStatusEnum.UNPAID.getValue().equals(order.getStatus()), "订单不可支付,请检查订单状态"); RLock lock = redissonClient.getLock(ORDER_LOCK_PREFIX + order.getOrderSn()); try { lock.lock(); // 扣减余额 memberFeignClient.deductBalance(SecurityUtils.getMemberId(), order.getPayAmount()); // 扣减库存 skuFeignClient.deductStock(order.getOrderSn()); // 修改订单状态 → 【已支付】 // .... return true; } finally { //释放锁 if (lock.isLocked()) { lock.unlock(); } } }- 1
- 2
- 3
- 4
- 5
- 6
- 7
- 8
- 9
- 10
- 11
- 12
- 13
- 14
- 15
- 16
- 17
- 18
- 19
- 20
- 21
- 22
- 23
- 24
- 25
- 26
- 27
- 28
- 29
微服务商城源码
名称/Git仓库 Github Gitee 开源组织 有来开源组织 有来开源组织 后端 youlai-mall 📖 youlai-mall 📖 前端 mall-admin🌎 mall-admin 🌎 移动端 mall-app 🌎 mall-app 🌎 联系我
如果在您阅读本文的过程中遇到任何问题或有疑惑之处,欢迎通过开源组织首页加我好友。
有来开源组织:gitee.com/youlaiorg -
相关阅读:
【2023 · CANN训练营第一季】基于昇腾910的TF网络脚本训练(ModelArts平台)
释放搜索潜力:基于ES(ElasticSearch)打造高效的语义搜索系统,让信息尽在掌握[2.项目讲解篇],支持Linux/Windows部署安装
ahooks解决React闭包问题方法示例
英伟达与斯坦福携手,打造未来全息XR眼镜:头带时代的终结
排序算法-冒泡排序
2023年了,还不知道你的事务为什么会失效吗?
[数据结构]栈和队列
手把手教你搭建Maven私服
001计算机网络基础习题+答案+解析
C++入门和基础
- 原文地址:https://blog.csdn.net/u013737132/article/details/133295970
