-
《SpringBoot篇》16.SpringBoot整合Elasticsearch超详细教程
陈老老老板🧙♂️ 👮♂️本文专栏:《SpringBoot篇》
🤴本文简述:本文讲一下SpringBoot整合MongoDB超详细教程,超级详细。
👳♂️上一篇文章: Java8新特性详解
🧔有任何问题,都可以私聊我,我能帮得上的一定帮忙,感谢大佬们支持。
👨🚒我认为人人都可以学好编程,我愿意成为你的领路人!(需内推私聊)
1.ES简介
注:公司中大部分也是对于管理日志信息使用es,我们也是,这里做简单的教学,之后会有更加完整的ES学习介绍。
说明:
ES(Elasticsearch)Elasticsearch是一个基于Lucene的搜索服务器。它提供了一个分布式多用户能力的全文搜索引擎,基于RESTful web接口。Elasticsearch是用Java语言开发的,并作为Apache许可条款下的开放源码发布,是一种流行的企业级搜索引擎。Elasticsearch用于云计算中,能够达到实时搜索,稳定,可靠,快速,安装使用方便 。
其实记住是一个分布式全文搜索引擎,重点是全文搜索。全文搜索:这里解释一下全文索引比如用户要搜索一个文章,以Java为关键字进行搜索,不管是书名中还是文章的标题,文章的作者名字,文章的摘要,只要是包含java关键字就会作为查询结果返回给用户查看,这就使用了全文搜索技术。
搜索的条件不再是仅用于对某一个字段进行比对与查找,而是在一条数据中使用搜索条件去比对表中更多的字段,只要能匹配上就作为查询结果,而ES技术就是一种可以实现上述效果的技术。2.全文搜索实现过程:倒排索引
ES设计了一种全新的思想,来实现全文搜索。具体操作过程如下:
(1)进行分词
将被查询的字段的数据全部文本信息进行查分,分成若干个词
- 例如“我不想上班”就会被拆分成三个词,分别是“我”、“不想”、“上班”,此过程专业术语叫做分词。(根据分词的策略不同,分出的效果是不一样的,不同的分词策略称为分词器(ik)。)
(2)存储对应id
将分词得到的结果存储起来,对应每条数据的id
-
例如id为1的数据中名称这一项的值是“我不想上班”,那么分词结束后,就会出现“我”对应id为1,“不想”对应id为1,“上班”对应id为1
-
例如id为2的数据中名称这一项的值是“上班真的快乐“,那么分词结束后,就会出现“上班”对应id为2,“真的”对应id为2,“快乐”对应id为2
-
按照上述形式可以对所有文档进行分词。需要注意分词的过程不是仅对一个字段进行,而是对每一个参与查询的字段都执行,最终结果汇总到一个表格中此时就会出现如下对应结果:
分词结果关键字 对应id 我 1 不想 1 上班 1,2 真的 2 快乐 2
(3)通过id查询结果
当进行查询时,如果输入“上班”作为查询条件,可以通过上述表格数据进行比对,得到id值1,2,然后根据id值就可以得到查询的结果数据了。
注:全文搜索中的分词结果关键字查询后得到的并不是整条的数据,而是数据的id,要想获得具体数据还要再次查询,这种分词结果关键字叫做倒排索引。
3.安装
(1)下载ES
windows版安装包下载地址:https://www.elastic.co/cn/downloads/elasticsearch

(2)解压缩
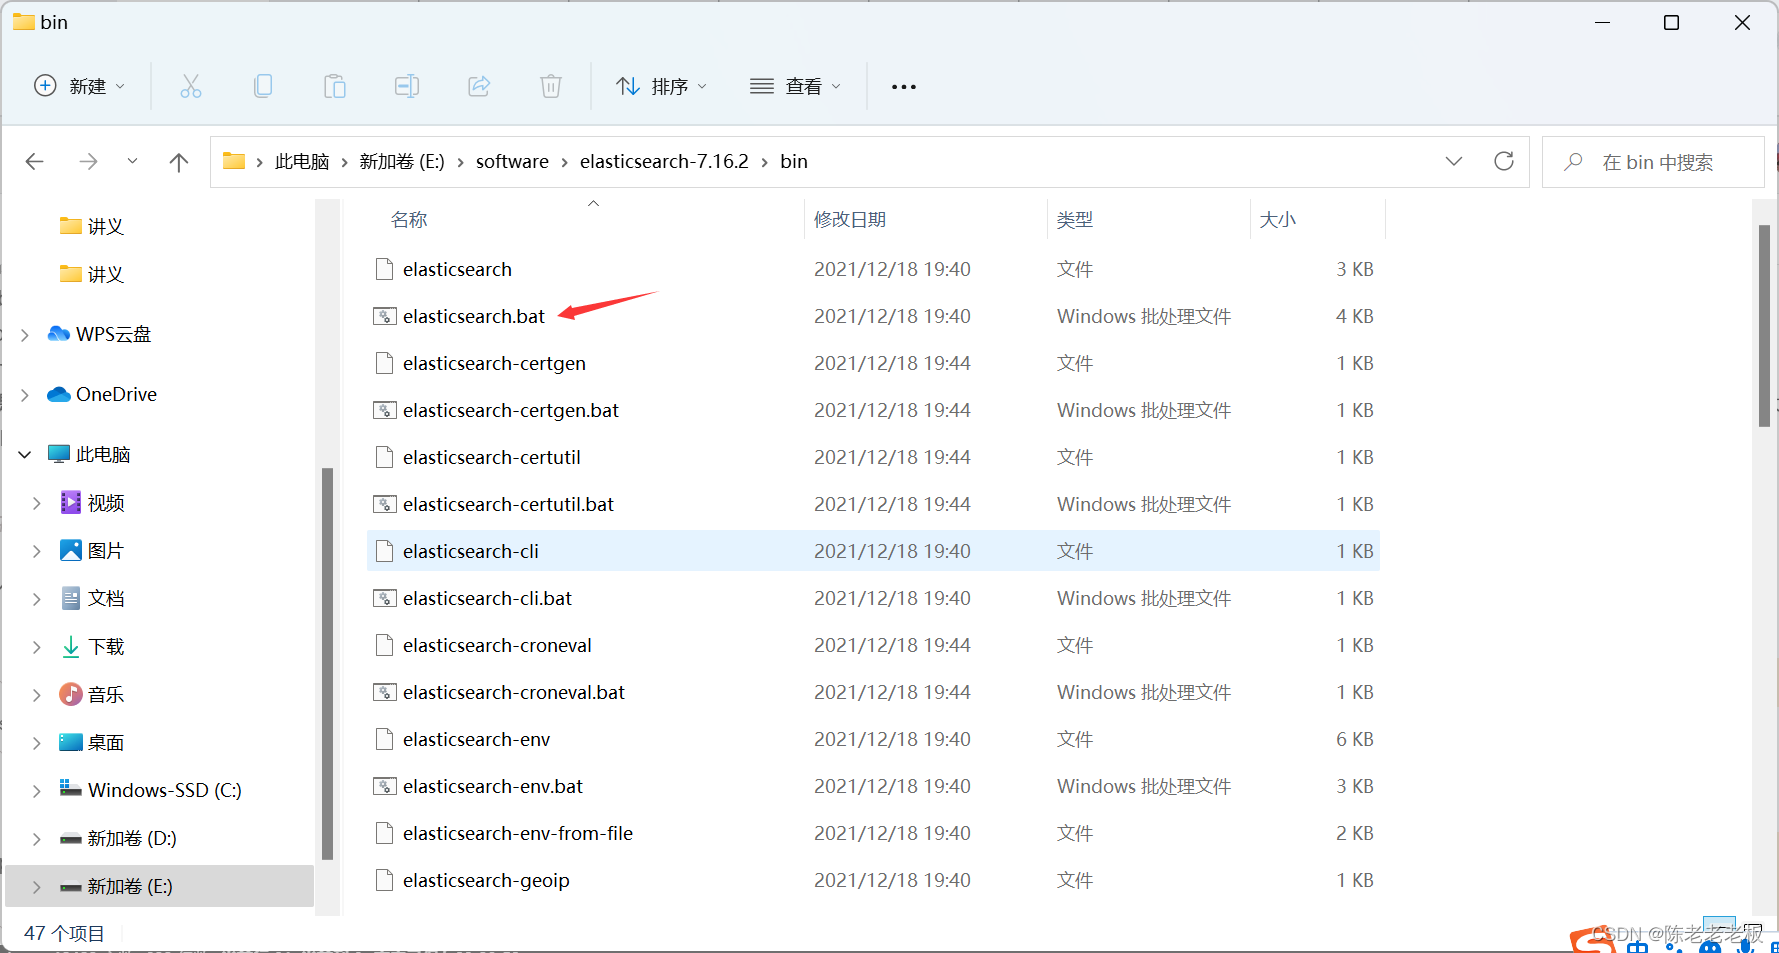
下载的安装包是解压缩就能使用的zip文件,解压缩完毕后会得到如下文件

- bin目录:包含所有的可执行命令
- config目录:包含ES服务器使用的配置文件
- jdk目录:此目录中包含了一个完整的jdk工具包,版本17,当ES升级时,使用最新版本的jdk确保不会出现版本支持性不足的问题
- lib目录:包含ES运行的依赖jar文件
- logs目录:包含ES运行后产生的所有日志文件
- modules目录:包含ES软件中所有的功能模块,也是一个一个的jar包。和jar目录不同,jar目录是ES运行期间依赖的jar包,modules是ES软件自己的功能jar包
- plugins目录:包含ES软件安装的插件,默认为空
(3)启动服务器
进入bin目录,再进入命令窗口,输入以下命令:
elasticsearch.bat- 1
双击elasticsearch.bat文件即可启动ES服务器,默认服务端口9200。通过浏览器访问http://localhost:9200看到如下信息视为ES服务器正常启动
{ "name" : "CZBK-**********", "cluster_name" : "elasticsearch", "cluster_uuid" : "j137DSswTPG8U4Yb-0T1Mg", "version" : { "number" : "7.16.2", "build_flavor" : "default", "build_type" : "zip", "build_hash" : "2b937c44140b6559905130a8650c64dbd0879cfb", "build_date" : "2021-12-18T19:42:46.604893745Z", "build_snapshot" : false, "lucene_version" : "8.10.1", "minimum_wire_compatibility_version" : "6.8.0", "minimum_index_compatibility_version" : "6.0.0-beta1" }, "tagline" : "You Know, for Search" }- 1
- 2
- 3
- 4
- 5
- 6
- 7
- 8
- 9
- 10
- 11
- 12
- 13
- 14
- 15
- 16
- 17

(4)基本操作
ES中保存要查询的数据,只不过格式和数据库存储数据格式不同。在ES中我们要先创建倒排索引(这个索引的功能又点类似于数据库的表),然后将数据添加到倒排索引中,添加的数据称为文档。所以要进行ES的操作要先创建索引,再添加文档,这样才能进行后续的查询操作。
要操作ES可以通过Rest风格的请求来进行,也就是说发送一个请求就可以执行一个操作。比如新建索引,删除索引这些操作都可以使用发送请求的形式来进行。
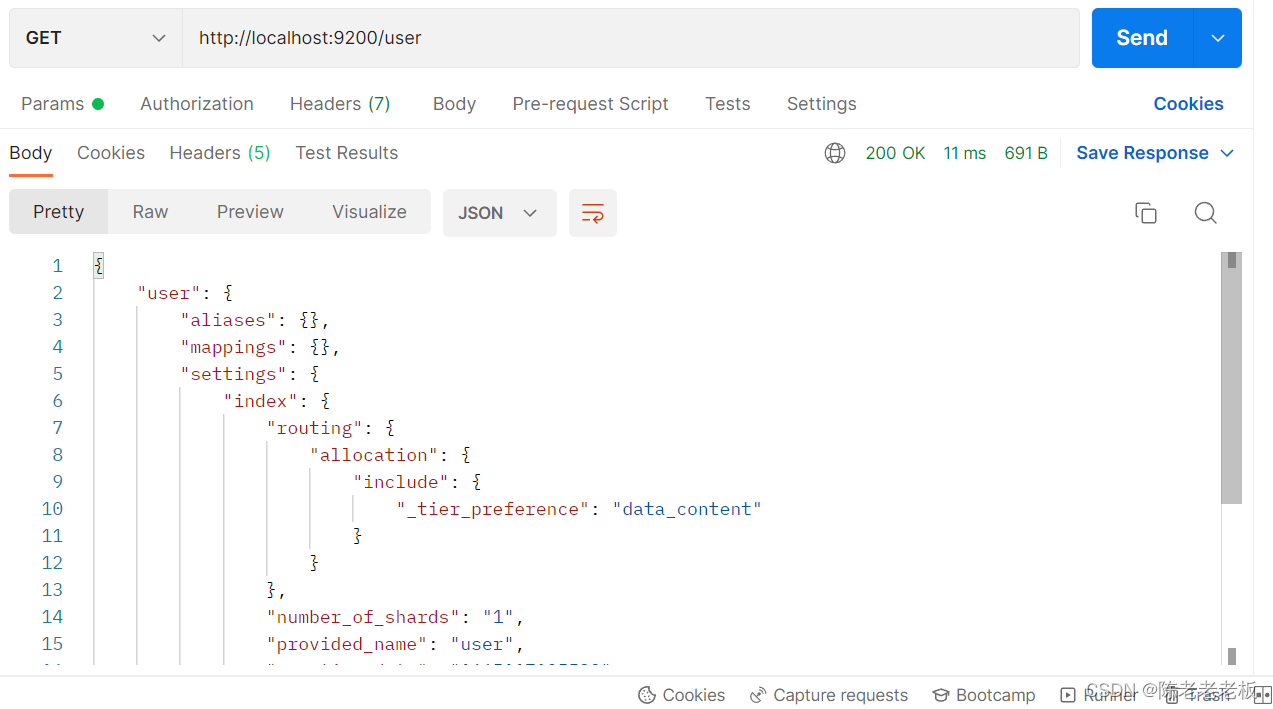
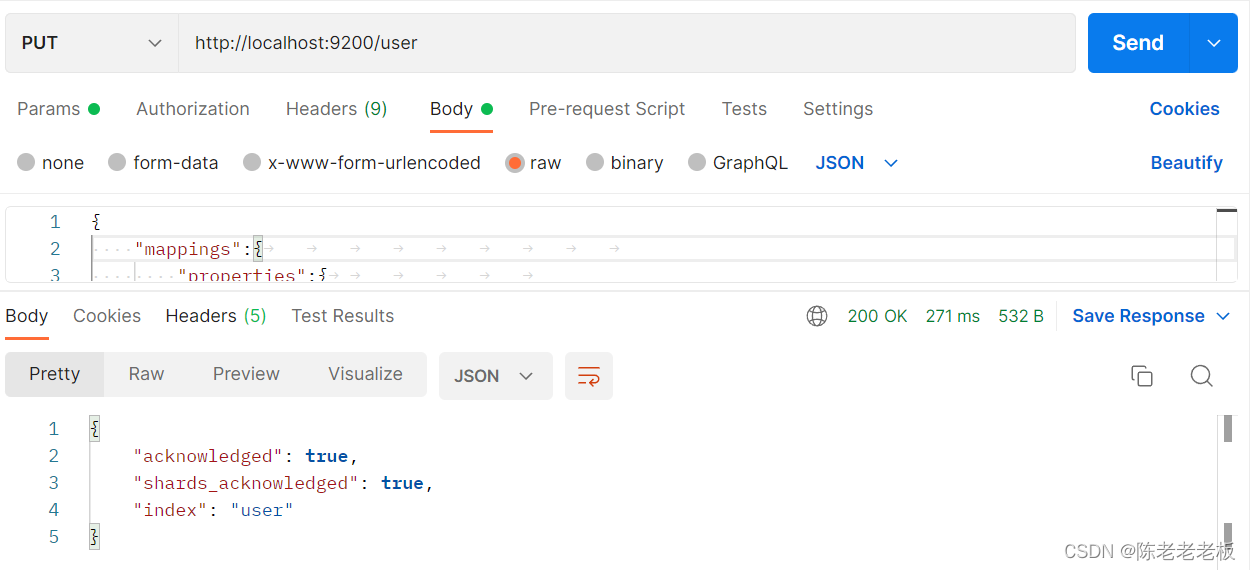
(1)创建索引
-
user是索引名称,注意是put请求
PUT请求 http://localhost:9200/user- 1
发送请求后,看到如下信息即索引创建成功
{ "acknowledged": true, "shards_acknowledged": true, "index": "books" }- 1
- 2
- 3
- 4
- 5

注: 重复创建已经存在的索引会出现错误信息,reason属性中描述错误原因。{ "error": { "root_cause": [ { "type": "resource_already_exists_exception", "reason": "index [books/VgC_XMVAQmedaiBNSgO2-w] already exists", "index_uuid": "VgC_XMVAQmedaiBNSgO2-w", "index": "books" } ], "type": "resource_already_exists_exception", "reason": "index [books/VgC_XMVAQmedaiBNSgO2-w] already exists", # books索引已经存在 "index_uuid": "VgC_XMVAQmedaiBNSgO2-w", "index": "book" }, "status": 400 }- 1
- 2
- 3
- 4
- 5
- 6
- 7
- 8
- 9
- 10
- 11
- 12
- 13
- 14
- 15
- 16
- 17

(2)查询索引
GET请求 http://localhost:9200/user- 1
查询索引得到索引相关信息,如下
{ "book": { "aliases": {}, "mappings": {}, "settings": { "index": { "routing": { "allocation": { "include": { "_tier_preference": "data_content" } } }, "number_of_shards": "1", "provided_name": "books", "creation_date": "1645768584849", "number_of_replicas": "1", "uuid": "VgC_XMVAQmedaiBNSgO2-w", "version": { "created": "7160299" } } } } }- 1
- 2
- 3
- 4
- 5
- 6
- 7
- 8
- 9
- 10
- 11
- 12
- 13
- 14
- 15
- 16
- 17
- 18
- 19
- 20
- 21
- 22
- 23
- 24
- 25
注: 如果查询了不存在的索引,会返回错误信息。
{ "error": { "root_cause": [ { "type": "index_not_found_exception", "reason": "no such index [book]", "resource.type": "index_or_alias", "resource.id": "book", "index_uuid": "_na_", "index": "book" } ], "type": "index_not_found_exception", "reason": "no such index [book]", # 没有book索引 "resource.type": "index_or_alias", "resource.id": "book", "index_uuid": "_na_", "index": "book" }, "status": 404 }- 1
- 2
- 3
- 4
- 5
- 6
- 7
- 8
- 9
- 10
- 11
- 12
- 13
- 14
- 15
- 16
- 17
- 18
- 19
- 20
- 21

(3)删除索引
DELETE请求 http://localhost:9200/books- 1
删除所有后,给出删除结果
{ "acknowledged": true }- 1
- 2
- 3

注: 如果重复删除,会给出错误信息,同样在reason属性中描述具体的错误原因
{ "error": { "root_cause": [ { "type": "index_not_found_exception", "reason": "no such index [books]", "resource.type": "index_or_alias", "resource.id": "book", "index_uuid": "_na_", "index": "book" } ], "type": "index_not_found_exception", "reason": "no such index [books]", # 没有books索引 "resource.type": "index_or_alias", "resource.id": "book", "index_uuid": "_na_", "index": "book" }, "status": 404 }- 1
- 2
- 3
- 4
- 5
- 6
- 7
- 8
- 9
- 10
- 11
- 12
- 13
- 14
- 15
- 16
- 17
- 18
- 19
- 20
- 21

(4)创建索引并指定分词器
前面创建的索引是未指定分词器的,可以在创建索引时添加请求参数,设置分词器。目前国内较为流行的分词器是IK分词器,使用前先在下对应的分词器,然后使用。
IK分词器下载地址:https://github.com/medcl/elasticsearch-analysis-ik/releases

分词器下载后解压到ES安装目录的plugins目录中即可,安装分词器后需要重新启动ES服务器。

使用IK分词器创建索引格式:(要把注释删掉否则报错)PUT请求 http://localhost:9200/books 请求参数如下(注意是json格式的参数) { "mappings":{ #定义mappings属性,替换创建索引时对应的mappings属性 "properties":{ #定义索引中包含的属性设置 "id":{ #设置索引中包含id属性 "type":"keyword" #当前属性可以被直接搜索 }, "name":{ #设置索引中包含name属性 "type":"text", #当前属性是文本信息,参与分词 "analyzer":"ik_max_word", #使用IK分词器进行分词 "copy_to":"all" #分词结果拷贝到all属性中 }, "type":{ "type":"keyword" }, "description":{ "type":"text", "analyzer":"ik_max_word", "copy_to":"all" }, "all":{ #定义属性,用来描述多个字段的分词结果集合,当前属性可以参与查询 "type":"text", "analyzer":"ik_max_word" } } } }- 1
- 2
- 3
- 4
- 5
- 6
- 7
- 8
- 9
- 10
- 11
- 12
- 13
- 14
- 15
- 16
- 17
- 18
- 19
- 20
- 21
- 22
- 23
- 24
- 25
- 26
- 27
- 28
- 29

创建完毕后返回结果和不使用分词器创建索引的结果是一样的。
此时可以通过查看索引信息观察到添加的请求参数mappings已经进入到了索引属性中
{ "user": { "aliases": {}, "mappings": { #mappings属性已经被替换 "properties": { "all": { "type": "text", "analyzer": "ik_max_word" }, "description": { "type": "text", "copy_to": [ "all" ], "analyzer": "ik_max_word" }, "id": { "type": "keyword" }, "name": { "type": "text", "copy_to": [ "all" ], "analyzer": "ik_max_word" }, "type": { "type": "keyword" } } }, "settings": { "index": { "routing": { "allocation": { "include": { "_tier_preference": "data_content" } } }, "number_of_shards": "1", "provided_name": "books", "creation_date": "1645769809521", "number_of_replicas": "1", "uuid": "DohYKvr_SZO4KRGmbZYmTQ", "version": { "created": "7160299" } } } } }- 1
- 2
- 3
- 4
- 5
- 6
- 7
- 8
- 9
- 10
- 11
- 12
- 13
- 14
- 15
- 16
- 17
- 18
- 19
- 20
- 21
- 22
- 23
- 24
- 25
- 26
- 27
- 28
- 29
- 30
- 31
- 32
- 33
- 34
- 35
- 36
- 37
- 38
- 39
- 40
- 41
- 42
- 43
- 44
- 45
- 46
- 47
- 48
- 49
- 50
- 51
- 52
目前我们已经有了索引了,但是索引中还没有数据,所以要先添加数据,ES中称数据为文档,下面进行文档操作。
a.添加文档,有三种方式
POST请求 http://localhost:9200/user/_doc #使用系统生成id POST请求 http://localhost:9200/user/_create/1 #使用指定id POST请求 http://localhost:9200/user/_doc/1 #使用指定id,不存在创建,存在更新(版本递增) 文档通过请求参数传递,数据格式json { "name":"cllb", "type":"bozhu", "description":"xihuan java" }- 1
- 2
- 3
- 4
- 5
- 6
- 7
- 8
- 9
- 10

b.查询文档
这里注意请求时要把参数调整为none,否则会报错。
GET请求 http://localhost:9200/user/_doc/1 #查询单个文档 GET请求 http://localhost:9200/user/_search #查询全部文档- 1
- 2

c.条件查询
GET请求 http://localhost:9200/user/_search?q=name:cllb # q=查询属性名:查询属性值- 1

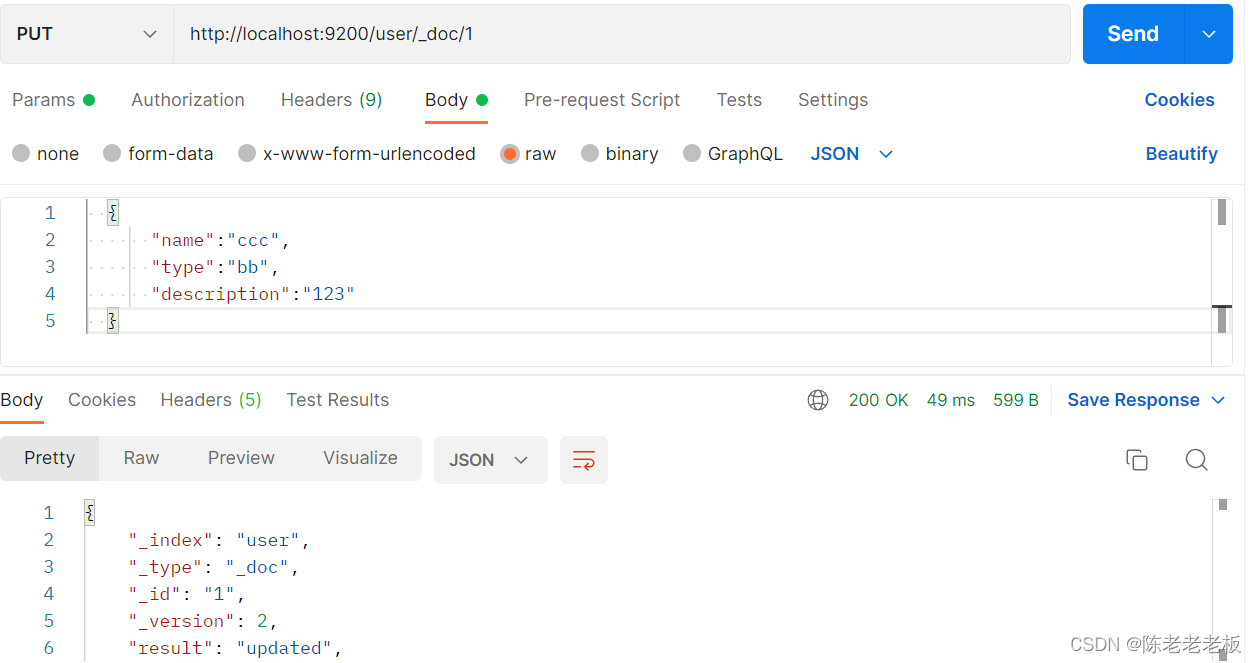
d.修改文档(全量更新)
PUT请求 http://localhost:9200/user/_doc/1 文档通过请求参数传递,数据格式json { "name":"ccc", "type":"bb", "description":"123" }- 1
- 2
- 3
- 4
- 5
- 6
- 7
- 8
e.修改文档(部分更新)
POST请求 http://localhost:9200/user/_update/1 文档通过请求参数传递,数据格式json { "doc":{ #部分更新并不是对原始文档进行更新,而是对原始文档对象中的doc属性中的指定属性更新 "name":"springboot" #仅更新提供的属性值,未提供的属性值不参与更新操作 } }- 1
- 2
- 3
- 4
- 5
- 6
- 7
- 8

f.删除文档
DELETE请求 http://localhost:9200/books/_doc/1- 1

4. 整合(早期低级版)
其实和整合Redis,MongoDB,ES都是一样的。
下面就开始springboot整合ES,操作步骤如下:(1):导入springboot整合ES的starter坐标
<dependency> <groupId>org.springframework.bootgroupId> <artifactId>spring-boot-starter-data-elasticsearchartifactId> dependency>- 1
- 2
- 3
- 4
(2):进行基础配置
spring: elasticsearch: rest: uris: http://localhost:9200- 1
- 2
- 3
- 4
配置ES服务器地址,端口9200
(3):使用springboot整合ES的专用客户端接口ElasticsearchRestTemplate来进行操作
@SpringBootTest class Springboot18EsApplicationTests { @Autowired private ElasticsearchRestTemplate template; }- 1
- 2
- 3
- 4
- 5
(4)连接pojo层
package com.test; import org.springframework.data.elasticsearch.annotations.Document; import java.lang.annotation.Documented; @Document(indexName = "user") public class User { private Integer id; private String name; private String type; private String description; public User(Integer id, String name, String type, String description) { this.id = id; this.name = name; this.type = type; this.description = description; } public User() { } public Integer getId() { return id; } public void setId(Integer id) { this.id = id; } public String getName() { return name; } public void setName(String name) { this.name = name; } public String getType() { return type; } public void setType(String type) { this.type = type; } public String getDescription() { return description; } public void setDescription(String description) { this.description = description; } @Override public String toString() { return "Book{" + "id=" + id + ", name='" + name + '\'' + ", type='" + type + '\'' + ", description='" + description + '\'' + '}'; } }- 1
- 2
- 3
- 4
- 5
- 6
- 7
- 8
- 9
- 10
- 11
- 12
- 13
- 14
- 15
- 16
- 17
- 18
- 19
- 20
- 21
- 22
- 23
- 24
- 25
- 26
- 27
- 28
- 29
- 30
- 31
- 32
- 33
- 34
- 35
- 36
- 37
- 38
- 39
- 40
- 41
- 42
- 43
- 44
- 45
- 46
- 47
- 48
- 49
- 50
- 51
- 52
- 53
- 54
- 55
- 56
- 57
- 58
- 59
- 60
- 61
- 62
- 63
- 64
- 65
- 66
- 67
- 68
- 69
(5)连接dao层
package com.test; import org.elasticsearch.ElasticsearchSecurityException; import org.springframework.data.elasticsearch.repository.ElasticsearchRepository; public interface Esresposity extends ElasticsearchRepository<User,Integer> { }- 1
- 2
- 3
- 4
- 5
- 6
- 7
- 8
注: 上述这是ES早期的操作方式,使用的客户端被称为Low Level Client,因为这种操作方式在性能方面略显不足。
于是ES开发了全新的客户端操作方式,称为High Level Client。
高级别客户端与ES版本同步更新,但是springboot最初整合ES的时候使用的是低级别客户端,所以企业开发需要更换成高级别的客户端模式。5.整合(最新高级版)
下面使用高级别客户端方式进行springboot整合ES,操作步骤如下:
(1)导入springboot整合ES高级别客户端的坐标
此种形式目前没有对应的starter,需要去找。
<dependency> <groupId>org.elasticsearch.clientgroupId> <artifactId>elasticsearch-rest-high-level-clientartifactId> dependency>- 1
- 2
- 3
- 4
(2)使用编程的形式设置连接的ES服务器,并获取客户端对象
@SpringBootTest class HighClientTest { private RestHighLevelClient client; @Test void testCreateClient() throws IOException { HttpHost host = HttpHost.create("http://localhost:9200"); RestClientBuilder builder = RestClient.builder(host); client = new RestHighLevelClient(builder); client.close(); } }- 1
- 2
- 3
- 4
- 5
- 6
- 7
- 8
- 9
- 10
- 11
- 12
注: 记得客户端使用完毕需要手工关闭。配置ES服务器地址与端口9200,由于当前客户端是手工维护的,因此不能通过自动装配的形式加载对象。
(3)使用客户端对象操作ES
例如创建索引:(这里需要先执行上面的删除索引操作,否则会报错)
@SpringBootTest class HighClientTest{ private RestHighLevelClient client; @Test void testCreateIndex() throws IOException { HttpHost host = HttpHost.create("http://localhost:9200"); RestClientBuilder builder = RestClient.builder(host); client = new RestHighLevelClient(builder); CreateIndexRequest request = new CreateIndexRequest("user"); client.indices().create(request, RequestOptions.DEFAULT); client.close(); } }- 1
- 2
- 3
- 4
- 5
- 6
- 7
- 8
- 9
- 10
- 11
- 12
- 13
- 14
- 15

注:第一步永远是获取RestHighLevelClient对象,创建索引的对象是CreateIndexRequest,其他操作也会有自己专用的Request对象。最后一步永远是关闭该对象的连接。可以得出以下结论,进行方法提取。
@SpringBootTest class Springboot18EsApplicationTests { @BeforeEach //在测试类中每个操作运行前运行的方法 void setUp() { HttpHost host = HttpHost.create("http://localhost:9200"); RestClientBuilder builder = RestClient.builder(host); client = new RestHighLevelClient(builder); } @AfterEach //在测试类中每个操作运行后运行的方法 void tearDown() throws IOException { client.close(); } private RestHighLevelClient client; @Test void testCreateIndex() throws IOException { CreateIndexRequest request = new CreateIndexRequest("book"); client.indices().create(request, RequestOptions.DEFAULT); } }- 1
- 2
- 3
- 4
- 5
- 6
- 7
- 8
- 9
- 10
- 11
- 12
- 13
- 14
- 15
- 16
- 17
- 18
- 19
- 20
- 21
- 22

现在的书写简化了很多,也更合理。下面使用上述模式将所有的ES操作执行一遍,测试结果
创建索引(IK分词器):
@Test void testCreateIndexByIK() throws IOException { CreateIndexRequest request = new CreateIndexRequest("books"); String json = "{\n" + " \"mappings\":{\n" + " \"properties\":{\n" + " \"id\":{\n" + " \"type\":\"keyword\"\n" + " },\n" + " \"name\":{\n" + " \"type\":\"text\",\n" + " \"analyzer\":\"ik_max_word\",\n" + " \"copy_to\":\"all\"\n" + " },\n" + " \"type\":{\n" + " \"type\":\"keyword\"\n" + " },\n" + " \"description\":{\n" + " \"type\":\"text\",\n" + " \"analyzer\":\"ik_max_word\",\n" + " \"copy_to\":\"all\"\n" + " },\n" + " \"all\":{\n" + " \"type\":\"text\",\n" + " \"analyzer\":\"ik_max_word\"\n" + " }\n" + " }\n" + " }\n" + "}"; //设置请求中的参数 request.source(json, XContentType.JSON); client.indices().create(request, RequestOptions.DEFAULT); }- 1
- 2
- 3
- 4
- 5
- 6
- 7
- 8
- 9
- 10
- 11
- 12
- 13
- 14
- 15
- 16
- 17
- 18
- 19
- 20
- 21
- 22
- 23
- 24
- 25
- 26
- 27
- 28
- 29
- 30
- 31
- 32
- 33
注:IK分词器是通过请求参数的形式进行设置的,设置请求参数使用request对象中的source方法进行设置,至于参数是什么,取决于你的操作种类。当请求中需要参数时,均可使用当前形式进行参数设置。
添加文档:
@Test //添加文档 void testCreateDoc() throws IOException { User user = userDao.selectById(1); IndexRequest request = new IndexRequest("user").id(book.getId().toString()); String json = JSON.toJSONString(book); request.source(json,XContentType.JSON); client.index(request,RequestOptions.DEFAULT); }- 1
- 2
- 3
- 4
- 5
- 6
- 7
- 8
- 9
添加文档使用的请求对象是IndexRequest,与创建索引使用的请求对象不同。
批量添加文档:
@Test //批量添加文档 void testCreateDocAll() throws IOException { List<User> userList = userDao.selectList(null); BulkRequest bulk = new BulkRequest(); for (User user : userList) { IndexRequest request = new IndexRequest("user").id(user.getId().toString()); String json = JSON.toJSONString(book); request.source(json,XContentType.JSON); bulk.add(request); } client.bulk(bulk,RequestOptions.DEFAULT); }- 1
- 2
- 3
- 4
- 5
- 6
- 7
- 8
- 9
- 10
- 11
- 12
- 13
注:批量做时,先创建一个BulkRequest的对象,可以将该对象理解为是一个保存request对象的容器,将所有的请求都初始化好后,添加到BulkRequest对象中,再使用BulkRequest对象的bulk方法,一次性执行完毕。
按id查询文档:
@Test //按id查询 void testGet() throws IOException { GetRequest request = new GetRequest("user","1"); GetResponse response = client.get(request, RequestOptions.DEFAULT); String json = response.getSourceAsString(); System.out.println(json); }- 1
- 2
- 3
- 4
- 5
- 6
- 7
- 8
根据id查询文档使用的请求对象是GetRequest。
按条件查询文档:
@Test //按条件查询 void testSearch() throws IOException { SearchRequest request = new SearchRequest("user"); SearchSourceBuilder builder = new SearchSourceBuilder(); builder.query(QueryBuilders.termQuery("all","spring")); request.source(builder); SearchResponse response = client.search(request, RequestOptions.DEFAULT); SearchHits hits = response.getHits(); for (SearchHit hit : hits) { String source = hit.getSourceAsString(); //System.out.println(source); Book book = JSON.parseObject(source, Book.class); System.out.println(book); } }- 1
- 2
- 3
- 4
- 5
- 6
- 7
- 8
- 9
- 10
- 11
- 12
- 13
- 14
- 15
- 16
- 17
- 18
注:按条件查询文档使用的请求对象是SearchRequest,查询时调用SearchRequest对象的termQuery方法,需要给出查询属性名,此处支持使用合并字段,也就是前面定义索引属性时添加的all属性。

总结:ES是为了查询速度快,之后会有更细致的有关ES的博客。希望对您有帮助,感谢阅读
结束语:裸体一旦成为艺术,便是最圣洁的。道德一旦沦为虚伪,便是最下流的。
勇敢去做你认为正确的事,不要被世俗的流言蜚语所困扰。 -
相关阅读:
小白学习spring第二天
如何 build 一个 mysql_client 镜像
技术分享 | app自动化测试(Android)– 属性获取与断言
大厂程序员:杭州小公司给不了40k?网友群嘲
柯桥英语口语学校,商务英语BEC考前须知
基于Docker环境下的Jenkins搭建及使用
针对美国国家安全局“酸狐狸”漏洞攻击武器平台的分析与应对方案建议
Java标准输入输出流【转换流&打印流】
【系统架构设计师】第四章 计算机网络
笔记:Python 字典和集合(练习题)
- 原文地址:https://blog.csdn.net/weixin_47343544/article/details/127182639