-
小白学习spring第二天
第8节:Spring配置文件模块化
1、配置文件模块化的业务背景,为什么要进行配置文件模块化 2、配置文件模块化的具体实现 方式一: 创建多个并列的配置文件 方式二: 创建一个主配置,多个从配置,主配置当中引入从配置- 1
- 2
- 3
- 4
8.1 Spring模块化的介绍
我们现在的配置都集中配在了一个applicationContext.xml文件中,当开发人员过多时, 如果所有bean都配 置到同一个配置文件中,会使这个文件巨大,而且也不方便维护。 针对这个问题,Spring提供了多配置文件的方式,也就是所谓的配置文件模块化- 1
8.2 Spring模块化的配置
8.2.1 方式1
并列的多个配置文件 直接编写多个配置文件,比如说beans1.xml,beans2.xml......, 然后在创建ApplicationContext的时候,直接传入多个配置文件。- 1
ApplicationContext act = new ClassPathXmlApplicationContext("beans1.xml","beans2.xml","...");- 1
8.2.2 方式2
主从配置文件 先配置一个主配置文件,然后在里面导入其它的配置文件。- 1
<import resource="beans1.xml" /> <import resource="beans2.xml" />- 1
- 2
注意: 同一个xml文件中不能出现相同名称的bean,如果出现会报错 多个xml文件如果出现相同名称的bean,不会报错,但是后加载的会覆盖前加载的bean,所以企业开发中尽 量保证bean的名称是唯一的。- 1
- 2
- 3
- 4
- 5
第9节:模板设计模式解析
1、了解什么是设计模式,将常见的模式简单复习 2、模板设计模式的介绍 3、模板设计模式的使用场景,结合已经学习到技术解释模板设计模式 4、模板设计模式具体案例的实现 5、引出Spring中JdbcTemplate模板对象 设计模式是java编程当中非常重要的思想, 不管是实际开发还是面试过程当中,经常涉及。所以凡是涉及到设计模式的内容都是重点。- 1
- 2
- 3
- 4
- 5
- 6
9.1 模板设计模式介绍
模板类: 模板方法(Template Method)模式的定义如下:定义一个操作中的算法骨架,而将算法的一些步骤延迟到子类中,使得子类可以不改变该算法结构的情况下重定义该算法的某些特定步骤。它是一种类行为型模式。 模板方法模式的静态结构图如下:- 1
- 2
- 3

9.2 模板设计模式的应用场景
在多个子类中拥有相同的方法,而且逻辑相同时,可以将这些方法抽出来放到一个模板抽象类中 程序主框架相同,细节不同的情况下,也可以使用模板方法 举例说明: a:使用过Servlet的人都清楚,除了要在web.xml做相应的配置外,还需继承一个叫HttpServlet的抽象类。HttpService类提供了一个service()方法,这个方法调用七个do方法中的一个或几个,完成对客户端调用的响应。这些do方法需要由HttpServlet的具体子类提供,因此这是典型的模板方法模式。 b:持久层对数据库的操作,Spring提供了JdbcTemplate模板对象, 完成CRUD操作。- 1
- 2
- 3
- 4
- 5
- 6
- 7
- 8
- 9
9.3 模板设计模式实现
9.3.1 实现出国留学手续设计程序
分析:出国留学手续一般经过以下流程:索取学校资料,提出入学申请,办理因私出国护照、出境卡和公证,申请签证,体检、订机票、准备行装,抵达目标学校等,其中有些业务对各个学校是一样的,但有些业务因学校不同而不同,所以比较适合用模板方法模式来实现。 在本实例中,我们先定义一个出国留学的抽象类 StudyAbroad,里面包含了一个模板方法 TemplateMethod(),该方法中包含了办理出国留学手续流程中的各个基本方法,其中有些方法的处理由于各国都一样,所以在抽象类中就可以实现,但有些方法的处理各国是不同的,必须在其具体子类(如美国留学类 StudyInAmerica)中实现。如果再增加一个国家,只要增加一个子类就可以了。- 1
- 2
- 3
- 4
图 2 所示是其结构图- 1

9.3.2 程序代码实现
//抽象类: 出国留学 public abstract class StudyAbroad { //定义抽象方法,索取学校资料 public abstract void LookingForSchool(); //定义抽象方法,定义入学申请 public abstract void ApplyForEnrol(); //定义入学申请方法: public void ApplyForPassport() { System.out.println("三.办理因私出国护照、出境卡和公证:"); System.out.println(" 1)持录取通知书、本人户口簿或身份证向户口所在地公安机关申请办理因私出国护照和出境卡。"); System.out.println(" 2)办理出生公证书,学历、学位和成绩公证,经历证书,亲属关系公证,经济担保公证。"); } //定义申请签证方法 public void ApplyForVisa() { System.out.println("四.申请签证:"); System.out.println(" 1)准备申请国外境签证所需的各种资料,包括个人学历、成绩单、工作经历的证明;个人及家庭收入、资金和财产证明;家庭成员的关系证明等;"); System.out.println(" 2)向拟留学国家驻华使(领)馆申请入境签证。申请时需按要求填写有关表格,递交必需的证明材料,缴纳签证。有的国家(比如美国、英国、加拿大等)在申请签证时会要求申请人前往使(领)馆进行面试。"); } //体检、订机票、准备行装 方法 public void ReadyGoAbroad() { System.out.println("五.体检、订机票、准备行装:"); System.out.println(" 1)进行身体检查、免疫检查和接种传染病疫苗;"); System.out.println(" 2)确定机票时间、航班和转机地点。"); } //定义抵达抽象方法 public abstract void Arriving(); //定义模板方法: public void templateMethod(){ (1)(2).... } }- 1
- 2
- 3
- 4
- 5
- 6
- 7
- 8
- 9
- 10
- 11
- 12
- 13
- 14
- 15
- 16
- 17
- 18
- 19
- 20
- 21
- 22
- 23
- 24
- 25
- 26
- 27
- 28
- 29
- 30
- 31
- 32
- 33
- 34
- 35
- 36
- 37
- 38
//定义具体的子类,美国留学 public class StudyInAmerica extends StudyAbroad { //索取资料的具体实现 @Override public void LookingForSchool() { System.out.println("一.索取学校以下资料:"); System.out.println(" 1)对留学意向国家的政治、经济、文化背景和教育体制、学术水平进行较为全面的了解;"); System.out.println(" 2)全面了解和掌握国外学校的情况,包括历史、学费、学制、专业、师资配备、教学设施、学术地位、学生人数等;"); System.out.println(" 3)了解该学校的住宿、交通、医疗保险情况如何;"); System.out.println(" 4)该学校在中国是否有授权代理招生的留学中介公司?"); System.out.println(" 5)掌握留学签证情况;"); System.out.println(" 6)该国政府是否允许留学生合法打工?"); System.out.println(" 8)毕业之后可否移民?"); System.out.println(" 9)文凭是否受到我国认可?"); } //入学申请的具体实现 @Override public void ApplyForEnrol() { System.out.println("二.入学申请:"); System.out.println(" 1)填写报名表;"); System.out.println(" 2)将报名表、个人学历证明、最近的学习成绩单、推荐信、个人简历、托福或雅思语言考试成绩单等资料寄往所申请的学校;"); System.out.println(" 3)为了给签证办理留有充裕的时间,建议越早申请越好,一般提前1年就比较从容。"); } //抵达的具体实现 @Override public void Arriving() { System.out.println("六.抵达目标学校:"); System.out.println(" 1)安排住宿;"); System.out.println(" 2)了解校园及周边环境。"); } }- 1
- 2
- 3
- 4
- 5
- 6
- 7
- 8
- 9
- 10
- 11
- 12
- 13
- 14
- 15
- 16
- 17
- 18
- 19
- 20
- 21
- 22
- 23
- 24
- 25
- 26
- 27
- 28
- 29
- 30
- 31
- 32
- 33
- 34
- 35
public class StudyAbroadProcess { public static void main(String[] args) { StudyAbroad tm = new StudyInAmerica(); tm.TemplateMethod(); } }- 1
- 2
- 3
- 4
- 5
- 6
9.3.3 运行结果如下
一.索取学校以下资料: 1)对留学意向国家的政治、经济、文化背景和教育体制、学术水平进行较为全面的了解; 2)全面了解和掌握国外学校的情况,包括历史、学费、学制、专业、师资配备、教学设施、学术地位、学生人数等; 3)了解该学校的住宿、交通、医疗保险情况如何; 4)该学校在中国是否有授权代理招生的留学中介公司? 5)掌握留学签证情况; 6)该国政府是否允许留学生合法打工? 8)毕业之后可否移民? 9)文凭是否受到我国认可? 二.入学申请: 1)填写报名表; 2)将报名表、个人学历证明、最近的学习成绩单、推荐信、个人简历、托福或雅思语言考试成绩单等资料寄往所申请的学校; 3)为了给签证办理留有充裕的时间,建议越早申请越好,一般提前1年就比较从容。 三.办理因私出国护照、出境卡和公证: 1)持录取通知书、本人户口簿或身份证向户口所在地公安机关申请办理因私出国护照和出境卡。 2)办理出生公证书,学历、学位和成绩公证,经历证书,亲属关系公证,经济担保公证。 四.申请签证: 1)准备申请国外境签证所需的各种资料,包括个人学历、成绩单、工作经历的证明;个人及家庭收入、资金和财产证明;家庭成员的关系证明等; 2)向拟留学国家驻华使(领)馆申请入境签证。申请时需按要求填写有关表格,递交必需的证明材料,缴纳签证。有的国家(比如美国、英国、加拿大等)在申请签证时会要求申请人前往使(领)馆进行面试。 五.体检、订机票、准备行装: 1)进行身体检查、免疫检查和接种传染病疫苗; 2)确定机票时间、航班和转机地点。 六.抵达目标学校: 1)安排住宿; 2)了解校园及周边环境。- 1
- 2
- 3
- 4
- 5
- 6
- 7
- 8
- 9
- 10
- 11
- 12
- 13
- 14
- 15
- 16
- 17
- 18
- 19
- 20
- 21
- 22
- 23
- 24
- 25
第10节:Spring整合JDBC
1、JDBC技术操作数据库的步骤,JDBC开发的弊端问题 2、介绍Spring在持久层提供的JdbcTemplate模板对象 3、JdbcTemplate模板对象的使用步骤,常见的读写方法 4、扩展JdbcDaoSupport工具类(让实现接口类继承这个类)当中配置文件注入JdbcTemplate原理(dataSourse)- 1
- 2
- 3
- 4
10.1 整合思路分析
Spring提供了ioc容器,管理jdbc操作数据库的过程中需要的数据库连接对象,同时Spring提供了整合jdbc操作数据库的工具类JdbcDaoSupport 和模板工具 JdbcTemplate,在JdbcTemplate中提供了大量的操作数据库的方式供用户使用。所以我们只需要获取模板工具类然后调用方法就可以完成Jdbc的操作了。- 1
10.2 添加技术依赖
<dependencies> <dependency> <groupId>org.springframeworkgroupId> <artifactId>spring-contextartifactId> <version>${spring.version}version> dependency> <dependency> <groupId>org.springframeworkgroupId> <artifactId>spring-jdbcartifactId> <version>${spring.version}version> dependency> <dependency> <groupId>mysqlgroupId> <artifactId>mysql-connector-javaartifactId> <version>5.1.47version> dependency> <dependency> <groupId>com.mchangegroupId> <artifactId>c3p0artifactId> <version>0.9.5.2version> dependency> <dependency> <groupId>junitgroupId> <artifactId>junitartifactId> <version>4.12version> <scope>testscope> dependency> dependencies>- 1
- 2
- 3
- 4
- 5
- 6
- 7
- 8
- 9
- 10
- 11
- 12
- 13
- 14
- 15
- 16
- 17
- 18
- 19
- 20
- 21
- 22
- 23
- 24
- 25
- 26
- 27
- 28
- 29
- 30
- 31
- 32
- 33
10.3 构建数据库表和实体类

public class Account implements Serializable { private Integer id; private String name; private double money; public Integer getId() { return id; } public void setId(Integer id) { this.id = id; } public String getName() { return name; } public void setName(String name) { this.name = name; } public double getMoney() { return money; } public void setMoney(double money) { this.money = money; } @Override public String toString() { return "Account{" + "id=" + id + ", name='" + name + '\'' + ", money=" + money + '}'; } }- 1
- 2
- 3
- 4
- 5
- 6
- 7
- 8
- 9
- 10
- 11
- 12
- 13
- 14
- 15
- 16
- 17
- 18
- 19
- 20
- 21
- 22
- 23
- 24
- 25
- 26
- 27
- 28
- 29
- 30
- 31
- 32
- 33
- 34
- 35
- 36
- 37
- 38
10.4 编写持久层代码
public interface AccountDao { public void save(Account account); public void delete(Integer id); public void update(Account account); public Account findById(Integer id); public Integer getTotalRecords(); public List<Account> findAll(); }- 1
- 2
- 3
- 4
- 5
- 6
- 7
- 8
public class AccountDaoImpl implements AccountDao { private JdbcTemplate jdbcTemplate; public void setJdbcTemplate(JdbcTemplate jdbcTemplate) { this.jdbcTemplate = jdbcTemplate; } @Override public void save(Account account) { String sql ="insert into account(name,money) values(?,?)"; jdbcTemplate.update(sql,account.getName(),account.getMoney()); } @Override public void delete(Integer id) { String sql ="delete from account where id = ? "; jdbcTemplate.update(sql,id); } @Override public void update(Account account) { String sql ="update account set money = ? , name=? where id= ?"; jdbcTemplate.update(sql,account.getMoney(),account.getName(),account.getId()); } @Override public Account findById(Integer id) { String sql ="select * from account where id = ? "; Account account = jdbcTemplate.queryForObject(sql, new BeanPropertyRowMapper<Account>(Account.class),id); return account; } @Override public Long getTotalRecords() { Long count = jdbcTemplate.queryForObject("select count(*) from account", Long.class); System.out.println(count); return count; } @Override public List<Account> findAll() { String sql ="select * from account"; List<Account> accountList = jdbcTemplate.query(sql, new BeanPropertyRowMapper<Account>(Account.class)); return accountList; } }- 1
- 2
- 3
- 4
- 5
- 6
- 7
- 8
- 9
- 10
- 11
- 12
- 13
- 14
- 15
- 16
- 17
- 18
- 19
- 20
- 21
- 22
- 23
- 24
- 25
- 26
- 27
- 28
- 29
- 30
- 31
- 32
- 33
- 34
- 35
- 36
- 37
- 38
- 39
- 40
- 41
- 42
- 43
- 44
- 45
- 46
10.5 编写业务层代码
public interface AccountService { public void save(Account account); public void delete(Integer id); public void update(Account account); public Account findById(Integer id); public Long getTotalRecords(); public ListfindAll(); } - 1
- 2
- 3
- 4
- 5
- 6
- 7
- 8
public class AccountServiceImpl implements AccountService { private AccountDao accountDao; public void setAccountDao(AccountDao accountDao) { this.accountDao = accountDao; } @Override public void save(Account account) { accountDao.save(account); } @Override public void delete(Integer id) { accountDao.delete(id); } @Override public void update(Account account) { accountDao.update(account); } @Override public Account findById(Integer id) { return accountDao.findById(id); } @Override public Long getTotalRecords() { return accountDao.getTotalRecords(); } @Override public List<Account> findAll() { return accountDao.findAll(); } }- 1
- 2
- 3
- 4
- 5
- 6
- 7
- 8
- 9
- 10
- 11
- 12
- 13
- 14
- 15
- 16
- 17
- 18
- 19
- 20
- 21
- 22
- 23
- 24
- 25
- 26
- 27
- 28
- 29
- 30
- 31
- 32
- 33
- 34
- 35
- 36
- 37
- 38
10.6 创建并编写配置文件
将数据库的连接信息抽取到外部配置文件中,和spring的配置文件分离开,有利于后期维护- 1
jdbc.driver=com.mysql.jdbc.Driver jdbc.url=jdbc:mysql://localhost:3306/test jdbc.username=root jdbc.password=root- 1
- 2
- 3
- 4
<bean id="dataSource" class="com.mchange.v2.c3p0.ComboPooledDataSource"> <property name="driverClass" value="${jdbc.driver}"/> <property name="jdbcUrl" value="${jdbc.url}"/> <property name="user" value="${jdbc.username}"/> <property name="password" value="${jdbc.password}"/> bean> <bean id="jdbcTemplate" class="org.springframework.jdbc.core.JdbcTemplate"> <property name="dataSource" ref="dataSource"/> bean> <bean id="accountDao" class="com.ujiuye.dao.impl.AccountDaoImpl"> <property name="jdbcTemplate" ref="jdbcTemplate">property> bean> <bean id="accountService" class="com.ujiuye.service.AccountServiceImpl"> <property name="accountDao" ref="accountDao">property> bean>- 1
- 2
- 3
- 4
- 5
- 6
- 7
- 8
- 9
- 10
- 11
- 12
- 13
- 14
- 15
- 16
- 17
- 18
- 19
- 20
- 21
10.7 测试代码
//测试save方法 @Test public void testJdbcTemplateSave(){ ApplicationContext context = new ClassPathXmlApplicationContext("applicationContext.xml"); AccountService service = (AccountService) context.getBean("accountService"); Account account = new Account(); account.setName("jack"); account.setMoney(1001D); service.save(account); } //测试update方法 @Test public void testJdbcTemplateUpdate(){ ApplicationContext context = new ClassPathXmlApplicationContext("applicationContext.xml"); AccountService service = (AccountService) context.getBean("accountService"); Account account = new Account(); account.setName("jack2"); account.setMoney(999D); account.setId(1008); service.update(account); } //测试delete方法 @Test public void testJdbcTemplateDelete(){ ApplicationContext context = new ClassPathXmlApplicationContext("applicationContext.xml"); AccountService service = (AccountService) context.getBean("accountService"); service.delete(1001); } //测试唯一性查询findById @Test public void testJdbcTemplateFindById(){ ApplicationContext context = new ClassPathXmlApplicationContext("applicationContext.xml"); AccountService service = (AccountService) context.getBean("accountService"); Account account = service.findById(1001); System.out.println(account); } //测试总记录数 @Test public void testJdbcTemplateGetTotalRecords(){ ApplicationContext context = new ClassPathXmlApplicationContext("applicationContext.xml"); AccountService service = (AccountService) context.getBean("accountService"); Long totalRecords = service.getTotalRecords(); System.out.println("表当中的总记录数为:"+totalRecords); } //测试账户列表 @Test public void testJdbcTemplateGetAll(){ ApplicationContext context = new ClassPathXmlApplicationContext("applicationContext.xml"); AccountService service = (AccountService) context.getBean("accountService"); List<Account> accountList = service.findAll(); accountList.forEach((account -> { System.out.println(account); })); }- 1
- 2
- 3
- 4
- 5
- 6
- 7
- 8
- 9
- 10
- 11
- 12
- 13
- 14
- 15
- 16
- 17
- 18
- 19
- 20
- 21
- 22
- 23
- 24
- 25
- 26
- 27
- 28
- 29
- 30
- 31
- 32
- 33
- 34
- 35
- 36
- 37
- 38
- 39
- 40
- 41
- 42
- 43
- 44
- 45
- 46
- 47
- 48
- 49
- 50
- 51
- 52
- 53
- 54
- 55
- 56
- 57
- 58
- 59
- 60
- 61
- 62
- 63
- 64
- 65
第11节:Spring常用注解
11.1 项目中注解和 XML 的选择问题
学习基于注解的 IoC 配置,大家脑海里首先得有一个认知,即注解配置和 xml 配置要实现的功能都是一样的,都是要降低程序间的耦合。只是配置的形式不一样。 关于实际的开发中到底使用xml还是注解,每家公司有着不同的使用习惯 , 所以这两种配置方式我们都需要掌握。我们在讲解注解配置时,采用上一章节的案例,把 Spring 的 xml 配置内容改为使用注解逐步实现。 xml:便于维护~ 开发效率低 注解:开发效率高 不便于维护- 1
- 2
- 3
- 4
- 5
- 6
- 7
- 8
- 9
11.2 常用注解
11.2.1 用于创建对象的注解
注解 说明 @Component 使用在类上用于实例化Bean @Controller 使用在web层类上用于实例化Bean @Service 使用在service层类上用于实例化Bean @Repository 使用在dao层类上用于实例化Bean 注意: 使用注解进行开发时,需要在applicationContext.xml中配置组件扫描,作用是指定哪个包及其子包下的Bean需要进行扫描以便识别使用注解配置的类、字段和方法。 <!--注解的组件扫描--> <context:component-scan base-package="com.offcn"></context:component-scan>- 1
- 2
- 3
- 4
- 5
使用@Component或@Repository标识UserDaoImpl需要Spring进行实例化。- 1
//@Component("userDao") @Repository("userDao") public class UserDaoImpl implements UserDao { @Override public void save() { System.out.println("save running... ..."); } }- 1
- 2
- 3
- 4
- 5
- 6
- 7
- 8
使用@Component或@Service标识UserServiceImpl需要Spring进行实例化- 1
//@Component("userService") @Service("userService") public class UserServiceImpl implements UserService { @Override public void save() { System.out.println("save running... ..."); } }- 1
- 2
- 3
- 4
- 5
- 6
- 7
- 8
11.2.2 用于注入数据的注解
注解 说明 @Value 注入普通属性 @Autowired 自动按照类型注入。当使用注解注入属性时,set 方法可以省略。它只能注入其他 bean 类型。 如果容器当中有多个接口的实现类, 会继续根据名称进行自动装配。 @Qualifier 结合@Autowired一起使用用于根据名称进行依赖注入 @Resource 相当于@Autowired+@Qualifier,按照名称进行注入,是java提供的,不是框架提供的 使用@Value进行字符串的注入- 1
@Repository("userDao") public class UserDaoImpl implements UserDao { @Value("注入普通数据") private String str; @Value("${jdbc.driver}") private String driver; @Override public void save() { System.out.println(str); System.out.println(driver); System.out.println("save running... ..."); } }- 1
- 2
- 3
- 4
- 5
- 6
- 7
- 8
- 9
- 10
- 11
- 12
- 13
使用@Autowired或者@Autowired+@Qulifier或者@Resource进行userDao的注入- 1
//@Component("userService") @Service("userService") public class UserServiceImpl implements UserService { /*@Autowired @Qualifier("userDao")*/ @Resource(name="userDao") private UserDao userDao; @Override public void save() { userDao.save(); } }- 1
- 2
- 3
- 4
- 5
- 6
- 7
- 8
- 9
- 10
- 11
- 12
11.2.3 生命周期相关的注解
注解 说明 @PostConstruct 使用在方法上标注该方法是Bean的初始化方法 @PreDestroy 使用在方法上标注该方法是Bean的销毁方法 使用@PostConstruct标注初始化方法,使用@PreDestroy标注销毁方法- 1
@PostConstruct public void init(){ System.out.println("初始化方法...."); } @PreDestroy public void destroy(){ System.out.println("销毁方法....."); }- 1
- 2
- 3
- 4
- 5
- 6
- 7
- 8
11.2.4 用于改变作用范围的注解
注解 说明 @Scope 标注Bean的作用范围,scope取值singleton prototype request session globalsession 注意: Struts2 web层的框架: spring整合Struts2使用多例。 使用@Scope标注Bean的范围- 1
- 2
- 3
- 4
//@Scope("prototype") @Scope("singleton") public class UserDaoImpl implements UserDao { //此处省略代码 }- 1
- 2
- 3
- 4
- 5
第12节:Spring基于注解的IoC案例
1、SpringIOC环境搭建,工程的创建,相关依赖的引入 2、创建核心配置文件,在配置文件当中管理各个资源,开启对注解的支持 3、编写测试用例对注解的测试- 1
- 2
- 3
12.1 框架技术依赖
org.springframework spring-context ${spring.version} org.springframework spring-jdbc ${spring.version} mysql mysql-connector-java 5.1.47 com.mchange c3p0 0.9.5.2 junit junit 4.12 test - 1
- 2
- 3
- 4
- 5
- 6
- 7
- 8
- 9
- 10
- 11
- 12
- 13
- 14
- 15
- 16
- 17
- 18
- 19
- 20
- 21
- 22
- 23
- 24
- 25
- 26
- 27
- 28
- 29
- 30
- 31
- 32
- 33
12.2 使用注解配置管理的资源
@Repository(value = "userDao") public class UserDaoImpl implements UserDao { @Autowired private JdbcTemplate jdbcTemplate; @Override public void save(User user) { String sql ="insert into user (name,birthday) values(?,?)"; jdbcTemplate.update(sql,user.getName(),user.getBirthday()); } } @Service("userService") public class UserServiceImpl implements UserService { @Autowired private UserDao userDao ; @Override public void saveService(User user) { userDao.save(user); } }- 1
- 2
- 3
- 4
- 5
- 6
- 7
- 8
- 9
- 10
- 11
- 12
- 13
- 14
- 15
- 16
- 17
- 18
- 19
- 20
- 21
- 22
- 23
12.3 在 spring 的配置文件开启对注解的支持
<context:component-scan base-package="com.offcn">context:component-scan> <bean id="dataSource" class="com.mchange.v2.c3p0.ComboPooledDataSource"> <property name="driverClass" value="com.mysql.jdbc.Driver">property> <property name="jdbcUrl" value="jdbc:mysql://localhost:3306/test">property> <property name="user" value="root">property> <property name="password" value="root">property> bean> <bean id="jdbcTemplate" class="org.springframework.jdbc.core.JdbcTemplate"> <constructor-arg name="dataSource" ref="dataSource">constructor-arg> bean>- 1
- 2
- 3
- 4
- 5
- 6
- 7
- 8
- 9
- 10
- 11
- 12
12.4 编写测试代码完成注解ioc操作
//IOC 注解版本的案例: @Test public void test1(){ ClassPathXmlApplicationContext context = new ClassPathXmlApplicationContext("applicationContext.xml"); UserService userService = (UserService) context.getBean("userService"); User user = new User(); user.setName("admin"); user.setBirthday(new Date()); userService.saveService(user); }- 1
- 2
- 3
- 4
- 5
- 6
- 7
- 8
- 9
- 10
第13节:Spring 的纯注解配置
1、使用注解管理Bean以及完成DI后,核心配置文件依然存在,使用新注解完全取代核心配置文件 2、在原有IOC基础案例上,进行改造。使用@Configuration 注解取代核心配置文件。@Bean注解注入bean对象,@ComponentScan 注解取代核心配置当中的包扫描器,@PropertySource注解引入外部的配置属性文件,演示由注解替代标签的替代过程。 3、测试阶段,使用AnnotationConfigApplicationContext 核心工厂, 重点强调一下该工厂的使用场景- 1
- 2
- 3
13.1 注解Ioc案例待改造的问题
使用上面的注解还不能全部替代xml配置文件,还需要使用注解替代的配置如下。 非自定义的Bean的配置:<bean> 加载properties文件的配置:<context:property-placeholder> 组件扫描的配置:<context:component-scan> 引入其他文件:<import>- 1
- 2
- 3
- 4
- 5
13.2 新注解说明
注解 说明 @Configuration 用于指定当前类是一个 Spring 配置类,当创建容器时会从该类上加载注解,作用等价于applicationContext.xml 配置文件。 @ComponentScan 用于指定 Spring在初始化容器时要扫描的包。 作用和在 Spring 的 xml 配置文件中的 @Bean 使用在方法上,标注将该方法的返回值存储到 Spring容器中。 id的值默认是方法的明名称, 可以自定义id的值 @PropertySource 用于加载xxx.properties 文件中的配置 结合@Value(“${}”) 取配置文件的值。 @Import 用于导入其他配置类 @Configuration //指定当前类是一个配置类,取代applicationContext.xml配置文件 @ComponentScan("com.offcn") //指定Spring在初始化容器时要扫描的包 @Import({DataSourceConfiguration.class}) //导入其他的配置类 public class SpringConfiguration { ... }- 1
- 2
- 3
- 4
- 5
- 6
@PropertySource("classpath:dbConfig.properties") //当前类中引入dbConfig.properties文件 public class DataSourceConfiguration { @Value("${jdbc.driver}") private String driver; @Value("${jdbc.url}") private String url; @Value("${jdbc.username}") private String username; @Value("${jdbc.password}") private String password; }- 1
- 2
- 3
- 4
- 5
- 6
- 7
- 8
- 9
- 10
- 11
@Bean
@Bean(name="dataSource") //将方法的返回值存入到IOC容器当中 public DataSource getDataSource() throws Exception { ComboPooledDataSource dataSource = new ComboPooledDataSource(); dataSource.setDriverClass(driver); dataSource.setJdbcUrl(url); dataSource.setUser(username); dataSource.setPassword(password); return dataSource; } @Bean("jdbcTemplate") public JdbcTemplate jdbcTemplate(@Autowired DataSource dataSource){ JdbcTemplate jdbcTemplate = new JdbcTemplate(dataSource); return jdbcTemplate; }- 1
- 2
- 3
- 4
- 5
- 6
- 7
- 8
- 9
- 10
- 11
- 12
- 13
- 14
13.3 通过注解获取容器
public void AnnotationTest (){ //使用AnnotationConfigApplicationContext获得ioc容器对象 ApplicationContext context= new AnnotationConfigApplicationContext(SpringConfig.class); Object obj = context.getBean("..."); }- 1
- 2
- 3
- 4
- 5
第14节:Spring 整合 Junit
Spring整合Junit单元测试,在学习阶段,开发阶段是经常使用的。 我们要了解Spring整合Junit单元测试的地位。如果开发过程当中完全不使用该技术点,不影响开发效果,可能会影响开发进度,为提高开发效率,避免重复性代码,Spring整合Junit单元测试务必要掌握,在使用Spring框架开发时,我们也推荐使用整合Junit后进行测试- 1
14.1 IOC中的问题和解决思路
在测试类中,每个测试方法都有以下两行代码: ClassPathXmlApplicationContext context = new ClassPathXmlApplicationContext("applicationContext.xml"); UserService userService = (UserService) context.getBean("userService"); 这两行代码的作用是获取容器,如果不写的话,直接会提示空指针异常。所以又不能轻易删掉。- 1
- 2
- 3
- 4
- 5
14.2 整合Junit 配置步骤
14.2.1 添加技术依赖
<properties> <spring.version>5.2.5.RELEASEspring.version> properties> <dependency> <groupId>junitgroupId> <artifactId>junitartifactId> <version>4.12version> <scope>testscope> dependency> <dependency> <groupId>org.springframeworkgroupId> <artifactId>spring-testartifactId> <version>${spring.version}version> dependency> <dependency> <groupId>org.springframeworkgroupId> <artifactId>spring-contextartifactId> <version>${spring.version}version> dependency>- 1
- 2
- 3
- 4
- 5
- 6
- 7
- 8
- 9
- 10
- 11
- 12
- 13
- 14
- 15
- 16
- 17
- 18
- 19
- 20
- 21
- 22
- 23
14.2.2 使用@RunWith 注解替换
@RunWith(SpringJUnit4ClassRunner.class) public class SpringJunitTest { }- 1
- 2
- 3
- 4
14.2.3 使用@ContextConfiguration 指定 Spring 配置文件的位置
@RunWith(SpringJUnit4ClassRunner.class) //加载spring核心配置文件 //@ContextConfiguration(value = {"classpath:applicationContext.xml"}) //加载spring核心配置类 @ContextConfiguration(classes = {SpringConfiguration.class}) public class SpringJunitTest { }- 1
- 2
- 3
- 4
- 5
- 6
- 7
- 8
14.2.4 使用@Autowired 注入数据
@RunWith(SpringJUnit4ClassRunner.class) @ContextConfiguration(classes = {SpringConfiguration.class}) public class SpringJunitTest { @Autowired private ApplicationContext context; @Test public void test(){ ... } }- 1
- 2
- 3
- 4
- 5
- 6
- 7
- 8
- 9
- 10
- 11
第15节:Spring整合JDBC实现转账业务
15.1 不使用事务问题
1、搭建一个转账的业务环境,准备所需资源,数据库表以及实体类 2、持久层具体实现使用DBUtils 方便操作连接对象,管理事务 3、搭建业务层,完成对持久层的调用 4、演示转账测试用例,在没有遇到异常情况下成功转账,在转账过程当中遇到意外情况,损失了数据的一致性,从而引出事务。- 1
- 2
- 3
- 4
public class Account implements Serializable { private Integer id; private String name; private double money; public Integer getId() { return id; } public void setId(Integer id) { this.id = id; } public String getName() { return name; } public void setName(String name) { this.name = name; } public double getMoney() { return money; } public void setMoney(double money) { this.money = money; } @Override public String toString() { return "Account{" + "id=" + id + ", name='" + name + '\'' + ", money=" + money + '}'; } }- 1
- 2
- 3
- 4
- 5
- 6
- 7
- 8
- 9
- 10
- 11
- 12
- 13
- 14
- 15
- 16
- 17
- 18
- 19
- 20
- 21
- 22
- 23
- 24
- 25
- 26
- 27
- 28
- 29
- 30
- 31
- 32
- 33
- 34
- 35
- 36
- 37
- 38
15.1.2 引入DBUtils依赖坐标
<!--引入QueryRunner--> <dependency> <groupId>commons-dbutils</groupId> <artifactId>commons-dbutils</artifactId> <version>1.7</version> </dependency>- 1
- 2
- 3
- 4
- 5
- 6
15.1.3 创建dao接口以及对应的实现类
public interface AccountDao { public Account findByName(String name); public void update(Account account); } public class AccountDaoImpl implements AccountDao { private QueryRunner queryRunner = new QueryRunner(new ComboPooledDataSource()); @Override public Account findByName(String name) { try { String sql ="select *from account where name =? "; Account account = queryRunner.query(sql, new BeanHandler<>(Account.class), name); return account; } catch (SQLException throwables) { throwables.printStackTrace(); } return null; } @Override public void update(Account account) { try { String sql ="update account set money =? where name =? "; queryRunner.update(sql, account.getMoney(), account.getName()); } catch (SQLException throwables) { throwables.printStackTrace(); } } }- 1
- 2
- 3
- 4
- 5
- 6
- 7
- 8
- 9
- 10
- 11
- 12
- 13
- 14
- 15
- 16
- 17
- 18
- 19
- 20
- 21
- 22
- 23
- 24
- 25
- 26
- 27
- 28
- 29
- 30
- 31
15.1.4 创建业务接口以及对应的实现类
public interface AccountService { /** * 定义业务方法, 实现转账 * @param sourceAccountName 来源账户 * @param targetAccountName 目标账户 * @param money 转账金额 */ public void transfer(String sourceAccountName,String targetAccountName,double money); } public class AccountServiceImpl implements AccountService { //依赖dao层 private AccountDao accountDao = new AccountDaoImpl(); @Override public void transfer(String sourceAccountName, String targetAccountName, double money) { //查询来源账户和目标账户 Account sAccount = accountDao.findByName(sourceAccountName); Account tAccount = accountDao.findByName(targetAccountName); //来源账户减钱,目标账户加钱 sAccount.setMoney(sAccount.getMoney()-money); tAccount.setMoney(tAccount.getMoney()+money); //持久化到数据库 accountDao.update(sAccount); //模拟异常发生 int i=1/0; accountDao.update(tAccount); } }- 1
- 2
- 3
- 4
- 5
- 6
- 7
- 8
- 9
- 10
- 11
- 12
- 13
- 14
- 15
- 16
- 17
- 18
- 19
- 20
- 21
- 22
- 23
- 24
- 25
- 26
- 27
- 28
- 29
- 30
15.1.5 测试转账业务
@Test public void test1(){ //获得业务层对象: AccountService service = new AccountServiceImpl(); service.transfer("aaa","bbb",100D); }- 1
- 2
- 3
- 4
- 5
- 6
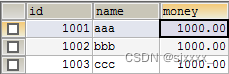
没有遇到异常情况,转账结果正常。aaa账户减少100元,bbb账户增加100元- 1

模拟异常情况转账结果:aaa账户减钱,bbb账户并未加钱,数据的一致性受损- 1

15.2 使用事务
15.2.1 编写工具类管理数据库连接
1、上述案例,遇到异常损失了数据一致性,加入事务控制 2、创建一个ConnectionUtils工具类,引入ThreadLocal 管理Connection对象 话术: 转账过程,由于遇到异常情况,转账损失了数据的一致性,加入事务控制。要么都同时成功,事务提交,要么都同时失败,事务回滚,要保证在同一个事务当中进行操作,那么必须保证同一个连接对象。如何保证持久层和业务层使用同一个连接对象呢?引入ThreadLocal对象,介绍该对象的特点,对象提供的存,取,移除的常用方法。ConnectionUtils 工具类提供的管理连接的方法,就能保证持久层以及业务层获得相同的连接对象,保证在同一个事务当中进行操作 ThreadLocal 详解:线程局部变量。 public class ThreadLocal{ // map集合 private Map<Thread,Object> map = new HashMap<>(); // set public void set(Object obj){ map.put(CurrentThread,obj);//key 不需要指定,默认是当前线程对象。 } //get public Object get(){ return map.get(CurrentThread); } // remove 移除 public Object remove(){ return map.remove(currentThread); } } 总结: 该对象内部维护了一个map集合, set, get ,remove方法。 操作的时候, key不需要指定,当前线程对象做key。 public class ConnectionUtils { private ThreadLocal<Connection> tl = new ThreadLocal<Connection>(); private DataSource dataSource; public void setDataSource(DataSource dataSource) { this.dataSource = dataSource; } /** * 获取当前线程上的连接 * @return */ public Connection getThreadConnection() { try{ //1.先从ThreadLocal上获取 Connection connection = tl.get(); //2.判断当前线程上是否有连接 if (connection == null) { //3.从数据源中获取一个连接,并且存入ThreadLocal中 connection = dataSource.getConnection(); tl.set(connection); } //4.返回当前线程上的连接 return connection; }catch (Exception e){ throw new RuntimeException(e); } } /** * 把连接和线程解绑 */ public void removeConnection(){ tl.remove(); }- 1
- 2
- 3
- 4
- 5
- 6
- 7
- 8
- 9
- 10
- 11
- 12
- 13
- 14
- 15
- 16
- 17
- 18
- 19
- 20
- 21
- 22
- 23
- 24
- 25
- 26
- 27
- 28
- 29
- 30
- 31
- 32
- 33
- 34
- 35
- 36
- 37
- 38
- 39
- 40
- 41
- 42
- 43
- 44
- 45
- 46
- 47
- 48
- 49
- 50
- 51
- 52
- 53
- 54
- 55
- 56
- 57
- 58
- 59
- 60
- 61
- 62
- 63
15.2.2 编写事务管理工具类
讲解思路: 1、介绍 TransactionManager工具类的作用,定义和事务相关的所有内容 2、引入 ConnectionUtils 工具类,方便获取同一线程的连接对象 话术: TransactionManager 是管理事务的工具类,主要定义了和事务相关的方法,例如:事务的开启,事务的提交,事务的回滚操作等。该工具类目前需要手动创建和管理,使用Spring进行事务管理后,该工具类由Spring提供,不需要手动编写和管理。所以该工具类重在理解,为Spring进行事务管理做好铺垫 /** * 和事务管理相关的工具类,它包含了,开启事务,提交事务,回滚事务和释放连接 */ public class TransactionManager { private ConnectionUtils connectionUtils; public void setConnectionUtils(ConnectionUtils connectionUtils) { this.connectionUtils = connectionUtils; } /** * 开启事务 */ public void beginTransaction(){ try { connectionUtils.getThreadConnection().setAutoCommit(false); }catch (Exception e){ e.printStackTrace(); } } /** * 提交事务 */ public void commit(){ try { connectionUtils.getThreadConnection().commit(); }catch (Exception e){ e.printStackTrace(); } } /** * 回滚事务 */ public void rollback(){ try { connectionUtils.getThreadConnection().rollback(); }catch (Exception e){ e.printStackTrace(); } } /** * 释放连接 */ public void release(){ try { connectionUtils.getThreadConnection().close();//还回连接池中 connectionUtils.removeConnection();//当前线程解除绑定 }catch (Exception e){ e.printStackTrace(); } } }- 1
- 2
- 3
- 4
- 5
- 6
- 7
- 8
- 9
- 10
- 11
- 12
- 13
- 14
- 15
- 16
- 17
- 18
- 19
- 20
- 21
- 22
- 23
- 24
- 25
- 26
- 27
- 28
- 29
- 30
- 31
- 32
- 33
- 34
- 35
- 36
- 37
- 38
- 39
- 40
- 41
- 42
- 43
- 44
- 45
- 46
- 47
- 48
- 49
- 50
- 51
- 52
- 53
- 54
- 55
- 56
15.2.3 编写业务层和持久层事务代码
1、使用QueryRunner完成持久层编写。 传统方式 QueryRunner queryRunner = new QueryRunner(DataSource dataSource); 直接通过new关键字获得对象。注入数据源,在执行读写操作直接从数据源当中获得连接,无法进行 事务的控制 2、加入IOC功能后,对象交给IOC容器管理。通过DI方式对queryRunner赋值。注意的问题是,一定不能注入数据源,为了方便管理事务,执行读写操作时,手动指定连接对象。连接对象由ConnectionUtils工具类管理,引入该对象,通过DI方式进行赋值 3、在使用QueryRunner完成读写操作时,指定连接对象,保证同一事务使用同一连接。 public class AccountDaoImpl implements AccountDao { private QueryRunner queryRunner ; private ConnectionUtils connectionUtils; public void setQueryRunner(QueryRunner queryRunner) { this.queryRunner = queryRunner; } public void setConnectionUtils(ConnectionUtils connectionUtils) { this.connectionUtils = connectionUtils; } @Override public Account findByName(String name) { try { String sql ="select * from account where name =? "; Account account = queryRunner.query(connectionUtils.getThreadConnection(), sql,new BeanHandler<Account>(Account.class), name); return account; } catch (SQLException throwables) { throwables.printStackTrace(); } return null; } @Override public void update(Account account) { try { String sql ="update account set money =? where name =? "; queryRunner.update(connectionUtils.getThreadConnection(),sql, account.getMoney(), account.getName()); } catch (SQLException throwables) { throwables.printStackTrace(); } } } public class AccountServiceImpl implements AccountService { //依赖dao层 private AccountDao accountDao ; private TransactionManager txManager; public AccountDao getAccountDao() { return accountDao; } public void setAccountDao(AccountDao accountDao) { this.accountDao = accountDao; } public TransactionManager getTxManager() { return txManager; } public void setTxManager(TransactionManager txManager) { this.txManager = txManager; } @Override public void transfer(String sourceAccountName, String targetAccountName, double money) { try { //开启事务: txManager.beginTransaction(); //查询来源账户和目标账户 Account sAccount = accountDao.findByName(sourceAccountName); Account tAccount = accountDao.findByName(targetAccountName); //来源账户减钱,目标账户加钱 sAccount.setMoney(sAccount.getMoney()-money); tAccount.setMoney(tAccount.getMoney()+money); //持久化到数据库 accountDao.update(sAccount); //模拟异常发生 int i=1/0; accountDao.update(tAccount); } catch (Exception exception){ //事务回滚 txManager.rollback(); exception.printStackTrace(); } finally { //释放资源 txManager.release(); } } } <!-- 配置数据源 --> <bean id="dataSource" class="com.mchange.v2.c3p0.ComboPooledDataSource"> <!--连接数据库的必备信息--> <property name="driverClass" value="com.mysql.jdbc.Driver"></property> <property name="jdbcUrl" value="jdbc:mysql://localhost:3306/test"></property> <property name="user" value="root"></property> <property name="password" value="root"></property> </bean> <!-- 配置Connection的工具类 ConnectionUtils --> <bean id="connectionUtils" class="com.offcn.utils.ConnectionUtils"> <!-- 注入数据源--> <property name="dataSource" ref="dataSource"></property> </bean> <!-- 配置事务管理器--> <bean id="txManager" class="com.offcn.utils.TransactionManager"> <!-- 注入ConnectionUtils --> <property name="connectionUtils" ref="connectionUtils"></property> </bean> <!--配置QueryRunner--> <bean id="queryRunner" class="org.apache.commons.dbutils.QueryRunner" scope="prototype"></bean> <!--配置Dao对象--> <bean id="accountDao" class="com.offcn.dao.impl.AccountDaoImpl"> <!-- 注入QueryRunner --> <property name="queryRunner" ref="queryRunner"></property> <!-- 注入ConnectionUtils --> <property name="connectionUtils" ref="connectionUtils"></property> </bean> <!-- 配置Service层对象 --> <bean id="accountService" class="com.offcn.service.impl.AccountServiceImpl"> <!-- 注入dao --> <property name="accountDao" ref="accountDao"></property> <!--注入txManager--> <property name="txManager" ref="txManager"></property> </bean>- 1
- 2
- 3
- 4
- 5
- 6
- 7
- 8
- 9
- 10
- 11
- 12
- 13
- 14
- 15
- 16
- 17
- 18
- 19
- 20
- 21
- 22
- 23
- 24
- 25
- 26
- 27
- 28
- 29
- 30
- 31
- 32
- 33
- 34
- 35
- 36
- 37
- 38
- 39
- 40
- 41
- 42
- 43
- 44
- 45
- 46
- 47
- 48
- 49
- 50
- 51
- 52
- 53
- 54
- 55
- 56
- 57
- 58
- 59
- 60
- 61
- 62
- 63
- 64
- 65
- 66
- 67
- 68
- 69
- 70
- 71
- 72
- 73
- 74
- 75
- 76
- 77
- 78
- 79
- 80
- 81
- 82
- 83
- 84
- 85
- 86
- 87
- 88
- 89
- 90
- 91
- 92
- 93
- 94
- 95
- 96
- 97
- 98
- 99
- 100
- 101
- 102
- 103
- 104
- 105
- 106
- 107
- 108
- 109
- 110
- 111
- 112
- 113
- 114
- 115
- 116
- 117
- 118
- 119
- 120
- 121
- 122
- 123
- 124
- 125
- 126
- 127
- 128
15.2.4 测试转账
@RunWith(SpringJUnit4ClassRunner.class) @ContextConfiguration(locations = "classpath:applicationContext.xml") public class TestAccountTransfer { @Autowired private AccountService accountService; @Test public void test1(){ accountService.transfer("aaa","bbb",100); } } 测试结果: 正常转账成功,遇到异常情况, 事务进行回滚,保证了数据的一致性。- 1
- 2
- 3
- 4
- 5
- 6
- 7
- 8
- 9
- 10
- 11
- 12
15.3 转账业务案例中存在的问题
上一小节的代码,通过对业务层改造,已经可以实现事务控制了,但是由于我们添加了事务控制,也产生了一个新的问题: 业务层方法变得臃肿了,里面充斥着很多重复代码。并且业务层方法和事务控制方法耦合了。 试想一下,如果我们此时提交,回滚,释放资源中任何一个方法名变更,都需要修改业务层的代码,况且这还只是一个业务层实现类,而实际的项目中这种业务层实现类可能有十几个甚至几十个。 以上问题 如何解决呢?接下来使用下一小节中提到的技术解决该问题。- 1
- 2
- 3
- 4
- 5
15.4 使用动态代理
15.4.1 动态代理概述
动态代理分类: JDK动态代理:(基于接口的动态代理) 被代理类必须实现某个接口。 【掌握】 CGLIB: 基于普通的类实现代理。 需要引入第三方包。 作用: 对某个类的某个方法进行功能性的增强。 重写: 装饰设计者模式: 动态代理: 语法: Object proxy = Proxy.newInstance(param1,param2,param3); 入门案例: package com.offcn.tx.proxy; import com.offcn.proxy.CompanyParty; import com.offcn.proxy.Person; import org.junit.Test; import java.lang.reflect.InvocationHandler; import java.lang.reflect.Method; import java.lang.reflect.Proxy; public class TestProxy { @Test public void test1(){ Person person = new Person(); //获得person类的代理类对象: 返回值: Object /** * 1: param1:类的加载器。 被代理类(目标类)对象的类加载器。 * 2: param2: Class[] interfaces 被代理类实现接口当中的所有方法。 * 目的: 使得代理类对象和被代理类对象有着相同的行为。 * 3: InvocationHandler: 接口类型。 使用的匿名内部类。 * 代理类和被代理类要达成具体的代理策略~ */ CompanyParty proxy = (CompanyParty) Proxy.newProxyInstance( person.getClass().getClassLoader(), person.getClass().getInterfaces(), new InvocationHandler() { /** * //达成具体的代理策略: * @param proxy 代理对象的引用。 该对象一般情况不用。 * @param method 封装了当前执行的目标方法。 * @param args 当前目标方法执行的参数。 Object[] * @return 执行当前目标方法的返回值。 * @throws Throwable */ @Override public Object invoke(Object proxy, Method method, Object[] args) throws Throwable { String name = method.getName();//获得当前执行方法的名称。 Double money =(Double) args[0]; Object obj = null; if("sing".equals(name) && money >1000D){ //参数一: 目标对象。被代理对象 //参数二: 执行目标方法的参数: obj= method.invoke(person,money); } if("dance".equals(name) && money>=2000){ obj = method.invoke(person,money); } return obj; } } ); proxy.sing(1001D); proxy.dance(2000D); } }- 1
- 2
- 3
- 4
- 5
- 6
- 7
- 8
- 9
- 10
- 11
- 12
- 13
- 14
- 15
- 16
- 17
- 18
- 19
- 20
- 21
- 22
- 23
- 24
- 25
- 26
- 27
- 28
- 29
- 30
- 31
- 32
- 33
- 34
- 35
- 36
- 37
- 38
- 39
- 40
- 41
- 42
- 43
- 44
- 45
- 46
- 47
- 48
- 49
- 50
- 51
- 52
- 53
- 54
- 55
- 56
- 57
- 58
- 59
- 60
- 61
- 62
- 63
- 64
- 65
- 66
- 67
- 68
- 69
- 70
- 71
- 72
- 73
- 74
- 75
- 76
15.4.2 创建代理工具类
/** * 用于创建客户业务层对象工厂(当然也可以创建其他业务层对象,只不过我们此处不做那么繁琐) */ public class BeanFactory { private AccountService accountService; private TransactionManager txManager; public void setAccountService(AccountService accountService) { this.accountService = accountService; } public void setTxManager(TransactionManager txManager) { this.txManager = txManager; } /** * 获取Service代理对象 * @return */ public AccountService getAccountService() { return (AccountService) Proxy.newProxyInstance(accountService.getClass().getClassLoader(), accountService.getClass().getInterfaces(), new InvocationHandler() { /** * 添加事务的支持 * * @param proxy * @param method 执行目标方法被封装到Method当中 * @param args 执行目标方法的参数 * @return 执行目标方法的返回值 * @throws Throwable */ @Override public Object invoke(Object proxy, Method method, Object[] args) throws Throwable { Object returntValue = null; try { //1.开启事务 txManager.beginTransaction(); //2.执行操作 returntValue = method.invoke(accountService, args); //3.提交事务 txManager.commit(); //4.返回结果 return returntValue; } catch (Exception e) { //5.回滚操作 txManager.rollback(); throw new RuntimeException(e); } finally { //6.释放连接 txManager.release(); } } }); } }- 1
- 2
- 3
- 4
- 5
- 6
- 7
- 8
- 9
- 10
- 11
- 12
- 13
- 14
- 15
- 16
- 17
- 18
- 19
- 20
- 21
- 22
- 23
- 24
- 25
- 26
- 27
- 28
- 29
- 30
- 31
- 32
- 33
- 34
- 35
- 36
- 37
- 38
- 39
- 40
- 41
- 42
- 43
- 44
- 45
- 46
- 47
- 48
- 49
- 50
- 51
- 52
- 53
- 54
- 55
- 56
- 57
15.4.3 测试动态代理转账业务
配置静态工厂,生产实例bean- 1
<bean id="beanFactory" class="com.offcn.factory.BeanFactory"> <property name="accountService" ref="accountService">property> <property name="txManager" ref="txManager">property> bean> <bean id="proxyAccountService" factory-bean="beanFactory" factory-method="getAccountService"> bean>- 1
- 2
- 3
- 4
- 5
- 6
- 7
- 8
- 9
- 10
业务层代码的修改:把和事务相关的代码去掉- 1
@Override public void transfer(String sourceAccountName, String targetAccountName, double money) { Account sAccount = accountDao.findByName(sourceAccountName); Account tAccount = accountDao.findByName(targetAccountName); //来源账户减钱,目标账户加钱 sAccount.setMoney(sAccount.getMoney()-money); tAccount.setMoney(tAccount.getMoney()+money); //持久化到数据库 accountDao.update(sAccount); //模拟异常发生 //int i=1/0; accountDao.update(tAccount); }- 1
- 2
- 3
- 4
- 5
- 6
- 7
- 8
- 9
- 10
- 11
- 12
- 13
- 14
- 15
测试代码:- 1
@RunWith(SpringJUnit4ClassRunner.class) @ContextConfiguration(locations = "classpath:applicationContext.xml") public class TestAccountTransfer { @Autowired @Qualifier("proxyAccountService") private AccountService accountProxyService; @Test public void testAccountProxy(){ accountProxyService.transfer("aaa","bbb",100D); } }- 1
- 2
- 3
- 4
- 5
- 6
- 7
- 8
- 9
- 10
- 11
- 12
- 13
- 14
总结:使用动态代理改造之后, 业务层代码已经和事务相关代码进行了分离,并且保证了事务的一致性。- 1
-
相关阅读:
【正点原子】Alpha-I.MX开发板操作系统移植流程
vue sass-loader,webpack安装卸载操作命令
Kotlin 实现自定义下拉阴影弹窗的功能
动态修改el-input样式;动态修改elmentUI元素样式;css变量
【云原生之Docker实战】使用Docker部署Restyaboard项目管理工具
ClickHouse 复制粘贴多行sql语句报错
市面上跑步耳机哪种好、2023年最适合跑步用的耳机排名
Spring(存储Bean对象五大类注解,获取Bean对象三种注入方式)
leetcode309最佳买卖股票时机含冷冻期刷题打卡
el-form内容重置(解决点击保存关闭后再点击新增会有编辑携带的数据的问题)
- 原文地址:https://blog.csdn.net/sjxxxx_/article/details/127576383
