-
品达通用_16. 数据模型_20. 通用权限系统企业应用指南
品达通用_16. 数据模型_20. 通用权限系统企业应用指南
16. 数据模型
16.1 权限数据模型介绍
在项目中要进行权限控制,需要有一套权限相关的数据表来提供支持,这是整个权限控制的基础。本系统采用的权限数据模型是在经典的RBAC权限数据模型的基础之上进行的改进,共涉及到如下9张表:
pd_core_org----------------组织表 pd_core_station------------岗位表 pd_auth_user---------------用户表 pd_auth_role---------------角色表 pd_auth_resource-----------资源表 pd_auth_menu---------------菜单表 pd_auth_user_role----------用户角色关系表 pd_auth_role_authority-----角色权限关系表 pd_auth_role_org-----------角色组织关系表- 1
- 2
- 3
- 4
- 5
- 6
- 7
- 8
- 9
需要说明的是菜单和资源其实都属于权限,是两种不同类型的权限,即菜单权限和资源权限。具体说明如下:
- 菜单权限:对应的是系统的菜单,不同的用户可能拥有不同的菜单权限,这样登录系统后看到的菜单也不同
- 资源权限:对应的是某个功能的访问接口,拥有权限则可以访问此接口,没有权限则禁止访问此接口
16.2 导入表结构
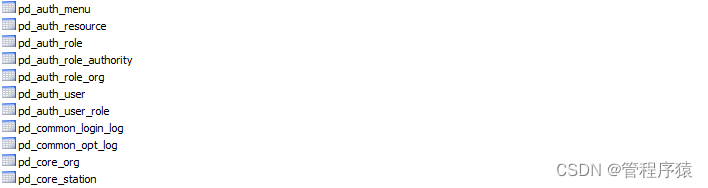
在MySQL中创建pd-auth数据库,在此数据库中执行授课资料中的"pd_auth.sql"脚本即可。执行完后可以看到如下11张表:
16.2.1 pd_common_login_log表
pd_common_login_log为用户登录日志表,具体的字段如下:
字段名 类型 说明 id bigint 主键 request_ip varchar 操作IP user_id bigint 登录人ID user_name varchar 登录人姓名 account varchar 登录人账号 description varchar 登录描述 login_date date 登录时间 ua varchar 浏览器请求头 browser varchar 浏览器名称 browser_version varchar 浏览器版本 operating_system varchar 操作系统 location varchar 登录地点 create_time datetime 创建时间 create_user bigint 创建人ID 16.2.2 pd_common_opt_log表
pd_common_opt_log为用户操作日志表,具体字段如下:
字段名 类型 说明 id bigint 主键 request_ip varchar 操作IP type varchar 日志类型 OPT:操作类型 EX:异常类型 user_name varchar 操作人 description varchar 操作描述 class_path varchar 类路径 action_method varchar 请求方法 request_uri varchar 请求地址 http_method varchar 请求类型 GET:GET请求;POST:POST请求;PUT:PUT请求;DELETE:DELETE请求;PATCH:PATCH请求;TRACE:TRACE请求;HEAD:HEAD请求;OPTIONS:OPTIONS请求 params longtext 请求参数 result longtext 返回值 ex_desc longtext 异常详情信息 ex_detail longtext 异常描述 start_time timestamp 开始时间 finish_time timestamp 完成时间 consuming_time bigint 消耗时间 ua varchar 浏览器请求头 create_time datetime 创建时间 create_user bigint 创建人ID 16.2.3 pd_auth_menu表
pd_auth_menu为菜单表,具体字段如下:
字段名 类型 说明 id bigint 主键 name varchar 菜单名称 describe_ varchar 功能描述 is_public bit 是否是公开菜单 path varchar 对应路由path component varchar 对应路由组件component is_enable bit 是否启用 sort_value int 排序 icon varchar 菜单图标 group_ varchar 菜单分组 parent_id bigint 父级菜单id create_user bigint 创建人id create_time datetime 创建时间 update_user bigint 更新人id update_time datetime 更新时间 16.2.4 pd_auth_resource表
pd_auth_resource为资源表,具体字段如下:
字段名 类型 说明 id bigint 主键 code varchar 资源编码 name varchar 接口名称 menu_id bigint 菜单ID method varchar HTTP请求方式 url varchar 接口请求url describe_ varchar 接口描述 create_user bigint 创建人id create_time datetime 创建时间 update_user bigint 更新人id update_time datetime 更新时间 16.2.5 pd_auth_role表
pd_auth_role为角色表,具体字段如下:
字段名称 类型 说明 id bigint 主键 name varchar 角色名称 code varchar 角色编码 describe_ varchar 角色描述 status bit 是否启用状态 readonly bit 是否内置角色 create_user bigint 创建人id create_time datetime 创建时间 update_user bigint 更新人id update_time datetime 更新时间 16.2.6 pd_auth_user表
pd_auth_user表为用户表,具体字段如下:
字段名 类型 说明 id bigint 主键 account varchar 账号 name varchar 姓名 org_id bigint 组织ID station_id bigint 岗位ID email varchar 邮箱 mobile varchar 手机号 sex varchar 性别 status bit 启用状态 avatar varchar 头像 work_describe varchar 工作描述 password_error_last_time datetime 最后一次输错密码时间 password_error_num int 密码错误次数 password_expire_time datetime 密码过期时间 password varchar 密码 last_login_time datetime 最后登录时间 create_user bigint 创建人id create_time datetime 创建时间 update_user bigint 更新人id update_time datetime 更新时间 16.2.7 pd_core_station表
pd_core_station表为岗位表,具体字段如下:
字段名称 类型 说明 id bigint 主键 name varchar 岗位名称 org_id bigint 组织ID status bit 是否启用状态 describe_ varchar 描述 create_time datetime 创建时间 create_user bigint 创建人ID update_time datetime 更新时间 update_user bigint 更新人ID 16.2.8 pd_core_org表
pd_core_org表为组织表,具体字段如下:
字段名称 类型 说明 id bigint 主键 name varchar 组织名称 abbreviation varchar 简称 parent_id bigint 父ID tree_path varchar 树结构 sort_value int 排序 status bit 状态 describe_ varchar 描述 create_time datetime 创建时间 create_user bigint 创建人ID update_time datetime 更新时间 update_user bigint 更新人ID 16.2.9 pd_auth_user_role表
pd_auth_user_role为用户角色关系表,具体字段为:
字段名称 类型 说明 id bigint 主键 role_id bigint 角色ID user_id bigint 用户ID create_user bigint 创建人ID create_time datetime 创建时间 16.2.10 pd_auth_role_org表
pd_auth_role_org为角色组织关系表,具体字段为:
字段名称 类型 说明 id bigint 主键 role_id bigint 角色ID org_id bigint 组织ID create_time datetime 创建时间 create_user bigint 创建人ID 16.2.11 pd_auth_role_authority表
pd_auth_role_authority为角色权限关系表,具体字段为:
字段名称 类型 说明 id bigint 主键 authority_id bigint 权限ID authority_type varchar 权限类型 MENU:菜单 RESOURCE:资源 role_id bigint 角色ID create_time datetime 创建时间 create_user bigint 创建人ID 16.3 导入实体类
前面我们已经介绍了通用权限系统中涉及到的数据表,一般在开发过程中我们会创建和数据表对应的实体类来封装相关信息。在课程资料中已经提供了相关实体类Entity和相关DTO,直接复制到pd-auth-entity工程中即可。
17. 认证和鉴权流程
品达通用权限系统对外提供的功能中
认证和鉴权是其核心功能,通过导入的初始工程可以发现其中有两个服务,即网关服务和权限服务。其中用户认证需要在权限服务中完成,鉴权需要在网关服务中完成。在实现认证和鉴权之前我们必须明确认证和鉴权的整体执行流程。17.1 认证流程
1、用户通过前端系统发送登录请求,请求中携带账号、密码、验证码等信息。
2、前端登录请求首先请求到网关服务,网关服务将请求路由到权限微服务。
3、权限微服务进行认证操作,如果认证通过则生成jwt token返回给前端,同时将用户拥有的资源权限使用userId作为key保存到缓存中。
注:缓存中保存的用户资源权限是由pd_auth_resource资源表中的method和url两个字段的值拼接成的。例如,某个用户拥有删除日志的权限,在表中删除日志权限对应一条数据,其中method的值为DELETE,url的值为/optLog,那么缓存中保存的用户拥有的资源权限为:DELETE/optLog。- 1
17.2 鉴权流程
1、用户认证后访问其他功能时将jwt token放在请求头中,首先经过网关服务处理。
2、在网关服务的过滤器中获取请求头中的token并进行解析,将解析出的用户相关数据放在zuul的header中。
注:之所以要将用户相关数据放在zuul的header中,是因为在后续的网关AccessFilter过滤器和权限服务中都会使用到这些数据。- 1
3、在网关服务的过滤器中进行鉴权相关处理。
18. 权限服务开发
18.1 基础环境搭建
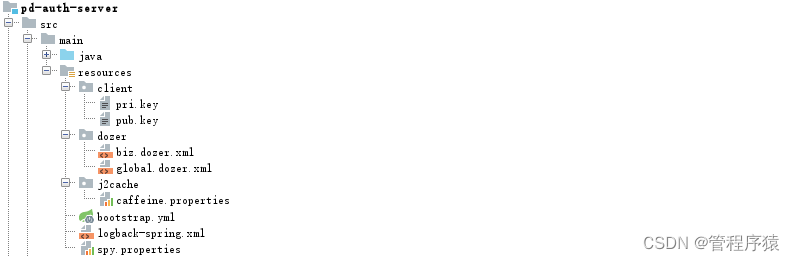
在开发权限服务的业务功能之前,我们需要进行基础环境的搭建,这是权限服务的基础。这些基础环境包括:配置文件、配置类、启动类等。
18.1.1 配置文件
18.1.1.1 bootstrap.yml
由于我们当前使用的是Nacos作为整个项目的配置中心,所以Spring Boot的大部分配置文件都在Nacos中进行统一配置,我们的项目中只需要按照Spring Boot的要求在resources目录下提供bootstrap.yml配置文件即可,文件内容如下:
# @xxx@ 从pom.xml中取值, 所以 @xx@ 标注的值,都不能从nacos中获取 pinda: nacos: ip: ${NACOS_IP:@pom.nacos.ip@} port: ${NACOS_PORT:@pom.nacos.port@} namespace: ${NACOS_ID:@pom.nacos.namespace@} spring: main: allow-bean-definition-overriding: true application: name: @project.artifactId@ profiles: active: @pom.profile.name@ cloud: nacos: config: server-addr: ${pinda.nacos.ip}:${pinda.nacos.port} file-extension: yml namespace: ${pinda.nacos.namespace} shared-dataids: common.yml,redis.yml,mysql.yml refreshable-dataids: common.yml enabled: true discovery: server-addr: ${pinda.nacos.ip}:${pinda.nacos.port} namespace: ${pinda.nacos.namespace} metadata: # 元数据,用于权限服务实时获取各个服务的所有接口 management.context-path: ${server.servlet.context-path:}${spring.mvc.servlet.path:}${management.endpoints.web.base-path:} aop: proxy-target-class: true auto: true # 只能配置在bootstrap.yml ,否则会生成 log.path_IS_UNDEFINED 文件夹 # window会自动在 代码所在盘 根目录下自动创建文件夹, 如: D:/data/projects/logs logging: file: path: /data/projects/logs name: ${logging.file.path}/${spring.application.name}/root.log # 用于/actuator/info info: name: '@project.name@' description: '@project.description@' version: '@project.version@' spring-boot-version: '@spring.boot.version@' spring-cloud-version: '@spring.cloud.version@'- 1
- 2
- 3
- 4
- 5
- 6
- 7
- 8
- 9
- 10
- 11
- 12
- 13
- 14
- 15
- 16
- 17
- 18
- 19
- 20
- 21
- 22
- 23
- 24
- 25
- 26
- 27
- 28
- 29
- 30
- 31
- 32
- 33
- 34
- 35
- 36
- 37
- 38
- 39
- 40
- 41
- 42
- 43
- 44
- 45
- 46
18.1.1.2 logback-spring.xml
由于pd-auth-server已经添加了pd-tools-log模块的依赖,所以可以在项目中使用logback记录日志信息。在resources目录下提供logback-spring.xml配置文件,Spring Boot默认就可以加载到,文件内容如下:
<configuration> <include resource="com/itheima/pinda/log/logback/pinda-defaults.xml"/> <springProfile name="test,docker,prod"> <logger name="com.itheima.pinda.authority.controller" additivity="true" level="${log.level.controller}"> <appender-ref ref="ASYNC_CONTROLLER_APPENDER"/> logger> <logger name="com.itheima.pinda.authority.biz.service" additivity="true" level="${log.level.service}"> <appender-ref ref="ASYNC_SERVICE_APPENDER"/> logger> <logger name="com.itheima.pinda.authority.biz.dao" additivity="false" level="${log.level.dao}"> <appender-ref ref="ASYNC_DAO_APPENDER"/> logger> springProfile> <springProfile name="dev"> <logger name="com.itheima.pinda.authority.controller" additivity="true" level="${log.level.controller}"> <appender-ref ref="CONTROLLER_APPENDER"/> logger> <logger name="com.itheima.pinda.authority.biz.service" additivity="true" level="${log.level.service}"> <appender-ref ref="SERVICE_APPENDER"/> logger> springProfile> configuration>- 1
- 2
- 3
- 4
- 5
- 6
- 7
- 8
- 9
- 10
- 11
- 12
- 13
- 14
- 15
- 16
- 17
- 18
- 19
- 20
- 21
- 22
- 23
- 24
- 25
- 26
- 27
- 28
- 29
- 30
18.1.1.3 j2cache配置文件
在当前pd-auth-server项目中会使用到j2cache来操作缓存,在Nacos配置中心的redis.yml中已经配置了j2cache的相关配置:
j2cache: # config-location: /j2cache.properties open-spring-cache: true cache-clean-mode: passive allow-null-values: true redis-client: lettuce l2-cache-open: true # l2-cache-open: false # 关闭二级缓存 broadcast: net.oschina.j2cache.cache.support.redis.SpringRedisPubSubPolicy # broadcast: jgroups # 关闭二级缓存 L1: provider_class: caffeine L2: provider_class: net.oschina.j2cache.cache.support.redis.SpringRedisProvider config_section: lettuce sync_ttl_to_redis: true default_cache_null_object: false serialization: fst caffeine: properties: /j2cache/caffeine.properties # 这个配置文件需要放在项目中 lettuce: mode: single namespace: storage: generic channel: j2cache scheme: redis hosts: ${pinda.redis.ip}:${pinda.redis.port} password: ${pinda.redis.password} database: ${pinda.redis.database} sentinelMasterId: maxTotal: 100 maxIdle: 10 minIdle: 10 timeout: 10000- 1
- 2
- 3
- 4
- 5
- 6
- 7
- 8
- 9
- 10
- 11
- 12
- 13
- 14
- 15
- 16
- 17
- 18
- 19
- 20
- 21
- 22
- 23
- 24
- 25
- 26
- 27
- 28
- 29
- 30
- 31
- 32
- 33
- 34
通过上面的配置可以看到,还需要在项目中提供/j2cache/caffeine.properties,文件内容如下:
######################################### # Caffeine configuration # \u6682\u65F6\u6CA1\u7528 # [name] = size, xxxx[s|m|h|d] ######################################### default=2000, 2h captcha=1000, 5m resource=2000, 2h user_resource=3000, 2h- 1
- 2
- 3
- 4
- 5
- 6
- 7
- 8
- 9
18.1.1.4 密钥文件
JWT签名算法中,一般有两个选择:HS256和RS256。 HS256 (带有 SHA-256 的 HMAC )是一种对称加密算法, 双方之间仅共享一个密钥。由于使用相同的密钥生成签名和验证签名, 因此必须注意确保密钥不被泄密。 RS256 (采用SHA-256 的 RSA 签名) 是一种非对称加密算法, 它使用公共/私钥对: JWT的提供方采用私钥生成签名, JWT 的使用方获取公钥以验证签名。- 1
- 2
- 3
- 4
- 5
本项目中使用RS256非对称加密算法进行签名,这就需要使用RSA生成一对公钥和私钥。在授课资料中已经提供了一对公钥和私钥,其中pub.key为公钥,pri.key为私钥。
将授课资料中的pub.key和pri.key文件复制到项目的resources/client下。
注意:为什么必须要将这两个文件复制到项目的resources/client下呢?因为在Nacos配置中心的pd-auth-server.yml中通过配置的形式已经指定了这两个配置文件的位置和名称:
authentication: user: header-name: token expire: 43200 # 外部token有效期为12小时 pri-key: client/pri.key # 加密 pub-key: client/pub.key # 解密- 1
- 2
- 3
- 4
- 5
- 6
18.1.1.5 spy.properties
spy.properties是p6spy所需的属性文件。p6spy是一个开源项目,通常使用它来跟踪数据库操作,查看程序运行过程中执行的sql语句,还可以输出执行sql语句消耗的时间。
在Nacos配置中心的pd-auth-server-dev.yml中进行了如下配置:
# p6spy是一个开源项目,通常使用它来跟踪数据库操作,查看程序运行过程中执行的sql语句 # 开发环境需要使用p6spy进行sql语句输出 # 但p6spy会有性能损耗,不适合在生产线使用,故其他环境无需配置 spring: datasource: driver-class-name: com.p6spy.engine.spy.P6SpyDriver url: jdbc:p6spy:mysql://${pinda.mysql.ip}:${pinda.mysql.port}/${pinda.mysql.database}?serverTimezone=CTT&characterEncoding=utf8&useUnicode=true&useSSL=false&autoReconnect=true&zeroDateTimeBehavior=convertToNull&allowMultiQueries=true db-type: mysql- 1
- 2
- 3
- 4
- 5
- 6
- 7
- 8
我们在开发阶段使用的数据源其实就是P6Spy提供的数据源,这样就可以在控制台打印sql已经sql执行的时间了。
spy.properties配置文件内容如下:
module.log=com.p6spy.engine.logging.P6LogFactory,com.p6spy.engine.outage.P6OutageFactory logMessageFormat=com.baomidou.mybatisplus.extension.p6spy.P6SpyLogger appender=com.baomidou.mybatisplus.extension.p6spy.StdoutLogger deregisterdrivers=true useprefix=true excludecategories=info,debug,result,commit,resultset dateformat=yyyy-MM-dd HH:mm:ss driverlist=com.mysql.cj.jdbc.Driver outagedetection=true outagedetectioninterval=2- 1
- 2
- 3
- 4
- 5
- 6
- 7
- 8
- 9
- 10
18.1.1.6 dozer
在resources下创建dozer目录并提供biz.dozer.xml和global.dozer.xml文件,内容如下:
biz.dozer.xml
<mappings xmlns:xsi="http://www.w3.org/2001/XMLSchema-instance" xmlns="http://dozermapper.github.io/schema/bean-mapping" xsi:schemaLocation="http://dozermapper.github.io/schema/bean-mapping http://dozermapper.github.io/schema/bean-mapping.xsd"> <mapping date-format="yyyy-MM-dd HH:mm:ss"> <class-a>com.itheima.pinda.authority.entity.auth.Menuclass-a> <class-b>com.itheima.pinda.authority.dto.auth.VueRouterclass-b> <field> <a>namea> <b>meta.titleb> field> <field> <a>namea> <b>nameb> field> <field> <a>icona> <b>meta.iconb> field> mapping> mappings>- 1
- 2
- 3
- 4
- 5
- 6
- 7
- 8
- 9
- 10
- 11
- 12
- 13
- 14
- 15
- 16
- 17
- 18
- 19
- 20
- 21
- 22
global.dozer.xml
<mappings xmlns:xsi="http://www.w3.org/2001/XMLSchema-instance" xmlns="http://dozermapper.github.io/schema/bean-mapping" xsi:schemaLocation="http://dozermapper.github.io/schema/bean-mapping http://dozermapper.github.io/schema/bean-mapping.xsd"> <configuration> <date-format>yyyy-MM-dd HH:mm:ssdate-format> configuration> mappings>- 1
- 2
- 3
- 4
- 5
- 6
- 7
- 8
- 9
- 10
- 11
- 12
- 13
- 14
- 15
- 16
- 17
- 18
18.1.2 配置类
全局异常处理的配置类:
package com.itheima.pinda.authority.config; import com.itheima.pinda.common.handler.DefaultGlobalExceptionHandler; import org.springframework.context.annotation.Configuration; import org.springframework.stereotype.Controller; import org.springframework.web.bind.annotation.ControllerAdvice; import org.springframework.web.bind.annotation.ResponseBody; import org.springframework.web.bind.annotation.RestController; /** * 全局异常处理 */ @Configuration @ControllerAdvice(annotations = {RestController.class, Controller.class}) @ResponseBody public class ExceptionConfiguration extends DefaultGlobalExceptionHandler { }- 1
- 2
- 3
- 4
- 5
- 6
- 7
- 8
- 9
- 10
- 11
- 12
- 13
- 14
- 15
- 16
- 17
公共基础的配置类:
package com.itheima.pinda.authority.config; import com.itheima.pinda.common.config.BaseConfig; import org.springframework.context.annotation.Configuration; @Configuration public class AuthorityWebConfiguration extends BaseConfig { }- 1
- 2
- 3
- 4
- 5
- 6
数据库相关的配置类:
package com.itheima.pinda.authority.config; import cn.hutool.core.util.ArrayUtil; import com.alibaba.druid.spring.boot.autoconfigure.DruidDataSourceBuilder; import com.baomidou.mybatisplus.autoconfigure.ConfigurationCustomizer; import com.baomidou.mybatisplus.autoconfigure.MybatisPlusProperties; import com.baomidou.mybatisplus.autoconfigure.MybatisPlusPropertiesCustomizer; import com.itheima.pinda.database.datasource.BaseDatabaseConfiguration; import com.itheima.pinda.database.properties.DatabaseProperties; import com.p6spy.engine.spy.P6DataSource; import lombok.extern.slf4j.Slf4j; import org.apache.ibatis.mapping.DatabaseIdProvider; import org.apache.ibatis.plugin.Interceptor; import org.apache.ibatis.scripting.LanguageDriver; import org.apache.ibatis.session.ExecutorType; import org.apache.ibatis.session.SqlSessionFactory; import org.apache.ibatis.type.TypeHandler; import org.mybatis.spring.SqlSessionTemplate; import org.mybatis.spring.annotation.MapperScan; import org.springframework.aop.Advisor; import org.springframework.beans.factory.ObjectProvider; import org.springframework.beans.factory.annotation.Qualifier; import org.springframework.boot.context.properties.ConfigurationProperties; import org.springframework.boot.context.properties.EnableConfigurationProperties; import org.springframework.context.ApplicationContext; import org.springframework.context.annotation.Bean; import org.springframework.context.annotation.Configuration; import org.springframework.core.io.ResourceLoader; import org.springframework.jdbc.datasource.DataSourceTransactionManager; import org.springframework.stereotype.Repository; import org.springframework.transaction.PlatformTransactionManager; import org.springframework.transaction.interceptor.TransactionInterceptor; import javax.sql.DataSource; import java.util.List; @Configuration @Slf4j @MapperScan( basePackages = {"com.itheima.pinda",}, annotationClass = Repository.class, sqlSessionFactoryRef = AuthorityDatabaseAutoConfiguration.DATABASE_PREFIX + "SqlSessionFactory") @EnableConfigurationProperties({MybatisPlusProperties.class, DatabaseProperties.class}) public class AuthorityDatabaseAutoConfiguration extends BaseDatabaseConfiguration { /** * 每个数据源配置不同即可 */ final static String DATABASE_PREFIX = "master"; public AuthorityDatabaseAutoConfiguration(MybatisPlusProperties properties, DatabaseProperties databaseProperties, ObjectProvider<Interceptor[]> interceptorsProvider, ObjectProvider<TypeHandler[]> typeHandlersProvider, ObjectProvider<LanguageDriver[]> languageDriversProvider, ResourceLoader resourceLoader, ObjectProvider<DatabaseIdProvider> databaseIdProvider, ObjectProvider<List<ConfigurationCustomizer>> configurationCustomizersProvider, ObjectProvider<List<MybatisPlusPropertiesCustomizer>> mybatisPlusPropertiesCustomizerProvider, ApplicationContext applicationContext) { super(properties, databaseProperties, interceptorsProvider, typeHandlersProvider, languageDriversProvider, resourceLoader, databaseIdProvider, configurationCustomizersProvider, mybatisPlusPropertiesCustomizerProvider, applicationContext); } @Bean(DATABASE_PREFIX + "SqlSessionTemplate") public SqlSessionTemplate getSqlSessionTemplate(@Qualifier(DATABASE_PREFIX + "SqlSessionFactory") SqlSessionFactory sqlSessionFactory) { ExecutorType executorType = this.properties.getExecutorType(); if (executorType != null) { return new SqlSessionTemplate(sqlSessionFactory, executorType); } else { return new SqlSessionTemplate(sqlSessionFactory); } } /** * 数据源信息 * * @return */ @Bean(name = DATABASE_PREFIX + "DruidDataSource") @ConfigurationProperties(prefix = "spring.datasource.druid") public DataSource druidDataSource() { return DruidDataSourceBuilder.create().build(); } @Bean(name = DATABASE_PREFIX + "DataSource") public DataSource dataSource(@Qualifier(DATABASE_PREFIX + "DruidDataSource") DataSource dataSource) { if (ArrayUtil.contains(DEV_PROFILES, this.profiles)) { return new P6DataSource(dataSource); } else { return dataSource; } } /** * mybatis Sql Session 工厂 * * @return * @throws Exception */ @Bean(DATABASE_PREFIX + "SqlSessionFactory") public SqlSessionFactory getSqlSessionFactory(@Qualifier(DATABASE_PREFIX + "DataSource") DataSource dataSource) throws Exception { return super.sqlSessionFactory(dataSource); } /** * 数据源事务管理器 * * @return */ @Bean(name = DATABASE_PREFIX + "TransactionManager") public DataSourceTransactionManager dsTransactionManager(@Qualifier(DATABASE_PREFIX + "DataSource") DataSource dataSource) { return new DataSourceTransactionManager(dataSource); } /** * 事务拦截器 * * @param transactionManager * @return */ @Bean(DATABASE_PREFIX + "TransactionInterceptor") public TransactionInterceptor transactionInterceptor(@Qualifier(DATABASE_PREFIX + "TransactionManager") PlatformTransactionManager transactionManager) { return new TransactionInterceptor(transactionManager, this.transactionAttributeSource()); } /** * 事务 Advisor * * @param transactionManager * @return */ @Bean(DATABASE_PREFIX + "Advisor") public Advisor getAdvisor(@Qualifier(DATABASE_PREFIX + "TransactionManager") PlatformTransactionManager transactionManager, @Qualifier(DATABASE_PREFIX + "TransactionInterceptor") TransactionInterceptor ti) { return super.txAdviceAdvisor(ti); } }- 1
- 2
- 3
- 4
- 5
- 6
- 7
- 8
- 9
- 10
- 11
- 12
- 13
- 14
- 15
- 16
- 17
- 18
- 19
- 20
- 21
- 22
- 23
- 24
- 25
- 26
- 27
- 28
- 29
- 30
- 31
- 32
- 33
- 34
- 35
- 36
- 37
- 38
- 39
- 40
- 41
- 42
- 43
- 44
- 45
- 46
- 47
- 48
- 49
- 50
- 51
- 52
- 53
- 54
- 55
- 56
- 57
- 58
- 59
- 60
- 61
- 62
- 63
- 64
- 65
- 66
- 67
- 68
- 69
- 70
- 71
- 72
- 73
- 74
- 75
- 76
- 77
- 78
- 79
- 80
- 81
- 82
- 83
- 84
- 85
- 86
- 87
- 88
- 89
- 90
- 91
- 92
- 93
- 94
- 95
- 96
- 97
- 98
- 99
- 100
- 101
- 102
- 103
- 104
- 105
- 106
- 107
- 108
- 109
- 110
- 111
- 112
- 113
- 114
- 115
- 116
- 117
- 118
- 119
- 120
- 121
- 122
- 123
- 124
- 125
- 126
- 127
- 128
- 129
- 130
- 131
- 132
- 133
- 134
- 135
- 136
- 137
mybatis框架相关的配置类:
package com.itheima.pinda.authority.config; import com.itheima.pinda.database.datasource.BaseMybatisConfiguration; import com.itheima.pinda.database.properties.DatabaseProperties; import lombok.extern.slf4j.Slf4j; import org.springframework.context.annotation.Configuration; /** * Mybatis相关配置 */ @Configuration @Slf4j public class AuthorityMybatisAutoConfiguration extends BaseMybatisConfiguration { public AuthorityMybatisAutoConfiguration(DatabaseProperties databaseProperties) { super(databaseProperties); } }- 1
- 2
- 3
- 4
- 5
- 6
- 7
- 8
- 9
- 10
- 11
- 12
- 13
- 14
- 15
- 16
18.1.3 启动类
package com.itheima.pinda; import com.itheima.pinda.auth.server.EnableAuthServer; import com.itheima.pinda.user.annotation.EnableLoginArgResolver; import com.itheima.pinda.validator.config.EnableFormValidator; import lombok.extern.slf4j.Slf4j; import org.springframework.boot.SpringApplication; import org.springframework.boot.autoconfigure.SpringBootApplication; import org.springframework.cloud.client.discovery.EnableDiscoveryClient; import org.springframework.cloud.openfeign.EnableFeignClients; import org.springframework.context.ConfigurableApplicationContext; import org.springframework.context.annotation.Configuration; import org.springframework.context.annotation.EnableAspectJAutoProxy; import org.springframework.core.env.Environment; import java.net.InetAddress; import java.net.UnknownHostException; @SpringBootApplication @EnableDiscoveryClient @EnableAuthServer @EnableFeignClients(value = { "com.itheima.pinda", }) @Slf4j @EnableAspectJAutoProxy(proxyTargetClass = true, exposeProxy = true) @EnableLoginArgResolver @EnableFormValidator public class AuthorityApplication { public static void main(String[] args) throws UnknownHostException { ConfigurableApplicationContext application = SpringApplication.run(AuthorityApplication.class, args); Environment env = application.getEnvironment(); log.info("应用 '{}' 运行成功! Swagger文档: http://{}:{}/doc.html", env.getProperty("spring.application.name"), InetAddress.getLocalHost().getHostAddress(), env.getProperty("server.port")); } }- 1
- 2
- 3
- 4
- 5
- 6
- 7
- 8
- 9
- 10
- 11
- 12
- 13
- 14
- 15
- 16
- 17
- 18
- 19
- 20
- 21
- 22
- 23
- 24
- 25
- 26
- 27
- 28
- 29
- 30
- 31
- 32
- 33
- 34
- 35
- 36
- 37
- 38
18.2 开发认证功能
18.2.1 easy-captcha
easy-captcha是生成图形验证码的Java类库,支持gif、中文、算术等类型,可用于Java Web、JavaSE等项目。参考地址:https://gitee.com/whvse/EasyCaptcha
maven坐标:
<dependency> <groupId>com.github.whvcsegroupId> <artifactId>easy-captchaartifactId> <version>1.6.2version> dependency>- 1
- 2
- 3
- 4
- 5
效果展示:

使用方式:
package com.itheima.pinda; import com.wf.captcha.ArithmeticCaptcha; import com.wf.captcha.base.Captcha; import java.io.File; import java.io.FileOutputStream; public class EasyCaptchaTest { public static void main(String[] args) throws Exception{ //算术类型图片验证码 Captcha captcha = new ArithmeticCaptcha(115, 42);//指定图片的宽度和高度 captcha.setCharType(2); captcha.out(new FileOutputStream(new File("d:\\hello.png"))); String text = captcha.text(); System.out.println(text); } }- 1
- 2
- 3
- 4
- 5
- 6
- 7
- 8
- 9
- 10
- 11
- 12
- 13
- 14
- 15
- 16
- 17
18.2.2 开发验证码接口
第一步:创建LoginController并提供生成验证码的方法
package com.itheima.pinda.authority.controller.auth; import com.itheima.pinda.authority.biz.service.auth.ValidateCodeService; import com.itheima.pinda.base.BaseController; import com.itheima.pinda.base.R; import io.swagger.annotations.Api; import io.swagger.annotations.ApiOperation; import lombok.extern.slf4j.Slf4j; import org.springframework.beans.factory.annotation.Autowired; import org.springframework.web.bind.annotation.*; import javax.servlet.http.HttpServletResponse; import java.io.IOException; /** * 登录 */ @RestController @RequestMapping("/anno") @Api(value = "UserAuthController", tags = "登录") @Slf4j public class LoginController extends BaseController { @Autowired private ValidateCodeService validateCodeService; @ApiOperation(value = "验证码", notes = "验证码") @GetMapping(value = "/captcha", produces = "image/png") public void captcha(@RequestParam(value = "key") String key, HttpServletResponse response) throws IOException { this.validateCodeService.create(key, response); } }- 1
- 2
- 3
- 4
- 5
- 6
- 7
- 8
- 9
- 10
- 11
- 12
- 13
- 14
- 15
- 16
- 17
- 18
- 19
- 20
- 21
- 22
- 23
- 24
- 25
- 26
- 27
- 28
- 29
第二步:创建ValidateCodeService接口
package com.itheima.pinda.authority.biz.service.auth; import java.io.IOException; import javax.servlet.http.HttpServletResponse; /** * 验证码 */ public interface ValidateCodeService { /** * 生成验证码 */ void create(String key, HttpServletResponse response) throws IOException; }- 1
- 2
- 3
- 4
- 5
- 6
- 7
- 8
- 9
- 10
- 11
- 12
第三步:创建ValidateCodeServiceImpl
package com.itheima.pinda.authority.biz.service.auth.impl; import java.io.IOException; import javax.servlet.http.HttpServletResponse; import com.itheima.pinda.authority.biz.service.auth.ValidateCodeService; import com.itheima.pinda.common.constant.CacheKey; import com.itheima.pinda.exception.BizException; import com.wf.captcha.ArithmeticCaptcha; import net.oschina.j2cache.CacheChannel; import net.oschina.j2cache.CacheObject; import org.apache.commons.lang3.StringUtils; import org.springframework.beans.factory.annotation.Autowired; import org.springframework.http.HttpHeaders; import org.springframework.http.MediaType; import org.springframework.stereotype.Service; /** * 验证码服务 */ @Service public class ValidateCodeServiceImpl implements ValidateCodeService { @Autowired private CacheChannel cache; @Override public void create(String key, HttpServletResponse response) throws IOException { if (StringUtils.isBlank(key)) { throw BizException.validFail("验证码key不能为空"); } response.setContentType(MediaType.IMAGE_PNG_VALUE); response.setHeader(HttpHeaders.PRAGMA, "No-cache"); response.setHeader(HttpHeaders.CACHE_CONTROL, "No-cache"); response.setDateHeader(HttpHeaders.EXPIRES, 0L); Captcha captcha = new ArithmeticCaptcha(115, 42); captcha.setCharType(2); cache.set(CacheKey.CAPTCHA, key, StringUtils.lowerCase(captcha.text())); captcha.out(response.getOutputStream()); } }- 1
- 2
- 3
- 4
- 5
- 6
- 7
- 8
- 9
- 10
- 11
- 12
- 13
- 14
- 15
- 16
- 17
- 18
- 19
- 20
- 21
- 22
- 23
- 24
- 25
- 26
- 27
- 28
- 29
- 30
- 31
- 32
- 33
- 34
- 35
- 36
- 37
- 38
- 39
- 40
- 41
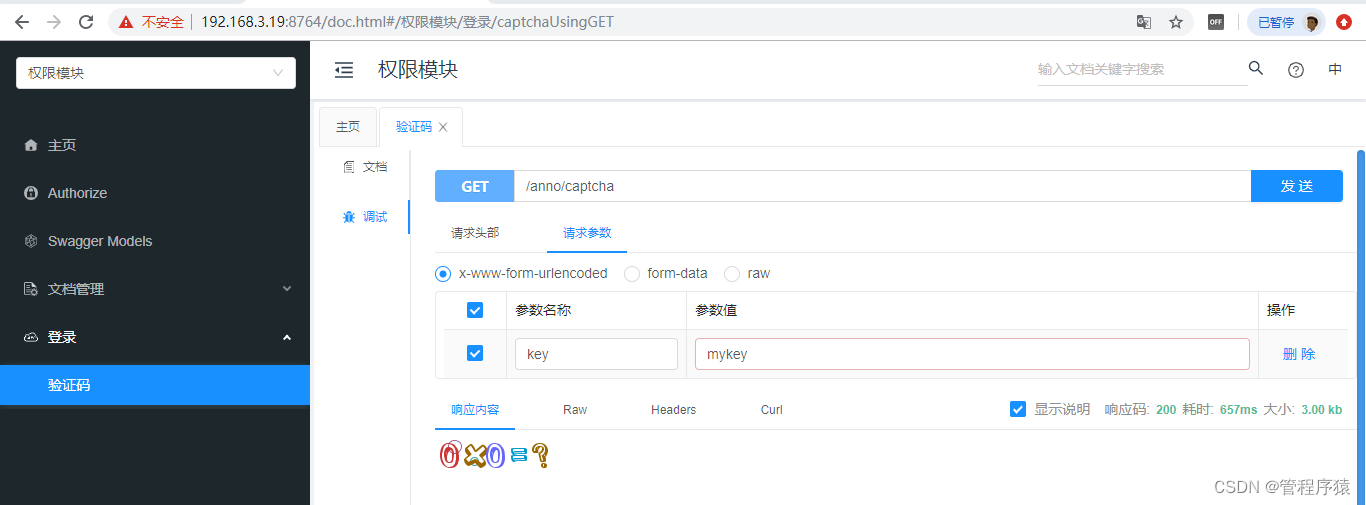
验证码接口开发完成后可以启动服务,通过接口文档进行测试:
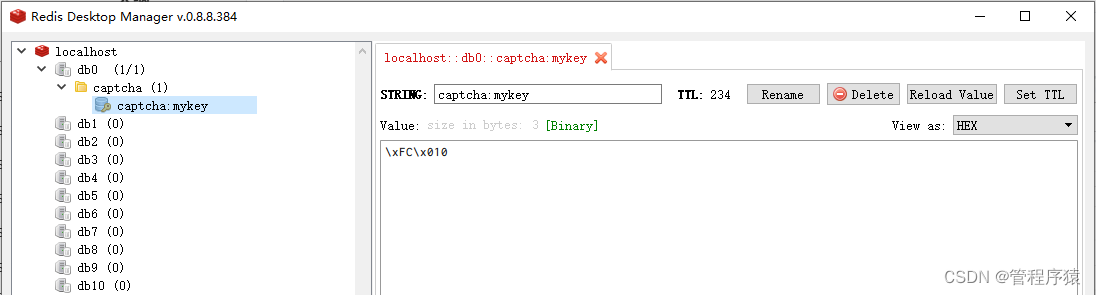
可以看到已经将验证码缓存到redis:
18.2.3 开发认证接口
第一步:在LoginController中创建login方法
@Autowired private AuthManager authManager;//认证管理器对象 /** * 登录认证 */ @ApiOperation(value = "登录", notes = "登录") @PostMapping(value = "/login") public R<LoginDTO> login(@Validated @RequestBody LoginParamDTO login) throws BizException { log.info("account={}", login.getAccount()); if (this.validateCodeService.check(login.getKey(), login.getCode())) { return this.authManager.login(login.getAccount(), login.getPassword()); } return this.success(null); }- 1
- 2
- 3
- 4
- 5
- 6
- 7
- 8
- 9
- 10
- 11
- 12
- 13
- 14
- 15
- 16
第二步:在ValidateCodeService接口中扩展check方法完成校验验证码
/** * 校验验证码 * @param key 前端上送 key * @param value 前端上送待校验值 */ boolean check(String key, String value);- 1
- 2
- 3
- 4
- 5
- 6
第三步:在ValidateCodeServiceImpl实现类中实现check方法
//校验验证码 @Override public boolean check(String key, String value) { if (StringUtils.isBlank(value)) { throw BizException.validFail("请输入验证码"); } //根据key从缓存中获取验证码 CacheObject cacheObject = cache.get(CacheKey.CAPTCHA, key); if (cacheObject.getValue() == null) { throw BizException.validFail("验证码已过期"); } //比对验证码 if (!StringUtils.equalsIgnoreCase(value, String.valueOf(cacheObject.getValue()))) { throw BizException.validFail("验证码不正确"); } //验证通过,立即从缓存中删除验证码 cache.evict(CacheKey.CAPTCHA, key); return true; }- 1
- 2
- 3
- 4
- 5
- 6
- 7
- 8
- 9
- 10
- 11
- 12
- 13
- 14
- 15
- 16
- 17
- 18
- 19
- 20
第四步:创建AuthManager认证管理器类,提供用户名密码认证功能
package com.itheima.pinda.authority.biz.service.auth.impl; import com.baomidou.mybatisplus.core.toolkit.Wrappers; import com.itheima.pinda.auth.server.utils.JwtTokenServerUtils; import com.itheima.pinda.auth.utils.JwtUserInfo; import com.itheima.pinda.auth.utils.Token; import com.itheima.pinda.authority.biz.service.auth.ResourceService; import com.itheima.pinda.authority.dto.auth.LoginDTO; import com.itheima.pinda.authority.dto.auth.ResourceQueryDTO; import com.itheima.pinda.authority.dto.auth.UserDTO; import com.itheima.pinda.authority.entity.auth.Resource; import com.itheima.pinda.authority.entity.auth.User; import com.itheima.pinda.base.R; import com.itheima.pinda.dozer.DozerUtils; import com.itheima.pinda.exception.BizException; import com.itheima.pinda.exception.code.ExceptionCode; import com.itheima.pinda.utils.BizAssert; import com.itheima.pinda.utils.NumberHelper; import com.itheima.pinda.authority.biz.service.auth.UserService; import com.itheima.pinda.utils.TimeUtils; import lombok.extern.slf4j.Slf4j; import org.apache.commons.codec.digest.DigestUtils; import org.springframework.beans.factory.annotation.Autowired; import org.springframework.stereotype.Service; import java.time.LocalDateTime; import java.util.List; import java.util.stream.Collectors; /** *认证管理器 */ @Service @Slf4j public class AuthManager { @Autowired private JwtTokenServerUtils jwtTokenServerUtils; @Autowired private UserService userService; @Autowired private ResourceService resourceService; @Autowired private DozerUtils dozer; /** * 账号登录 * @param account * @param password */ public R<LoginDTO> login(String account, String password) { // 登录验证 R<User> result = checkUser(account, password); if (result.getIsError()) { return R.fail(result.getCode(), result.getMsg()); } User user = result.getData(); // 生成jwt token Token token = this.generateUserToken(user); List<Resource> resourceList =this.resourceService. findVisibleResource(ResourceQueryDTO.builder(). userId(user.getId()).build()); List<String> permissionsList = null; if(resourceList != null && resourceList.size() > 0){ permissionsList = resourceList.stream(). map(Resource::getCode). collect(Collectors.toList()); } //封装数据 LoginDTO loginDTO = LoginDTO.builder() .user(this.dozer.map(user, UserDTO.class)) .token(token) .permissionsList(permissionsList) .build(); return R.success(loginDTO); } //生成jwt token private Token generateUserToken(User user) { JwtUserInfo userInfo = new JwtUserInfo(user.getId(), user.getAccount(), user.getName(), user.getOrgId(), user.getStationId()); Token token = this.jwtTokenServerUtils.generateUserToken(userInfo, null); log.info("token={}", token.getToken()); return token; } // 登录验证 private R<User> checkUser(String account, String password) { User user = this.userService.getOne(Wrappers.<User>lambdaQuery() .eq(User::getAccount, account)); // 密码加密 String passwordMd5 = DigestUtils.md5Hex(password); if (user == null || !user.getPassword().equals(passwordMd5)) { return R.fail(ExceptionCode.JWT_USER_INVALID); } return R.success(user); } }- 1
- 2
- 3
- 4
- 5
- 6
- 7
- 8
- 9
- 10
- 11
- 12
- 13
- 14
- 15
- 16
- 17
- 18
- 19
- 20
- 21
- 22
- 23
- 24
- 25
- 26
- 27
- 28
- 29
- 30
- 31
- 32
- 33
- 34
- 35
- 36
- 37
- 38
- 39
- 40
- 41
- 42
- 43
- 44
- 45
- 46
- 47
- 48
- 49
- 50
- 51
- 52
- 53
- 54
- 55
- 56
- 57
- 58
- 59
- 60
- 61
- 62
- 63
- 64
- 65
- 66
- 67
- 68
- 69
- 70
- 71
- 72
- 73
- 74
- 75
- 76
- 77
- 78
- 79
- 80
- 81
- 82
- 83
- 84
- 85
- 86
- 87
- 88
- 89
- 90
- 91
- 92
- 93
- 94
- 95
- 96
- 97
- 98
- 99
- 100
- 101
- 102
- 103
第五步:创建UserService接口、UserServiceImpl实现类、UserMapper接口
package com.itheima.pinda.authority.biz.service.auth; import com.baomidou.mybatisplus.extension.service.IService; /** * 业务接口 */ public interface UserService extends IService<User> { }- 1
- 2
- 3
- 4
- 5
- 6
- 7
package com.itheima.pinda.authority.biz.service.auth.impl; import com.baomidou.mybatisplus.extension.service.impl.ServiceImpl; import com.itheima.pinda.authority.biz.dao.auth.UserMapper; import com.itheima.pinda.authority.biz.service.auth.UserService; import com.itheima.pinda.authority.entity.auth.User; import lombok.extern.slf4j.Slf4j; import org.springframework.stereotype.Service; /** * 业务实现类 */ @Slf4j @Service public class UserServiceImpl extends ServiceImpl<UserMapper, User> implements UserService { }- 1
- 2
- 3
- 4
- 5
- 6
- 7
- 8
- 9
- 10
- 11
- 12
- 13
- 14
- 15
package com.itheima.pinda.authority.biz.dao.auth; import com.baomidou.mybatisplus.core.mapper.BaseMapper; import com.itheima.pinda.authority.entity.auth.User; import org.springframework.stereotype.Repository; /** * Mapper 接口 */ @Repository public interface UserMapper extends BaseMapper<User> { }- 1
- 2
- 3
- 4
- 5
- 6
- 7
- 8
- 9
- 10
- 11
第六步:创建ResourceService接口、ResourceServiceImpl实现类、ResourceMapper接口、ResourceMapper.xml
package com.itheima.pinda.authority.biz.service.auth; import java.util.List; import com.baomidou.mybatisplus.extension.service.IService; import com.itheima.pinda.authority.dto.auth.ResourceQueryDTO; import com.itheima.pinda.authority.entity.auth.Resource; /** * 业务接口 */ public interface ResourceService extends IService<Resource> { /** * 查询 用户拥有的资源权限 */ List<Resource> findVisibleResource(ResourceQueryDTO resource); }- 1
- 2
- 3
- 4
- 5
- 6
- 7
- 8
- 9
- 10
- 11
- 12
- 13
- 14
package com.itheima.pinda.authority.biz.service.auth.impl; import java.util.List; import java.util.stream.Collectors; import com.baomidou.mybatisplus.extension.service.impl.ServiceImpl; import com.itheima.pinda.authority.biz.service.auth.ResourceService; import com.itheima.pinda.authority.dto.auth.ResourceQueryDTO; import com.itheima.pinda.authority.entity.auth.Resource; import com.itheima.pinda.common.constant.CacheKey; import com.itheima.pinda.exception.BizException; import com.itheima.pinda.utils.StrHelper; import com.itheima.pinda.authority.biz.dao.auth.ResourceMapper; import lombok.extern.slf4j.Slf4j; import net.oschina.j2cache.CacheChannel; import org.springframework.beans.factory.annotation.Autowired; import org.springframework.stereotype.Service; /** * 业务实现类 * 资源 */ @Slf4j @Service public class ResourceServiceImpl extends ServiceImpl<ResourceMapper, Resource> implements ResourceService { @Autowired private CacheChannel cache; /** * 查询用户的可用资源权限 */ @Override public List<Resource> findVisibleResource(ResourceQueryDTO resourceQueryDTO) { //查询当前用户可访问的资源 List<Resource> visibleResource = baseMapper.findVisibleResource(resourceQueryDTO); if(visibleResource != null && visibleResource.size() > 0){ List<String> userResource = visibleResource. stream(). map((Resource r) -> { return r.getMethod() + r.getUrl(); }).collect(Collectors.toList()); //将当前用户可访问的资源载入缓存,形式为:GET/user/page cache.set(CacheKey.USER_RESOURCE, resourceQueryDTO.getUserId().toString(), userResource); } return visibleResource; } }- 1
- 2
- 3
- 4
- 5
- 6
- 7
- 8
- 9
- 10
- 11
- 12
- 13
- 14
- 15
- 16
- 17
- 18
- 19
- 20
- 21
- 22
- 23
- 24
- 25
- 26
- 27
- 28
- 29
- 30
- 31
- 32
- 33
- 34
- 35
- 36
- 37
- 38
- 39
- 40
- 41
- 42
- 43
- 44
- 45
- 46
- 47
package com.itheima.pinda.authority.biz.dao.auth; import java.util.List; import com.baomidou.mybatisplus.core.mapper.BaseMapper; import com.itheima.pinda.authority.dto.auth.ResourceQueryDTO; import com.itheima.pinda.authority.entity.auth.Resource; import org.springframework.stereotype.Repository; /** * Mapper 接口 */ @Repository public interface ResourceMapper extends BaseMapper<Resource> { /** * 查询用户拥有的资源权限 */ List<Resource> findVisibleResource(ResourceQueryDTO resource); }- 1
- 2
- 3
- 4
- 5
- 6
- 7
- 8
- 9
- 10
- 11
- 12
- 13
- 14
- 15
- 16
- 17
在resources目录下创建mapper_authority目录,在此目录中创建ResourceMapper.xml
DOCTYPE mapper PUBLIC "-//mybatis.org//DTD Mapper 3.0//EN" "http://mybatis.org/dtd/mybatis-3-mapper.dtd"> <mapper namespace="com.itheima.pinda.authority.biz.dao.auth.ResourceMapper"> <resultMap id="BaseResultMap" type="com.itheima.pinda.authority.entity.auth.Resource"> <id column="id" jdbcType="BIGINT" property="id"/> <result column="create_user" jdbcType="BIGINT" property="createUser"/> <result column="create_time" jdbcType="TIMESTAMP" property="createTime"/> <result column="update_user" jdbcType="BIGINT" property="updateUser"/> <result column="update_time" jdbcType="TIMESTAMP" property="updateTime"/> <result column="code" jdbcType="VARCHAR" property="code"/> <result column="name" jdbcType="VARCHAR" property="name"/> <result column="menu_id" jdbcType="BIGINT" property="menuId"/> <result column="describe_" jdbcType="VARCHAR" property="describe"/> <result column="method" jdbcType="VARCHAR" property="method"/> <result column="url" jdbcType="VARCHAR" property="url"/> resultMap> <sql id="Base_Column_List"> id, create_user, create_time, update_user, update_time, code, name, menu_id, describe_,method,url sql> <select id="findVisibleResource" resultMap="BaseResultMap"> SELECT <include refid="Base_Column_List"/> from pd_auth_resource where 1=1 and id in ( SELECT authority_id FROM pd_auth_role_authority ra INNER JOIN pd_auth_user_role ur on ra.role_id = ur.role_id INNER JOIN pd_auth_role r on r.id = ra.role_id where ur.user_id = #{userId, jdbcType=BIGINT} and r.`status` = true and ra.authority_type = 'RESOURCE' ) select> mapper>- 1
- 2
- 3
- 4
- 5
- 6
- 7
- 8
- 9
- 10
- 11
- 12
- 13
- 14
- 15
- 16
- 17
- 18
- 19
- 20
- 21
- 22
- 23
- 24
- 25
- 26
- 27
- 28
- 29
- 30
- 31
- 32
- 33
- 34
- 35
- 36
- 37
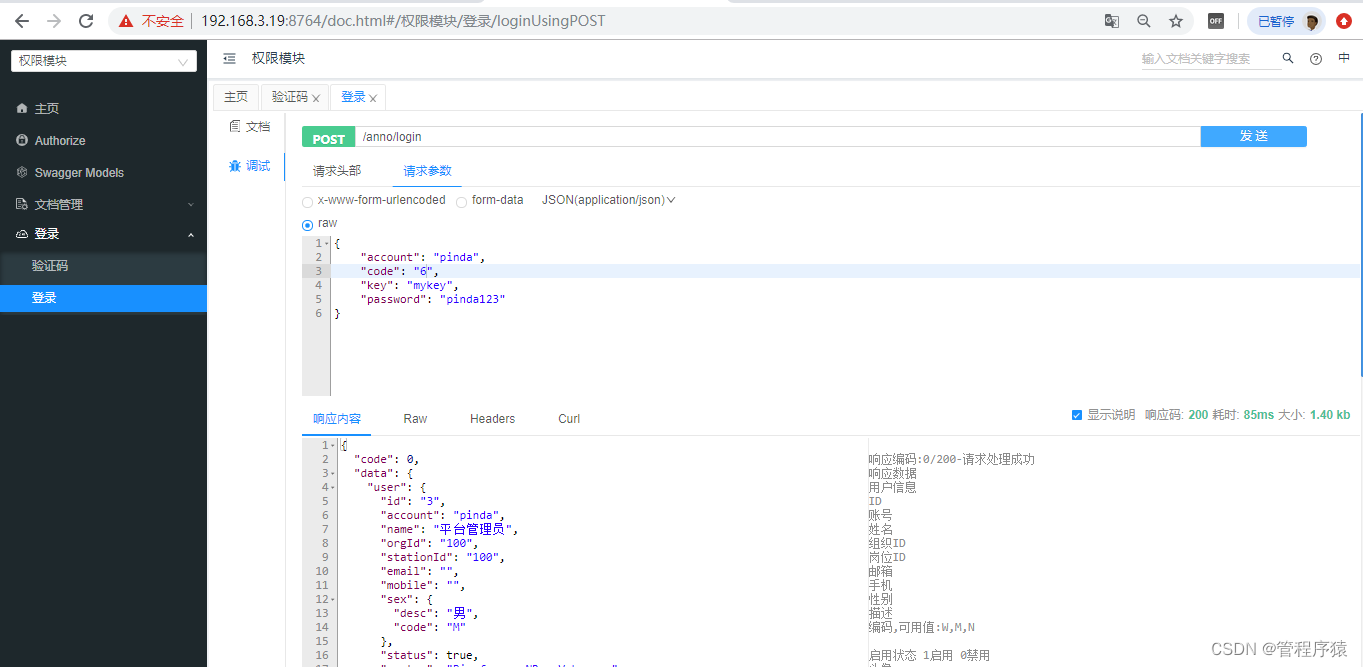
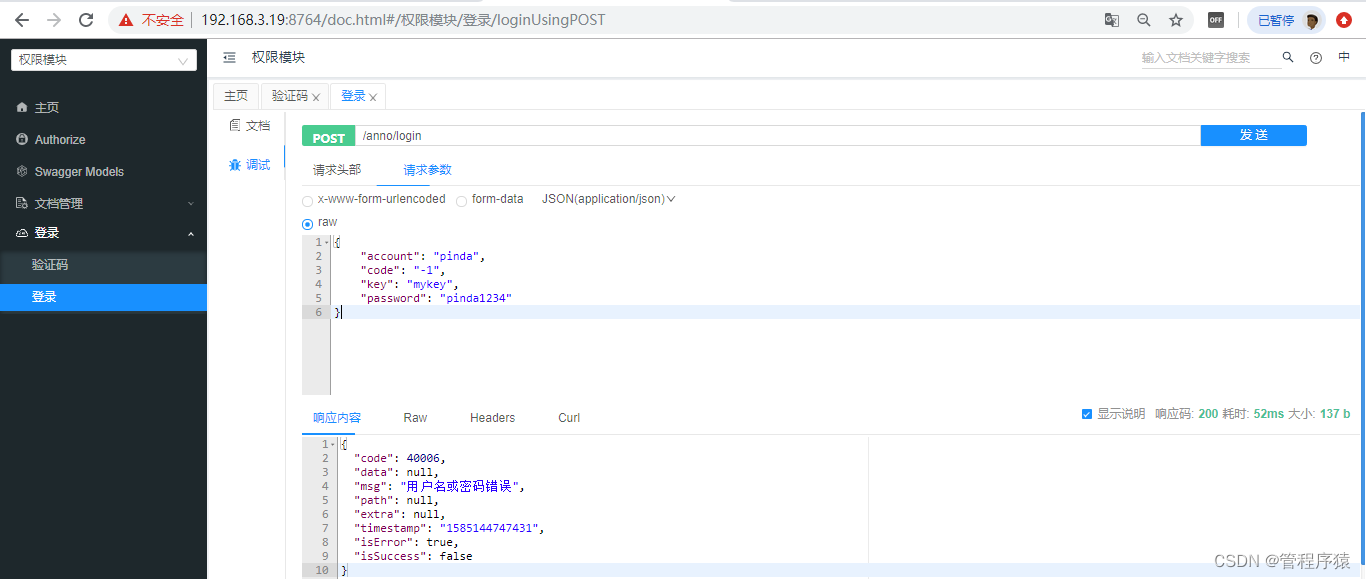
认证接口开发完成后可以使用接口文档进行测试:
18.3 开发操作日志功能
当前的权限服务已经依赖了pd-tools-log日志模块,此模块中已经定义好了SysLogAspect切面类用于拦截Controller中添加@SysLog注解的方法,在切面类中通过前置通知和后置通知方法收集操作日志相关信息并发布SysLogEvent日志事件,通过定义SysLogListener监听器来监听日志事件。
在权限服务中只需要定义配置类来创建SysLogListener,同时将SysLogListener所需的Consumer参数传递进行即可。
具体开发步骤:
第一步:创建OptLogService接口
package com.itheima.pinda.authority.biz.service.common; import com.baomidou.mybatisplus.extension.service.IService; import com.itheima.pinda.authority.entity.common.OptLog; import com.itheima.pinda.log.entity.OptLogDTO; /** * 业务接口 * 操作日志 */ public interface OptLogService extends IService<OptLog> { /** * 保存日志 */ boolean save(OptLogDTO entity); }- 1
- 2
- 3
- 4
- 5
- 6
- 7
- 8
- 9
- 10
- 11
- 12
- 13
- 14
- 15
第二步:创建OptLogServiceImpl实现类
package com.itheima.pinda.authority.biz.service.common.impl; import com.baomidou.mybatisplus.extension.service.impl.ServiceImpl; import com.itheima.pinda.authority.biz.dao.common.OptLogMapper; import com.itheima.pinda.authority.entity.common.OptLog; import com.itheima.pinda.dozer.DozerUtils; import com.itheima.pinda.log.entity.OptLogDTO; import com.itheima.pinda.authority.biz.service.common.OptLogService; import lombok.extern.slf4j.Slf4j; import org.springframework.beans.factory.annotation.Autowired; import org.springframework.stereotype.Service; /** * 业务实现类 * 操作日志 */ @Slf4j @Service public class OptLogServiceImpl extends ServiceImpl<OptLogMapper, OptLog> implements OptLogService { @Autowired DozerUtils dozer; @Override public boolean save(OptLogDTO entity) { return super.save(dozer.map(entity, OptLog.class)); } }- 1
- 2
- 3
- 4
- 5
- 6
- 7
- 8
- 9
- 10
- 11
- 12
- 13
- 14
- 15
- 16
- 17
- 18
- 19
- 20
- 21
- 22
- 23
- 24
- 25
- 26
第三步:创建OptLogMapper接口
package com.itheima.pinda.authority.biz.dao.common; import com.baomidou.mybatisplus.core.mapper.BaseMapper; import com.itheima.pinda.authority.entity.common.OptLog; import org.springframework.stereotype.Repository; /** * Mapper 接口 * 系统日志 */ @Repository public interface OptLogMapper extends BaseMapper<OptLog> { }- 1
- 2
- 3
- 4
- 5
- 6
- 7
- 8
- 9
- 10
- 11
- 12
第四步:创建SysLogConfiguration配置类
package com.itheima.pinda.authority.config; import com.itheima.pinda.authority.biz.service.common.OptLogService; import com.itheima.pinda.log.entity.OptLogDTO; import com.itheima.pinda.log.event.SysLogListener; import org.springframework.context.annotation.Bean; import org.springframework.context.annotation.Configuration; import org.springframework.scheduling.annotation.EnableAsync; import java.util.function.Consumer; /** * 日志自动配置 */ @EnableAsync @Configuration public class SysLogConfiguration { //日志记录监听器 @Bean public SysLogListener sysLogListener(OptLogService optLogService) { Consumer<OptLogDTO> consumer = (optLog) -> optLogService.save(optLog); return new SysLogListener(consumer); } }- 1
- 2
- 3
- 4
- 5
- 6
- 7
- 8
- 9
- 10
- 11
- 12
- 13
- 14
- 15
- 16
- 17
- 18
- 19
- 20
- 21
测试:
在已经开发的Controller的方法上加入@SysLog注解,然后通过接口文档访问,可以看到操作日志已经插入到pd_common_opt_log日志表中了。
18.4 导入其他功能代码
本课程的侧重点在于基础组件的构建以及认证和鉴权的开发实现,对于基础的数据维护不再作为重点内容讲解。
在授课资料中已经提供了其他功能的代码实现,这些功能包括:
1、岗位数据维护(CRUD)
2、组织数据维护(CRUD)
3、菜单数据维护(CRUD)
4、角色数据维护(CRUD)
5、用户数据维护(CRUD)
6、用户登录日志维护(CRD)
直接将这些功能代码复制到pd-auth-server工程中使用即可。
19. 网关服务开发
pd-gateway作为通用权限系统的网关服务,前端的http请求首先需要经过网关服务处理,再通过网关服务的路由功能转发到权限服务或者其他微服务进行业务处理。我们可以在网关服务进行统一的jwt令牌解析、鉴权相关操作。
19.1 配置文件
19.1.1 bootstrap.yml
由于我们当前使用的是Nacos作为整个项目的配置中心,所以Spring Boot的大部分配置文件都在Nacos中进行统一配置,我们的项目中只需要按照Spring Boot的要求在resources目录下提供bootstrap.yml配置文件即可,文件内容如下:
pinda: # docker部署时,需要指定, 表示运行该服务的宿主机IP local-ip: ${LOCAL_IP:${spring.cloud.client.ip-address}} nacos: ip: ${NACOS_IP:@pom.nacos.ip@} port: ${NACOS_PORT:@pom.nacos.port@} namespace: ${NACOS_ID:@pom.nacos.namespace@} spring: main: allow-bean-definition-overriding: true application: name: @project.artifactId@ #pd-gateway profiles: active: @pom.profile.name@ #dev cloud: nacos: config: server-addr: ${pinda.nacos.ip}:${pinda.nacos.port} file-extension: yml namespace: ${pinda.nacos.namespace} shared-dataids: common.yml,redis.yml,mysql.yml refreshable-dataids: common.yml enabled: true discovery: server-addr: ${pinda.nacos.ip}:${pinda.nacos.port} namespace: ${pinda.nacos.namespace} metadata: management.context-path: ${server.servlet.context-path:}${spring.mvc.servlet.path:}${management.endpoints.web.base-path:} #http://localhost:8760/api/gate/actuator- 1
- 2
- 3
- 4
- 5
- 6
- 7
- 8
- 9
- 10
- 11
- 12
- 13
- 14
- 15
- 16
- 17
- 18
- 19
- 20
- 21
- 22
- 23
- 24
- 25
- 26
- 27
- 28
- 29
- 30
19.1.2 logback-spring.xml
由于pd-gateway已经添加了pd-tools-log模块的依赖,所以可以在项目中使用logback记录日志信息。在resources目录下提供logback-spring.xml配置文件,Spring Boot默认就可以加载到,文件内容如下:
<configuration> <include resource="com/itheima/pinda/log/logback/pinda-defaults.xml"/> <springProfile name="test,docker,prod"> <logger name="com.itheima.pinda.zuul" additivity="true" level="INFO"> <appender-ref ref="ASYNC_CONTROLLER_APPENDER"/> logger> springProfile> <springProfile name="dev"> <logger name="com.itheima.pinda.zuul" additivity="true" level="INFO"> <appender-ref ref="CONTROLLER_APPENDER"/> logger> springProfile> configuration>- 1
- 2
- 3
- 4
- 5
- 6
- 7
- 8
- 9
- 10
- 11
- 12
- 13
- 14
- 15
- 16
- 17
- 18
19.1.3 j2cache配置文件
在当前pd-gateway项目中会使用到j2cache来操作缓存,在Nacos配置中心的redis.yml中已经配置了j2cache的相关配置:
j2cache: # config-location: /j2cache.properties open-spring-cache: true cache-clean-mode: passive allow-null-values: true redis-client: lettuce l2-cache-open: true # l2-cache-open: false # 关闭二级缓存 broadcast: net.oschina.j2cache.cache.support.redis.SpringRedisPubSubPolicy # broadcast: jgroups # 关闭二级缓存 L1: provider_class: caffeine L2: provider_class: net.oschina.j2cache.cache.support.redis.SpringRedisProvider config_section: lettuce sync_ttl_to_redis: true default_cache_null_object: false serialization: fst caffeine: properties: /j2cache/caffeine.properties # 这个配置文件需要放在项目中 lettuce: mode: single namespace: storage: generic channel: j2cache scheme: redis hosts: ${pinda.redis.ip}:${pinda.redis.port} password: ${pinda.redis.password} database: ${pinda.redis.database} sentinelMasterId: maxTotal: 100 maxIdle: 10 minIdle: 10 timeout: 10000- 1
- 2
- 3
- 4
- 5
- 6
- 7
- 8
- 9
- 10
- 11
- 12
- 13
- 14
- 15
- 16
- 17
- 18
- 19
- 20
- 21
- 22
- 23
- 24
- 25
- 26
- 27
- 28
- 29
- 30
- 31
- 32
- 33
- 34
通过上面的配置可以看到,还需要在项目中提供/j2cache/caffeine.properties,文件内容如下:
######################################### # Caffeine configuration # \u6682\u65F6\u6CA1\u7528 # [name] = size, xxxx[s|m|h|d] ######################################### default=2000, 2h resource=2000, 1h- 1
- 2
- 3
- 4
- 5
- 6
- 7
19.1.4 密钥文件
JWT签名算法中,一般有两个选择:HS256和RS256。 HS256 (带有 SHA-256 的 HMAC )是一种对称加密算法, 双方之间仅共享一个密钥。由于使用相同的密钥生成签名和验证签名, 因此必须注意确保密钥不被泄密。 RS256 (采用SHA-256 的 RSA 签名) 是一种非对称加密算法, 它使用公共/私钥对: JWT的提供方采用私钥生成签名, JWT 的使用方获取公钥以验证签名。- 1
- 2
- 3
- 4
- 5
本项目中使用RS256非对称加密算法进行签名,这就需要使用RSA生成一对公钥和私钥。在授课资料中已经提供了一对公钥和私钥,其中pub.key为公钥,pri.key为私钥。
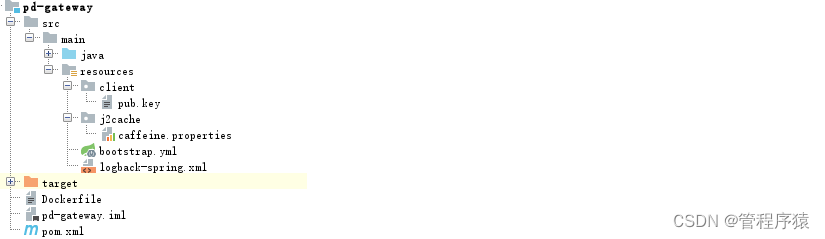
前面我们已经提到,在当前网关服务中我们需要对客户端请求中携带的jwt token进行解析,只需要公钥就可以。将授课资料中的pub.key文件复制到pd-gateway项目的resources/client下。
19.2 启动类
package com.itheima.pinda; import com.itheima.pinda.auth.client.EnableAuthClient; import org.springframework.boot.SpringApplication; import org.springframework.boot.autoconfigure.SpringBootApplication; import org.springframework.cloud.client.discovery.EnableDiscoveryClient; import org.springframework.cloud.netflix.zuul.EnableZuulProxy; import org.springframework.cloud.openfeign.EnableFeignClients; /** *网关启动类 */ @SpringBootApplication @EnableDiscoveryClient @EnableFeignClients({"com.itheima.pinda"}) @EnableZuulProxy//开启网关代理 @EnableAuthClient//开启授权客户端,开启后就可以使用pd-tools-jwt提供的工具类进行jwt token解析了 public class ZuulServerApplication { public static void main(String[] args) { SpringApplication.run(ZuulServerApplication.class, args); } }- 1
- 2
- 3
- 4
- 5
- 6
- 7
- 8
- 9
- 10
- 11
- 12
- 13
- 14
- 15
- 16
- 17
- 18
- 19
- 20
- 21
19.3 配置类
package com.itheima.pinda.zuul.config; import com.itheima.pinda.common.config.BaseConfig; import org.springframework.context.annotation.Bean; import org.springframework.context.annotation.Configuration; import org.springframework.web.cors.UrlBasedCorsConfigurationSource; import org.springframework.web.filter.CorsFilter; /** * 解决跨域问题 */ @Configuration public class ZuulConfiguration extends BaseConfig { @Bean public CorsFilter corsFilter() { final UrlBasedCorsConfigurationSource source = new UrlBasedCorsConfigurationSource(); final org.springframework.web.cors.CorsConfiguration config = new org.springframework.web.cors.CorsConfiguration(); // 允许cookies跨域 config.setAllowCredentials(true); // #允许向该服务器提交请求的URI,*表示全部允许 config.addAllowedOrigin("*"); // #允许访问的头信息,*表示全部 config.addAllowedHeader("*"); // 预检请求的缓存时间(秒),即在这个时间段里,对于相同的跨域请求不会再预检了 config.setMaxAge(18000L); // 允许提交请求的方法,*表示全部允许 config.addAllowedMethod("OPTIONS"); config.addAllowedMethod("HEAD"); // 允许Get的请求类型 config.addAllowedMethod("GET"); config.addAllowedMethod("PUT"); config.addAllowedMethod("POST"); config.addAllowedMethod("DELETE"); config.addAllowedMethod("PATCH"); source.registerCorsConfiguration("/**", config); return new CorsFilter(source); } }- 1
- 2
- 3
- 4
- 5
- 6
- 7
- 8
- 9
- 10
- 11
- 12
- 13
- 14
- 15
- 16
- 17
- 18
- 19
- 20
- 21
- 22
- 23
- 24
- 25
- 26
- 27
- 28
- 29
- 30
- 31
- 32
- 33
- 34
- 35
- 36
- 37
- 38
- 39
19.4 API接口和熔断器
在网关服务中会通过Feign来调用权限服务获取相关信息,所以需要定义API接口和对应的熔断器类
package com.itheima.pinda.zuul.api; import com.itheima.pinda.authority.dto.auth.ResourceQueryDTO; import com.itheima.pinda.authority.entity.auth.Resource; import com.itheima.pinda.base.R; import org.springframework.cloud.openfeign.FeignClient; import org.springframework.web.bind.annotation.GetMapping; import java.util.List; @FeignClient(name = "${pinda.feign.authority-server:pd-auth-server}", fallback = ResourceApiFallback.class) public interface ResourceApi { //获取所有需要鉴权的资源 @GetMapping("/resource/list") public R<List> list(); //查询当前登录用户拥有的资源权限 @GetMapping("/resource") public R<List<Resource>> visible(ResourceQueryDTO resource); }- 1
- 2
- 3
- 4
- 5
- 6
- 7
- 8
- 9
- 10
- 11
- 12
- 13
- 14
- 15
- 16
- 17
- 18
- 19
- 20
package com.itheima.pinda.zuul.api; import com.itheima.pinda.authority.dto.auth.ResourceQueryDTO; import com.itheima.pinda.authority.entity.auth.Resource; import com.itheima.pinda.base.R; import org.springframework.stereotype.Component; import java.util.List; /** * 资源API熔断 */ @Component public class ResourceApiFallback implements ResourceApi { public R<List> list() { return null; } public R<List<Resource>> visible(ResourceQueryDTO resource) { return null; } }- 1
- 2
- 3
- 4
- 5
- 6
- 7
- 8
- 9
- 10
- 11
- 12
- 13
- 14
- 15
- 16
- 17
- 18
- 19
- 20
19.5 过滤器
在网关服务中我们需要通过过滤器来实现
jwt token解析和鉴权相关处理。19.5.1 BaseFilter
BaseFilter作为基础过滤器,统一抽取一些公共属性和方法。
package com.itheima.pinda.zuul.filter; import javax.servlet.http.HttpServletRequest; import com.itheima.pinda.base.R; import com.itheima.pinda.common.adapter.IgnoreTokenConfig; import com.netflix.zuul.ZuulFilter; import com.netflix.zuul.context.RequestContext; import lombok.extern.slf4j.Slf4j; import org.springframework.beans.factory.annotation.Autowired; import org.springframework.beans.factory.annotation.Value; import org.springframework.cloud.netflix.zuul.filters.RouteLocator; /** * 基础 网关过滤器 */ @Slf4j public abstract class BaseFilter extends ZuulFilter { @Value("${server.servlet.context-path}") protected String zuulPrefix; /** * 判断当前请求uri是否需要忽略 */ protected boolean isIgnoreToken() { HttpServletRequest request = RequestContext.getCurrentContext().getRequest(); String uri = request.getRequestURI(); uri = StrUtil.subSuf(uri, zuulPrefix.length()); uri = StrUtil.subSuf(uri, uri.indexOf("/", 1)); boolean ignoreToken = IgnoreTokenConfig.isIgnoreToken(uri); return ignoreToken; } /** * 网关抛异常 * @param errMsg * @param errCode * @param httpStatusCode */ protected void errorResponse(String errMsg, int errCode, int httpStatusCode) { R tokenError = R.fail(errCode, errMsg); RequestContext ctx = RequestContext.getCurrentContext(); // 返回错误码 ctx.setResponseStatusCode(httpStatusCode); ctx.addZuulResponseHeader( "Content-Type", "application/json;charset=UTF-8"); if (ctx.getResponseBody() == null) { // 返回错误内容 ctx.setResponseBody(tokenError.toString()); // 过滤该请求,不对其进行路由 ctx.setSendZuulResponse(false); } } }- 1
- 2
- 3
- 4
- 5
- 6
- 7
- 8
- 9
- 10
- 11
- 12
- 13
- 14
- 15
- 16
- 17
- 18
- 19
- 20
- 21
- 22
- 23
- 24
- 25
- 26
- 27
- 28
- 29
- 30
- 31
- 32
- 33
- 34
- 35
- 36
- 37
- 38
- 39
- 40
- 41
- 42
- 43
- 44
- 45
- 46
- 47
- 48
- 49
- 50
- 51
- 52
19.5.2 TokenContextFilter
TokenContextFilter过滤器主要作用就是解析请求头中的jwt token并将解析出的用户信息放入zuul的header中供后面的程序使用。
package com.itheima.pinda.zuul.filter; import javax.servlet.http.HttpServletRequest; import com.itheima.pinda.auth.client.properties.AuthClientProperties; import com.itheima.pinda.auth.client.utils.JwtTokenClientUtils; import com.itheima.pinda.auth.utils.JwtUserInfo; import com.itheima.pinda.base.R; import com.itheima.pinda.context.BaseContextConstants; import com.itheima.pinda.exception.BizException; import com.itheima.pinda.utils.StrHelper; import com.netflix.zuul.context.RequestContext; import org.springframework.beans.factory.annotation.Autowired; import org.springframework.cloud.netflix.zuul.filters.support.FilterConstants; import org.springframework.stereotype.Component; import org.springframework.util.StringUtils; import static org.springframework.cloud.netflix.zuul.filters.support.FilterConstants.PRE_TYPE; /** * 解析token中的用户信息 过滤器 */ @Component public class TokenContextFilter extends BaseFilter { @Autowired private AuthClientProperties authClientProperties; @Autowired private JwtTokenClientUtils jwtTokenClientUtils; @Override public String filterType() { // 前置过滤器 return PRE_TYPE; } /** * filterOrder:通过int值来定义过滤器的执行顺序,数字越大,优先级越低 */ @Override public int filterOrder() { /* 一定要在 org.springframework.cloud.netflix.zuul.filters.pre.PreDecorationFilter 过滤器之后执行,因为这个过滤器做了路由,而我们需要这个路由信息来鉴权 这个过滤器会将我们鉴权需要的信息放置在请求上下文中 */ return FilterConstants.PRE_DECORATION_FILTER_ORDER + 1; } /** * 返回一个boolean类型来判断该过滤器是否要执行 */ @Override public boolean shouldFilter() { return true; } @Override public Object run() { // 不进行拦截的地址 if (isIgnoreToken()) { return null; } RequestContext ctx = RequestContext.getCurrentContext(); HttpServletRequest request = ctx.getRequest(); //获取token, 解析,然后将信息放入 header //1, 获取token String userToken = request.getHeader(authClientProperties.getUser().getHeaderName()); //2, 解析token JwtUserInfo userInfo = null; try { userInfo = jwtTokenClientUtils.getUserInfo(userToken); } catch (BizException e) { errorResponse(e.getMessage(), e.getCode(), 200); return null; } catch (Exception e) { errorResponse("解析token出错", R.FAIL_CODE, 200); return null; } //3, 将信息放入header if (userInfo != null) { addHeader(ctx, BaseContextConstants.JWT_KEY_ACCOUNT, userInfo.getAccount()); addHeader(ctx, BaseContextConstants.JWT_KEY_USER_ID, userInfo.getUserId()); addHeader(ctx, BaseContextConstants.JWT_KEY_NAME, userInfo.getName()); addHeader(ctx, BaseContextConstants.JWT_KEY_ORG_ID, userInfo.getOrgId()); addHeader(ctx, BaseContextConstants.JWT_KEY_STATION_ID, userInfo.getStationId()); } return null; } private void addHeader(RequestContext ctx, String name, Object value) { if (StringUtils.isEmpty(value)) { return; } ctx.addZuulRequestHeader(name, StrHelper.encode(value.toString())); } }- 1
- 2
- 3
- 4
- 5
- 6
- 7
- 8
- 9
- 10
- 11
- 12
- 13
- 14
- 15
- 16
- 17
- 18
- 19
- 20
- 21
- 22
- 23
- 24
- 25
- 26
- 27
- 28
- 29
- 30
- 31
- 32
- 33
- 34
- 35
- 36
- 37
- 38
- 39
- 40
- 41
- 42
- 43
- 44
- 45
- 46
- 47
- 48
- 49
- 50
- 51
- 52
- 53
- 54
- 55
- 56
- 57
- 58
- 59
- 60
- 61
- 62
- 63
- 64
- 65
- 66
- 67
- 68
- 69
- 70
- 71
- 72
- 73
- 74
- 75
- 76
- 77
- 78
- 79
- 80
- 81
- 82
- 83
- 84
- 85
- 86
- 87
- 88
- 89
- 90
- 91
- 92
- 93
- 94
- 95
- 96
- 97
- 98
- 99
- 100
- 101
- 102
- 103
- 104
19.5.3 AccessFilter
AccessFilter过滤器主要进行的是鉴权相关处理。具体的处理逻辑如下:
第1步:判断当前请求uri是否需要忽略 第2步:获取当前请求的请求方式和uri,拼接成GET/user/page这种形式,称为权限标识符 第3步:从缓存中获取所有需要进行鉴权的资源(同样是由资源表的method字段值+url字段值拼接成),如果没有获取到则通过Feign调用权限服务获取并放入缓存中 第4步:判断这些资源是否包含当前请求的权限标识符,如果不包含当前请求的权限标识符,则返回未经授权错误提示 第5步:如果包含当前的权限标识符,则从zuul header中取出用户id,根据用户id取出缓存中的用户拥有的权限,如果没有取到则通过Feign调用权限服务获取并放入缓存,判断用户拥有的权限是否包含当前请求的权限标识符 第6步:如果用户拥有的权限包含当前请求的权限标识符则说明当前用户拥有权限,直接放行 第7步:如果用户拥有的权限不包含当前请求的权限标识符则说明当前用户没有权限,返回未经授权错误提示- 1
- 2
- 3
- 4
- 5
- 6
- 7
package com.itheima.pinda.zuul.filter; import cn.hutool.core.util.StrUtil; import com.itheima.pinda.authority.dto.auth.ResourceQueryDTO; import com.itheima.pinda.authority.entity.auth.Resource; import com.itheima.pinda.base.R; import com.itheima.pinda.common.constant.CacheKey; import com.itheima.pinda.context.BaseContextConstants; import com.itheima.pinda.exception.code.ExceptionCode; import com.itheima.pinda.zuul.api.ResourceApi; import com.netflix.zuul.context.RequestContext; import lombok.extern.slf4j.Slf4j; import net.oschina.j2cache.CacheChannel; import net.oschina.j2cache.CacheObject; import org.springframework.beans.factory.annotation.Autowired; import org.springframework.cloud.netflix.zuul.filters.support.FilterConstants; import org.springframework.stereotype.Component; import java.util.List; import java.util.stream.Collectors; import static org.springframework.cloud.netflix.zuul.filters.support.FilterConstants.PRE_TYPE; /** * 权限验证过滤器 */ @Component @Slf4j public class AccessFilter extends BaseFilter { @Autowired private CacheChannel cacheChannel; @Autowired private ResourceApi resourceApi; @Override public String filterType() { return PRE_TYPE; } @Override public int filterOrder() { return FilterConstants.PRE_DECORATION_FILTER_ORDER + 10; } @Override public boolean shouldFilter() { return true; } /** * 验证当前用户是否拥有某个URI的访问权限 */ @Override public Object run() { // 不进行拦截的地址 if (isIgnoreToken()) { return null; } RequestContext requestContext = RequestContext.getCurrentContext(); String requestURI = requestContext.getRequest().getRequestURI(); requestURI = StrUtil.subSuf(requestURI, zuulPrefix.length()); requestURI = StrUtil.subSuf(requestURI, requestURI.indexOf("/", 1)); String method = requestContext.getRequest().getMethod(); String permission = method + requestURI; //从缓存中获取所有需要进行鉴权的资源 CacheObject resourceNeed2AuthObject = cacheChannel.get(CacheKey.RESOURCE, CacheKey.RESOURCE_NEED_TO_CHECK); List<String> resourceNeed2Auth = (List<String>) resourceNeed2AuthObject.getValue(); if(resourceNeed2Auth == null){ resourceNeed2Auth = resourceApi.list().getData(); if(resourceNeed2Auth != null){ cacheChannel.set(CacheKey.RESOURCE, CacheKey.RESOURCE_NEED_TO_CHECK, resourceNeed2Auth); } } if(resourceNeed2Auth != null){ long count = resourceNeed2Auth.stream().filter((String r) -> { return permission.startsWith(r); }).count(); if(count == 0){ //未知请求 errorResponse(ExceptionCode.UNAUTHORIZED.getMsg(), ExceptionCode.UNAUTHORIZED.getCode(), 200); return null; } } String userId = requestContext.getZuulRequestHeaders(). get(BaseContextConstants.JWT_KEY_USER_ID); CacheObject cacheObject = cacheChannel.get(CacheKey.USER_RESOURCE, userId); List<String> userResource = (List<String>) cacheObject.getValue(); // 如果从缓存获取不到当前用户的资源权限,需要查询数据库获取,然后再放入缓存 if(userResource == null){ ResourceQueryDTO resourceQueryDTO = new ResourceQueryDTO(); resourceQueryDTO.setUserId(new Long(userId)); //通过Feign调用服务,查询当前用户拥有的权限 R<List<Resource>> result = resourceApi.visible(resourceQueryDTO); if(result.getData() != null){ List<Resource> userResourceList = result.getData(); userResource = userResourceList.stream().map((Resource r) -> { return r.getMethod() + r.getUrl(); }).collect(Collectors.toList()); cacheChannel.set(CacheKey.USER_RESOURCE,userId,userResource); } } long count = userResource.stream().filter((String r) -> { return permission.startsWith(r); }).count(); if(count > 0){ //有访问权限 return null; }else{ log.warn("用户{}没有访问{}资源的权限",userId,method + requestURI); errorResponse(ExceptionCode.UNAUTHORIZED.getMsg(), ExceptionCode.UNAUTHORIZED.getCode(), 200); } return null; } }- 1
- 2
- 3
- 4
- 5
- 6
- 7
- 8
- 9
- 10
- 11
- 12
- 13
- 14
- 15
- 16
- 17
- 18
- 19
- 20
- 21
- 22
- 23
- 24
- 25
- 26
- 27
- 28
- 29
- 30
- 31
- 32
- 33
- 34
- 35
- 36
- 37
- 38
- 39
- 40
- 41
- 42
- 43
- 44
- 45
- 46
- 47
- 48
- 49
- 50
- 51
- 52
- 53
- 54
- 55
- 56
- 57
- 58
- 59
- 60
- 61
- 62
- 63
- 64
- 65
- 66
- 67
- 68
- 69
- 70
- 71
- 72
- 73
- 74
- 75
- 76
- 77
- 78
- 79
- 80
- 81
- 82
- 83
- 84
- 85
- 86
- 87
- 88
- 89
- 90
- 91
- 92
- 93
- 94
- 95
- 96
- 97
- 98
- 99
- 100
- 101
- 102
- 103
- 104
- 105
- 106
- 107
- 108
- 109
- 110
- 111
- 112
- 113
- 114
- 115
- 116
- 117
- 118
- 119
- 120
- 121
- 122
20. 通用权限系统企业应用指南
20.1 新项目开发
如果是新项目开发,可以在品达通用权限系统的基础上进行相关的业务开发,其实就是将通用权限系统当做开发脚手架在此基础之上快速开始业务开发。
本小节通过一个商品服务的案例来讲解如何基于品达通用权限系统进行新业务的开发。
20.1.1 数据库环境搭建
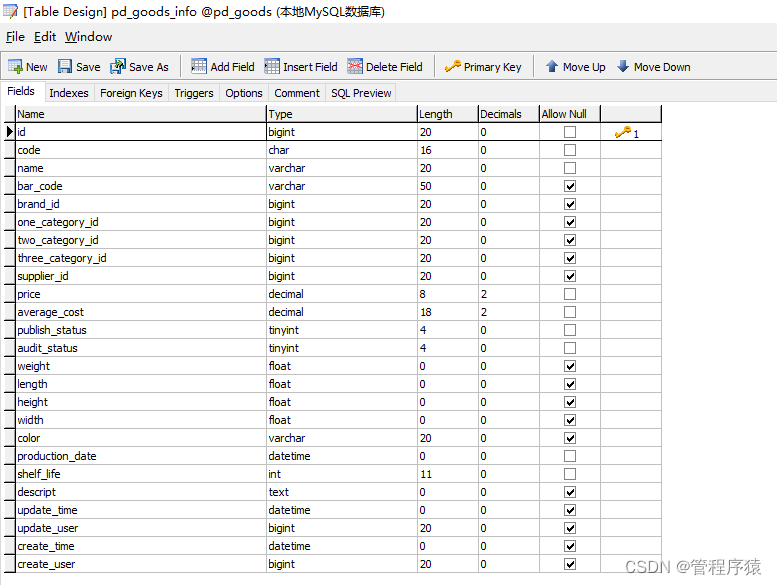
创建数据库pd_goods并创建表pd_goods_info,可以使用资料中提供的建表脚本pd_goods_info.sql进行创建。
20.1.2 后端业务功能开发
20.1.2.1 创建工程
在品达通用权限系统基础上创建商品服务相关模块,如下图:
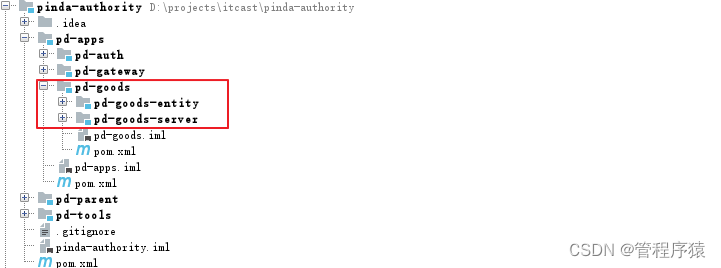
pd-goods #商品服务父工程 ├── pd-goods-entity #实体 ├── pd-goods-server #服务- 1
- 2
- 3
20.1.2.2 pd-goods-entity开发
第一步:配置pom.xml
<project xmlns="http://maven.apache.org/POM/4.0.0" xmlns:xsi="http://www.w3.org/2001/XMLSchema-instance" xsi:schemaLocation="http://maven.apache.org/POM/4.0.0 http://maven.apache.org/xsd/maven-4.0.0.xsd"> <parent> <artifactId>pd-goodsartifactId> <groupId>com.itheimagroupId> <version>1.0-SNAPSHOTversion> parent> <modelVersion>4.0.0modelVersion> <artifactId>pd-goods-entityartifactId> <description>接口服务实体模块description> <dependencies> <dependency> <groupId>com.itheimagroupId> <artifactId>pd-tools-commonartifactId> dependency> <dependency> <groupId>io.springfoxgroupId> <artifactId>springfox-coreartifactId> dependency> <dependency> <groupId>com.baomidougroupId> <artifactId>mybatis-plusartifactId> dependency> dependencies> project>- 1
- 2
- 3
- 4
- 5
- 6
- 7
- 8
- 9
- 10
- 11
- 12
- 13
- 14
- 15
- 16
- 17
- 18
- 19
- 20
- 21
- 22
- 23
- 24
- 25
- 26
- 27
- 28
第二步:创建商品实体类
package com.itheima.pinda.goods.entity; import com.baomidou.mybatisplus.annotation.TableName; import com.itheima.pinda.base.entity.Entity; import lombok.*; import lombok.experimental.Accessors; import java.math.BigDecimal; import java.time.LocalDateTime; @Data @NoArgsConstructor @AllArgsConstructor @ToString(callSuper = true) @EqualsAndHashCode(callSuper = true) @Accessors(chain = true) @TableName("pd_goods_info") public class GoodsInfo extends Entity<Long> { private static final long serialVersionUID = 1L; /** * 商品编码 */ private String code; /** * 商品名称 */ private String name; /** * 国条码 */ private String barCode; /** * 品牌表id */ private Integer brandId; /** * 一级分类id */ private Integer oneCategoryId; /** * 二级分类id */ private Integer twoCategoryId; /** * 三级分类id */ private Integer threeCategoryId; /** * 商品的供应商id */ private Integer supplierId; /** * 商品售价价格 */ private BigDecimal price; /** * 商品加权平均成本 */ private BigDecimal averageCost; /** * 上下架状态:0下架,1上架 */ private boolean publishStatus; /** * 审核状态: 0未审核,1已审核 */ private boolean auditStatus; /** * 商品重量 */ private Float weight; /** * 商品长度 */ private Float length; /** * 商品重量 */ private Float height; /** * 商品宽度 */ private Float width; /** * 颜色 */ private String color; /** * 生产日期 */ private LocalDateTime productionDate; /** * 商品有效期 */ private Integer shelfLife; /** * 商品描述 */ private String descript; }- 1
- 2
- 3
- 4
- 5
- 6
- 7
- 8
- 9
- 10
- 11
- 12
- 13
- 14
- 15
- 16
- 17
- 18
- 19
- 20
- 21
- 22
- 23
- 24
- 25
- 26
- 27
- 28
- 29
- 30
- 31
- 32
- 33
- 34
- 35
- 36
- 37
- 38
- 39
- 40
- 41
- 42
- 43
- 44
- 45
- 46
- 47
- 48
- 49
- 50
- 51
- 52
- 53
- 54
- 55
- 56
- 57
- 58
- 59
- 60
- 61
- 62
- 63
- 64
- 65
- 66
- 67
- 68
- 69
- 70
- 71
- 72
- 73
- 74
- 75
- 76
- 77
- 78
- 79
- 80
- 81
- 82
- 83
- 84
- 85
- 86
- 87
- 88
- 89
- 90
- 91
- 92
- 93
- 94
- 95
- 96
- 97
- 98
- 99
- 100
- 101
- 102
- 103
- 104
- 105
- 106
- 107
- 108
- 109
- 110
- 111
- 112
- 113
- 114
- 115
- 116
- 117
- 118
- 119
- 120
- 121
第三步:创建商品操作对应的多个DTO类
package com.itheima.pinda.goods.dto; import com.itheima.pinda.goods.entity.GoodsInfo; import lombok.*; import lombok.experimental.Accessors; import java.time.LocalDateTime; @Data @NoArgsConstructor @AllArgsConstructor @ToString(callSuper = true) @EqualsAndHashCode(callSuper = true) @Accessors(chain = true) public class GoodsInfoPageDTO extends GoodsInfo { private LocalDateTime startCreateTime; private LocalDateTime endCreateTime; }- 1
- 2
- 3
- 4
- 5
- 6
- 7
- 8
- 9
- 10
- 11
- 12
- 13
- 14
- 15
- 16
- 17
package com.itheima.pinda.goods.dto; import com.itheima.pinda.goods.entity.GoodsInfo; public class GoodsInfoSaveDTO extends GoodsInfo { }- 1
- 2
- 3
- 4
- 5
- 6
package com.itheima.pinda.goods.dto; import com.itheima.pinda.goods.entity.GoodsInfo; public class GoodsInfoUpdateDTO extends GoodsInfo { }- 1
- 2
- 3
- 4
- 5
- 6
20.1.2.3 pd-goods-server开发
第一步:配置pom.xml文件
<project xmlns="http://maven.apache.org/POM/4.0.0" xmlns:xsi="http://www.w3.org/2001/XMLSchema-instance" xsi:schemaLocation="http://maven.apache.org/POM/4.0.0 http://maven.apache.org/xsd/maven-4.0.0.xsd"> <parent> <artifactId>pd-goodsartifactId> <groupId>com.itheimagroupId> <version>1.0-SNAPSHOTversion> parent> <modelVersion>4.0.0modelVersion> <artifactId>pd-goods-serverartifactId> <description>接口服务启动模块description> <dependencies> <dependency> <groupId>com.itheimagroupId> <artifactId>pd-tools-logartifactId> dependency> <dependency> <groupId>com.itheimagroupId> <artifactId>pd-tools-swagger2artifactId> dependency> <dependency> <groupId>com.itheimagroupId> <artifactId>pd-tools-validatorartifactId> dependency> <dependency> <groupId>com.itheimagroupId> <artifactId>pd-tools-xssartifactId> dependency> <dependency> <groupId>com.alibaba.cloudgroupId> <artifactId>spring-cloud-starter-alibaba-nacos-discoveryartifactId> <exclusions> <exclusion> <artifactId>fastjsonartifactId> <groupId>com.alibabagroupId> exclusion> <exclusion> <groupId>com.google.guavagroupId> <artifactId>guavaartifactId> exclusion> exclusions> dependency> <dependency> <groupId>org.springframework.cloudgroupId> <artifactId>spring-cloud-starter-netflix-hystrixartifactId> <exclusions> <exclusion> <groupId>com.google.guavagroupId> <artifactId>guavaartifactId> exclusion> exclusions> dependency> <dependency> <groupId>org.springframework.cloudgroupId> <artifactId>spring-cloud-starter-openfeignartifactId> <exclusions> <exclusion> <groupId>com.google.guavagroupId> <artifactId>guavaartifactId> exclusion> exclusions> dependency> <dependency> <groupId>org.ow2.asmgroupId> <artifactId>asmartifactId> <version>${asm.version}version> dependency> <dependency> <groupId>org.springframework.bootgroupId> <artifactId>spring-boot-starter-webartifactId> <exclusions> <exclusion> <groupId>org.apache.tomcat.embedgroupId> <artifactId>tomcat-embed-websocketartifactId> exclusion> <exclusion> <groupId>org.springframework.bootgroupId> <artifactId>spring-boot-starter-tomcatartifactId> exclusion> exclusions> dependency> <dependency> <groupId>org.springframework.bootgroupId> <artifactId>spring-boot-starter-undertowartifactId> dependency> <dependency> <groupId>org.springframework.bootgroupId> <artifactId>spring-boot-starter-aopartifactId> dependency> <dependency> <groupId>org.springframework.bootgroupId> <artifactId>spring-boot-starter-actuatorartifactId> dependency> <dependency> <groupId>org.springframework.bootgroupId> <artifactId>spring-boot-starter-jsonartifactId> dependency> <dependency> <groupId>org.springframework.bootgroupId> <artifactId>spring-boot-starter-testartifactId> <scope>testscope> dependency> <dependency> <groupId>com.itheimagroupId> <artifactId>pd-tools-databasesartifactId> dependency> <dependency> <groupId>com.itheimagroupId> <artifactId>pd-tools-dozerartifactId> dependency> <dependency> <groupId>org.springframework.cloudgroupId> <artifactId>spring-cloud-contextartifactId> dependency> <dependency> <groupId>com.baomidougroupId> <artifactId>mybatis-plus-boot-starterartifactId> dependency> <dependency> <groupId>org.springframework.bootgroupId> <artifactId>spring-boot-configuration-processorartifactId> <optional>trueoptional> <scope>compilescope> dependency> <dependency> <groupId>com.itheimagroupId> <artifactId>pd-goods-entityartifactId> <version>1.0-SNAPSHOTversion> dependency> dependencies> <build> <resources> <resource> <directory>src/main/resourcesdirectory> <filtering>truefiltering> resource> resources> <plugins> <plugin> <groupId>org.springframework.bootgroupId> <artifactId>spring-boot-maven-pluginartifactId> <executions> <execution> <goals> <goal>repackagegoal> goals> execution> executions> plugin> plugins> build> project>- 1
- 2
- 3
- 4
- 5
- 6
- 7
- 8
- 9
- 10
- 11
- 12
- 13
- 14
- 15
- 16
- 17
- 18
- 19
- 20
- 21
- 22
- 23
- 24
- 25
- 26
- 27
- 28
- 29
- 30
- 31
- 32
- 33
- 34
- 35
- 36
- 37
- 38
- 39
- 40
- 41
- 42
- 43
- 44
- 45
- 46
- 47
- 48
- 49
- 50
- 51
- 52
- 53
- 54
- 55
- 56
- 57
- 58
- 59
- 60
- 61
- 62
- 63
- 64
- 65
- 66
- 67
- 68
- 69
- 70
- 71
- 72
- 73
- 74
- 75
- 76
- 77
- 78
- 79
- 80
- 81
- 82
- 83
- 84
- 85
- 86
- 87
- 88
- 89
- 90
- 91
- 92
- 93
- 94
- 95
- 96
- 97
- 98
- 99
- 100
- 101
- 102
- 103
- 104
- 105
- 106
- 107
- 108
- 109
- 110
- 111
- 112
- 113
- 114
- 115
- 116
- 117
- 118
- 119
- 120
- 121
- 122
- 123
- 124
- 125
- 126
- 127
- 128
- 129
- 130
- 131
- 132
- 133
- 134
- 135
- 136
- 137
- 138
- 139
- 140
- 141
- 142
- 143
- 144
- 145
- 146
- 147
- 148
- 149
- 150
- 151
- 152
- 153
- 154
第二步:导入资料中提供的配置文件
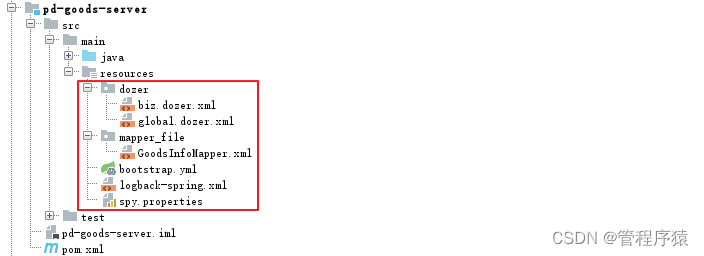
第三步:在配置中心Nacos中创建pd-goods-server.yml
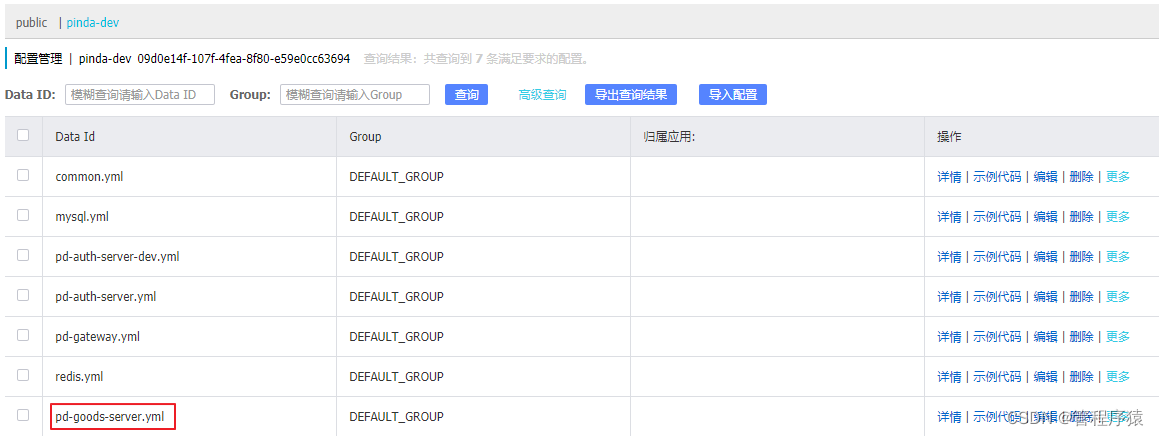
配置文件内容如下:
# 在这里配置 权限服务 所有环境都能使用的配置 pinda: mysql: database: pd_goods swagger: enabled: true docket: core: title: 核心模块 base-package: com.itheima.pinda.goods.controller server: port: 8767- 1
- 2
- 3
- 4
- 5
- 6
- 7
- 8
- 9
- 10
- 11
- 12
- 13
第四步:编写启动类
package com.itheima.pinda; import com.itheima.pinda.validator.config.EnableFormValidator; import lombok.extern.slf4j.Slf4j; import org.springframework.boot.SpringApplication; import org.springframework.boot.autoconfigure.SpringBootApplication; import org.springframework.cloud.client.discovery.EnableDiscoveryClient; import org.springframework.cloud.netflix.hystrix.EnableHystrix; import org.springframework.cloud.openfeign.EnableFeignClients; import org.springframework.context.ConfigurableApplicationContext; import org.springframework.core.env.Environment; import org.springframework.transaction.annotation.EnableTransactionManagement; import java.net.InetAddress; import java.net.UnknownHostException; @SpringBootApplication @EnableDiscoveryClient @EnableHystrix @EnableFeignClients(value = { "com.itheima.pinda", }) @EnableTransactionManagement @Slf4j @EnableFormValidator public class GoodsServerApplication { public static void main(String[] args) throws UnknownHostException { ConfigurableApplicationContext application = SpringApplication.run(GoodsServerApplication.class, args); Environment env = application.getEnvironment(); log.info("\n----------------------------------------------------------\n\t" + "应用 '{}' 运行成功! 访问连接:\n\t" + "Swagger文档: \t\thttp://{}:{}/doc.html\n\t" + "----------------------------------------------------------", env.getProperty("spring.application.name"), InetAddress.getLocalHost().getHostAddress(), env.getProperty("server.port")); } }- 1
- 2
- 3
- 4
- 5
- 6
- 7
- 8
- 9
- 10
- 11
- 12
- 13
- 14
- 15
- 16
- 17
- 18
- 19
- 20
- 21
- 22
- 23
- 24
- 25
- 26
- 27
- 28
- 29
- 30
- 31
- 32
- 33
- 34
- 35
- 36
- 37
- 38
第五步:导入资料中提供的配置类
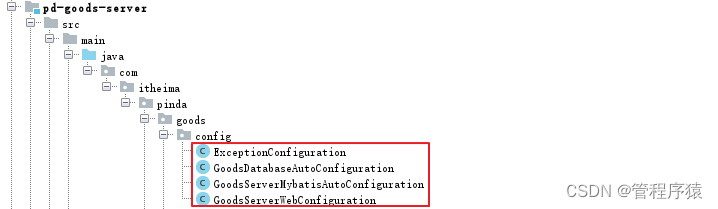
第六步:创建Mapper接口
package com.itheima.pinda.goods.dao; import com.baomidou.mybatisplus.core.mapper.BaseMapper; import com.itheima.pinda.goods.entity.GoodsInfo; import org.springframework.stereotype.Repository; /** * Mapper 接口 */ @Repository public interface GoodsInfoMapper extends BaseMapper<GoodsInfo> { }- 1
- 2
- 3
- 4
- 5
- 6
- 7
- 8
- 9
- 10
- 11
- 12
第七步:创建Service接口和实现类
package com.itheima.pinda.goods.service; import com.baomidou.mybatisplus.extension.service.IService; import com.itheima.pinda.goods.entity.GoodsInfo; public interface GoodsInfoService extends IService<GoodsInfo> { }- 1
- 2
- 3
- 4
- 5
- 6
- 7
package com.itheima.pinda.goods.service.impl; import com.baomidou.mybatisplus.extension.service.impl.ServiceImpl; import com.itheima.pinda.goods.dao.GoodsInfoMapper; import com.itheima.pinda.goods.entity.GoodsInfo; import com.itheima.pinda.goods.service.GoodsInfoService; import lombok.extern.slf4j.Slf4j; import org.springframework.stereotype.Service; @Slf4j @Service public class GoodsInfoServiceImpl extends ServiceImpl<GoodsInfoMapper, GoodsInfo> implements GoodsInfoService { }- 1
- 2
- 3
- 4
- 5
- 6
- 7
- 8
- 9
- 10
- 11
- 12
- 13
第八步:创建Controller
package com.itheima.pinda.goods.controller; import com.baomidou.mybatisplus.core.metadata.IPage; import com.baomidou.mybatisplus.extension.plugins.pagination.Page; import com.itheima.pinda.base.BaseController; import com.itheima.pinda.base.R; import com.itheima.pinda.base.entity.SuperEntity; import com.itheima.pinda.database.mybatis.conditions.Wraps; import com.itheima.pinda.database.mybatis.conditions.query.LbqWrapper; import com.itheima.pinda.dozer.DozerUtils; import com.itheima.pinda.goods.dto.GoodsInfoPageDTO; import com.itheima.pinda.goods.dto.GoodsInfoSaveDTO; import com.itheima.pinda.goods.dto.GoodsInfoUpdateDTO; import com.itheima.pinda.goods.entity.GoodsInfo; import com.itheima.pinda.goods.service.GoodsInfoService; import com.itheima.pinda.log.annotation.SysLog; import io.swagger.annotations.Api; import io.swagger.annotations.ApiImplicitParam; import io.swagger.annotations.ApiImplicitParams; import io.swagger.annotations.ApiOperation; import lombok.extern.slf4j.Slf4j; import org.springframework.beans.factory.annotation.Autowired; import org.springframework.validation.annotation.Validated; import org.springframework.web.bind.annotation.*; import java.util.List; @Slf4j @Validated @RestController @RequestMapping("/goodsInfo") @Api(value = "GoodsInfo", tags = "商品信息") public class GoodsInfoController extends BaseController { @Autowired private DozerUtils dozer; @Autowired private GoodsInfoService goodsInfoService; /** * 分页查询商品信息 * * @param data 分页查询对象 * @return 查询结果 */ @ApiOperation(value = "分页查询商品信息", notes = "分页查询商品信息") @ApiImplicitParams({ @ApiImplicitParam(name = "current", value = "当前页", dataType = "long", paramType = "query", defaultValue = "1"), @ApiImplicitParam(name = "size", value = "每页显示几条", dataType = "long", paramType = "query", defaultValue = "10"), }) @GetMapping("/page") @SysLog("分页查询商品信息") public R<IPage<GoodsInfo>> page(GoodsInfoPageDTO data) { Page<GoodsInfo> page = getPage(); LbqWrapper<GoodsInfo> wrapper = Wraps.lbQ(); wrapper.like(GoodsInfo::getName, data.getName()) .like(GoodsInfo::getCode, data.getCode()) .eq(GoodsInfo::getBarCode, data.getBarCode()) .geHeader(GoodsInfo::getCreateTime, data.getStartCreateTime()) .leFooter(GoodsInfo::getCreateTime, data.getEndCreateTime()) .orderByDesc(GoodsInfo::getCreateTime); goodsInfoService.page(page, wrapper); return success(page); } @ApiOperation(value = "查询商品信息", notes = "查询商品信息") @GetMapping("/list") @SysLog("查询商品信息") public R<List<GoodsInfo>> list(GoodsInfoPageDTO data) { LbqWrapper<GoodsInfo> wrapper = Wraps.lbQ(); wrapper.like(GoodsInfo::getName, data.getName()) .like(GoodsInfo::getCode, data.getCode()) .eq(GoodsInfo::getBarCode, data.getBarCode()) .geHeader(GoodsInfo::getCreateTime, data.getStartCreateTime()) .leFooter(GoodsInfo::getCreateTime, data.getEndCreateTime()) .orderByDesc(GoodsInfo::getCreateTime); return success(goodsInfoService.list(wrapper)); } /** * 查询商品信息 * * @param id 主键id * @return 查询结果 */ @ApiOperation(value = "查询商品信息", notes = "查询商品信息") @GetMapping("/{id}") @SysLog("查询商品信息") public R<GoodsInfo> get(@PathVariable Long id) { return success(goodsInfoService.getById(id)); } /** * 新增商品信息 * * @param data 新增对象 * @return 新增结果 */ @ApiOperation(value = "新增商品信息", notes = "新增商品信息不为空的字段") @PostMapping @SysLog("新增商品信息") public R<GoodsInfo> save(@RequestBody @Validated GoodsInfoSaveDTO data) { GoodsInfo GoodsInfo = dozer.map(data, GoodsInfo.class); goodsInfoService.save(GoodsInfo); return success(GoodsInfo); } /** * 修改商品信息 * * @param data 修改对象 * @return 修改结果 */ @ApiOperation(value = "修改商品信息", notes = "修改商品信息不为空的字段") @PutMapping @SysLog("修改商品信息") public R<GoodsInfo> update(@RequestBody @Validated(SuperEntity.Update.class) GoodsInfoUpdateDTO data) { GoodsInfo GoodsInfo = dozer.map(data, GoodsInfo.class); goodsInfoService.updateById(GoodsInfo); return success(GoodsInfo); } /** * 删除商品信息 * * @param ids 主键id * @return 删除结果 */ @ApiOperation(value = "删除商品信息", notes = "根据id物理删除商品信息") @SysLog("删除商品信息") @DeleteMapping public R<Boolean> delete(@RequestParam("ids[]") List<Long> ids) { goodsInfoService.removeByIds(ids); return success(); } }- 1
- 2
- 3
- 4
- 5
- 6
- 7
- 8
- 9
- 10
- 11
- 12
- 13
- 14
- 15
- 16
- 17
- 18
- 19
- 20
- 21
- 22
- 23
- 24
- 25
- 26
- 27
- 28
- 29
- 30
- 31
- 32
- 33
- 34
- 35
- 36
- 37
- 38
- 39
- 40
- 41
- 42
- 43
- 44
- 45
- 46
- 47
- 48
- 49
- 50
- 51
- 52
- 53
- 54
- 55
- 56
- 57
- 58
- 59
- 60
- 61
- 62
- 63
- 64
- 65
- 66
- 67
- 68
- 69
- 70
- 71
- 72
- 73
- 74
- 75
- 76
- 77
- 78
- 79
- 80
- 81
- 82
- 83
- 84
- 85
- 86
- 87
- 88
- 89
- 90
- 91
- 92
- 93
- 94
- 95
- 96
- 97
- 98
- 99
- 100
- 101
- 102
- 103
- 104
- 105
- 106
- 107
- 108
- 109
- 110
- 111
- 112
- 113
- 114
- 115
- 116
- 117
- 118
- 119
- 120
- 121
- 122
- 123
- 124
- 125
- 126
- 127
- 128
- 129
- 130
- 131
- 132
- 133
- 134
- 135
- 136
- 137
- 138
- 139
20.1.3 配置网关路由规则
在Nacos中的pd-gateway.yml中新增商品服务相关的路由配置,内容如下:
zuul: # debug: # request: true # include-debug-header: true retryable: false servlet-path: / # 默认是/zuul , 上传文件需要加/zuul前缀才不会出现乱码,这个改成/ 即可不加前缀 ignored-services: "*" # 忽略eureka上的所有服务 sensitive-headers: # 一些比较敏感的请求头,不想通过zuul传递过去, 可以通过该属性进行设置 # prefix: /api #为zuul设置一个公共的前缀 # strip-prefix: false #对于代理前缀默认会被移除 故加入false 表示不要移除 routes: # 路由配置方式 authority: # authority是路由名称,可以随便定义,但是path和service-id需要一一对应 path: /authority/** serviceId: pd-auth-server goods: path: /goods/** serviceId: pd-goods-server- 1
- 2
- 3
- 4
- 5
- 6
- 7
- 8
- 9
- 10
- 11
- 12
- 13
- 14
- 15
- 16
- 17
20.1.4 前端开发
可以将pinda-authority-ui作为前端开发脚手架,基于此工程开发商品服务相关页面。资料中已经提供了开发完成的前端工程,直接运行即可。
20.1.5 配置菜单和资源权限
启动网关服务、权限服务、商品服务、前端工程,使用管理员账号登录,配置商品服务相关的菜单和对应的资源权限。
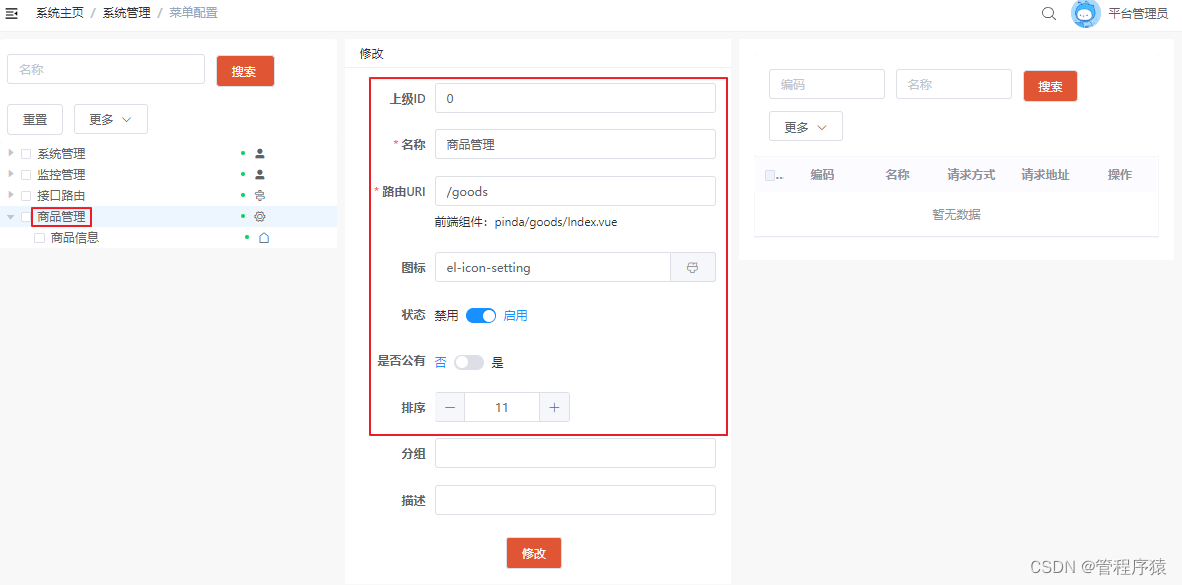
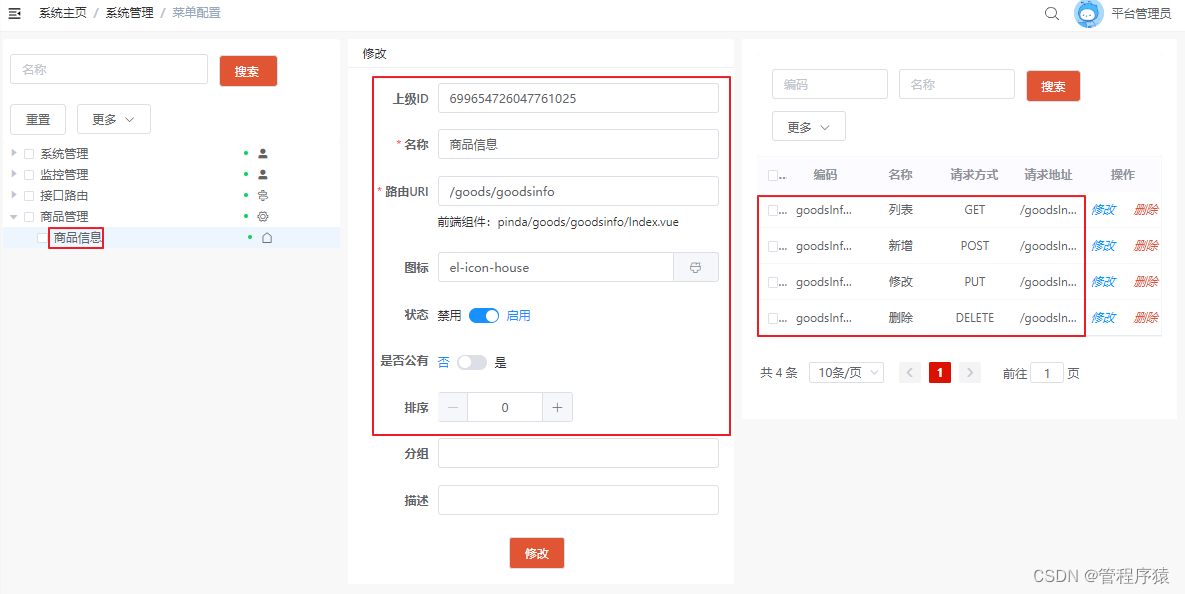
20.1.6 配置角色
启动网关服务和权限服务,使用管理员账号登录。创建新角色并进行配置(菜单权限和资源权限)和授权(为用户分配角色)。
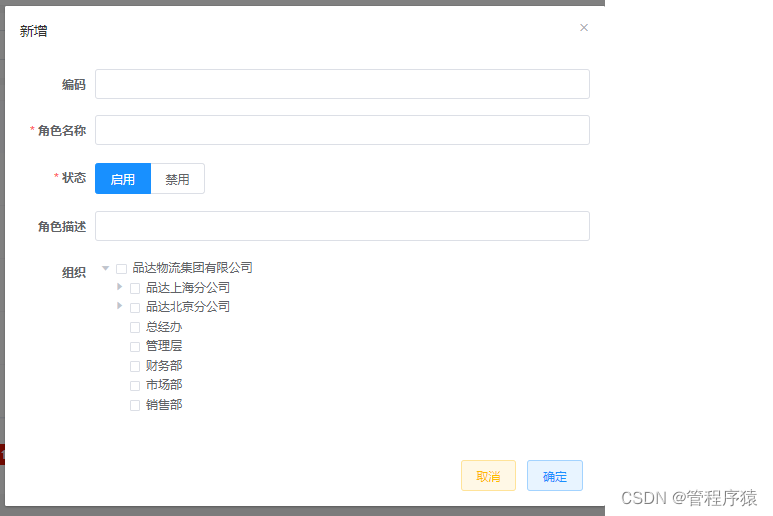
=
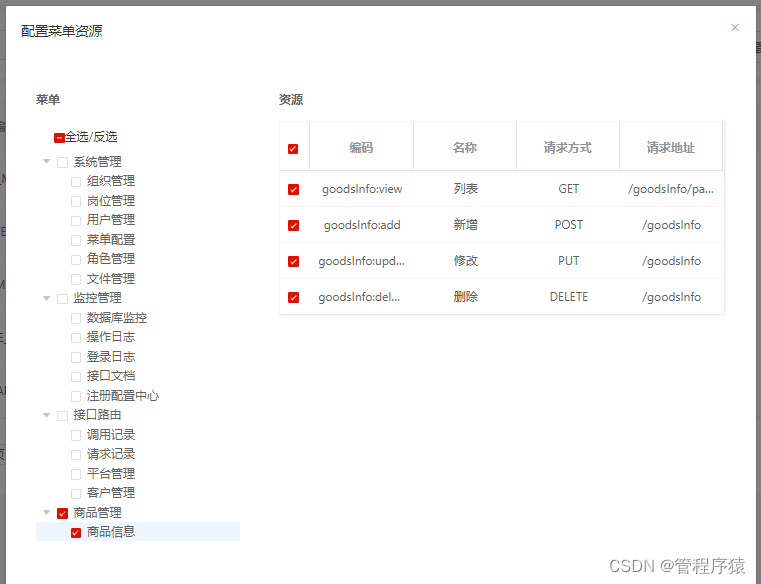
20.2 已有项目集成
本小节通过一个已经完成开发的TMS(品达物流)项目来展示如何进行已有项目集成的过程。
20.2.1 TMS调整
20.2.1.1 页面菜单
对于已经完成相关业务开发的项目,可以将其前端系统的页面通过iframe的形式内嵌到通用权限系统的前端页面中,这就需要对其前端系统的页面进行相应的修改。因为原来的TMS系统前端页面的左侧菜单和导航菜单都在自己页面中展示,现在需要将这些菜单配置到通用权限系统中,通过权限系统的前端系统来展示。
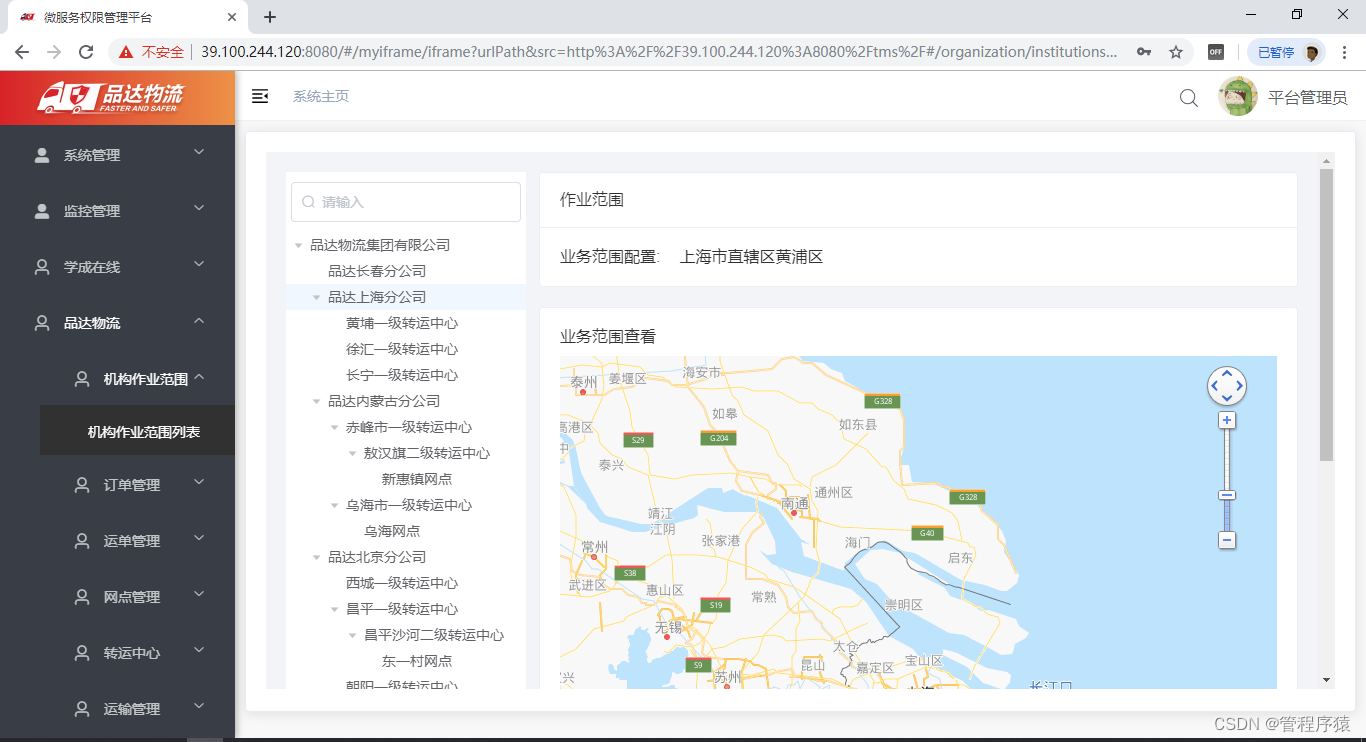
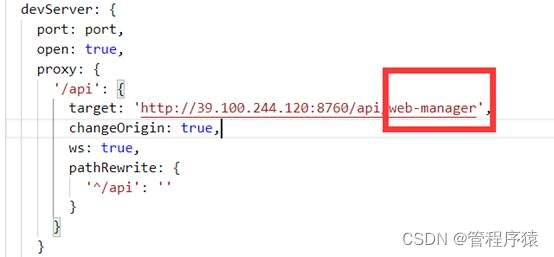
20.2.2 网关路由配置
配置通用权限系统的网关路由规则,将针对TMS的请求转发到TMS相关服务:
zuul: retryable: false servlet-path: / ignored-services: "*" # 忽略eureka上的所有服务 sensitive-headers: # 一些比较敏感的请求头,不想通过zuul传递过去, 可以通过该属性进行设置 routes: # 路由配置方式 authority: path: /authority/** serviceId: pd-auth-server pay: path: /pay/** serviceId: pd-ofpay-server web-manager: path: /web-manager/** serviceId: pd-web-manager web-xczx: path: /xczx/api/** url: http://xc-main-java.itheima.net:7291/api/- 1
- 2
- 3
- 4
- 5
- 6
- 7
- 8
- 9
- 10
- 11
- 12
- 13
- 14
- 15
- 16
- 17
- 18
20.2.3 通用权限系统配置
20.2.3.1 菜单配置
登录通用权限系统,配置TMS项目相应的菜单:
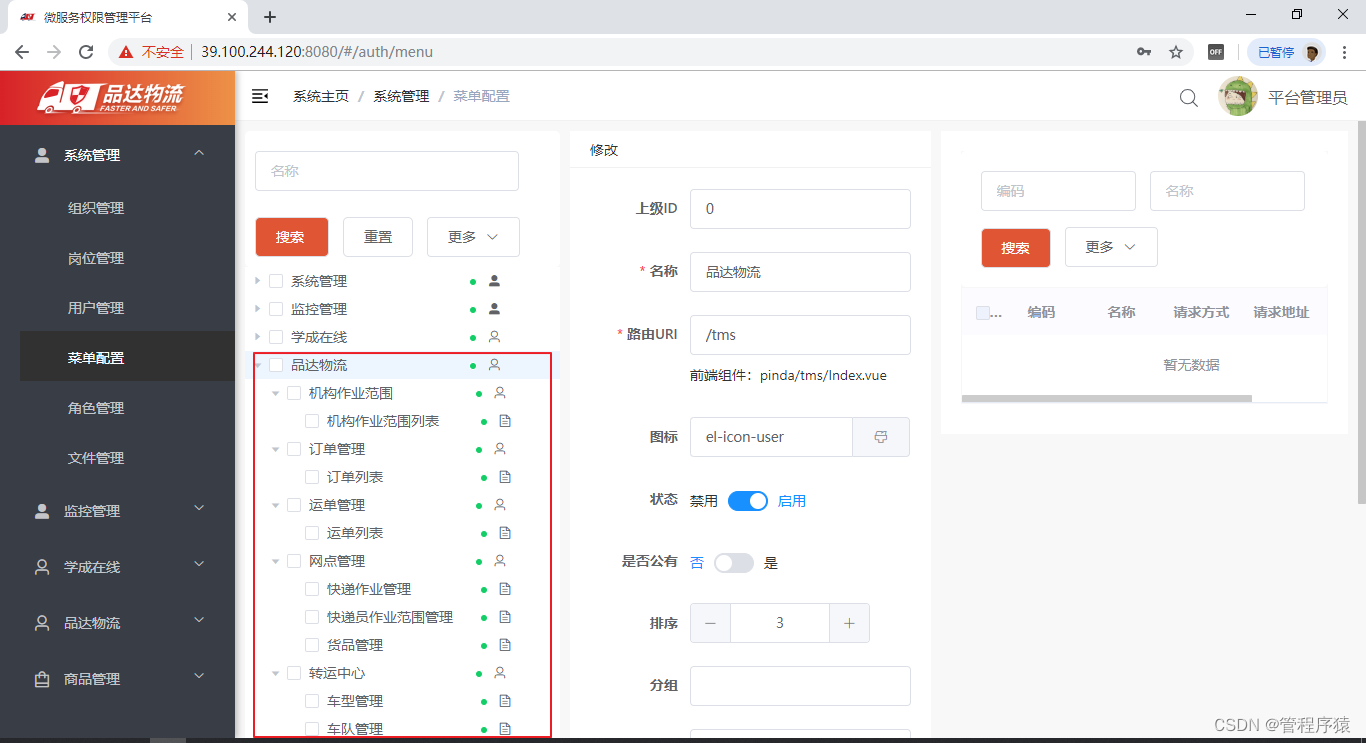
20.2.3.2 资源权限配置
资源权限都是关联到某个菜单下的,所以要配置资源权限需要先选中某个菜单,然后就可以配置相关资源权限了:
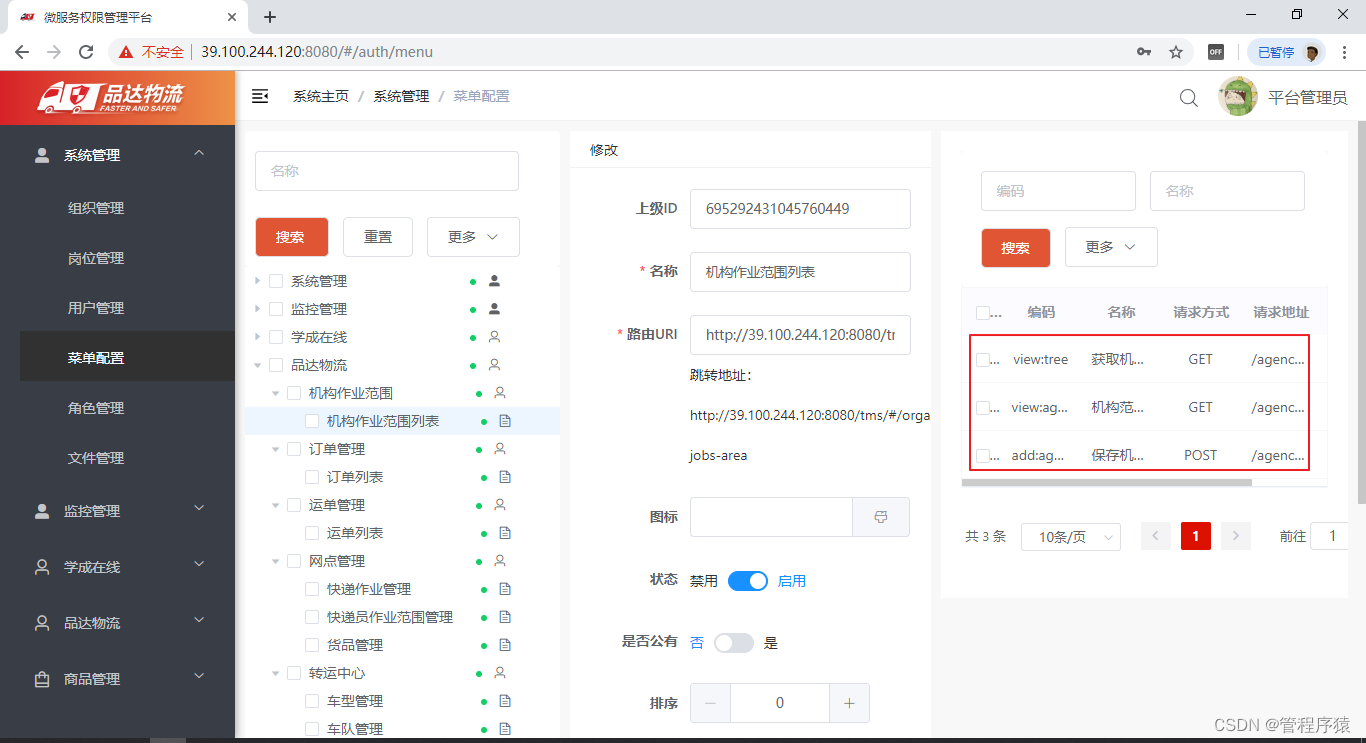
20.2.3.3 角色配置
登录通用权限系统,在角色管理菜单中配置TMS项目中使用到的角色:
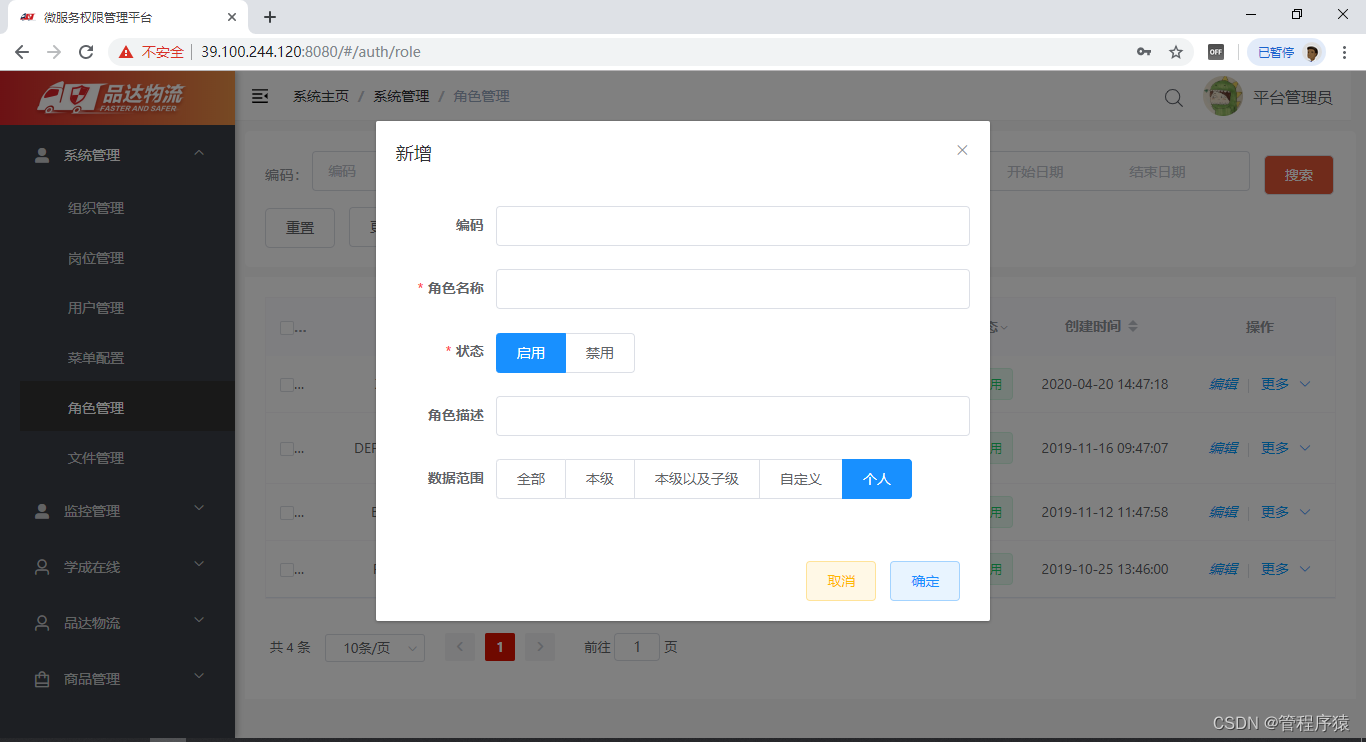
角色创建完成后可以为角色配置菜单权限和资源权限:
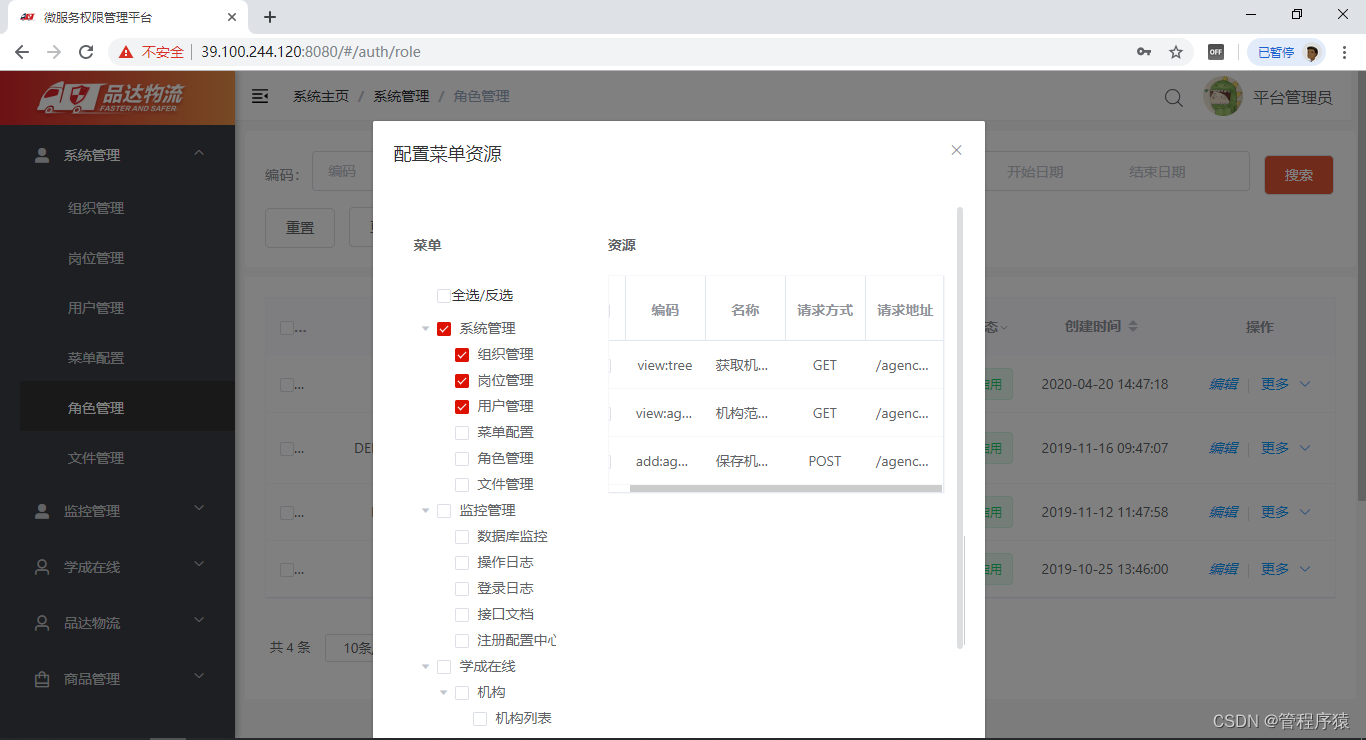
完成角色的菜单权限和资源权限配置后可以将角色授权给用户:
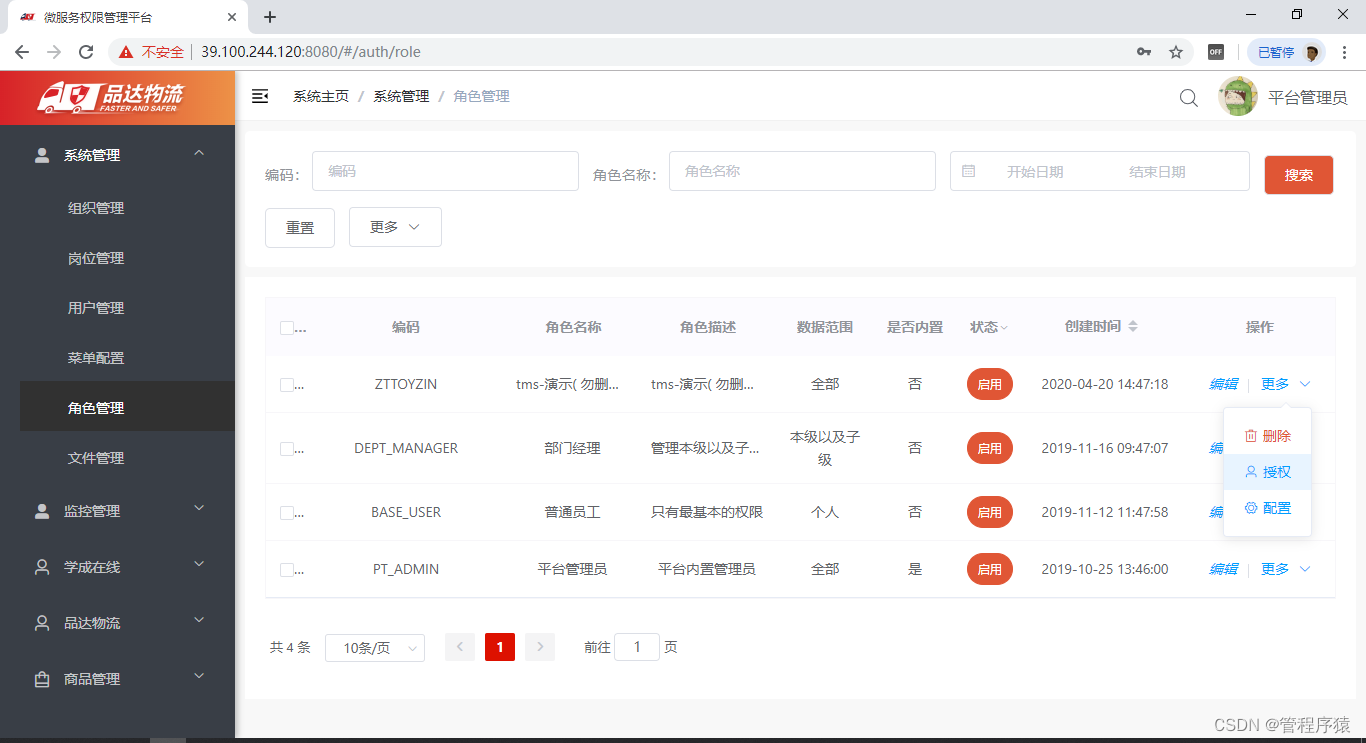
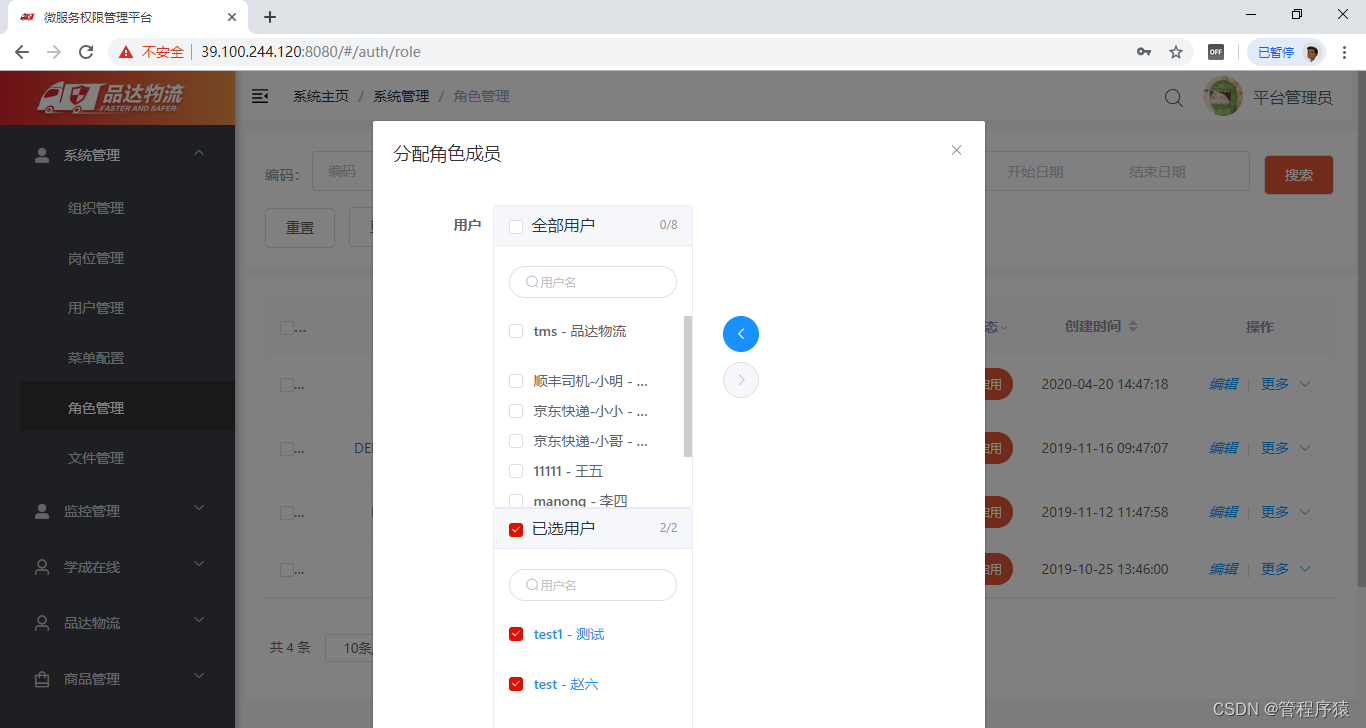
-
相关阅读:
Linux系统编程——进程中vfork函数
MuseScore编译成 移动端的app 02
java计算机毕业设计环巢湖区域旅游网站源码+mysql数据库+系统+lw文档+部署
矿大数据结构实验四 折半查找 二叉搜索树 最短路径 排序
Ace编辑器
Leetcode654 最大二叉树
Direct3D网格(二)
uni-app 5小时快速入门 7 页面配置(上)
《C和指针》笔记28:可变参数和stdarg宏
FutureTask源码阅读
- 原文地址:https://blog.csdn.net/guan1843036360/article/details/127405414

- 最新文章
-
【FHE】我们如何实现同态加密推理(八):SiLU 的密文化——两条路径,和一个 8 字节的开关
SQLcl 中 c/old/new 替换变量为何失效?先定位再替换
不让模型写作文,直接从它脑子里读答案:Jev 决策在 .NET 的两条路线
Halo插件:支持GitHub的图床附件策略
电视投屏界的“一股清流”!SimpleTVCast 6.0.0-beta 抢先体验:无需TV端App,界面大换血!✨
华三VXLAN集中式网关实战指南:Spine多活网关 + 双活接入(M-LAG)
软件更好写之后口碑会更重要
大 O、大 Omega、大 Theta 的区别,O(n) 复杂度是什么意思
Java标签跳转:一个鲜为人知但却很实用的小技巧
多智能体系统论文速读