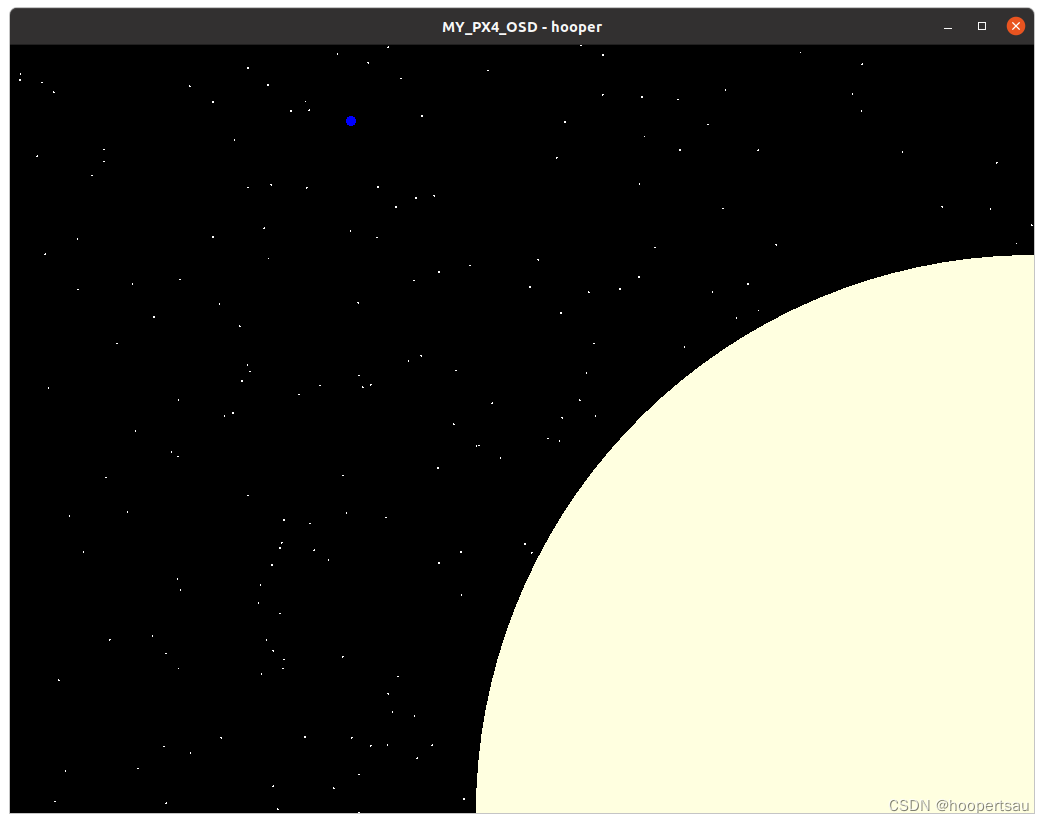
-
OpenHD改造实现廉价高清数字图传(树莓派zero + ubuntu PC )—(三)OpenVG和libshapes在PC上的移植
上一篇文章主要讲的是wifibroadcast的通信相关内容,解决的是数据如何传输和接收的问题。这篇文章主要是这个系列的第三篇文章,主要讲讲怎么将OpenHD的OSD显示到PC上。这里主要用到的底层接口是OpenVG接口,以及libshapes这个库。
OpenHD的地面站是用的树莓派,这两个库在树莓派上都已经有了很成熟的移植了,所以很方面的就可以调用这些接口进行图形绘制,显示出好看的OSD画面。但是在PC上,还是要折腾一下才行的。
一、OSD显示的原理
在OpenHD中,osd是一个单独的程序,目录在wifibroadcast-osd里面。
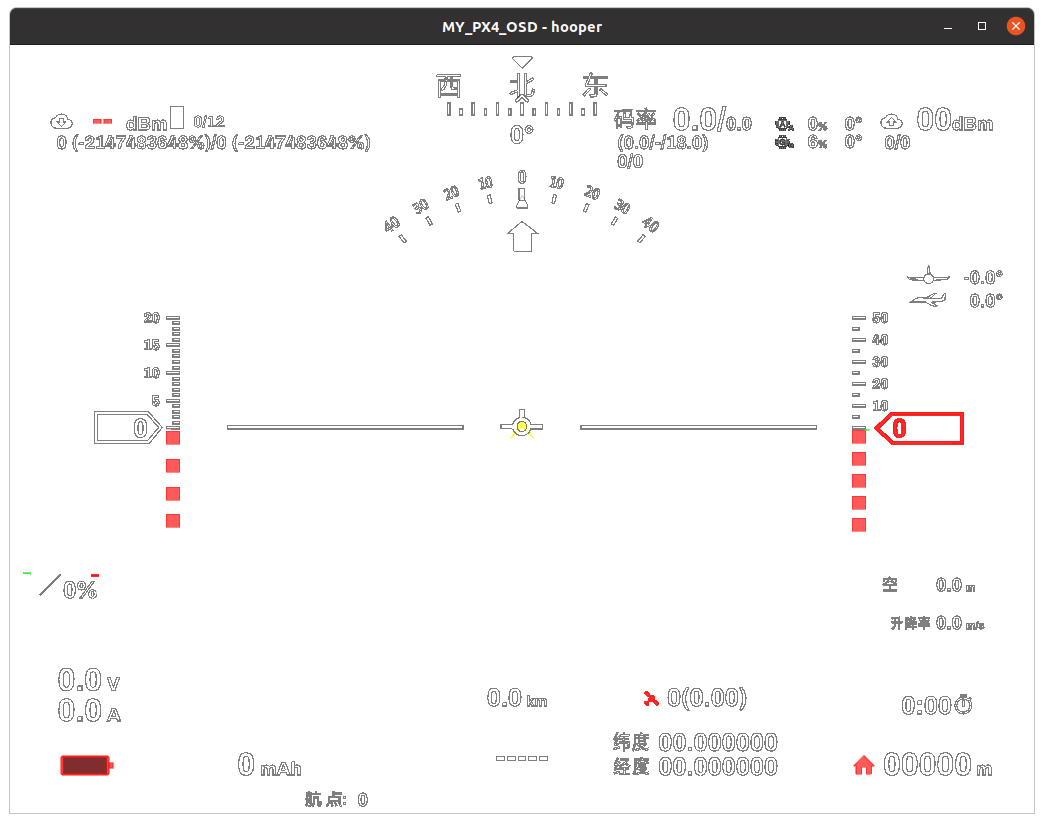
OSD显示主要基于OpenVG库实现矢量绘图,通过接收到的mavlink数据来驱动画面的变化和显示,实时展示飞机的姿态、位置、任务等各类信息。
但是osd程序并非直接i调用这个接口,而是通过一个封装过的库,能够简化图形绘制的复杂程度。这个库我们姑且叫他libshape(因为编译出来的so叫libshape.so),开源代码的地址:GitHub - ajstarks/openvg: Tools for exploring OpenVG。这个库是在树莓派上用的,它底层直接调用了标准的OpenVG接口。
所以要想移植好OSD的显示程序,核心是:
1、找到一个合适OpenVG在PC上的实现
2、将这个叫libshape的库移植到PC上
二、OpenVG在PC上的实现
OpenVG是一个面向嵌入式的2D矢量化图形接口,主要用于在各类嵌入式平台上的适量图绘制。这个本身只是一个接口标准,需要在各平台上由各自去实现,从而满足硬件加速的目的,类似于OpenGL的接口。
OpenHD使用的是树莓派硬件,在树莓派上有现成的实现,可以直接使用。但是在普通的PC平台上,就没有专门的实现了。
1、libbrcmEGL(树莓派的OpenVG实现)
OpenHD方案中采用的是树莓派进行显示,树莓派自身就带了一个OpenVG API的实现。同时,树莓派还整合了EGL相关接口,用于创建context和surface等,最终这些函数都打包到了EGL这个库中/opt/vc/lib/libbrcmEGL.so。
另外,单独针对OpenVG,树莓派还提供了一个库libbrcmOpenVG,但是相关内容都已经包含在了上面的libbrcmEGL.so中了,所以在使用时也不用链接它。
但是,在普通的Linux PC上就没有这个自带的OpenVG实现了,需要自己去找一下,有开源的ShivaVG和商业版的AmanithVG等可供选择。
2、ShivaVG(开源软件)
开源的OpenVG实现,在github上有源代码,https://github.com/ileben/ShivaVG
基本的OpenVG接口功能都有,底层是直接使用OpenGL相关接口去绘制的,相当于是对OpenGL的一个简单封装。ShivaVG也提供了类似于EGL函数的扩展接口,用于创建context和surface。
该库在编译时候依赖OpenGl相关的库。但是编译时比较坑,在configure的时候对OpenGL库的检查一直有问题,一直都无法通过。查看了一下configure相关的脚本内容,需要修改一下检查OpenGL库的相关脚本:需要在LIB这个变量上增加 -lGL库,而不是在LDFLAGS这个变量上加。修改完之后就可以顺利编译了。
虽然这个ShivaVG库看起来都很好,但是最重要字体接口没有,直接导致无法使用这个库来支撑上层的osd显示。但是这个项目还是可以作为一般的绘制显示的,可以作为研究使用。
3、AmanithVG(商业软件)
这是个商业版的软件,能够支持android、ios、windows、linux等多个平台,是个不错的选择。
官网地址AmanithVG, a software OpenVG library for 2D vector graphics rendering
github的SDK地址https://github.com/Mazatech/amanithvg-sdk
虽然没有源代码,SDK中提供的是编译好的各个平台上的lib库,还提供了几个示例代码,应该来讲是足够用了。
这个库的底层有两种实现模式:一个是纯粹基于软件(CPU)去实现绘制的,称作SRE,号称是市场上纯软实现OpenVG最快的库;另一是基于硬件的(GPU)去实现的,称作GLE。
该库没有整合EGL的相关功能,但提供了一个类似EGL函数接口的拓展,可以用于创建context和surface等,结合X11库的window进行画面的展示。
这个库的功能确实很全,也有font相关的接口,后续将用这个库去实现在PC上的OSD显示。
三、libshapes库的移植
刚才讲到,OpenHD中的OSD实际上并不是直接调用OpenVG相关接口函数,而是通过另一个开源项目ajstarks的openvg来间接调用OpenVG接口实现绘图。项目地址:https://github.com/ajstarks/openvg
该开源项目主要实现了对绘图接口的简化,仅仅封装了简单而必要的shape图形绘制相关的函数,让上层的应用开发人员能够集中精力在画面的设计和显示上,而不是复杂的OpenVG接口调用上。下图是该库封装出的一些简单的图形绘制函数,以及效果。

在OpenHD项目的源代码中,已经集成了相关的openvg项目的代码,就在目录openvg中。该工程最终编译出的文件是libshapes.so,头文件是shape.h,osd程序直接调用的就是这个库。这个openvg目录下面还有几个有趣的示例,主要是在client目录下,可以自行编译试试。这个代码看起来很简单很简洁干净,难怪OSD程序要直接用这个库呢。
OpenHD里面的这个openvg代码,比原工程主要增加了加载TTFFont字体相关功能。这个功能很关键,因此osd的程序在绘制飞机的各种姿态信息的时候,主要是使用各种特殊的字符,通过这些特殊字符的位置变化和组合,形成了一个完整的OSD画面。
在移植这个工程到PC上的时候主要有几个问题需要修正。
1、OpenVG绘制图形错位的问题
通常情况下调用openvg函数绘制图形,首先是 vgCreatePath()来创建的图形元素,然后调用vguXXX()这类函数,自动生成一个图形的path,例如矩形、椭圆等,在需要绘制的时候,调用vgDrawPath()函数来绘制这个path,从而实现各类形状的绘制。在需要绘制多个图形的时候,可以通过调用vgModifyPathCoords()修改元素的参数,例如位置等,再调用vgDrawPath()就可以实现不同图形的绘制。
但在AmanithVG的实现中,对于修改图形的函数存在bug,也就是vgModifyPathCoords函数。导致绘制出来的图形始终是错位的。所以libshapes的的绘制图形的函数都没法正确的绘制和显示。
例如以绘制矩形的函数为例,该代码在libshapes.c文件中。
- // Rect makes a rectangle at the specified location and dimensions
- void Rect(VGfloat x, VGfloat y, VGfloat w, VGfloat h) {
- const VGfloat coords[5] = { x, y, w, h, -w };
- vgModifyPathCoords(rect_path, 0, 4, coords);
- vgDrawPath(rect_path, VG_FILL_PATH | VG_STROKE_PATH);
- }
这个函数通过调用vgModifyPathCoords()实现对矩形的位置和宽度的设置,调用vgDrawPath()实现绘制。但是实际情况下在PC上绘制就是有问题。所以我们稍微修改一下这个函数。
- // Rect makes a rectangle at the specified location and dimensions
- void Rect(VGfloat x, VGfloat y, VGfloat w, VGfloat h) {
- const VGfloat coords[5] = { x, y, w, h, -w };
- // 修改
- vgClearPath(rect_path,VG_PATH_CAPABILITY_APPEND_TO | VG_PATH_CAPABILITY_MODIFY);
- vguRect(rect_path, x, y, w, h);
- //vgModifyPathCoords(rect_path, 0, 4, coords);
- vgDrawPath(rect_path, VG_FILL_PATH | VG_STROKE_PATH);
- }
我们首先将rect_path的数据清空,然后调用vguRect重新生成一个矩形的path,然后再调用vgDrawPath(),这样就可以正常绘制一个矩形了。
因此,找到libshapes.c里面所有涉及到函数,例如绘制圆形、多边形等,都改成先清空再生成,就可以解决。
2、文字字符显示的问题
在osd中,大量的图标的绘制都是使用绘制字符的相关函数vgDrawGlyphs(),这些字符都是通过加载一个特殊的osdicons.ttf文件,然后利用字符串绘制相关函数去绘制出来的,非常的巧妙。
这个osdicons.ttf在wifibroadcast-osd/osdfonts目录下。使用工具可以打开看一下这个字体文件 , 也可以使用相关工具进行编辑修改你想要的icon。

在opengvg中,绘制字符也可以认为就是绘制一系列的矢量线段,通过这些线段组成一个个的字符,这些字符被称为Glyphs。因此,每个字符矢量图组成就需要从tff文件中先读取出来,每个字符对应一组线段,这些线段组合成一个path,这个path就可以调用draw函数去绘制了。然后根据你想输出的字符,逐个glyph进行绘制,从而实现矢量字符的绘制。
对于矢量字符文件的加载,主要在fontsystem.c文件中实现,它底层调用了Freetype library来实现ttf文件的解析。
在定义path的每个点坐标的时候,原先的代码使用的是short类型,也就是只能是整数。但我尝试读取这些ttf文件的内容时候发现,读取出来的每个线段的坐标数据都是小于1的小数,所以在赋值给short之后,所有的数据都是0或者1,根本没法绘制图形,导致出现问题。
因此,要将坐标的定义改为float型。
- typedef struct scoord_T {
- float x, y; // 修改为float型
- } scoord_T;
- typedef struct paths_T {
- unsigned int cpos;
- unsigned int spos;
- unsigned int max_coords;
- unsigned int max_segments;
- scoord_T *coords;
- VGubyte *segments;
- int error;
- } paths_T;// 表示这个组成这个字符的所有的线段路径
另外,在字符的path创建的时候,要指定坐标系的数据类型为VG_PATH_DATATYPE_F,也就是float型。
- // 修改数据的类型为float,如果是short就会出现小于0的情况,不能缩放,然后就显示不出来了
- path = vgCreatePath(VG_PATH_FORMAT_STANDARD,
- VG_PATH_DATATYPE_F,
- 1.0f / 4096.0f, 0.0f, (VGint) paths.spos, (VGint) paths.cpos,
- VG_PATH_CAPABILITY_APPEND_TO);
这样,后面再绘制的时候就能够按照比例正常绘制字符了。
3、移植到X window进行绘图
openvg绘制图形的时候,是需要有一个上下文的环境的,这个上下文是跟当前的系统、硬件都是相关的。在原来的代码中,主要使用了树莓派自带的EGL相关函数来创建上下文context,使用一个被称为DispmanX的API来创建类似窗口的东西,用来在LCD上直接显示。
但是在PC上不太一样的,移植主要解决两个问题。
1、OpenVG上下文的创建问题
OpenVG的实现AmanithVG,官方的原话:
AmanithVG doesn’t depend on, nor include an EGL implementation.In order to supply some minimal EGL functionalities, some additional proprietary calls have been added to the API to accomplish the following tasks。
也就是不能使用EGL还创建一个context,并绑定OpenVG_API,需要使用这个SDK自带的一些函数,来完成上下文的创建。
注意:实际上也不完全是不能用EGL来创建上下文,只是不能用来创建给OpenVG使用的上下文。
但是,因为这个AmanithVG本质上使用的是OpenGL/OpenGLES来进行绘制,所以说可以通过EGL来创建OpenGL的上下文,绑定OpenGL_API,然后AmanithVG只能能够调用OpenGL就可以绘制图形了。甚至,可以实现离屏渲染,然后直接向framebuffer输出显示,这些我都进行了尝试,都是可以实现的。
所以,可以直接使用官方提供的SDK里面的函数创建上下文。
2、绘图窗口创建的问题
由于在PC上是没有树莓派的DispmanX相关API的,并且大概率你是使用一个X Window的图形化显示。因此,绘制的窗口应该使用X Window。
以上两个问题的移植修改,主要在oglinit.c文件中。
其实,我们要想使用和移植这个AmanithVG库,核心就是先创建一个OpenGL的环境,能够给SDK去调用。
整体上逻辑是:
(1)创建本地窗口(X Window),绑定OpenGL的上下文等
(2)创建openvg的context
(3)创建surface
(4)将context和surface绑定
- VGboolean oglinit_amanithvg(STATE_T * state)
- {
- // create window
- if (!windowCreate(state, WINDOW_TITLE, INITIAL_WINDOW_WIDTH, INITIAL_WINDOW_HEIGHT)) {
- return VG_FALSE;
- }
- // create an OpenVG context
- state->vgContext = NULL;
- state->vgContext = vgPrivContextCreateMZT(NULL);
- if (!state->vgContext) {
- return VG_FALSE;
- }
- // create a window surface (sRGBA premultiplied color space)
- state->vgWindowSurface = NULL;
- state->vgWindowSurface = vgPrivSurfaceCreateMZT(INITIAL_WINDOW_WIDTH, INITIAL_WINDOW_HEIGHT, VG_FALSE, VG_TRUE, VG_TRUE);
- if (!state->vgWindowSurface) {
- vgPrivContextDestroyMZT(state->vgContext);
- return VG_FALSE;
- }
- // bind context and surface
- if (vgPrivMakeCurrentMZT(state->vgContext, state->vgWindowSurface) == VG_FALSE) {
- vgPrivSurfaceDestroyMZT(state->vgWindowSurface);
- vgPrivContextDestroyMZT(state->vgContext);
- return VG_FALSE;
- }
- return VG_TRUE;
- }
这里最关键的一步是第一步,创建一个窗口和OpenGL环境,代码如下。
- VGboolean windowCreate(STATE_T * state, const char* title,
- const VGuint width,
- const VGuint height)
- {
- VGint screen, screenWidth, screenHeight;
- XSetWindowAttributes windowAttributes;
- XSizeHints windowSizeHints;
- XVisualInfo* visualInfo;
- MY_PFNGLXSWAPINTERVALSGIPROC sgiSwapInterval;
- MY_PFNGLXSWAPINTERVALEXTPROC extSwapInterval;
- // OpenGL surface configuration
- GLXFBConfig fbconfig;
- VGint fbConfigsCount = 0;
- static int glAttributes[] = {
- GLX_RENDER_TYPE, GLX_RGBA_BIT,
- GLX_DRAWABLE_TYPE, GLX_WINDOW_BIT,
- GLX_DOUBLEBUFFER, True,
- GLX_RED_SIZE, 1,
- GLX_GREEN_SIZE, 1,
- GLX_BLUE_SIZE, 1,
- GLX_ALPHA_SIZE, 1,
- GLX_DEPTH_SIZE, 1,
- None
- };
- // open a display on the current root window
- display = XOpenDisplay(NULL);
- if (display == NULL) {
- fprintf(stderr, "Unable to open display.\n");
- return VG_FALSE;
- }
- // get the default screen associated with the previously opened display
- screen = DefaultScreen(display);
- // 根窗口
- rootWindow = RootWindow(display, screen);
- // get screen bitdepth
- screenDepth = DefaultDepth(display, screen);
- // run only on a 32bpp display
- if ((screenDepth != 24) && (screenDepth != 32)) {
- fprintf(stderr, "Cannot find 32bit pixel format on the current display.\n");
- XCloseDisplay(display);
- return VG_FALSE;
- }
- // get screen dimensions
- screenWidth = DisplayWidth(display, screen);
- screenHeight = DisplayHeight(display, screen);
- state->screen_width = screenWidth;
- state->screen_height = screenHeight;
- printf("screen width=%d height=%d\r\n",screenWidth,screenHeight);
- unsigned long white = WhitePixel(display,screen);
- unsigned long black = BlackPixel(display,screen);
- // 再创建透明的OSD显示,在上层
- // 找到合适的配置
- GLXFBConfig* fbconfigs = glXChooseFBConfig(display, screen, glAttributes, &fbConfigsCount);
- int i = 0;
- static XRenderPictFormat *pictFormat;
- for(i = 0; ivisualInfo = (XVisualInfo_CPP*) glXGetVisualFromFBConfig(display, fbconfigs[i]);if(!visualInfo)continue;pictFormat = XRenderFindVisualFormat(display, visualInfo->visual);if(!pictFormat)continue;if(pictFormat->direct.alphaMask > 0) {fbconfig = fbconfigs[i];break;}}// initialize window's attribute structurewindowAttributes.colormap = XCreateColormap(display, rootWindow, visualInfo->visual, AllocNone);windowAttributes.border_pixel = 0;windowAttributes.background_pixmap = None;printf("None=%d\r\n",None);int attr_mask =CWBackPixmap|CWColormap|CWBorderPixel; /* What's in the attr data */// create the window centered on the screenstate->window_width = width;state->window_height = height;// 创建OSD窗口window = XCreateWindow(display, rootWindow, 0,0, width, height, 1, visualInfo->depth, InputOutput, visualInfo->visual, attr_mask, &windowAttributes);//if ( window == None )if (window == None || video_window == None){fprintf(stderr, "Unable to create the window.\n");XCloseDisplay(display);return VG_FALSE;}// set the window's nameXStoreName(display, window, title);// tell the server to report mouse and key-related eventsXSelectInput(display, window, KeyPressMask | KeyReleaseMask | ButtonPressMask | Button1MotionMask | Button2MotionMask | Button3MotionMask | StructureNotifyMask | ExposureMask);// initialize window's sizehint definition structurewindowSizeHints.flags = PPosition | PMinSize | PMaxSize;windowSizeHints.x = 0;windowSizeHints.y = 0;windowSizeHints.min_width = 1;// clamp window dimensions according to the maximum surface dimension supported by the OpenVG backendwindowSizeHints.max_width = vgPrivSurfaceMaxDimensionGetMZT();if (screenWidth < windowSizeHints.max_width) {windowSizeHints.max_width = screenWidth;}windowSizeHints.min_height = 1;windowSizeHints.max_height = windowSizeHints.max_width;if (screenHeight < windowSizeHints.max_height) {windowSizeHints.max_height = screenHeight;}// set the window's sizehintXSetWMNormalHints(display, window, &windowSizeHints);// clear the windowXClearWindow(display, window);// create a GLX context for OpenGL renderingglContext = glXCreateNewContext(display, fbconfig, GLX_RGBA_TYPE, NULL, True);if (!glContext) {fprintf(stderr, "Unable to create the GLX context.\n");XDestroyWindow(display, video_window);XDestroyWindow(display, window);XCloseDisplay(display);return VG_FALSE;}// create a GLX window to associate the frame buffer configuration with the created X windowglWindow = glXCreateWindow(display, fbconfig, window, NULL);// bind the GLX context to the WindowglXMakeContextCurrent(display, glWindow, glWindow, glContext);// GLX_EXT_swap_controlextSwapInterval = (MY_PFNGLXSWAPINTERVALEXTPROC)glXGetProcAddressARB((const GLubyte *)"glXSwapIntervalEXT");if (extSwapInterval) {extSwapInterval(display, glWindow, 0);}else {// GLX_SGI_swap_controlsgiSwapInterval = (MY_PFNGLXSWAPINTERVALSGIPROC)glXGetProcAddressARB((const GLubyte *)"glXSwapIntervalSGI");if (sgiSwapInterval) {sgiSwapInterval(0);}}// put the window on top of the othersXMapRaised(display, window);// clear event queueXFlush(display);XFree(visualInfo);return VG_TRUE;}
这样,核心的部分就算移植完成了,其他类似注销、swap等函数,根据实际进行修改就可以了,主要代码如下。
- // 销毁X11窗口
- void windowDestroy(void) {
- // unbind OpenGL context / surface
- glXMakeContextCurrent(display, 0, 0, 0);
- // destroy OpenGL surface/drawable
- glXDestroyWindow(display, glWindow);
- // destroy OpenGL context
- glXDestroyContext(display, glContext);
- // Close the window
- XDestroyWindow(display, window);
- // Close the display
- XCloseDisplay(display);
- }
- // 注销上下文
- void ogl_destroy_amanithvg(STATE_T * state) {
- // unbind context and surface
- vgPrivMakeCurrentMZT(NULL, NULL);
- // destroy OpenVG surface
- vgPrivSurfaceDestroyMZT(state->vgWindowSurface);
- // destroy OpenVG context
- vgPrivContextDestroyMZT(state->vgContext);
- // window context and surface destory
- windowDestroy();
- }
- // 刷新缓冲区,将图形进行显示
- bool ogl_swap_buffers(STATE_T * state)
- {
- glXSwapBuffers(display, glWindow);
- // acknowledge AmanithVG that we have performed a swapbuffers
- vgPostSwapBuffersMZT();
- return true;
- }
四、如何编译openvg
经过刚才的修改,基本上实现了libshapes库的移植,但如何基于AmanithVG进行编译呢。
首先是要将AmanithVG相关so库 amanithvg-sdk/lib/linux/x86_64/gle/standalone/ 拷贝到本目录,并将openvg的头文件也要拷贝过来。
修改openvg目录下的Makefile,主要是include以及lib相关选项。主要是要将AmanithVG和X11两个库要加进来。另外,其他树莓派专用的一些库就不用要用了。
- INCLUDEFLAGS=-I./amanith/include -fPIC
- LIBFLAGS=-L./amanith/lib -lAmanithVG -lGL -lX11 -lm -ljpeg -lpng -lfreetype -lfontconfig -lz
这样就可以make了。在client目录下,会有一些测试例子,可以运行试试。


这样,openvg就可以在PC上使用了。

- 相关阅读:
运维行业数字化维修数据屏来袭
Python实现逻辑回归模型教程
GIt快速入门(一文学会使用Git)
ModStartCMS v7.3.0 富文本MP3支持,后台组件优化
剖析虚幻渲染体系(14)- 延展篇:现代渲染引擎演变史Part 1(萌芽期)
【16】c++11新特性 —>弱引用智能指针weak_ptr(1)
uniapp实战项目 (仿知识星球App) - - 编译项目并安装到手机上
低代码平台协同OA升级,促进金融企业信息化建设
内网穿透到公网,让你的小伙伴访问你本地的项目
嵌入式分享合集83
- 原文地址:https://blog.csdn.net/hoopertsau/article/details/127032486