-
Spring源码级笔记(一)
Srping5 Spring的概述和IOC的介绍 IOC和bean的介绍 Spring中AOP的介绍 Spring中JdbcTemplate的使用 Spring中的事务(重要) Spring的新特性 笔记和源码 参考资料 1 Spring框架概述
1.1 spring5的下载
下载地址,目前下载的是5.2.6版本的(最新的不一定是最好的)
https://repo.spring.io/release/org/springframework/spring/

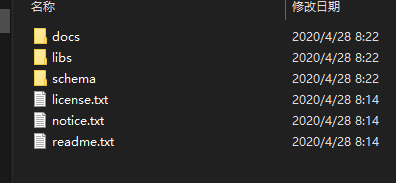
下载之后进行解压

解压之后的目录结构,其中jar包在libs目录中。
使用idea创建一个简单的java项目

1.2 选中需要的jar包
下面是需要导入的部分,下面是Spring中的核心部分

其中第一个日志相关的jar包不是spring5中的

新建一个lib文件夹用于存放jar包,lib和src同级目录

1.3 在spring中创建对象
下面是一个对于spring初步认识的例子,可以跟着写下来,并且可以自己进行思考为什么要这样写。
- 创建普通类,创建该类的对象
package com.wjiangquan.Spring5; /** * @author weijiangquan * @date 2022/9/25 -9:14 * @Description */ public class User { public void add(){ System.out.println("add...."); } }-
创建spring的bean文件
点击新建之后可以看到spring的配置文件

在bean文件中添加如下内容
<beans xmlns="http://www.springframework.org/schema/beans" xmlns:xsi="http://www.w3.org/2001/XMLSchema-instance" xsi:schemaLocation="http://www.springframework.org/schema/beans http://www.springframework.org/schema/beans/spring-beans.xsd"> <bean id="user" class="com.wjiangquan.spring5.User">bean> beans> -
进行测试代码的编写
public class TestSpring5 {

    @Test
    public void test(){
        // 1.加载spring的配置文件
         ApplicationContext context = new ClassPathXmlApplicationContext("bean1.xml");

        // 2.获取配置创建的对象
        User user = context.getBean("user", User.class);

        System.out.println(user);
        user.add();

    }
}
运行结果

2 IOC
- 什么是IOC
- 控制反转,把对象的创建和对象之间的调用过程,交给spring进行管理
- 使用ioc的目的:为了耦合度降低
- 上面入门的测试案例就是IOC实现
- IOC底层原理
- xml解析,工厂模式,反射

IOC降低耦合度(IOC的过程详细)—进一步降低了耦合度
画图讲解 IOC 底层原理

2.1 IOC中重要的接口
IOC(BeanFactory 接口)
- IOC思想基于IOC容器完成,IOC容器底层就是对象工厂
- Spring提供IOC容器实现两种方式:(两个接口)
(1)BeanFactory:IOC 容器基本实现,是 Spring 内部的使用接口,不提供开发人员进行使用
也就是说之前可以这样写

加载配置文件时候不会创建对象,在获取对象(使用)才去创建对象
(2)ApplicationContext:BeanFactory 接口的子接口,提供更多更强大的功能,一般由开发人
员进行使用
加载配置文件时候就会把在配置文件对象进行创建
一般使用第二种方式,一般使用tomcat服务器,对于这种耗时耗资源的过程都交给服务器去完成就可以了,需要的时候直接使用即可。
通过
ctrl+H查看接口的继承结构
可以看到最终有两个实现类
FileSyetemXmlApplicationContex;   //这个类加载的是全路径,比如说从c盘开始
CLassPathXmlApplicationContext;  //这个是从项目的src目录下开始进行寻找加载
2.2 IOC操作Bean管理(概念)
- 什么是Bean管理
- Bean管理指的是两个操作
- Spring创建对象
- Spring注入属性
- Bean管理操作有两种方式
- 基于xml配置文件方式实现
- 基于注解的方式实现
IOC 操作 Bean 管理(基于 xml 方式)
- 基于xml方式创建对象
<bean id="user" class="com.wjiangquan.spring5.User">bean>(1)在 spring 配置文件中,使用 bean 标签,标签里面添加对应属性,就可以实现对象创建
(2)在 bean 标签有很多属性,介绍常用的属性
**id 属性**:唯一标识 class 属性:类全路径(包类路径)
- 基于xml方式注入属性
(1) DI: 依赖注入,就是注入属性
- 第一种注入的方式就是
set注入
(1) 创建类,定义属性对应的set方法
/**
 * @author weijiangquan
 * @date 2022/9/25 -10:15
 * @Description 演示使用 set 方法进行注入属性
 */
public class Book {

    private String bname;
    private String bauthor;

    public void setBname(String bname) {
        this.bname = bname;
    }

    public void setBauthor(String bauthor) {
        this.bauthor = bauthor;
    }
}
(2) 在 spring 配置文件配置对象创建,配置属性注入
<beans xmlns="http://www.springframework.org/schema/beans"
       xmlns:xsi="http://www.w3.org/2001/XMLSchema-instance"
       xsi:schemaLocation="http://www.springframework.org/schema/beans http://www.springframework.org/schema/beans/spring-beans.xsd">


	<bean id="book" class="com.wjiangquan.spring5.Book">

		<property name="bname" value="tonghuashuijie">property>
		<property name="bauthor" value="xiaowei">property>
	bean>

beans>
在book中写入如下方法,方便测试
public void testDemo(){
        System.out.println(bname+":"+bauthor);
    }
然后对之前的测试类进行修改
public class TestSpring5 {

    @Test
    public void test(){
        // 1.加载spring的配置文件
         ApplicationContext context = new ClassPathXmlApplicationContext("bean1.xml");

        // 2.获取配置创建的对象
        Book book = context.getBean("book", Book.class);

        System.out.println(book);
        book.testDemo();
    }

}
运行结果,和预期的相符

- 第二种注入方式:使用有参数构造进行注入
(1) 创建一个类,并创建有参构造方法
package com.wjiangquan.spring5;

/**
 * @author weijiangquan
 * @date 2022/9/25 -10:32
 * @Description 有参数的构造注入
 */
public class Order {

    private String oname;
    private String address;


    public Order(String oname, String address) {
        this.oname = oname;
        this.address = address;
    }
}
在xml文件中进行配置
	<bean id="order" class="com.wjiangquan.spring5.Order">
		<constructor-arg name="oname" value="abbb">constructor-arg>
		<constructor-arg name="address" value="China">constructor-arg>
	bean>
测试
  @Test
    public void testOrder(){
        // 1.加载spring配置文件
        ApplicationContext context = new ClassPathXmlApplicationContext("bean1.xml");
        //2.获取配置创建的文件
        Order order = context.getBean("order", Order.class);
        System.out.println(order);
        order.ordersTest();
    }
在order类中加入如下
    public void ordersTest(){
        System.out.println(oname+":"+address);
    }
也可以通过索引值的方式,0表示第一个参数,不过一般不这么使用
<constructor-arg index="0" value="asda"></constructor-arg> <constructor-arg index="1" value="adsa"></constructor-arg>5、p 名称空间注入(了解)
使用 p 名称空间注入,可以简化基于 xml 配置方式
第一步 添加 p 名称空间在配置文件中
需要添加这个

进行属性的注入
	<bean id="book" class="com.wjiangquan.spring5.Book" p:bname="陌生女孩的来信" p:bauthor="小白">
	bean>
IOC 操作 Bean 管理(xml注入其他类型属性)

2、注入属性**-外部bean**
在没有使用Spring进行注入的写法
在平时的时候对于
dao和service的交换是这样的首先写一个dao的接口
public interface UserDao {
    public void update();
}
然后是dao的实现类
public class UserDaoImpl implements UserDao{

    @Override
    public void update() {
        System.out.println("dao update .......");
    }
}
service层调用dao
public class UserService {

    //创建UserDao的对象
    private UserDao userDao = new UserDaoImpl();

    public void add(){
        System.out.println("service add ..............................");

        /**
         * 原始的方式
         */
        // 创建UserDao对象
        userDao.update();
    }
}
测试类
public class TestBean {

    @Test
    public void test(){

        UserService userService = new UserService();
        userService.add();

    }
}
在使用Spring进行注入的写法
在上面的基础上进行改进,使用bean的外部注入的方式
dao层的代码在上面的基础上不需要改变
userService
public class UserService {

    //创建UserDao类型的属性,生成set方法
    private UserDao userDao;

    public void setUserDao(UserDao userDao) {
        System.out.println("setUserDao方法调用了");
        this.userDao = userDao;
    }

    public void add(){
        System.out.println("service add ..............................");

        /**
         * 原始的方式
         */
        // 创建UserDao对象
        userDao.update();
    }
}
测试方法
public class TestBean {

    @Test
    public void test(){
        ApplicationContext context =  new ClassPathXmlApplicationContext("bean2.xml");
        UserService userService = context.getBean("userService",UserService.class);

        userService.add();

    }
}
bean.xml文件的内容
<beans xmlns="http://www.springframework.org/schema/beans"
       xmlns:xsi="http://www.w3.org/2001/XMLSchema-instance"
       xsi:schemaLocation="http://www.springframework.org/schema/beans http://www.springframework.org/schema/beans/spring-beans.xsd">


	<bean id="userService" class="com.wjiangquan.spring5.service.UserService">

		<property name="userDao" ref="userDaoImpl">property>
	bean>

	<bean id="userDaoImpl" class="com.wjiangquan.spring5.dao.UserDaoImpl">bean>
beans>
这个时候使用到的两个对象都不需要自己去new了,而是通过spring中的bean进行了管理
运行结果

3 注入属性-内部 bean
(1)一对多关系:部门和员工
一个部门有多个员工,一个员工属于一个部门
部门是一,员工是多
(2)在实体类之间表示一对多关系,员工表示所属部门,使用对象类型属性进行表示
dept类
//部门类
public class Dept {
    private String dname;

    public void setDname(String dname) {
        this.dname = dname;
    }

    @Override
    public String toString() {
        return "Dept{" +
                "dname='" + dname + '\'' +
                '}';
    }
}
emp类
//员工类
public class Emp {
    private String ename;
    private String gender;
    // 员工属于某一个部门
    private Dept dept;

    public void setDept(Dept dept) {
        this.dept = dept;
    }

    public void setEname(String ename) {
        this.ename = ename;
    }

    public void setGender(String gender) {
        this.gender = gender;
    }

    public void add(){
        System.out.println(ename+"::"+gender+"::"+dept);
    }
}
bean文件
<beans xmlns="http://www.springframework.org/schema/beans"
       xmlns:xsi="http://www.w3.org/2001/XMLSchema-instance"
       xsi:schemaLocation="http://www.springframework.org/schema/beans http://www.springframework.org/schema/beans/spring-beans.xsd">


	<bean id="emp" class="com.wjiangquan.spring5.bean.Emp">

		<property name="ename" value="adasd">property>
		<property name="gender" value="男">property>


		<property name="dept">
			<bean id="dept" class="com.wjiangquan.spring5.bean.Dept">
				<property name="dname" value="后勤部">property>
			bean>
		property>

	bean>
beans>
测试
  @Test
    public void testBean2(){
        ApplicationContext context = new ClassPathXmlApplicationContext("bean3.xml");
        Emp emp = context.getBean("emp", Emp.class);
        emp.add();
    }
运行结果

注入属性-级联赋值
第一种写法
<beans xmlns="http://www.springframework.org/schema/beans"
       xmlns:xsi="http://www.w3.org/2001/XMLSchema-instance"
       xsi:schemaLocation="http://www.springframework.org/schema/beans http://www.springframework.org/schema/beans/spring-beans.xsd">


	<bean id="emp" class="com.wjiangquan.spring5.bean.Emp">

		<property name="ename" value="adasd">property>
		<property name="gender" value="男">property>


		<property name="dept" ref="dept">property>
	bean>

	<bean id="dept" class="com.wjiangquan.spring5.bean.Dept">
		<property name="dname" value="市场部">property>
	bean>

beans>
第二种写法

加入下面这个

2.3 注入集合类型属性(xml注入集合类型属性)
1. **注入数组类型属性**
1. **注入** **List** **集合类型属性**
1. **注入** **Map** **集合类型属性**
(1)创建类,定义数组、list、map、set 类型属性,生成对应 set 方法
为了避刚才的项目对于当前项目的影响,所以决定重新创建一个模块

import java.util.List;
import java.util.Map;
import java.util.Set;

/**
 * @author weijiangquan
 * @date 2022/9/25 -16:06
 * @Description
 */
public class Student {
    //1.数组类型的属性
    private String[] courses;

    //2.创建集合类型的属性
    private List<String> list;

    // 3.map集合类型的属性
    private Map<String,String> maps;

    // 4.set集合类型的属性
    private Set<String> sets;


    public void setCourses(String[] courses) {
        this.courses = courses;
    }

    public void setList(List<String> list) {
        this.list = list;
    }

    public void setMaps(Map<String, String> maps) {
        this.maps = maps;
    }

    public void setSets(Set<String> sets) {
        this.sets = sets;
    }

}
bean文件
<beans xmlns="http://www.springframework.org/schema/beans"
       xmlns:xsi="http://www.w3.org/2001/XMLSchema-instance"
       xsi:schemaLocation="http://www.springframework.org/schema/beans http://www.springframework.org/schema/beans/spring-beans.xsd">


	<bean id="student" class="com.wjiangquan.spring5.Student">

		<property name="courses">
			<array>
				<value>数学value>
				<value>历史value>
			array>
		property>

		<property name="list">
			<list>
				<value>小胖value>
				<value>小黑value>
			list>
		property>


		<property name="maps">
			<map>
				<entry key="JAVA" value="java">entry>
				<entry key="Web" value="web">entry>
			map>
		property>


		<property name="sets">
			<set>
				<value>Mysqlvalue>
				<value>Redisvalue>
			set>
		property>
	bean>
beans>
为了更好的测试,在Student类中添加如下方法
@Test
public void test(){
    System.out.println(Arrays.toString(courses));
    System.out.println(list);
    System.out.println(maps);
    System.out.println(sets);

}
测试代码
package com.wjiangquan.spring5.testDemo;

import com.wjiangquan.spring5.Student;
import org.junit.Test;
import org.springframework.context.ApplicationContext;
import org.springframework.context.support.ClassPathXmlApplicationContext;

/**
 * @author weijiangquan
 * @date 2022/9/25 -16:17
 * @Description
 */
public class TestSpring5Demo1 {

    @Test
    public void test(){
        ApplicationContext context = new  ClassPathXmlApplicationContext("bean.xml");
        Student student = context.getBean("student", Student.class);
        student.test();
    }
}
- 在集合中设置对象类型值
在实体类中加入如下
// 学生学习多门课 private List<Course> courseList; public void setCourseList(List<Course> courseList) { this.courseList = courseList; }<bean id="student" class="com.wjiangquan.spring5.collectiontype.Student"> <property name="courseList"> <list> <ref bean="course1">ref> <ref bean="course2">ref> list> property> bean> <bean id="course1" class="com.wjiangquan.spring5.collectiontype.Course"> <property name="cname" value="Spring5框架">property> bean> <bean id="course2" class="com.wjiangquan.spring5.collectiontype.Course"> <property name="cname" value="Mybatis框架">property> bean>也可以将公共的部分提取出来
把集合注入部分提取出来
(1)在 spring 配置文件中引入名称空间 util
红框中的为新添加的东西

(2)使用 util 标签完成 list 集合注入提取
<beans xmlns="http://www.springframework.org/schema/beans"
       xmlns:xsi="http://www.w3.org/2001/XMLSchema-instance"
       xmlns:util="http://www.springframework.org/schema/util"
       xsi:schemaLocation="http://www.springframework.org/schema/beans http://www.springframework.org/schema/beans/spring-beans.xsd
							http://www.springframework.org/schema/util  http://www.springframework.org/schema/util/spring-util.xsd">


	<util:list id="bookList">
		<value>红罗蒙value>
		<value>小率动value>
		<value>西游记value>
	util:list>


	<bean id="book" class="com.wjiangquan.spring5.collectiontype.Book">
		<property name="list" ref="bookList">property>
	bean>
beans>
测试和之前相同,测试通过
片转存中…(img-jjZLOqKK-1664118628099)]
(2)使用 util 标签完成 list 集合注入提取
<beans xmlns="http://www.springframework.org/schema/beans"
       xmlns:xsi="http://www.w3.org/2001/XMLSchema-instance"
       xmlns:util="http://www.springframework.org/schema/util"
       xsi:schemaLocation="http://www.springframework.org/schema/beans http://www.springframework.org/schema/beans/spring-beans.xsd
							http://www.springframework.org/schema/util  http://www.springframework.org/schema/util/spring-util.xsd">


	<util:list id="bookList">
		<value>红罗蒙value>
		<value>小率动value>
		<value>西游记value>
	util:list>


	<bean id="book" class="com.wjiangquan.spring5.collectiontype.Book">
		<property name="list" ref="bookList">property>
	bean>
beans>
测试和之前相同,测试通过
-
相关阅读:
神经网络matlab代码程序,matlab神经网络能做什么
Bootstrap的一些主要作用
【科研论文配图绘制】task8 总结与回顾
mybatis学习(15):mybatis连接mysql数据库
【Pytorch基础】二维/三维情况下 torch.mean()函数使用
oracle学习89-oracle之基本的sql_select语句之课后练习
C++ 多态
[软考中级]软件设计师-信息安全
【树莓派】刷机、基础配置及多种方式登录
有多条业务线,mysql建多库多表比较好还是一个库多个表比较好呢?
- 原文地址:https://blog.csdn.net/weixin_47994845/article/details/127045212