-
一文看懂ELK日志查看安装配置(超详细)
版本采用8.4.1
网址:
https://www.elastic.co/cn/elasticsearch/ https://www.elastic.co/cn/logstash/ https://www.elastic.co/cn/kibana/- 1
- 2
- 3
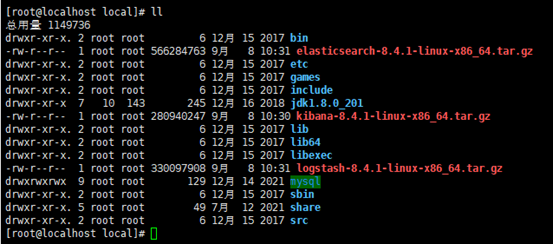
1、安装包导入到 /usr/local/ 文件夹下
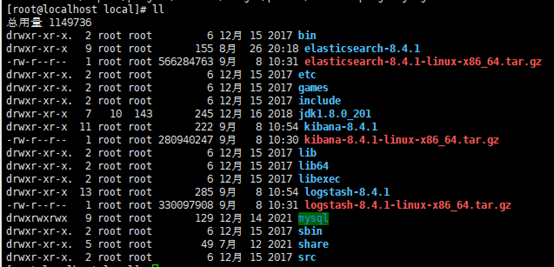
2、依次解压到各自文件夹下
tar -zxvf elasticsearchxxxxxxx.tar.gz tar -zxvf logstashxxxxxxx.tar.gz tar -zxvf kibanaxxxxxxx.tar.gz- 1
- 2
- 3
一、安装elasticsearch (es用户启动)
1、新建用户 es,密码: es123456
adduser es passwd es- 1
- 2

2、文件夹授权给es用户
chown es /usr/local/elasticsearch-8.4.1/ -R- 1

3、修改配置文件
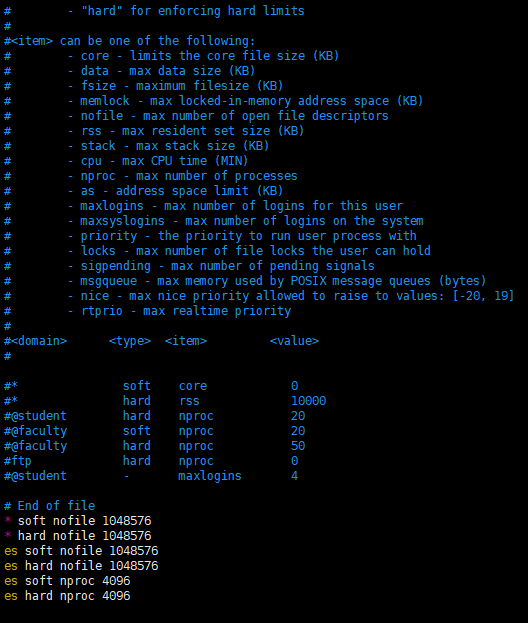
编辑 /etc/security/limits.conf末尾追加:
* soft nofile 1048576 * hard nofile 1048576 es soft nofile 1048576 es hard nofile 1048576 es soft nproc 4096 es hard nproc 4096- 1
- 2
- 3
- 4
- 5
- 6
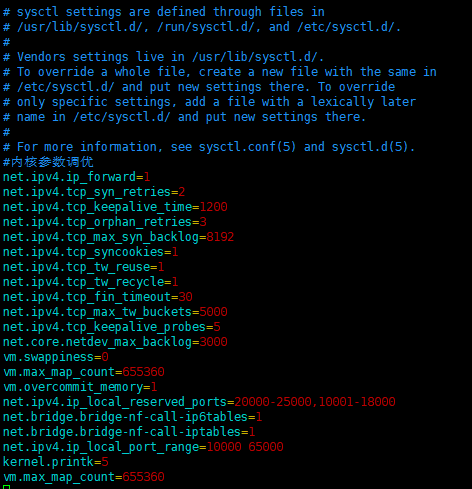
编辑 /etc/sysctl.conf
末尾追加:
kernel.printk=5 vm.max_map_count=655360- 1
- 2
4、执行如下语句,使上面配置生效
sysctl -p- 1
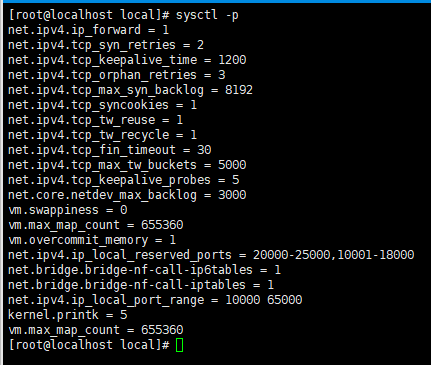
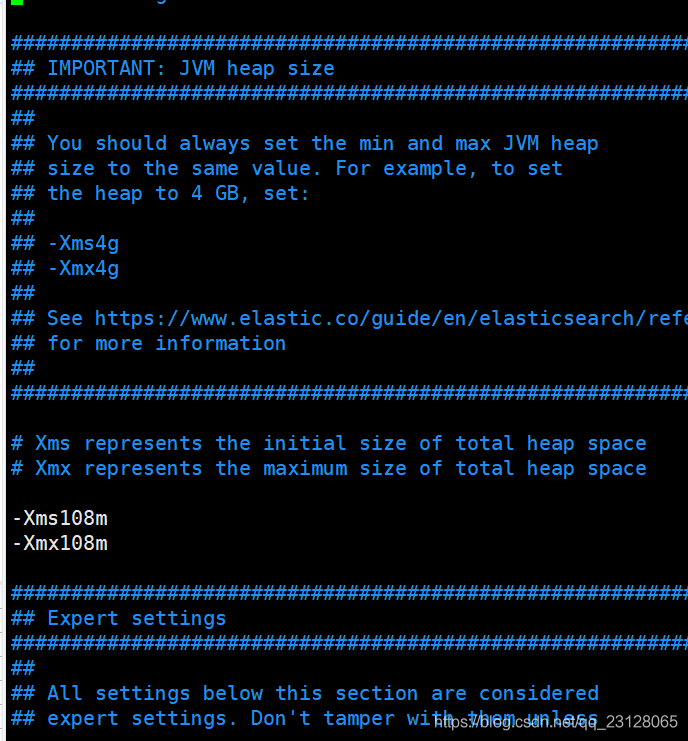
5、进入config文件夹开始配置,编辑jvm.options:vim /usr/local/elasticsearch/config/jvm.options- 1
新增:
-Xms108m -Xmx108m- 1
- 2
6、切换到es用户,启动服务
su es ./bin/elasticsearch -d (-d 后台运行)- 1
- 2
报错:
[2022-09-08T11:12:03,244][ERROR][o.e.b.Elasticsearch ] [localhost.localdomain] fatal exception while booting Elasticsearchjava. nio.file.NoSuchFileException: /usr/local/jdk1.8.0_201/lib/tool.jar at java.base/sun.nio.fs.UnixException.translateToIOException(UnixException.java:92) at java.base/sun.nio.fs.UnixException.rethrowAsIOException(UnixException.java:106) at java.base/sun.nio.fs.UnixException.rethrowAsIOException(UnixException.java:111) at java.base/sun.nio.fs.UnixFileAttributeViews$Basic.readAttributes(UnixFileAttributeViews.java:55) at java.base/sun.nio.fs.UnixFileSystemProvider.readAttributes(UnixFileSystemProvider.java:148) See logs for more details. ERROR: Elasticsearch did not exit normally - check the logs at /usr/local/elasticsearch-8.4.1/logs/elasticsearch.log ERROR: Elasticsearch exited unexpectedly- 1
- 2
- 3
- 4
- 5
- 6
- 7
- 8
- 9
- 10
- 11

log日志:
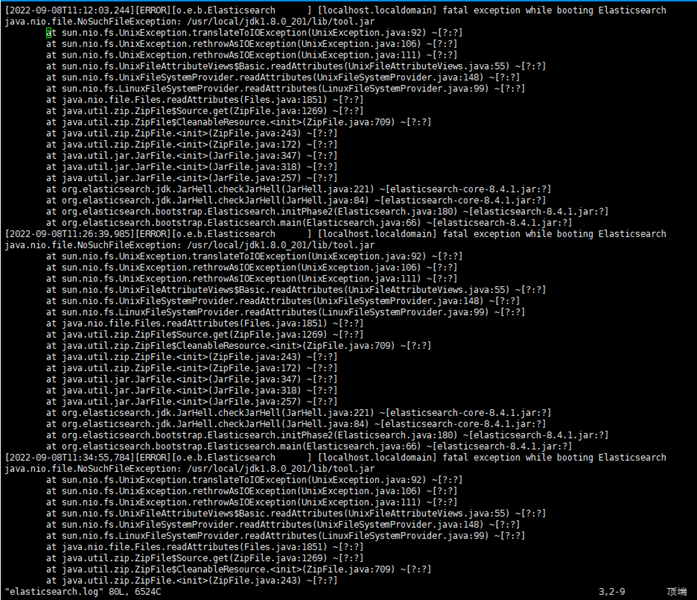
找不到 jdk/lib/tool.jar,查看文件夹下发现有tools.jar,没有tool.jar
解决方案:
把tools.jar复制一份,改名叫tool.jarcp tools.jar tool.jar- 1
7、重新启动
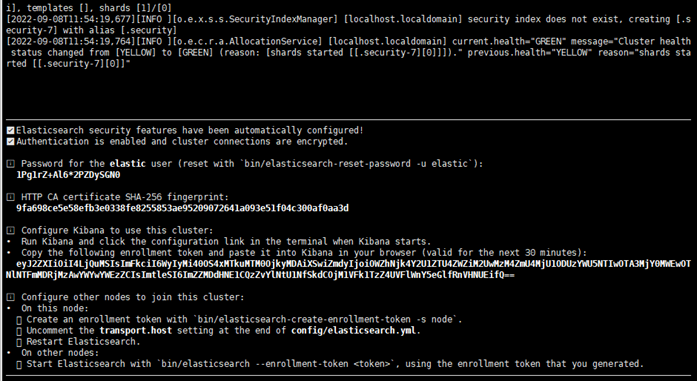
8、访问测试
输入 ip:9200,访问失败

原因:elasticsearch开启了安全认证,虽然start成功,但是访问ip:9200失败
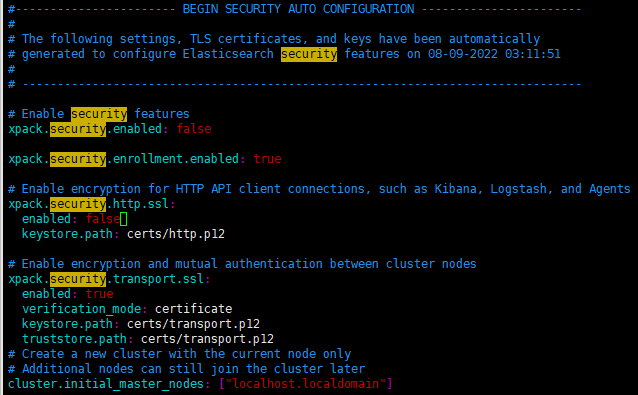
解决方案:修改 config/elasticsearch.yml 配置文件
搜索 security,把两处 ture 改成 false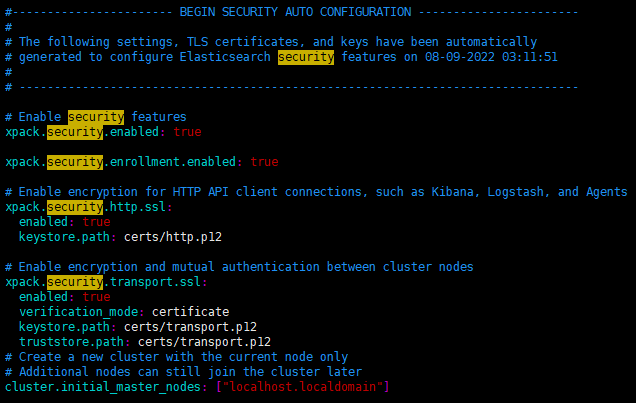
9、报错
[ERROR]fatal exception while booting Elasticsearchjava.lang.IllegalStateException:failed to obtain node locks,tried [/usr/local/elasticsearch-8.4.1/data];maybe these locations are not wirtable or multiple nodes were started on the same data path?原因:因为上面已经用es用户启动了一次elasticsearch,故而本次启动失败
解决方案:(1) 查进程 ps -ef | grep elastic (2) 杀进程:把所有看到的占用的端口都杀死一遍 kill -9 xxxxx- 1
- 2
- 3
- 4
- 5
- 6
- 7
- 8
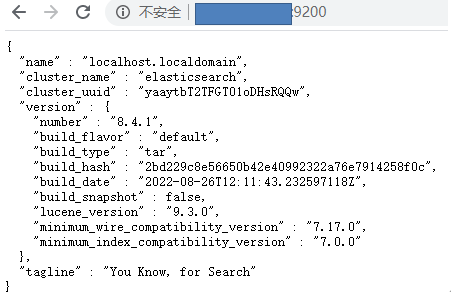
10、启动服务,成功

11、访问测试,成功
12、启动ElasticHD
进入elasticsearch文件夹下,执行
./ElasticHD -p 0.0.0.0:9800没有那个文件或目录
二、安装logstash
1、进入logstash文件夹
2、更改配置文件 config/logstash.yml修改监听地址和端口
地址填本机,端口9600-9700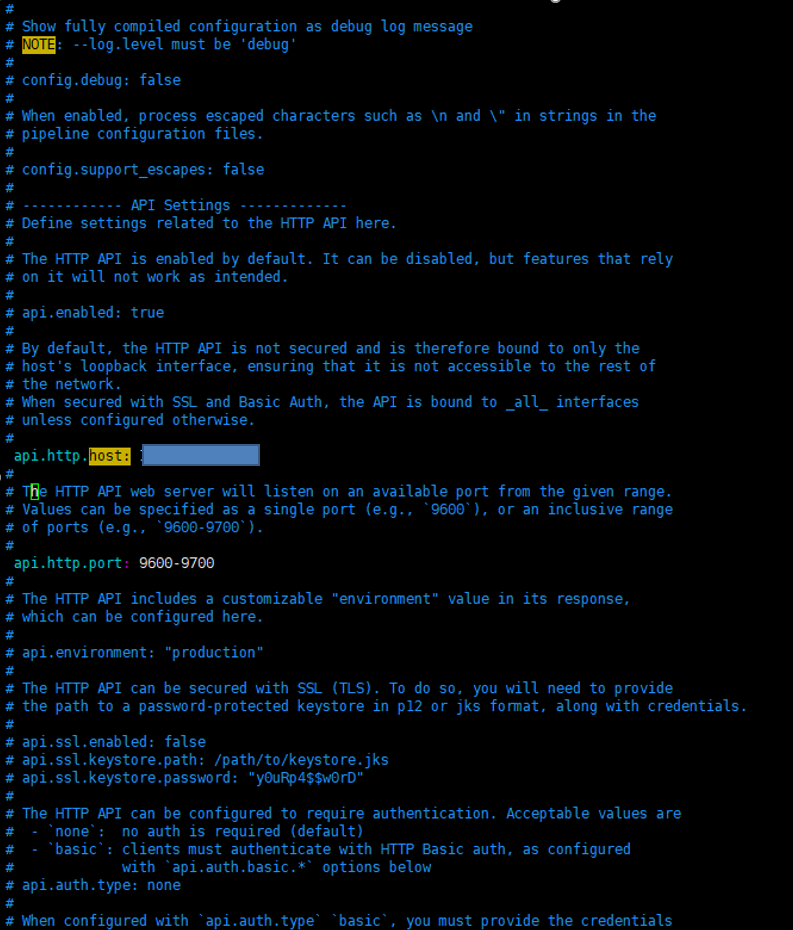
3、启动服务:
./bin/logstash -e ‘input {stdin{}} output{stdout{}}’- 1
4、简单测试,成功
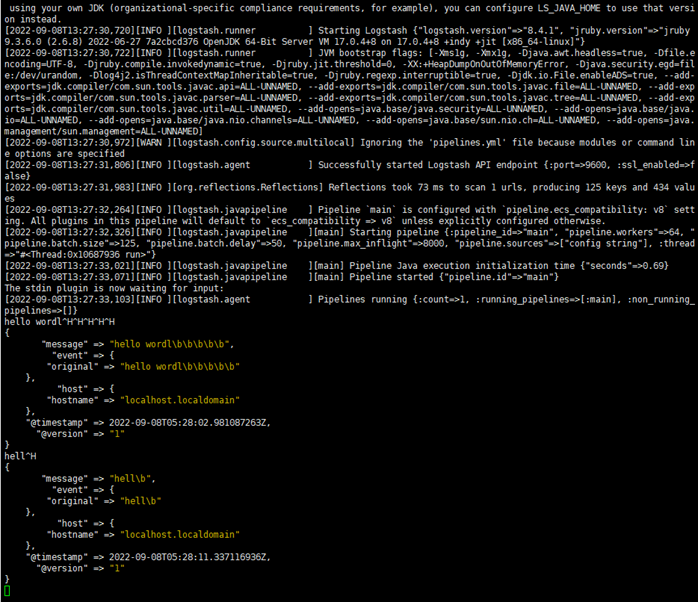
5、创建配置文件 logstash-sample.conf
input { tcp{ mode => "server" host => "0.0.0.0" type => "elk1" port => 9601 codec => json } tcp{ mode => "server" host => "0.0.0.0" type => "elk2" port => 9602 codec => json } } output { if [type]=="elk1" { elasticsearch { action => "index" hosts => "**.**.**.**:9200" index => "elk1" codec =>"json" } } if [type]=="elk2" { elasticsearch { action => "index" hosts => "**.**.**.**:9200" index => "elk2" codec =>"json" } } }- 1
- 2
- 3
- 4
- 5
- 6
- 7
- 8
- 9
- 10
- 11
- 12
- 13
- 14
- 15
- 16
- 17
- 18
- 19
- 20
- 21
- 22
- 23
- 24
- 25
- 26
- 27
- 28
- 29
- 30
- 31
- 32
- 33
- 34
- 35
- 36
- 37
- 38
- 39
6、后台启动logstash
nohup ./bin/logstash -f ./config/logstash-sample.conf &- 1

7、测试,成功
浏览器输入 ip:9600
三、安装kibana (es用户启动)
1、文件夹权限授权
chown es /usr/local/kibana-8.4.1/ -R- 1
2、修改配置文件:config下的kibana.yml
server.port:5601 server.host:’0.0.0.0’ elasticsearch.hosts:[‘http://x.x.x.x:9200’]- 1
- 2
- 3

3、切换用户,后台启动服务
nohup ./bin/kibana &- 1
4、测试,成功
浏览器输入 ip:5601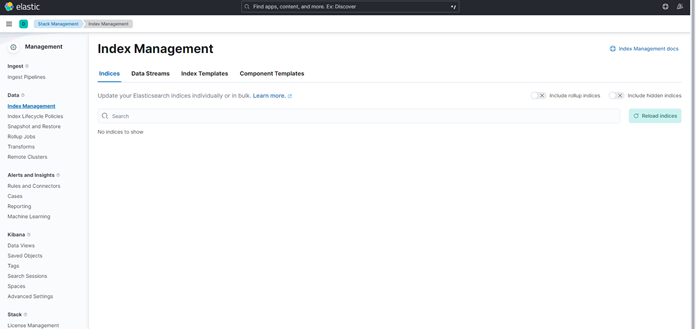
-
相关阅读:
python工程师-文件操作
最新版校园招聘进大厂系列----------(2)美团篇 -----未完待续
set和map通过一颗红黑树进行封装
【Mysql】case when 使用时的注意点
Qt 工程
2023Web前端开发面试手册
Hyperledger Fabric 通道配置文件和容器环境变量详解
多分类问题:初试手写数字识别
五、02【Java IO模型】之File类
计算机网络-DNS和HTTPDNS了解
- 原文地址:https://blog.csdn.net/qq_41749451/article/details/126831541
