-
Javassist实战
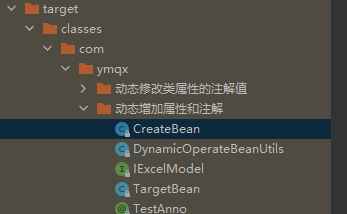
新建.class文件
Javaassist可以在一个已经编译好的类中添加新的属性/注解/方法,或者是修改已有的属性/注解/方法。也可以去生成一个新的类对象。
生成新类
引入jar包
<dependency> <groupId>org.javassistgroupId> <artifactId>javassistartifactId> <version>3.27.0-GAversion> dependency>- 1
- 2
- 3
- 4
- 5
编写创建字节码对象的类
public class TestBean2 { public static void main(String[] args) { /* 1、获取默认ClassPath 下的 ClassPool */ ClassPool pool = ClassPool.getDefault(); /* 2、创建一个新类 */ CtClass ctClass = pool.makeClass("com.ymqx.动态增加属性和注解.CreateBean"); try { /* 3、新增一个String型的,名字为 name 的变量 */ CtField ctField = new CtField(pool.get("java.lang.String"),"name",ctClass); /* 3.1、访问级别是 private */ ctField.setModifiers(Modifier.PRIVATE); /* 3.2、初始值是 "test" */ //ctClass.addField(ctField, CtField.Initializer.constant("test")); ctClass.addField(ctField); /* 4、使用CtNewMethod生成getter/setter */ CtMethod getter = CtNewMethod.getter("getName", ctField); CtMethod setter = CtNewMethod.setter("setName", ctField); ctClass.addMethod(getter); ctClass.addMethod(setter); /* 5、添加注解*/ /* 5.1、获取 ConstPool AnnotationsAttribute */ ConstPool constPool = ctClass.getClassFile().getConstPool(); AnnotationsAttribute annosAttribute = new AnnotationsAttribute(constPool, AnnotationsAttribute.visibleTag); /* 5.2、创建要添加的注解*/ Annotation jsonAnno = new Annotation(JSONField.class.getCanonicalName(), constPool); /* 5.3、设置注解中的属性和值*/ /*EnumMemberValue memberValue = new EnumMemberValue(constPool); memberValue.setType("boolean"); memberValue.setValue("false");*/ jsonAnno.addMemberValue("serialize", new BooleanMemberValue(false, constPool)); /* 5.4、将这个注解放到AnnotationsAttribute对象里面*/ annosAttribute.addAnnotation(jsonAnno); /* 5.5、将AnnotationsAttribute对象放到字段/类上*/ ctField.getFieldInfo().addAttribute(annosAttribute); /* 6、添加构造方法*/ /* 6.1、添加无参的构造函数 如果不添加,默认生成一个没有方法体的无参构造方法 */ CtConstructor cons1 = new CtConstructor(new CtClass[]{}, ctClass); cons1.setBody("{name = \"test\";}"); ctClass.addConstructor(cons1); /* 6.2、添加有参的构造函数 */ CtConstructor cons2 = new CtConstructor(new CtClass[]{pool.get("java.lang.String")}, ctClass); cons2.setBody("{$0.name = $1;}"); ctClass.addConstructor(cons2); /* 7、添加方法*/ /* 7.1、添加返回void、无参的打印方法 print */ CtMethod ctMethod = new CtMethod(CtClass.voidType, "print", new CtClass[]{}, ctClass); ctMethod.setModifiers(Modifier.PUBLIC); ctMethod.setBody("{System.out.println(name);}"); ctClass.addMethod(ctMethod); /* 7.2、make源码方式添加返回String的方法 change */ CtMethod ctMethod2 = CtNewMethod.make("public String change(String name) {\n" + " name += \"change\";\n" + " return name;\n" + "}", ctClass); ctClass.addMethod(ctMethod2); /* 8、生成字节码文件,方便查看创建出来的类的结果 */ ctClass.writeFile(System.getProperty("user.dir") + "\\target\\classes"); } catch (CannotCompileException e) { e.printStackTrace(); } catch (NotFoundException e) { e.printStackTrace(); } catch (IOException e) { e.printStackTrace(); } } }- 1
- 2
- 3
- 4
- 5
- 6
- 7
- 8
- 9
- 10
- 11
- 12
- 13
- 14
- 15
- 16
- 17
- 18
- 19
- 20
- 21
- 22
- 23
- 24
- 25
- 26
- 27
- 28
- 29
- 30
- 31
- 32
- 33
- 34
- 35
- 36
- 37
- 38
- 39
- 40
- 41
- 42
- 43
- 44
- 45
- 46
- 47
- 48
- 49
- 50
- 51
- 52
- 53
- 54
- 55
- 56
- 57
- 58
- 59
- 60
- 61
- 62
- 63
- 64
- 65
- 66
- 67
- 68
- 69
- 70
- 71
- 72
- 73
- 74
- 75
- 76
运行会生成新的.class文件
package com.ymqx.动态增加属性和注解; import com.alibaba.fastjson.annotation.JSONField; public class CreateBean { @JSONField( serialize = false ) private String name; public String getName() { return this.name; } public void setName(String var1) { this.name = var1; } public CreateBean() { this.name = "test"; } public CreateBean(String var1) { this.name = var1; } public void print() { System.out.println(this.name); } public String change(String var1) { var1 = String.valueOf(var1).concat(String.valueOf("change")); return var1; } }- 1
- 2
- 3
- 4
- 5
- 6
- 7
- 8
- 9
- 10
- 11
- 12
- 13
- 14
- 15
- 16
- 17
- 18
- 19
- 20
- 21
- 22
- 23
- 24
- 25
- 26
- 27
- 28
- 29
- 30
- 31
- 32
- 33
- 34
- 35
调用生成的类对象
创建一个类对象然后输出该对象编译完之后的 .class 文件。那如果我们想调用生成的类对象中的属性或者方法应该怎么去做呢?javassist也提供了相应的api。
方式一:读取 .class 文件再反射调用
public class GetBean { public static void main(String[] args) { //从classLoader中取出Person类的类对象 ClassPool classPool = ClassPool.getDefault(); Class<?> clazz = null; Object bean = null; try { //设置类路径 classPool.appendClassPath("D:\\中能电力\\代码\\MyTest\\target\\classes\\"); CtClass ctClass = classPool.get("com.ymqx.动态增加属性和注解.CreateBean"); //将获取ctClass 加载到上下文 clazz = ctClass.toClass(); //实例化对象 bean = clazz.newInstance(); Method setName = clazz.getMethod("setName", String.class); setName.invoke(bean, "不会叫的狼"); //打印对象 Method print = clazz.getMethod("print"); print.invoke(bean); //因为serialize = false,所以没有属性打印 System.out.println("toJSONString:"+ JSONObject.toJSONString(bean)); } catch (Exception e) { e.printStackTrace(); } } } 输出: 不会叫的狼 toJSONString:{}- 1
- 2
- 3
- 4
- 5
- 6
- 7
- 8
- 9
- 10
- 11
- 12
- 13
- 14
- 15
- 16
- 17
- 18
- 19
- 20
- 21
- 22
- 23
- 24
- 25
- 26
- 27
- 28
- 29
- 30
- 31
- 32
- 33
- 34
- 35
方式二:通过接口的方式
通过反射的方式去调用,问题在于我们的工程中其实并没有这个类对象,所以反射的方式比较麻烦,并且开销也很大。那么如果你的类对象可以抽象为一些方法的合集,就可以考虑为该类生成一个接口类。这样在newInstance()的时候我们就可以强转为接口,可以将反射的那一套省略掉了。
新增接口:
public interface BeanI { void print(); String change(String var1) ; }- 1
- 2
- 3
- 4
- 5
使代码生成的类,实现 PersonI 接口:
public class TestBean2 { public static void main(String[] args) { /* 1、获取默认ClassPath 下的 ClassPool */ ClassPool pool = ClassPool.getDefault(); /* 2、创建一个新类 */ CtClass ctClass = pool.makeClass("com.ymqx.动态增加属性和注解.CreateBean"); // 使代码生成的类,实现 PersonI 接口 ctClass.setInterfaces(new CtClass[]{pool.makeInterface("com.ymqx.动态增加属性和注解.BeanI")}); ... } }- 1
- 2
- 3
- 4
- 5
- 6
- 7
- 8
- 9
- 10
- 11
- 12
- 13
- 14
ctClass.setInterfaces(new CtClass[]{pool.makeInterface("com.ymqx.动态增加属性和注解.BeanI")});- 1
setInterfaces(CtClass[] list)的参数是个数组,可以实现多个接口。生成的.class文件实现了接口BeanI:
public class CreateBean implements BeanI { ... }- 1
- 2
- 3
如果不修改原先创建类代码,也可以事后给新类添加接口。
public class GetBean { public static void main(String[] args) { //从classLoader中取出Person类的类对象 ClassPool classPool = ClassPool.getDefault(); BeanI bean = null; try { // 设置类路径 classPool.appendClassPath("D:\\中能电力\\代码\\MyTest\\target\\classes\\"); CtClass ctClass = classPool.get("com.ymqx.动态增加属性和注解.CreateBean"); // 获取接口 CtClass codeClassI = classPool.get("com.ymqx.动态增加属性和注解.BeanI"); // 使代码生成的类,实现 PersonI 接口 ctClass.setInterfaces(new CtClass[]{codeClassI}); bean = (BeanI) ctClass.toClass().newInstance(); bean.print(); //因为serialize = false,所以没有属性打印 System.out.println("toJSONString:"+ JSONObject.toJSONString(bean)); } catch (Exception e) { e.printStackTrace(); } } } 输出: test toJSONString:{}- 1
- 2
- 3
- 4
- 5
- 6
- 7
- 8
- 9
- 10
- 11
- 12
- 13
- 14
- 15
- 16
- 17
- 18
- 19
- 20
- 21
- 22
- 23
- 24
- 25
- 26
- 27
- 28
封装公函
JavasistUtils
public class JavasistUtils { /** * 功能:动态创建类并添加注解 * */ public static void createBean(String className, Map<String, Map<String, Map<String, String>>> properties, String writeFilePath) { ClassPool pool = ClassPool.getDefault(); // 创建一个新类 CtClass ctClass = pool.makeClass(className); //让该类实现序列化接口 ctClass.setInterfaces(new CtClass[]{pool.makeInterface("com.ymqx.动态增加属性和注解.IExcelModel"),pool.makeInterface("java.io.Serializable")}); StringBuilder builder = new StringBuilder(); builder.append("return \"Person{\" + \n " ); try { for (String fieldKey : properties.keySet()) { //System.out.println("fieldKey=" + fieldKey); CtField ctField = new CtField(pool.get(String.class.getCanonicalName()), fieldKey, ctClass); ctField.setModifiers(Modifier.PRIVATE); ctClass.addField(ctField); // 类的字节码文件 ClassFile classFile = ctClass.getClassFile(); // 获取常量池 ConstPool constPool = classFile.getConstPool(); // 新增注解属性池 AnnotationsAttribute annotationsAttribute = new AnnotationsAttribute(constPool, AnnotationsAttribute.visibleTag); for (String annoKey : properties.get(fieldKey).keySet()) { //System.out.println("annoKey=" + annoKey); //创建要添加的注解 Annotation anno = new Annotation(Class.forName(annoKey).getCanonicalName(), constPool); //设置注解中的属性和值 properties.get(fieldKey).get(annoKey).forEach((k, v) -> { //System.out.println("k=" + k + ",v=" + v); anno.addMemberValue(k, new StringMemberValue(v, constPool)); }); //把这个注解放到一个AnnotationsAttribute对象里面 annotationsAttribute.addAnnotation(anno); } //把这个对象放在要打上这个注解的字段/类上面 ctField.getFieldInfo().addAttribute(annotationsAttribute); //添加getter setter方法 ctClass.addMethod(CtNewMethod.setter("set" + fieldKey.substring(0, 1).toUpperCase() + fieldKey.substring(1), ctField)); ctClass.addMethod(CtNewMethod.getter("get" + fieldKey.substring(0, 1).toUpperCase() + fieldKey.substring(1), ctField)); //组装toString方法体 String format = String.format("\"%s='\" + %s + '\\'' + ',' +\n", fieldKey, fieldKey); builder.append(format); } if ( builder.length()>0 && (-1 != builder.lastIndexOf(",")) ) { builder.setCharAt(builder.lastIndexOf(","), ' '); } builder.append("'}';"); //添加toString方法 CtMethod toStringMethod = new CtMethod(pool.get("java.lang.String"), "toString", null, ctClass); toStringMethod.setBody(builder.toString()); ctClass.addMethod(toStringMethod); //生成字节码文件,方便查看创建出来的类的结果 if (writeFilePath != null) { ctClass.writeFile(writeFilePath); } //也可以用这种方式,不用生成.class文件也可以直接使用动态生成的类 ctClass.toClass(ClassPool.getDefault().getClassLoader(), Class.class.getProtectionDomain()); } catch (Exception e) { e.printStackTrace(); } } }- 1
- 2
- 3
- 4
- 5
- 6
- 7
- 8
- 9
- 10
- 11
- 12
- 13
- 14
- 15
- 16
- 17
- 18
- 19
- 20
- 21
- 22
- 23
- 24
- 25
- 26
- 27
- 28
- 29
- 30
- 31
- 32
- 33
- 34
- 35
- 36
- 37
- 38
- 39
- 40
- 41
- 42
- 43
- 44
- 45
- 46
- 47
- 48
- 49
- 50
- 51
- 52
- 53
- 54
- 55
- 56
- 57
- 58
- 59
- 60
- 61
- 62
- 63
- 64
- 65
- 66
- 67
- 68
- 69
- 70
- 71
- 72
调用
public class TestBean { public static void main(String[] args) { /* 动态创建类 */ /* 设置需要新增的字段和注解 */ HashMap<String, String> annoValueMap1 = new HashMap<>(); annoValueMap1.put("name","change1"); annoValueMap1.put("type","1"); HashMap<String, Map<String, String>> annoMap1 = new HashMap<>(); annoMap1.put(TestAnno.class.getName(), annoValueMap1); HashMap<String, Map<String, Map<String, String>>> filedMap = new HashMap<>(); filedMap.put("val1", annoMap1); AtomicInteger atomicInteger = new AtomicInteger(); String className = TargetBean.class.getPackage().getName() + ".ExcelModel" + atomicInteger.getAndIncrement(); String writeFilePath = System.getProperty("user.dir") + "\\target\\classes"; /* 调用方法新增类 */ JavasistUtils.createBean(className, filedMap, writeFilePath); /*从classLoader中取出ExcelModel类的类对象*/ ClassLoader classLoader = ClassPool.getDefault().getClassLoader(); Class<?> clazz = null; try { //方法一:创建一个ExcelModel类的对象,并通过反射的形式给它设值 clazz = classLoader.loadClass(className); Object excelModel = clazz.newInstance(); Method setVal1 = clazz.getMethod("setVal1", String.class); setVal1.invoke(excelModel, "姓名"); //打印对象 System.out.println("toString:"+excelModel); System.out.println("toJSONString:"+ JSONObject.toJSONString(excelModel)); //方法二:定义一个接口,让新类实现,这样就可以通过接口访问新类了 ArrayList<IExcelModel> list = new ArrayList<>(); list.add((IExcelModel) excelModel); System.out.println(list); } catch (Exception e) { e.printStackTrace(); } } } 运行输出: toString:Person{val1='姓名' } toJSONString:{"val1":"姓名"} [Person{val1='姓名' }]- 1
- 2
- 3
- 4
- 5
- 6
- 7
- 8
- 9
- 10
- 11
- 12
- 13
- 14
- 15
- 16
- 17
- 18
- 19
- 20
- 21
- 22
- 23
- 24
- 25
- 26
- 27
- 28
- 29
- 30
- 31
- 32
- 33
- 34
- 35
- 36
- 37
- 38
- 39
- 40
- 41
- 42
- 43
- 44
- 45
- 46
- 47
- 48
- 49
所需注解:
public interface IExcelModel { } @Target({ ElementType.FIELD }) @Retention(RetentionPolicy.RUNTIME) @Inherited public @interface TestAnno { String name(); String type() default "1"; }- 1
- 2
- 3
- 4
- 5
- 6
- 7
- 8
- 9
- 10
参考文章:
javassist—字节码文件操作库 -
相关阅读:
受邀参加中日韩创新人才主题交流研讨会
均匀B样条曲线的表达式
Java集合---List和Set
华为机试:最小传输时延
一个 15 年 SAP ABAP 开发人员分享的 SAPGUI 一些个性化设置和实用小技巧试读版
维度建模之汇总分析表的设计经验分享
Linux - Shell、Console和Terminal的区别
vue响应式原理中的发布订阅模式的应用
【jQuery】jQuery中如何发送ajax请求以及解决跨域问题_10
vue 移动端app预览和保存pdf踩坑
- 原文地址:https://blog.csdn.net/weixin_40017062/article/details/126747195