-
博客系统项目详解
项目类型:Java Web项目
主要技术:Html、CSS、JS、Servlet、MySQL
开发工具:IDEA
数据库:MySQL
数据库表:2张
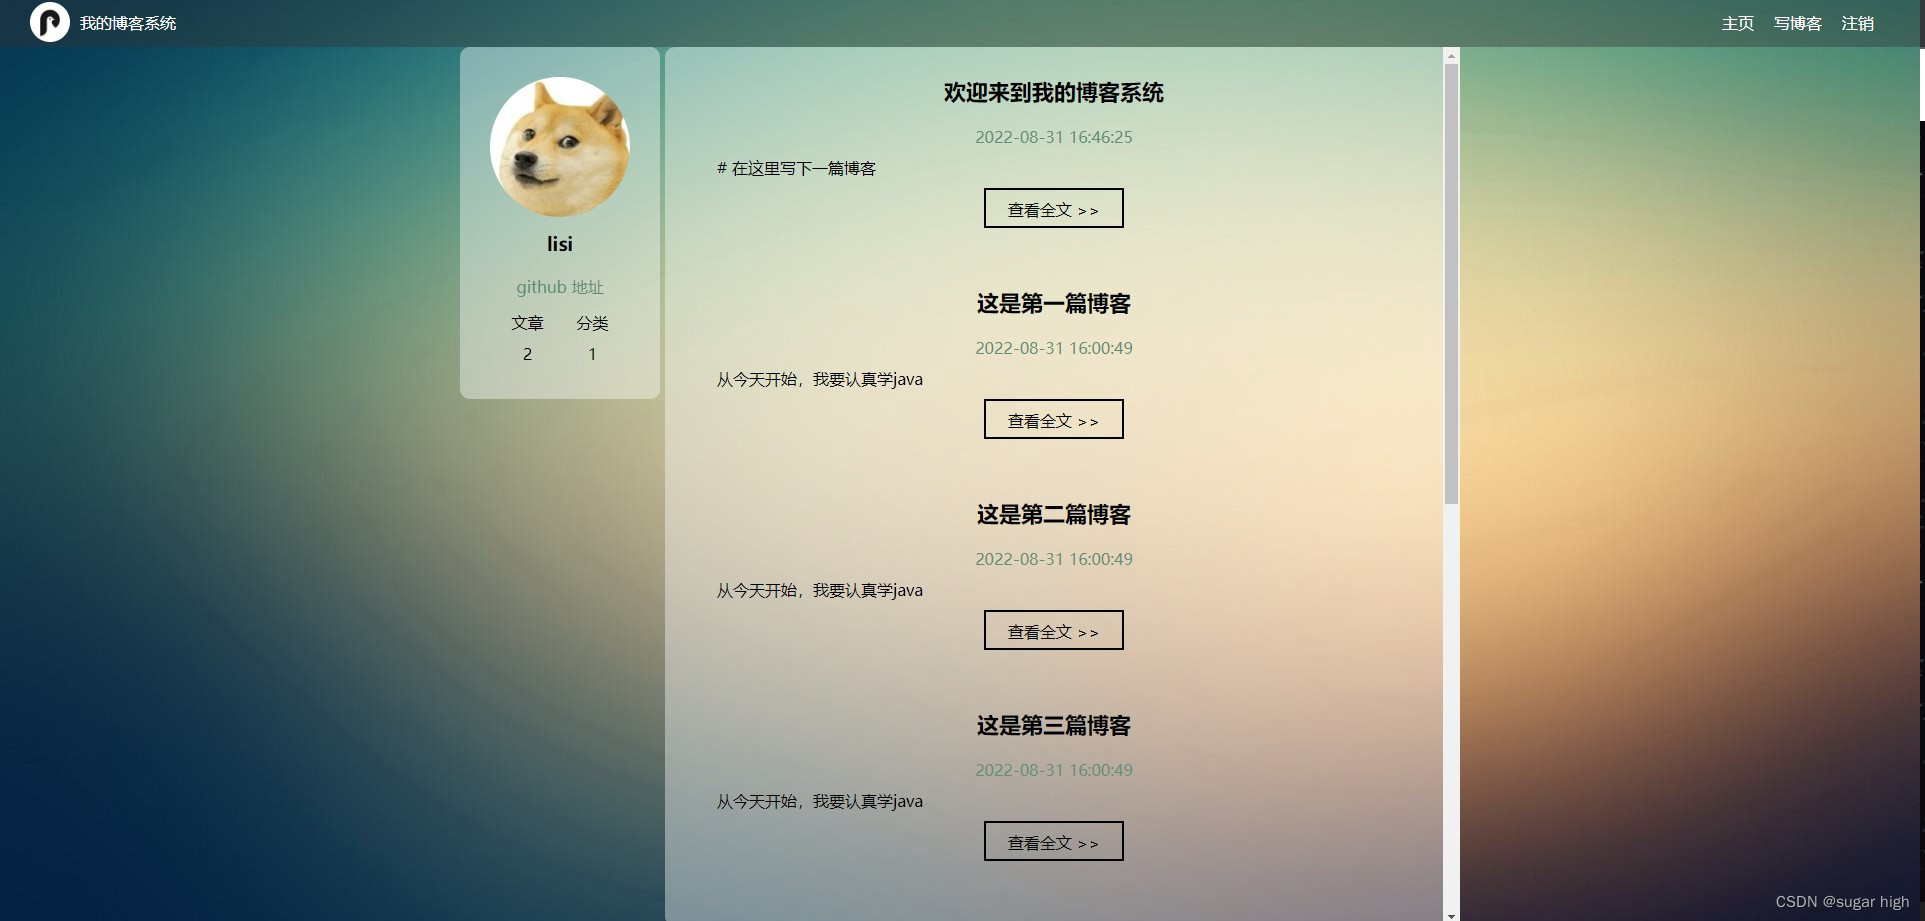
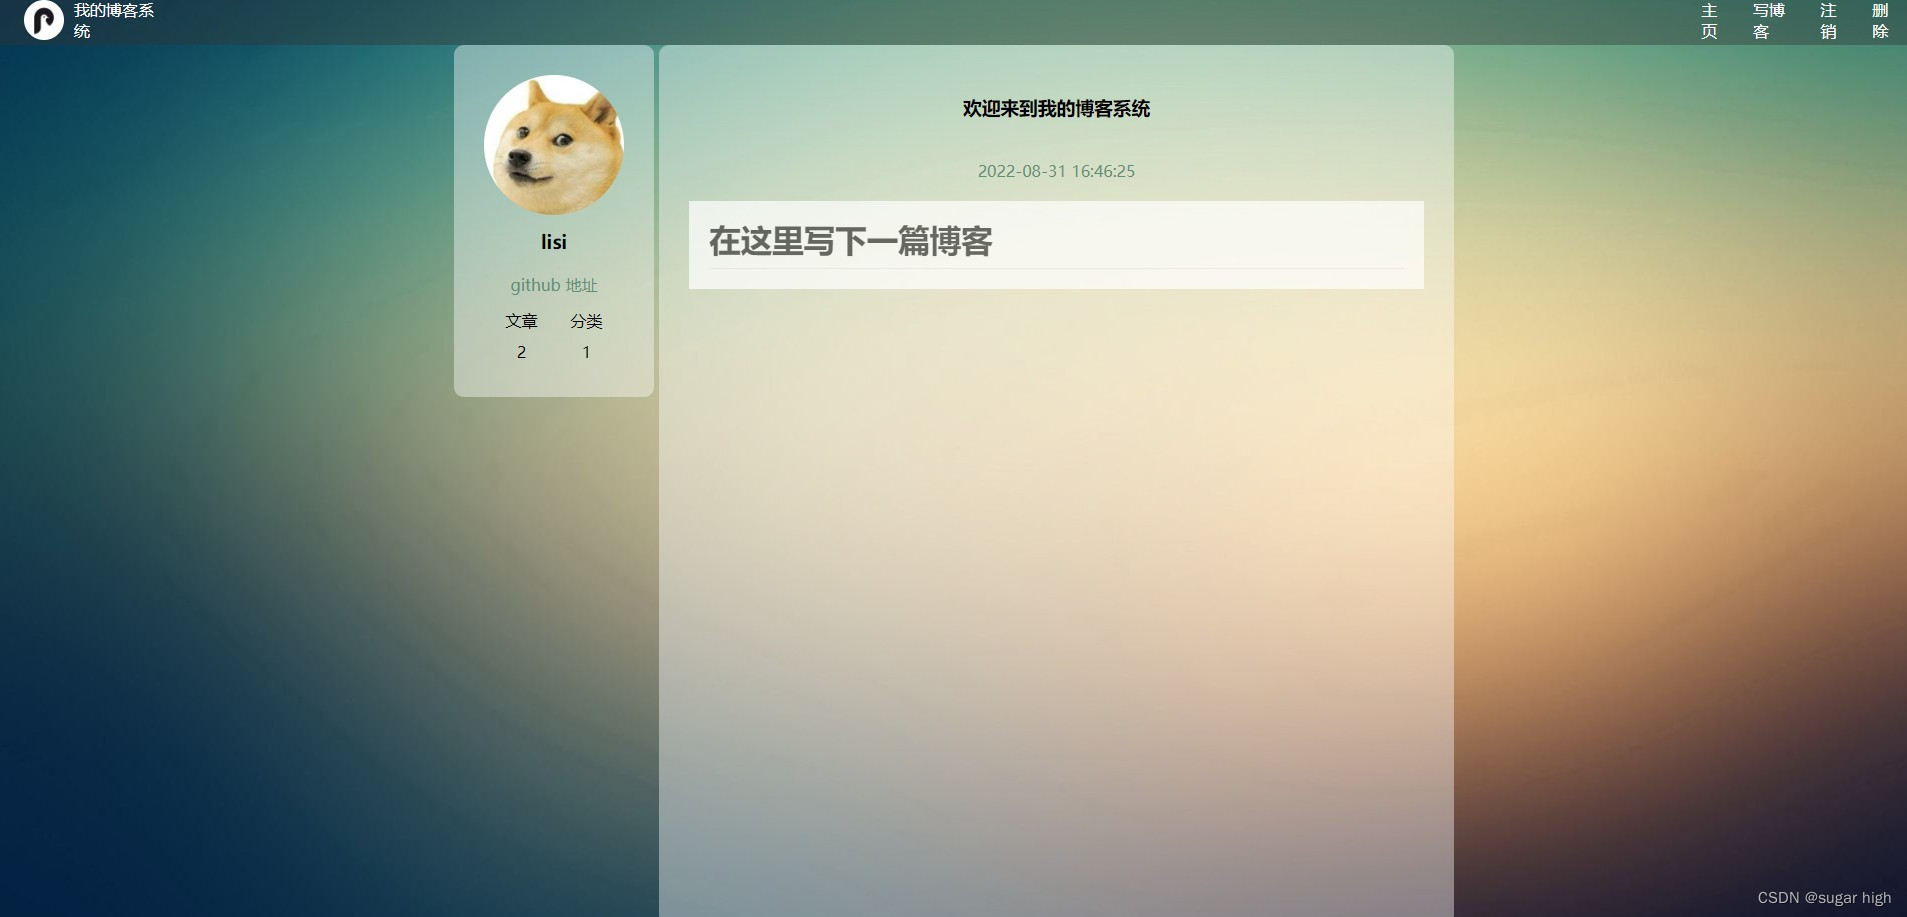
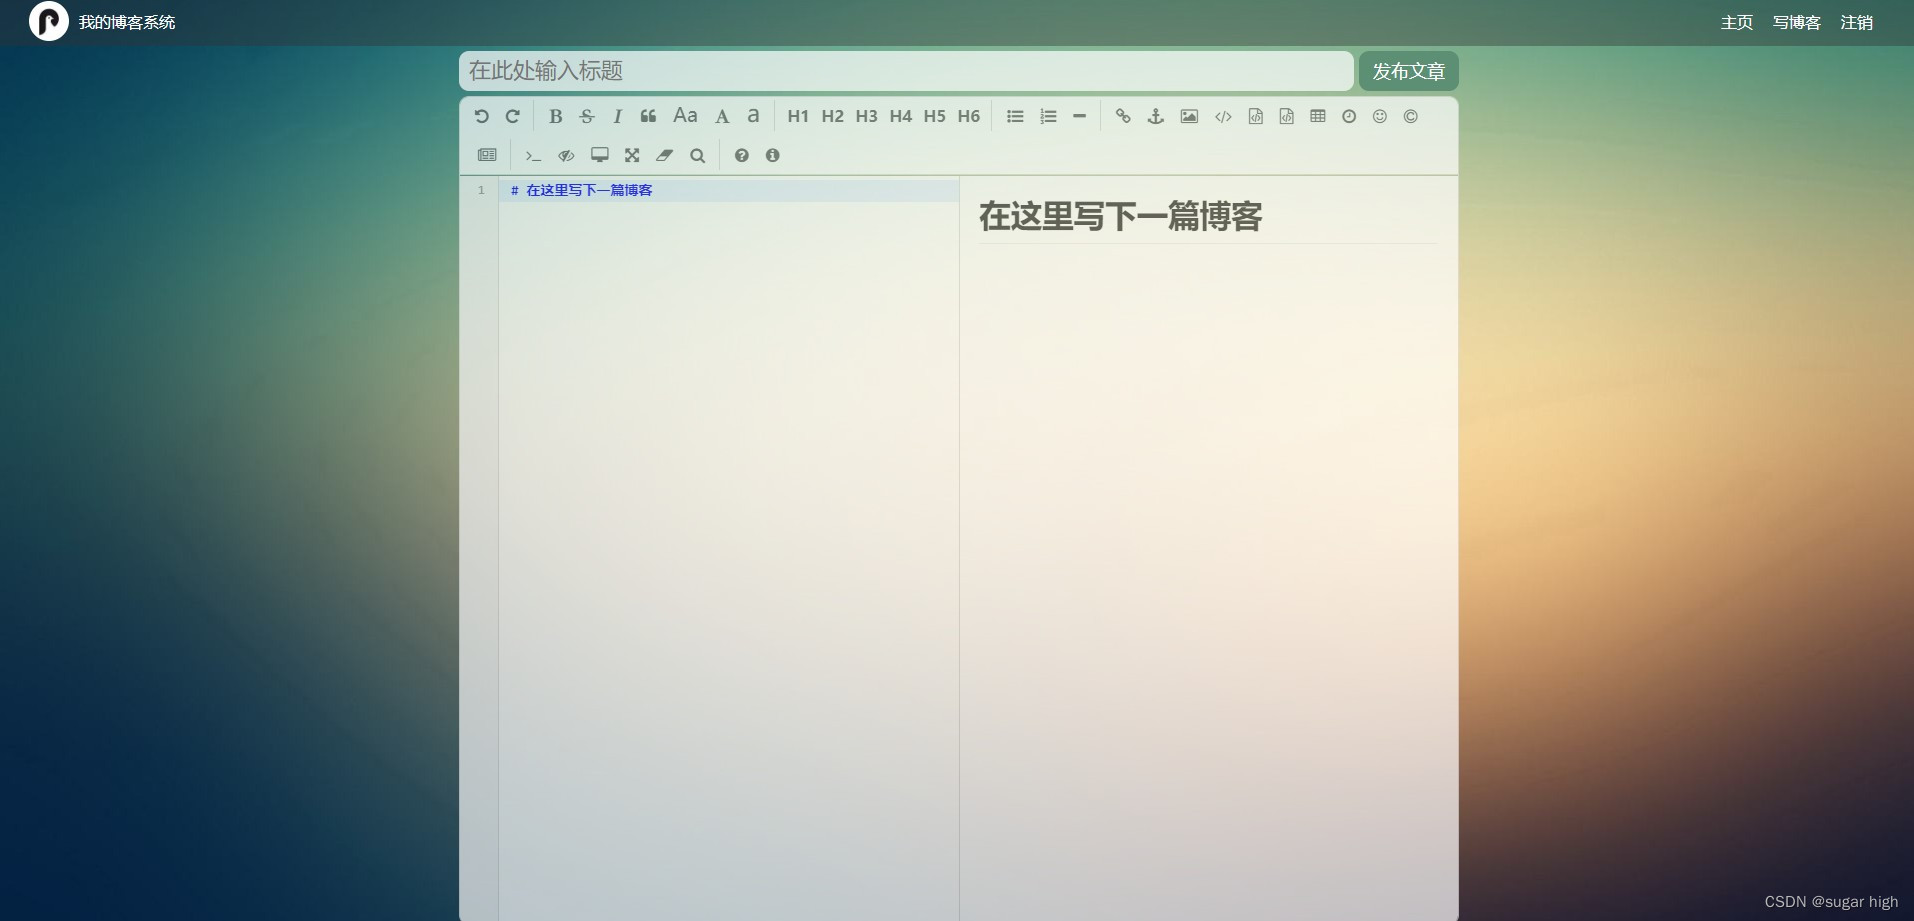
项目介绍:使用约定前后端接口,前后端分离的方法。后端采用Servlet,前端使用的是Html、CSS、JS。基本的功能包括用户登录、显示用户信息 、博客的编辑与发布、删除博客和用户注销功能。判定用户状态限制用户可操作的功能。页面展示
1.创建maven项目
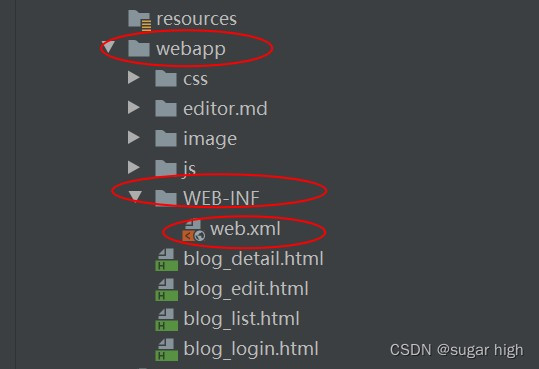
1.创建maven项目并创建好所需要的webapp目录
2.在web.xml引入代码片段<!DOCTYPE web-app PUBLIC "-//Sun Microsystems, Inc.//DTD Web Application 2.3//EN" "http://java.sun.com/dtd/web-app_2_3.dtd" > <web-app> <display-name>Archetype Created Web Application</display-name> </web-app>- 1
- 2
- 3
- 4
- 5
- 6
- 7
3.引入依赖(pom.xml)
<dependencies> <!-- https://mvnrepository.com/artifact/javax.servlet/javax.servlet-api --> <dependency> <groupId>javax.servlet</groupId> <artifactId>javax.servlet-api</artifactId> <version>3.1.0</version> <scope>provided</scope> </dependency> <!-- https://mvnrepository.com/artifact/com.fasterxml.jackson.core/jackson-databind --> <dependency> <groupId>com.fasterxml.jackson.core</groupId> <artifactId>jackson-databind</artifactId> <version>2.12.6.1</version> </dependency> <!-- 引入 mysql 驱动包 --> <!-- https://mvnrepository.com/artifact/mysql/mysql-connector-java --> <dependency> <groupId>mysql</groupId> <artifactId>mysql-connector-java</artifactId> <version>5.1.47</version> </dependency> </dependencies> <packaging>war</packaging> <build> <finalName>blog_sys</finalName> </build>- 1
- 2
- 3
- 4
- 5
- 6
- 7
- 8
- 9
- 10
- 11
- 12
- 13
- 14
- 15
- 16
- 17
- 18
- 19
- 20
- 21
- 22
- 23
- 24
- 25
- 26
- 27
2.导入写好的前端代码
将之前写好的前端代码导入到webapp目录下

3.设计数据库
本系统的两个实体信息包括用户和博客,因此创建用户表和博客表。
创建用户表:用户id ,用户名,用户密码
创建博客表:
博客的 id,博客的标题,博客的内容,博客的日期,作者 id
db.sql
-- 编写建库建表的 sql create database if not exists blog_sys; use blog_sys; -- 创建一个博客表 drop table if exists blog; create table blog ( blogId int primary key auto_increment, title varchar(1024), content mediumtext, userId int, postTime datetime ); -- 给博客表插入数据,方便测试 insert into blog values(null, '这是第一篇博客', '从今天开始,我要认真学java', 1, now()); insert into blog values(null, '这是第二篇博客', '从今天开始,我要认真学java', 1, now()); insert into blog values(null, '这是第三篇博客', '从今天开始,我要认真学java', 1, now()); insert into blog values(null, '这是第一篇博客', '从今天开始,我要认真学java', 2, now()); insert into blog values(null, '这是第二篇博客', '从今天开始,我要认真学java', 2, now()); insert into blog values(null, '这是第三篇博客', '从今天开始,我要认真学java', 2, now()); insert into blog values(null, '这是第四篇博客', '从今天开始,我要认真学java', 2, now()); -- 创建一个用户表 drop table if exists user; create table user( userId int primary key auto_increment, username varchar(128) unique, password varchar(128) ); insert into user values(null, 'zhangsan', '123'); insert into user values(null, 'lisi', '123');- 1
- 2
- 3
- 4
- 5
- 6
- 7
- 8
- 9
- 10
- 11
- 12
- 13
- 14
- 15
- 16
- 17
- 18
- 19
- 20
- 21
- 22
- 23
- 24
- 25
- 26
- 27
- 28
- 29
- 30
- 31
- 32
- 33
- 34
- 35
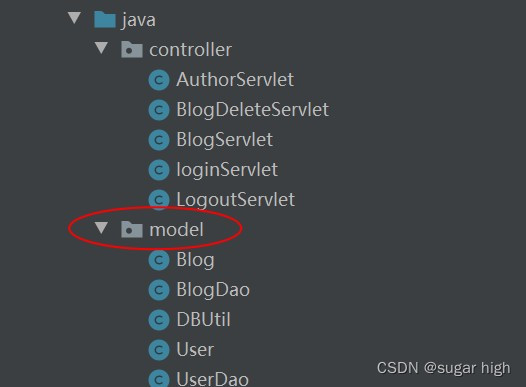
4.封装数据库操作
创建model包用来存放数据库操作代码
1)创建 DBUtil 类
用于和数据库建立连接
public class DBUtil { private static final String URL = "jdbc:mysql://127.0.0.1:3306/blog_sys?characterEncoding=utf8&useSSL=false"; private static final String USERNAME = "root"; private static final String PASSWORD = ""; private static volatile DataSource dataSource = null; private static DataSource getDataSource(){ if(dataSource == null){ synchronized (DBUtil.class){ if(dataSource == null){ dataSource = new MysqlDataSource(); ( (MysqlDataSource)dataSource).setURL(URL); ((MysqlDataSource)dataSource).setUser(USERNAME); ((MysqlDataSource)dataSource).setPassword(PASSWORD); } } } return dataSource; } public static Connection getConnection() throws SQLException { return getDataSource().getConnection(); } public static void close(Connection connection, PreparedStatement statement, ResultSet resultSet){ if(resultSet != null){ try { resultSet.close(); } catch (SQLException throwables) { throwables.printStackTrace(); } } if(statement != null){ try { statement.close(); } catch (SQLException throwables) { throwables.printStackTrace(); } } if(connection != null){ try { connection.close(); } catch (SQLException throwables) { throwables.printStackTrace(); } } } }- 1
- 2
- 3
- 4
- 5
- 6
- 7
- 8
- 9
- 10
- 11
- 12
- 13
- 14
- 15
- 16
- 17
- 18
- 19
- 20
- 21
- 22
- 23
- 24
- 25
- 26
- 27
- 28
- 29
- 30
- 31
- 32
- 33
- 34
- 35
- 36
- 37
- 38
- 39
- 40
- 41
- 42
- 43
- 44
- 45
- 46
- 47
- 48
- 49
- 50
- 51
- 52
- 53
- 54
- 55
- 56
- 57
- 58
- 59
- 60
- 61
- 62
- 63
- 64
- 65
- 66
- 67
2)创建 Blog类
博客信息和获取、设置博客信息方法的抽象类
public class Blog { private int blogId; private String title; private String content; private int userId; private Timestamp postTime; public int getBlogId() { return blogId; } public void setBlogId(int blogId) { this.blogId = blogId; } public String getTitle() { return title; } public void setTitle(String title) { this.title = title; } public String getContent() { return content; } public void setContent(String content) { this.content = content; } public int getUserId() { return userId; } public void setUserId(int userId) { this.userId = userId; } //把这里的getter方法给改了,不是返回一个时间戳对象,而是返回一个String(格式化好的时间) public String getPostTime() { //使用SimpleDateFormat来完成时间戳到格式化日期时间的转换 //这个转换过程,需要在构造方法中指定要转换的格式,然后调用format来进行转换 SimpleDateFormat simpleDateFormat = new SimpleDateFormat("yyyy-MM-dd HH:mm:ss"); return simpleDateFormat.format(postTime); } public void setPostTime(Timestamp postTime) { this.postTime = postTime; } }- 1
- 2
- 3
- 4
- 5
- 6
- 7
- 8
- 9
- 10
- 11
- 12
- 13
- 14
- 15
- 16
- 17
- 18
- 19
- 20
- 21
- 22
- 23
- 24
- 25
- 26
- 27
- 28
- 29
- 30
- 31
- 32
- 33
- 34
- 35
- 36
- 37
- 38
- 39
- 40
- 41
- 42
- 43
- 44
- 45
- 46
- 47
- 48
- 49
- 50
- 51
- 52
- 53
- 54
- 55
- 56
- 57
- 58
- 59
- 60
- 61
- 62
3)创建 User
用户信息和获取、设置用户信息方法的抽象类
public class User { private int userId = 0; private String username = ""; private String password = ""; public int getUserId() { return userId; } public void setUserId(int userId) { this.userId = userId; } public String getUsername() { return username; } public void setUsername(String username) { this.username = username; } public String getPassword() { return password; } public void setPassword(- 1
- 2
- 3
- 4
- 5
- 6
- 7
- 8
- 9
- 10
- 11
- 12
- 13
- 14
- 15
- 16
- 17
- 18
- 19
- 20
- 21
- 22
- 23
- 24
- 25
- 26
- 27
- 28
- 29
- 30
- 31
-
相关阅读:
如何像专家一样高效使用搜索引擎?适用于百度Baidu、谷歌Google
大珩PPT助手一键颜色设置
viple入门(五)
Allegro Design Entry HDL(OrCAD Capture HDL)工具栏管理详细介绍
css nth-child 的使用
C++的向上转型
统计字符出现次数类Counter
Python 连接 Oracle 详解
Linux应急响应学习
Redis知识补充
- 原文地址:https://blog.csdn.net/weixin_46429649/article/details/126660864
