-
【Sharding-JDBC】分库分表实际应用

内容介绍
1、基本概念
(1)什么是 Sharding Sphere
(2)分库分表
2、Sharding-JDBC 分库分表操作
3、Sharding-Proxy 分库分表操作
什么是 ShardingSphere
1、一套开源的分布式数据库中间件解决方案
2、有三个产品:Sharding-JDBC 和 Sharding-Proxy
3、定位为关系型数据库中间件,合理在分布式环境下使用关系型数据库操作
什么是分库分表
1、数据库数据量不可控的,随着时间和业务发展,造成表里面数据越来越多,如果再去对数据库表 curd 操作时候,造成性能问题。
2、方案 1:从硬件上
3、方案 2:分库分表
为了解决由于数据量过大而造成数据库性能降低问题。

分库分表的方式
1、分库分表有两种方式:垂直切分和水平切分
2、垂直切分:垂直分表和垂直分库
3、水平切分:水平分表和水平分库
4、垂直分表
(1)操作数据库中某张表,把这张表中一部分字段数据存到一张新表里面,再把这张表另一部分字段数据存到另外一张表里面

5、垂直分库
(1)把单一数据库按照业务进行划分,专库专表

6、水平分库

7、水平分表

分库分表应用和问题
1、应用
(1)在数据库设计时候考虑垂直分库和垂直分表
(2)随着数据库数据量增加,不要马上考虑做水平切分,首先考虑缓存处理,读写分离,使用索引等等方式,如果这些方式不能根本解决问题了,再考虑做水平分库和水平分表
2、分库分表问题
(1)跨节点连接查询问题(分页、排序)
(2)多数据源管理问题
Sharding-JDBC 简介
1、是轻量级的 java 框架,是增强版的 JDBC 驱动
2、Sharding-JDBC
(1)主要目的是:简化对分库分表之后数据相关操作

Sharding-JDBC 实现水平分表
1、搭建环境
(1)技术:SpringBoot 2.2.1+ MyBatisPlus + Sharding-JDBC + Druid 连接池
(2)创建 SpringBoot 工程

(3)修改工程 SpringBoot 版本 2.2.1
<parent> <groupId>org.springframework.boot</groupId> <artifactId>spring-boot-starter-parent</artifactId> <version>2.2.1.RELEASE</version> <relativePath/> <!-- lookup parent from repository --> </parent>- 1
- 2
- 3
- 4
- 5
- 6
(3)引入所需要的依赖
<dependency> <groupId>org.springframework.boot</groupId> <artifactId>spring-boot-starter</artifactId> </dependency> <dependency> <groupId>org.springframework.boot</groupId> <artifactId>spring-boot-starter-test</artifactId> </dependency> <dependency> <groupId>com.alibaba</groupId> <artifactId>druid-spring-boot-starter</artifactId> <version>1.1.20</version> </dependency> <dependency> <groupId>mysql</groupId> <artifactId>mysql-connector-java</artifactId> </dependency> <dependency> <groupId>org.apache.shardingsphere</groupId> <artifactId>sharding-jdbc-spring-boot-starter</artifactId> <version>4.0.0-RC1</version> </dependency> <dependency> <groupId>com.baomidou</groupId> <artifactId>mybatis-plus-boot-starter</artifactId> <version>3.0.5</version> </dependency> <dependency> <groupId>org.projectlombok</groupId> <artifactId>lombok</artifactId> </dependency>- 1
- 2
- 3
- 4
- 5
- 6
- 7
- 8
- 9
- 10
- 11
- 12
- 13
- 14
- 15
- 16
- 17
- 18
- 19
- 20
- 21
- 22
- 23
- 24
- 25
- 26
- 27
- 28
- 29
- 30
- 31
- 32
- 33
- 34
2、按照水平分表的方式,创建数据库和数据库表
(1)创建数据库 course_db
(2)在数据库创建两张表 course_1 和 course_2
(3)约定规则:如果添加课程 id 是偶数把数据添加 course_1,如果奇数添加到 course_2

3、编写代码实现对分库分表后数据的操作
(1)创建实体类,mapper

4、配置 Sharding-JDBC 分片策略
(1)在项目 application.properties 配置文件中进行配置

# shardingjdbc 分片策略 # 配置数据源,给数据源起名称 spring.shardingsphere.datasource.names=m1 # 一个实体类对应两张表,覆盖 spring.main.allow-bean-definition-overriding=true #配置数据源具体内容,包含连接池,驱动,地址,用户名和密码 spring.shardingsphere.datasource.m1.type=com.alibaba.druid.pool.DruidDataSource spring.shardingsphere.datasource.m1.driver-class-name=com.mysql.cj.jdbc.Driver spring.shardingsphere.datasource.m1.url=jdbc:mysql://localhost:3306/course_db?serverTimezone=GMT%2B8 spring.shardingsphere.datasource.m1.username=root spring.shardingsphere.datasource.m1.password=root #指定 course 表分布情况,配置表在哪个数据库里面,表名称都是什么 m1.course_1 , m1.course_2 spring.shardingsphere.sharding.tables.course.actual-data-nodes=m1.course_$->{1..2} # 指定 course 表里面主键 cid 生成策略 SNOWFLAKE spring.shardingsphere.sharding.tables.course.key-generator.column=cid spring.shardingsphere.sharding.tables.course.key-generator.type=SNOWFLAKE # 指定分片策略 约定 cid 值偶数添加到 course_1 表,如果 cid 是奇数添加到 course_2表 spring.shardingsphere.sharding.tables.course.table-strategy.inline.shardingcolumn=cid spring.shardingsphere.sharding.tables.course.table-strategy.inline.algorithmexpression=course_$->{cid % 2 + 1} # 打开 sql 输出日志 spring.shardingsphere.props.sql.show=true- 1
- 2
- 3
- 4
- 5
- 6
- 7
- 8
- 9
- 10
- 11
- 12
- 13
- 14
- 15
- 16
- 17
- 18
- 19
- 20
- 21
- 22
- 23
- 24
- 25
- 26
- 27
5、编写测试代码
@RunWith(SpringRunner.class) @SpringBootTest public class ShardingjdbcdemoApplicationTests { //注入mapper @Autowired private CourseMapper courseMapper; //=======================测试水平分表=================== //添加课程的方法 @Test public void addCourse() { for(int i=1;i<=10;i++) { Course course = new Course(); course.setCname("java"+i); course.setUserId(100L); course.setCstatus("Normal"+i); courseMapper.insert(course); } } //查询课程的方法 @Test public void findCourse() { QueryWrapper<Course> wrapper = new QueryWrapper<>(); wrapper.eq("cid",465114666322886656L); Course course = courseMapper.selectOne(wrapper); System.out.println(course); } }- 1
- 2
- 3
- 4
- 5
- 6
- 7
- 8
- 9
- 10
- 11
- 12
- 13
- 14
- 15
- 16
- 17
- 18
- 19
- 20
- 21
- 22
- 23
- 24
- 25
- 26
- 27
- 28
- 29
(1)上面测试代码执行,报错了

(2)解决方案,在配置文件中添加一行配置
# 一个实体类对应两张表,覆盖 spring.main.allow-bean-definition-overriding=true- 1
- 2
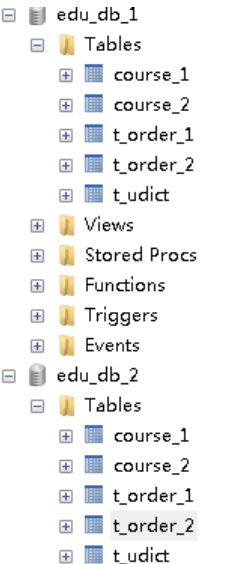
Sharding-JDBC 实现水平分库

2、创建数据库和表

3、在SpringBoot 配置文件配置数据库分片规则
#配置数据源的名字 server.port=8085 spring.shardingsphere.datasource.names=m1,m2 #配置第一个数据源具体内容,包含连接池,驱动,地址,用户名和密码 spring.shardingsphere.datasource.m1.type=com.alibaba.druid.pool.DruidDataSource spring.shardingsphere.datasource.m1.driver-class-name=com.mysql.cj.jdbc.Driver spring.shardingsphere.datasource.m1.url=jdbc:mysql://localhost:3306/edu_db_1?serverTimezone=GMT%2B8 spring.shardingsphere.datasource.m1.username=root spring.shardingsphere.datasource.m1.password=111111 #配置第二个数据源具体内容,包含连接池,驱动,地址,用户名和密码 spring.shardingsphere.datasource.m2.type=com.alibaba.druid.pool.DruidDataSource spring.shardingsphere.datasource.m2.driver-class-name=com.mysql.cj.jdbc.Driver spring.shardingsphere.datasource.m2.url=jdbc:mysql://localhost:3306/edu_db_2?serverTimezone=GMT%2B8 spring.shardingsphere.datasource.m2.username=root spring.shardingsphere.datasource.m2.password=111111 # 一个实体类对应两张表,覆盖 spring.main.allow-bean-definition-overriding=true ##指定查询到库的那个表 spring.shardingsphere.sharding.tables.course.actual-data-nodes=m$->{1..2}.course_$->{1..2} ##定义主键的规则 spring.shardingsphere.sharding.tables.course.key-generator.column=cid spring.shardingsphere.sharding.tables.course.key-generator.type=snowflake ##指定表分片的策略 约定cid值,奇数在 spring.shardingsphere.sharding.tables.course.table-strategy.inline.sharding-column=cid spring.shardingsphere.sharding.tables.course.table-strategy.inline.algorithm-expression=course_$->{cid % 2 + 1} ##指定数据库的分片规则 约定user_id 奇数在库2 偶数在库1 ##spring.shardingsphere.sharding.default-database-strategy.inline.sharding-column=user_id ##spring.shardingsphere.sharding.default-database-strategy.inline.algorithm-expression=m$->{user_id % 2 + 1} spring.shardingsphere.sharding.tables.course.database-strategy.inline.sharding-column=user_id spring.shardingsphere.sharding.tables.course.database-strategy.inline.algorithm-expression=m$->{user_id % 2 + 1} ###打开sql日志 spring.shardingsphere.props.sql.show=true- 1
- 2
- 3
- 4
- 5
- 6
- 7
- 8
- 9
- 10
- 11
- 12
- 13
- 14
- 15
- 16
- 17
- 18
- 19
- 20
- 21
- 22
- 23
- 24
- 25
- 26
- 27
- 28
- 29
- 30
- 31
- 32
- 33
- 34
- 35
- 36
- 37
- 38
- 39
- 40
- 41
4、编写测试方法
//======================测试水平分库===================== //添加操作 @Test public void addCourseDb() { Course course = new Course(); course.setCname("javademo1"); //分库根据user_id course.setUserId(100L); course.setCstatus("Normal1"); courseMapper.insert(course); } //查询操作 @Test public void findCourseDb() { QueryWrapperwrapper = new QueryWrapper<>(); //设置userid值 wrapper.eq("user_id",100L); //设置cid值 wrapper.eq("cid",768416853885190145L); Course course = courseMapper.selectOne(wrapper); System.out.println(course); } //分页查询操作 @Test public void findCourseDbPage() { QueryWrapper wrapper = new QueryWrapper<>(); IPage page=new Page (); page.setCurrent(1); page.setSize(4); IPage page1 = courseMapper.selectPage(page, wrapper); final List records = page1.getRecords(); for (Course record : records) { System.out.println(record); } } - 1
- 2
- 3
- 4
- 5
- 6
- 7
- 8
- 9
- 10
- 11
- 12
- 13
- 14
- 15
- 16
- 17
- 18
- 19
- 20
- 21
- 22
- 23
- 24
- 25
- 26
- 27
- 28
- 29
- 30
- 31
- 32
- 33
- 34
- 35
- 36
- 37
Sharding-JDBC实现垂直分库
1、需求分析

2、创建数据库和表

3、编写操作代码
(1)创建 user 实体类和 mapper
@Data @TableName(value = "t_user") //指定对应表 public class User { private Long userId; private String username; private String ustatus; }- 1
- 2
- 3
- 4
- 5
- 6
- 7
(2)配置垂直分库策略
#配置数据源的名字 server.port=8085 spring.shardingsphere.datasource.names=m1,m2,m0 #配置第一个数据源具体内容,包含连接池,驱动,地址,用户名和密码 spring.shardingsphere.datasource.m1.type=com.alibaba.druid.pool.DruidDataSource spring.shardingsphere.datasource.m1.driver-class-name=com.mysql.cj.jdbc.Driver spring.shardingsphere.datasource.m1.url=jdbc:mysql://localhost:3306/edu_db_1?serverTimezone=GMT%2B8 spring.shardingsphere.datasource.m1.username=root spring.shardingsphere.datasource.m1.password=111111 #配置第二个数据源具体内容,包含连接池,驱动,地址,用户名和密码 spring.shardingsphere.datasource.m2.type=com.alibaba.druid.pool.DruidDataSource spring.shardingsphere.datasource.m2.driver-class-name=com.mysql.cj.jdbc.Driver spring.shardingsphere.datasource.m2.url=jdbc:mysql://localhost:3306/edu_db_2?serverTimezone=GMT%2B8 spring.shardingsphere.datasource.m2.username=root spring.shardingsphere.datasource.m2.password=111111 #配置第三个数据源具体内容,包含连接池,驱动,地址,用户名和密码 spring.shardingsphere.datasource.m0.type=com.alibaba.druid.pool.DruidDataSource spring.shardingsphere.datasource.m0.driver-class-name=com.mysql.cj.jdbc.Driver spring.shardingsphere.datasource.m0.url=jdbc:mysql://localhost:3306/edu_user?serverTimezone=GMT%2B8 spring.shardingsphere.datasource.m0.username=root spring.shardingsphere.datasource.m0.password=111111 # 一个实体类对应两张表,覆盖 spring.main.allow-bean-definition-overriding=true ##配置t_user的专库专表 spring.shardingsphere.sharding.tables.t_user.actual-data-nodes=m$->{0}.t_user ##定义主键的规则 spring.shardingsphere.sharding.tables.t_user.key-generator.column=user_id spring.shardingsphere.sharding.tables.t_user.key-generator.type=snowflake ##指定表分片的策略 spring.shardingsphere.sharding.tables.t_user.table-strategy.inline.sharding-column=user_id spring.shardingsphere.sharding.tables.t_user.table-strategy.inline.algorithm-expression=t_user ##指定查询到库的那个表 spring.shardingsphere.sharding.tables.course.actual-data-nodes=m$->{1..2}.course_$->{1..2} ##定义主键的规则 spring.shardingsphere.sharding.tables.course.key-generator.column=cid spring.shardingsphere.sharding.tables.course.key-generator.type=snowflake ##指定表分片的策略 约定cid值,奇数在 spring.shardingsphere.sharding.tables.course.table-strategy.inline.sharding-column=cid spring.shardingsphere.sharding.tables.course.table-strategy.inline.algorithm-expression=course_$->{cid % 2 + 1} ##指定数据库的分片规则 约定user_id 奇数在库2 偶数在库1 ##spring.shardingsphere.sharding.default-database-strategy.inline.sharding-column=user_id ##spring.shardingsphere.sharding.default-database-strategy.inline.algorithm-expression=m$->{user_id % 2 + 1} spring.shardingsphere.sharding.tables.course.database-strategy.inline.sharding-column=user_id spring.shardingsphere.sharding.tables.course.database-strategy.inline.algorithm-expression=m$->{user_id % 2 + 1} ###打开sql日志 spring.shardingsphere.props.sql.show=true- 1
- 2
- 3
- 4
- 5
- 6
- 7
- 8
- 9
- 10
- 11
- 12
- 13
- 14
- 15
- 16
- 17
- 18
- 19
- 20
- 21
- 22
- 23
- 24
- 25
- 26
- 27
- 28
- 29
- 30
- 31
- 32
- 33
- 34
- 35
- 36
- 37
- 38
- 39
- 40
- 41
- 42
- 43
- 44
- 45
- 46
- 47
- 48
- 49
- 50
- 51
- 52
- 53
- 54
- 55
- 56
- 57
- 58
- 59
(3)编写测试代码
//======================测试垂直分库================== //添加操作 @Test public void addUserDb() { User user = new User(); user.setUsername("lucymaryEE"); user.setUstatus("a"); userMapper.insert(user); } //查询操作 @Test public void findUserDb() { QueryWrapperwrapper = new QueryWrapper<>(); //设置userid值 wrapper.eq("user_id",768510711851646977L); User user = userMapper.selectOne(wrapper); System.out.println(user); } - 1
- 2
- 3
- 4
- 5
- 6
- 7
- 8
- 9
- 10
- 11
- 12
- 13
- 14
- 15
- 16
- 17
- 18
- 19
Sharding-JDBC 操作公共表
1、公共表
(1)存储固定数据的表,表数据很少发生变化,查询时候经常进行关联
(2)在每个数据库中创建出相同结构公共表
2、在多个数据库都创建相同结构公共表

3、在项目配置文件 application.properties 进行公共表配置
# 配置公共表 spring.shardingsphere.sharding.broadcast-tables=t_udict spring.shardingsphere.sharding.tables.t_udict.key-generator.column=dictid spring.shardingsphere.sharding.tables.t_udict.key-generator.type=SNOWFLAKE- 1
- 2
- 3
- 4
4、编写测试代码
(1)创建新实体类和 mapper
@Data @TableName(value = "t_udict") public class Udict { private Long dictid; private String ustatus; private String uvalue; }- 1
- 2
- 3
- 4
- 5
- 6
- 7

(2)编写添加和删除方法进行测试
//======================测试公共表=================== //添加操作 @Test public void addDict() { Udict udict = new Udict(); udict.setUstatus("a"); udict.setUvalue("已启用"); udictMapper.insert(udict); } //删除操作 @Test public void deleteDict() { QueryWrapper<Udict> wrapper = new QueryWrapper<>(); //设置userid值 wrapper.eq("dictid",768432818194743297L); udictMapper.delete(wrapper); }- 1
- 2
- 3
- 4
- 5
- 6
- 7
- 8
- 9
- 10
- 11
- 12
- 13
- 14
- 15
- 16
- 17
- 18
Sharding-JDBC 实现读写分离
1、读写分离概念
为了确保数据库产品的稳定性,很多数据库拥有双机热备功能。也就是,第一台数据库服务器,是对外提供增删改业务的生产服务器;第二台数据库服务器,主要进行读的操作。原理:让主数据库( master )处理事务性增、改、删操作,而从数据库( slave )处理SELECT查询操作。

读写分离原理:

Sharding-JDBC 通过 sql 语句语义分析,实现读写分离过程,不会做数据同步
2、MySQL 配置读写分离
第一步 创建两个 MySQL 数据库服务,并且启动两个 MySQL 服务(linux环境下)
1、准备好的docker-compose文件
version: '3.1' services: mysql_master: image: mysql:5.7 restart: always container_name: mysql_master ports: - 3306:3306 volumes: - ~/mysql_master/conf:/etc/mysql/conf.d - ~/mysql_master/logs:/logs - ~/mysql_master/data:/var/lib/mysql environment: MYSQL_ROOT_PASSWORD: root mysql_slave: image: mysql:5.7 restart: always container_name: mysql_slave ports: - 3307:3306 volumes: - ~/mysql_slave/conf:/etc/mysql/conf.d - ~/mysql_slave/logs:/logs - ~/mysql_slave/data:/var/lib/mysql environment: MYSQL_ROOT_PASSWORD: root- 1
- 2
- 3
- 4
- 5
- 6
- 7
- 8
- 9
- 10
- 11
- 12
- 13
- 14
- 15
- 16
- 17
- 18
- 19
- 20
- 21
- 22
- 23
- 24
- 25
- 26
- 27
2、启动docker容器
docker-compose up -d- 1

Docker配置MySQL的主从复制
3、配置主库(在宿主机中操作)
cd ~/mysql_master/conf
vim my.cnf
内容如下:[mysqld] server_id=1 #表示数据库服务的标识 log_bin=mysql-binlog #表示开启二进制日志文件,并且设置二进制日志文件的名称 binlog_do_db=mydb #表示允许进行复制的数据库名称(可以暂时不存在) character_set_server=utf8 #设置数据库编码集- 1
- 2
- 3
- 4
- 5


4、测试主库
show master status;- 1

5、配置主库的复制账号
grant replication slave, replication client on *.* to 'repl'@'%' identified by 'repl';- 1
6、配置从库
cd ~/mysql_slave/conf
vim my.cnf 内容如下:
[mysqld] server_id=2 #表示数据库服务的标识 relay_log=mysql-relay-bin #表示开启中继日志,并且设置中继日志的名称 character_set_server=utf8 #设置数据库编码集- 1
- 2
- 3
- 4
7、配置从库连接的主库
change master to master_host='主库的ip地址', master_port=主库的端口, master_user='repl', master_password='repl', master_log_file='主库二进制文件的名称', master_log_pos=主从复制的起始位置; CHANGE MASTER TO MASTER_HOST='192.168.229.133', MASTER_PORT=3306, MASTER_USER='repl', MASTER_PASSWORD='repl', MASTER_LOG_FILE='mysql-binlog.000001', MASTER_LOG_POS=1755;- 1
- 2
- 3
- 4
- 5
- 6
- 7
- 8
- 9
- 10
- 11
- 12
- 13
- 14
- 15
- 16
8、从库开始/停止复制
start/stop slave;- 1
9、测试从库
show slave status;- 1


3、Sharding-JDBC操作
(1)配置读写分离策略
#配置数据源的名字 server.port=8085 spring.shardingsphere.datasource.names=m0,s0 #配置第三个数据源具体内容,包含连接池,驱动,地址,用户名和密码 spring.shardingsphere.datasource.m0.type=com.alibaba.druid.pool.DruidDataSource spring.shardingsphere.datasource.m0.driver-class-name=com.mysql.cj.jdbc.Driver spring.shardingsphere.datasource.m0.url=jdbc:mysql://192.168.229.133:3306/mydb?serverTimezone=GMT%2B8&useSSL=false spring.shardingsphere.datasource.m0.username=root spring.shardingsphere.datasource.m0.password=root #配置第四个数据源具体内容,包含连接池,驱动,地址,用户名和密码 spring.shardingsphere.datasource.s0.type=com.alibaba.druid.pool.DruidDataSource spring.shardingsphere.datasource.s0.driver-class-name=com.mysql.cj.jdbc.Driver spring.shardingsphere.datasource.s0.url=jdbc:mysql://192.168.229.133:3307/mydb?serverTimezone=GMT%2B8&useSSL=false spring.shardingsphere.datasource.s0.username=root spring.shardingsphere.datasource.s0.password=root # 一个实体类对应两张表,覆盖 spring.main.allow-bean-definition-overriding=true ##定义主库 spring.shardingsphere.sharding.master-slave-rules.ds0.master-data-source-name=m0 ##定义副库 spring.shardingsphere.sharding.master-slave-rules.ds0.slave-data-source-names=s0 # t_user 分表策略,固定分配至 ds0 的 t_user 真实表 spring.shardingsphere.sharding.tables.t_user.actual-data-nodes=ds0.t_user ##定义主键的规则 spring.shardingsphere.sharding.tables.t_user.key-generator.column=user_id spring.shardingsphere.sharding.tables.t_user.key-generator.type=snowflake ##指定表分片的策略 spring.shardingsphere.sharding.tables.t_user.table-strategy.inline.sharding-column=user_id spring.shardingsphere.sharding.tables.t_user.table-strategy.inline.algorithm-expression=t_user ###打开sql日志 spring.shardingsphere.props.sql.show=true- 1
- 2
- 3
- 4
- 5
- 6
- 7
- 8
- 9
- 10
- 11
- 12
- 13
- 14
- 15
- 16
- 17
- 18
- 19
- 20
- 21
- 22
- 23
- 24
- 25
- 26
- 27
- 28
- 29
- 30
- 31
- 32
- 33
- 34
- 35
- 36
- 37
- 38
- 39
- 40
(2)编写测试代码
//添加操作 @Test public void addUserDb() { User user = new User(); user.setUsername("lucymaryEE"); user.setUstatus("a"); userMapper.insert(user); } //查询操作 @Test public void findUserDb() { QueryWrapperwrapper = new QueryWrapper<>(); //设置userid值 wrapper.eq("user_id",768510711851646977L); User user = userMapper.selectOne(wrapper); System.out.println(user); } - 1
- 2
- 3
- 4
- 5
- 6
- 7
- 8
- 9
- 10
- 11
- 12
- 13
- 14
- 15
- 16
- 17
- 18
Sharding-Proxy简介
1、定位为透明的数据库代理端

2、Sharding-Proxy 独立应用,需要安装服务,进行分库分表或者读写分离配置,启动
使用
3、安装
(1)下载安装软件


(2)把下载之后压缩文件,解压,启动 bin 目录启动文件就可以了

Sharding-Proxy 配置(分表)
1、进入 conf目录,修改文件server.yaml,打开两段内容注释

authentication: users: root: password: root sharding: password: sharding authorizedSchemas: sharding_db props: max.connections.size.per.query: 1 acceptor.size: 16 # The default value is available processors count * 2. executor.size: 16 # Infinite by default. proxy.frontend.flush.threshold: 128 # The default value is 128. # LOCAL: Proxy will run with LOCAL transaction. # XA: Proxy will run with XA transaction. # BASE: Proxy will run with B.A.S.E transaction. proxy.transaction.type: LOCAL proxy.opentracing.enabled: false query.with.cipher.column: true sql.show: false- 1
- 2
- 3
- 4
- 5
- 6
- 7
- 8
- 9
- 10
- 11
- 12
- 13
- 14
- 15
- 16
- 17
- 18
- 19
- 20
- 21
2、进入 conf 目录,修改 config-sharding.yaml

(1)复制 mysql 驱动 jar 包到 lib 目录


schemaName: sharding_db dataSources: ds_0: url: jdbc:mysql://127.0.0.1:3306/edu_db_1?serverTimezone=UTC&useSSL=false username: root password: 11111 connectionTimeoutMilliseconds: 30000 idleTimeoutMilliseconds: 60000 maxLifetimeMilliseconds: 1800000 maxPoolSize: 50 shardingRule: tables: t_order: actualDataNodes: ds_${0}.t_order_${0..1} tableStrategy: inline: shardingColumn: order_id algorithmExpression: t_order_${order_id % 2} keyGenerator: type: SNOWFLAKE column: order_id bindingTables: - t_order defaultDatabaseStrategy: inline: shardingColumn: user_id algorithmExpression: ds_${0} defaultTableStrategy: none:- 1
- 2
- 3
- 4
- 5
- 6
- 7
- 8
- 9
- 10
- 11
- 12
- 13
- 14
- 15
- 16
- 17
- 18
- 19
- 20
- 21
- 22
- 23
- 24
- 25
- 26
- 27
- 28
- 29
- 30
- 31
- 32
- 33
3、启动Sharding-Proxy服务
(1)Sharding-Proxy 默认端口号 3307


4、通过Sharding-Proxy 启动端口进行连接
(1)打开 cmd 窗口连接 Sharding-Proxy,连接方式和连接 mysql 一样的

(2)进行 sql 命令操作看到只有一个库

(3)在 sharding_db 数据库创建表

(4)向表添加一条记录

5、回到本地 3306端口实际数据库中,看到已经创建好了表和添加数据

Sharding-Proxy 配置(分库)
1、创建两个数据库

2、找到conf 目录,config-sharding.yaml
schemaName: sharding_db dataSources: ds_0: url: jdbc:mysql://127.0.0.1:3306/edu_db_1?serverTimezone=UTC&useSSL=false username: root password: "11111" connectionTimeoutMilliseconds: 30000 idleTimeoutMilliseconds: 60000 maxLifetimeMilliseconds: 1800000 maxPoolSize: 50 shardingRule: tables: t_order: actualDataNodes: ds_${0}.t_order_${0..1} tableStrategy: inline: shardingColumn: order_id algorithmExpression: t_order_${order_id % 2} keyGenerator: type: SNOWFLAKE column: order_id bindingTables: - t_order defaultDatabaseStrategy: inline: shardingColumn: user_id algorithmExpression: ds_${0} defaultTableStrategy: none:- 1
- 2
- 3
- 4
- 5
- 6
- 7
- 8
- 9
- 10
- 11
- 12
- 13
- 14
- 15
- 16
- 17
- 18
- 19
- 20
- 21
- 22
- 23
- 24
- 25
- 26
- 27
- 28
- 29
- 30
- 31
- 32
3、启动Sharding-Proxy 服务

4、打开 cmd仓库,连接 Sharding-Proxy 服务
(1)创建数据库表,向表添加记录

(2)连接本地 3306 的 MySql 数据库服务器,表已经创建出来,表里面有数据
Sharding-Proxy 配置(读写分离)
1、创建三个数据

2、修改 conf里面配置文件,config-master-slave.yaml

schemaName: master_slave_db dataSources: master_ds: url: jdbc:mysql://127.0.0.1:3306/demo_ds_master?serverTimezone=UTC&useSSL=false username: root password: root connectionTimeoutMilliseconds: 30000 idleTimeoutMilliseconds: 60000 maxLifetimeMilliseconds: 1800000 maxPoolSize: 50 slave_ds_0: url: jdbc:mysql://127.0.0.1:3306/demo_ds_slave_0?serverTimezone=UTC&useSSL=false username: root password: root connectionTimeoutMilliseconds: 30000 idleTimeoutMilliseconds: 60000 maxLifetimeMilliseconds: 1800000 maxPoolSize: 50 slave_ds_1: url: jdbc:mysql://127.0.0.1:3306/demo_ds_slave_1?serverTimezone=UTC&useSSL=false username: root password: root connectionTimeoutMilliseconds: 30000 idleTimeoutMilliseconds: 60000 maxLifetimeMilliseconds: 1800000 maxPoolSize: 50 masterSlaveRule: name: ms_ds masterDataSourceName: master_ds slaveDataSourceNames: - slave_ds_0 - slave_ds_1- 1
- 2
- 3
- 4
- 5
- 6
- 7
- 8
- 9
- 10
- 11
- 12
- 13
- 14
- 15
- 16
- 17
- 18
- 19
- 20
- 21
- 22
- 23
- 24
- 25
- 26
- 27
- 28
- 29
- 30
- 31
- 32
- 33
- 34
3、启动 Sharding-Proxy服务

4、通过 cmd连接Sharding-Proxy,进行创建表和添加记录操作

(1)在主数据库和从数据库里面,都创建数据库表

(2)向表添加记录,不指定向哪个库添加
* 把添加数据添加到主数据库里面

(3)查询数据库表数据,不指定查询哪个库
* 直接执行查询从库里面的数据

-
相关阅读:
【推荐系统】ESMM:一种有效估算后点击转换率的方法
XML建模
@PreDestroy注解
正则表达式
SpringCloud五大组件 --- Spring Cloud Config 分布式配置
从零开始搭建仿抖音短视频APP--后端开发粉丝业务模块(1)
2.canal服务器配置及java客户端
计算机毕业设计之垃圾分类公益回收管理系统
Python与ArcGIS系列(七)自动化打印地图
数据结构和算法——图结构
- 原文地址:https://blog.csdn.net/cativen/article/details/126493631
