-
C++ 窗体程序初步(全网最全)
官方入门文档:[Create a traditional Windows Desktop application (C++)](https://docs.microsoft.com/en-us/cpp/windows/walkthrough-creating-windows-desktop-applications-cpp#:~:text=From the main menu%2C choose,Desktop Wizard then choose Next.)
IDE的选择
- 窗体程序的开发我会推荐大家使用微软旗下的Microsoft Visual Studio
- 打开网页后下拉到最下方,选择对应版本就可以直接下载
- [外链图片转存失败,源站可能有防盗链机制,建议将图片保存下来直接上传(img-LN78QTeB-1660453573869)(https://f.pz.al/pzal/2022/08/14/2faeac26253ef.gif)]
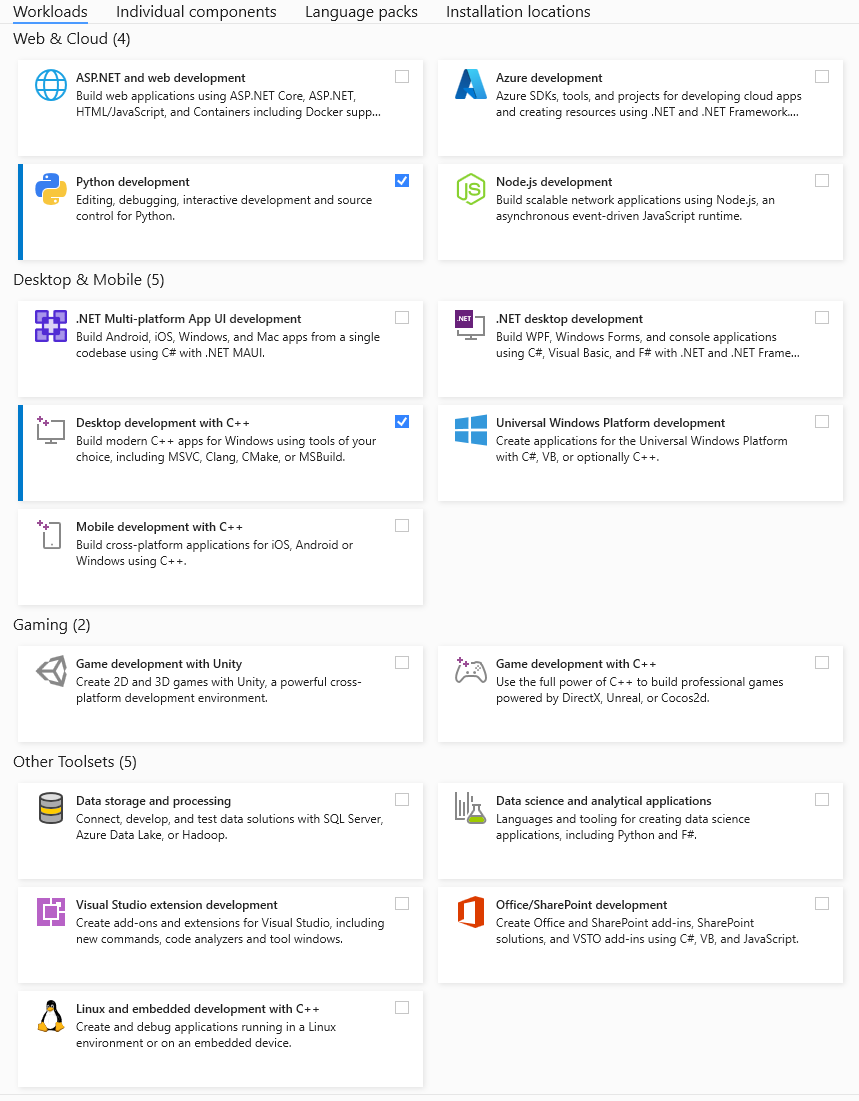
- 下载后双击运行,选择如下图的所需配置项(没有python需求的可以不勾选python,对窗体程序开发并没有影响)
- 然后点击下载并安装
- 接着就可以使用Visual Studio了
创建项目
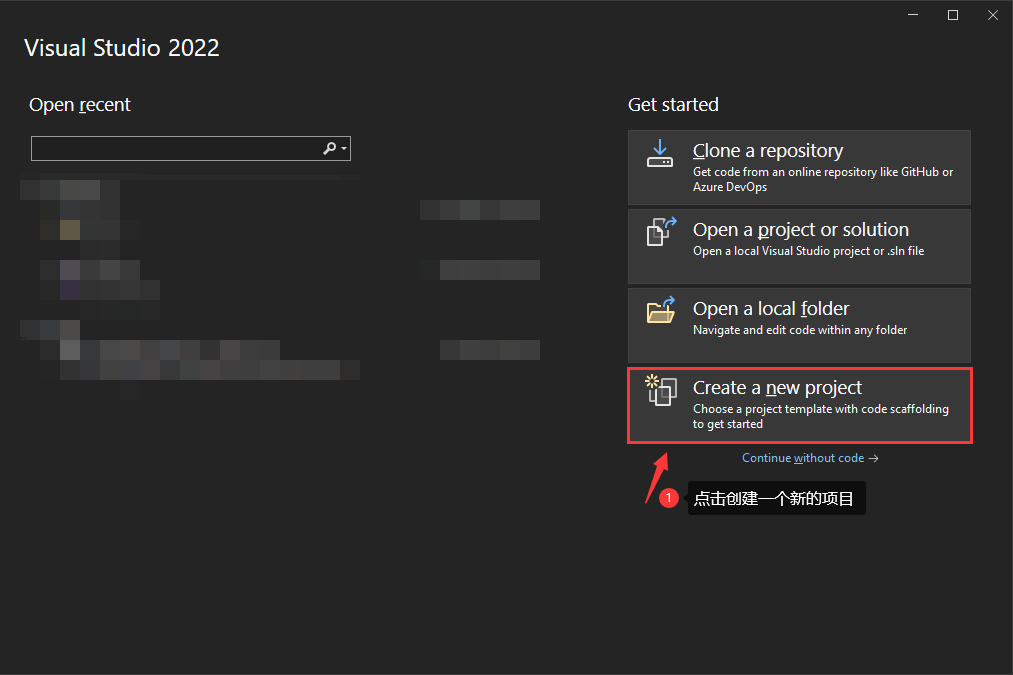
- 点击
Create a new project - 选择语言、终端、应用层,之后选择
桌面窗口引导程序- [外链图片转存失败,源站可能有防盗链机制,建议将图片保存下来直接上传(img-rL30XNYV-1660453573872)(https://f.pz.al/pzal/2022/08/14/8059401279784.png)]
- 接着点击下一步,填写项目名称以及选择项目保存路径
- [外链图片转存失败,源站可能有防盗链机制,建议将图片保存下来直接上传(img-mDol3NIk-1660453573874)(https://f.pz.al/pzal/2022/08/14/f0a6d9f1f427d.png)]
- 点击
Create即可创建成功
开发记录
程序主入口(
WinMain())-
首先,窗体程序和C++程序都会有一个程序入口,在C++程序中主入口如==code1-1,在窗体程序中主入口如code1-2==
-
int main() { // Your Own Code }- 1
- 2
- 3
- 4
-
int WinMain() { // Your Own Code }- 1
- 2
- 3
- 4
-
-
其次,在窗体程序中同样需要引入头文件,但与C++程序不同!!并且不需要定义命名空间!,C++程序头部如==code2-1,窗体程序头部如’code2-2’==
-
#includeusing namespace std; - 1
- 2
-
#include#include // 有时候需要,有时候可以不用 - 1
- 2
- 关于是否需要使用
-
-
在窗体程序中==
WinMain()==也是一种函数封装-
官方给出的封装原型如下:
-
int WINAPI WinMain( _In_ HINSTANCE hInstance, _In_opt_ HINSTANCE hPrevInstance, _In_ LPSTR lpCmdLine, _In_ int nCmdShow );- 1
- 2
- 3
- 4
- 5
- 6
-
那么在源文件中可以直接写成如下形式:
-
int WINAPI WinMain(HINSTANCE hInstance, HINSTANCE hPrevInstance, LPSTR lpCmdLine, int nCmdShow) { // 各种配置项写在这里 }- 1
- 2
- 3
- 4
- 5
- 6
-
-
对于==
WinMain()==的配置项如下:-
写法:
-
WNDCLASSEX wcex; wcex.cbSize = sizeof(WNDCLASSEX); wcex.style = CS_HREDRAW | CS_VREDRAW; wcex.lpfnWndProc = WndProc; wcex.cbClsExtra = 0; wcex.cbWndExtra = 0; wcex.hInstance = hInstance; wcex.hIcon = LoadIcon(wcex.hInstance, IDI_APPLICATION); wcex.hCursor = LoadCursor(NULL, IDC_ARROW); wcex.hbrBackground = (HBRUSH)(COLOR_WINDOW+1); wcex.lpszMenuName = NULL; wcex.lpszClassName = L"test"; wcex.hIconSm = LoadIcon(wcex.hInstance, IDI_APPLICATION);- 1
- 2
- 3
- 4
- 5
- 6
- 7
- 8
- 9
- 10
- 11
- 12
- 13
- 14
-
其中有些需要特别注意:
-
wcex.lpfnWndProc = WndProc;- 1
-
向wcex.lpfnWndProc赋的值须与LRESULT CALLBACK定义的函数名相同
-
wcex.cbClsExtra = 0; wcex.cbWndExtra = 0;- 1
- 2
-
句柄和窗体的额外内存,一般都默认为0
-
wcex.hIcon = LoadIcon(wcex.hInstance, IDI_APPLICATION); wcex.hIconSm = LoadIcon(wcex.hInstance, IDI_APPLICATION);- 1
- 2
-
窗口的Icon图标,如果没有,可以将IDI_APPLICATION替换为NULL,同时也可以使用已有的 .ico文件,其他系统图标参见官方文档
-
wcex.hCursor = LoadCursor(NULL, IDC_ARROW);- 1
-
当光标进入程序窗口后鼠标的样式可参照官方文档
-
wcex.hbrBackground = (HBRUSH)(COLOR_WINDOW+1);- 1
-
背景样式及颜色也可以更改,参考官方文档
-
wcex.lpszClassName = _T("test");- 1
-
这个是窗体的类名,格式即为
_T"类名",并且此类名会在创建窗体的时候用到
-
-
在这之后呢我们还需要进行判断,判断窗体程序是否注册窗体成功
-
代码如下:
-
if (!RegisterClassEx(&wcex)) { MessageBox(NULL, _T("Call to RegisterClassEx failed!"), _T("Hello World!"), NULL); return 1; }- 1
- 2
- 3
- 4
- 5
- 6
- 7
- 8
- 9
-
这一段一定要加上,否则窗体无法显示!
-
-
接下来我们还需要把窗体句柄写入全局变量中
-
代码如下:
-
hInst = hInstance;- 1
-
但是一定要在全局变量中定义
hInst这个变量名!
-
-
接下来我们需要创建窗体
-
可以使用一个函数对窗体句柄进行创建
-
HWND hWnd = CreateWindow(_T("test"), _T("Hello Wold!"), WS_OVERLAPPEDWINDOW, CW_USEDEFAULT, CW_USEDEFAULT, 500, 500, NULL, NULL, hInstance, NULL);- 1
- 2
- 3
- 4
- 5
- 6
- 7
- 8
- 9
- 10
- 11
-
具体的功能可以参考官方文档
-
使用Visual Studio开发的小伙伴其实可以直接在IDE里面就能够知道每个位置对应什么功能
-
-
窗体的配置已经OK了,但同样还需要进行判断是否创建成功
-
代码如下:
-
if (!hWnd) { MessageBox(NULL, _T("Call to CreateWindow failed!"), _T("Windows Desktop Guided Tour"), NULL); return 1; }- 1
- 2
- 3
- 4
- 5
- 6
- 7
- 8
- 9
-
这一段其实可以不写,但为了后期维护方便检查是否为窗体创建失败还是挺有用的
-
-
窗体现在是创建好了,但是需要展示出来,所以就有了以下的代码
-
ShowWindow(hWnd, nCmdShow); UpdateWindow(hWnd);- 1
- 2
-
这一段就这样写就行,详情移步至官方文档
-
-
而后呢,我们需要接受、翻译、执行窗体发送回来的Message
-
代码如下:
-
MSG msg; while (GetMessage(&msg, NULL, 0, 0)) { TranslateMessage(&msg); DispatchMessage(&msg); } return (int) msg.wParam;- 1
- 2
- 3
- 4
- 5
- 6
- 7
- 8
-
了解更多有关Message的知识,就看看官方文档过过眼就行
-
-
窗体创建过渡(
WinProc())-
在窗体构建完成之前也会有一个过程,这是毋庸置疑的,官方也对此给出了一个函数封装,使用方法与==``WinMain()`==类似,
-
封装原型:
-
LRESULT CALLBACK WndProc( _In_ HWND hWnd, _In_ UINT message, _In_ WPARAM wParam, _In_ LPARAM lParam );- 1
- 2
- 3
- 4
- 5
- 6
-
使用写法:
-
LRESULT CALLBACK WndProc(HWND hWnd, UINT message, WPARAM wParam, LPARAM lParam) { // 窗体内容及功能 }- 1
- 2
- 3
- 4
- 5
- 6
-
-
接下来我们就来实现一个简单的功能
-
我们希望在窗体左上角显示
Hello, Windows desktop!,那么接下来我们就需要在WinProc函数中调用WM_PAINT指令 -
并将上面那段话显示出来
-
代码如下:
-
PAINTSTRUCT ps; HDC hdc; TCHAR greeting[] = _T("Hello, Windows desktop!"); switch (message) { case WM_PAINT: hdc = BeginPaint(hWnd, &ps); // Here your application is laid out. // For this introduction, we just print out "Hello, Windows desktop!" // in the top left corner. TextOut(hdc, 5, 100, greeting, _tcslen(greeting)); // End application-specific layout section. EndPaint(hWnd, &ps); break; case WM_DESTROY: PostQuitMessage(0); break; default: return DefWindowProc(hWnd, message, wParam, lParam); break; } return 0;- 1
- 2
- 3
- 4
- 5
- 6
- 7
- 8
- 9
- 10
- 11
- 12
- 13
- 14
- 15
- 16
- 17
- 18
- 19
- 20
- 21
- 22
- 23
- 24
- 25
- 26
- 27
- 28
-
-
WinProc函数写好之后我们还得在WinMain函数前进行调用-
代码如下:
-
LRESULT CALLBACK WndProc(HWND, UINT, WPARAM, LPARAM);- 1
-
代码展示
-
代码到目前就写完了
-
所有代码:
-
#include#include #include #include static TCHAR szWindowClass[] = _T("test"); static TCHAR szTitle[] = _T("Hello World!"); HINSTANCE hInst; LRESULT CALLBACK WndProc(HWND, UINT, WPARAM, LPARAM); int WINAPI WinMain(_In_ HINSTANCE hInstance, _In_opt_ HINSTANCE hPrevInstance, _In_ LPSTR lpCmdLine, _In_ int nCmdShow) { WNDCLASSEX wcex; wcex.cbSize = sizeof(WNDCLASSEX); wcex.style = CS_HREDRAW | CS_VREDRAW; wcex.lpfnWndProc = WndProc; wcex.cbClsExtra = 0; wcex.cbWndExtra = 0; wcex.hInstance = hInstance; wcex.hIcon = LoadIcon(wcex.hInstance, IDI_APPLICATION); wcex.hCursor = LoadCursor(NULL, IDC_ARROW); wcex.hbrBackground = (HBRUSH)(COLOR_WINDOW + 1); wcex.lpszMenuName = NULL; wcex.lpszClassName = _T("test"); wcex.hIconSm = LoadIcon(wcex.hInstance, IDI_APPLICATION); if (!RegisterClassEx(&wcex)) { MessageBox(NULL, _T("Call to RegisterClassEx failed!"), _T("Windows Desktop Guided Tour"), NULL); return 1; } // Store instance handle in our global variable hInst = hInstance; // The parameters to CreateWindowEx explained: // WS_EX_OVERLAPPEDWINDOW : An optional extended window style. // szWindowClass: the name of the application // szTitle: the text that appears in the title bar // WS_OVERLAPPEDWINDOW: the type of window to create // CW_USEDEFAULT, CW_USEDEFAULT: initial position (x, y) // 500, 100: initial size (width, length) // NULL: the parent of this window // NULL: this application does not have a menu bar // hInstance: the first parameter from WinMain // NULL: not used in this application HWND hWnd = CreateWindowEx( WS_EX_OVERLAPPEDWINDOW, _T("test"), _T("Hello World!"), WS_OVERLAPPEDWINDOW, CW_USEDEFAULT, CW_USEDEFAULT, 500, 500, NULL, NULL, hInstance, NULL ); if (!hWnd) { MessageBox(NULL, _T("Call to CreateWindow failed!"), _T("Windows Desktop Guided Tour"), NULL); return 1; } // The parameters to ShowWindow explained: // hWnd: the value returned from CreateWindow // nCmdShow: the fourth parameter from WinMain ShowWindow(hWnd, nCmdShow); UpdateWindow(hWnd); // Main message loop: MSG msg; while (GetMessage(&msg, NULL, 0, 0)) { TranslateMessage(&msg); DispatchMessage(&msg); } return (int)msg.wParam; } // FUNCTION: WndProc(HWND, UINT, WPARAM, LPARAM) // // PURPOSE: Processes messages for the main window. // // WM_PAINT - Paint the main window // WM_DESTROY - post a quit message and return LRESULT CALLBACK WndProc(HWND hWnd, UINT message, WPARAM wParam, LPARAM lParam) { PAINTSTRUCT ps; HDC hdc; TCHAR greeting[] = _T("Hello, Windows desktop!"); switch (message) { case WM_PAINT: hdc = BeginPaint(hWnd, &ps); // Here your application is laid out. // For this introduction, we just print out "Hello, Windows desktop!" // in the top left corner. TextOut(hdc, 5, 100, greeting, _tcslen(greeting)); // End application-specific layout section. EndPaint(hWnd, &ps); break; case WM_DESTROY: PostQuitMessage(0); break; default: return DefWindowProc(hWnd, message, wParam, lParam); break; } return 0; } - 1
- 2
- 3
- 4
- 5
- 6
- 7
- 8
- 9
- 10
- 11
- 12
- 13
- 14
- 15
- 16
- 17
- 18
- 19
- 20
- 21
- 22
- 23
- 24
- 25
- 26
- 27
- 28
- 29
- 30
- 31
- 32
- 33
- 34
- 35
- 36
- 37
- 38
- 39
- 40
- 41
- 42
- 43
- 44
- 45
- 46
- 47
- 48
- 49
- 50
- 51
- 52
- 53
- 54
- 55
- 56
- 57
- 58
- 59
- 60
- 61
- 62
- 63
- 64
- 65
- 66
- 67
- 68
- 69
- 70
- 71
- 72
- 73
- 74
- 75
- 76
- 77
- 78
- 79
- 80
- 81
- 82
- 83
- 84
- 85
- 86
- 87
- 88
- 89
- 90
- 91
- 92
- 93
- 94
- 95
- 96
- 97
- 98
- 99
- 100
- 101
- 102
- 103
- 104
- 105
- 106
- 107
- 108
- 109
- 110
- 111
- 112
- 113
- 114
- 115
- 116
- 117
- 118
- 119
- 120
- 121
- 122
- 123
- 124
- 125
- 126
- 127
-
-
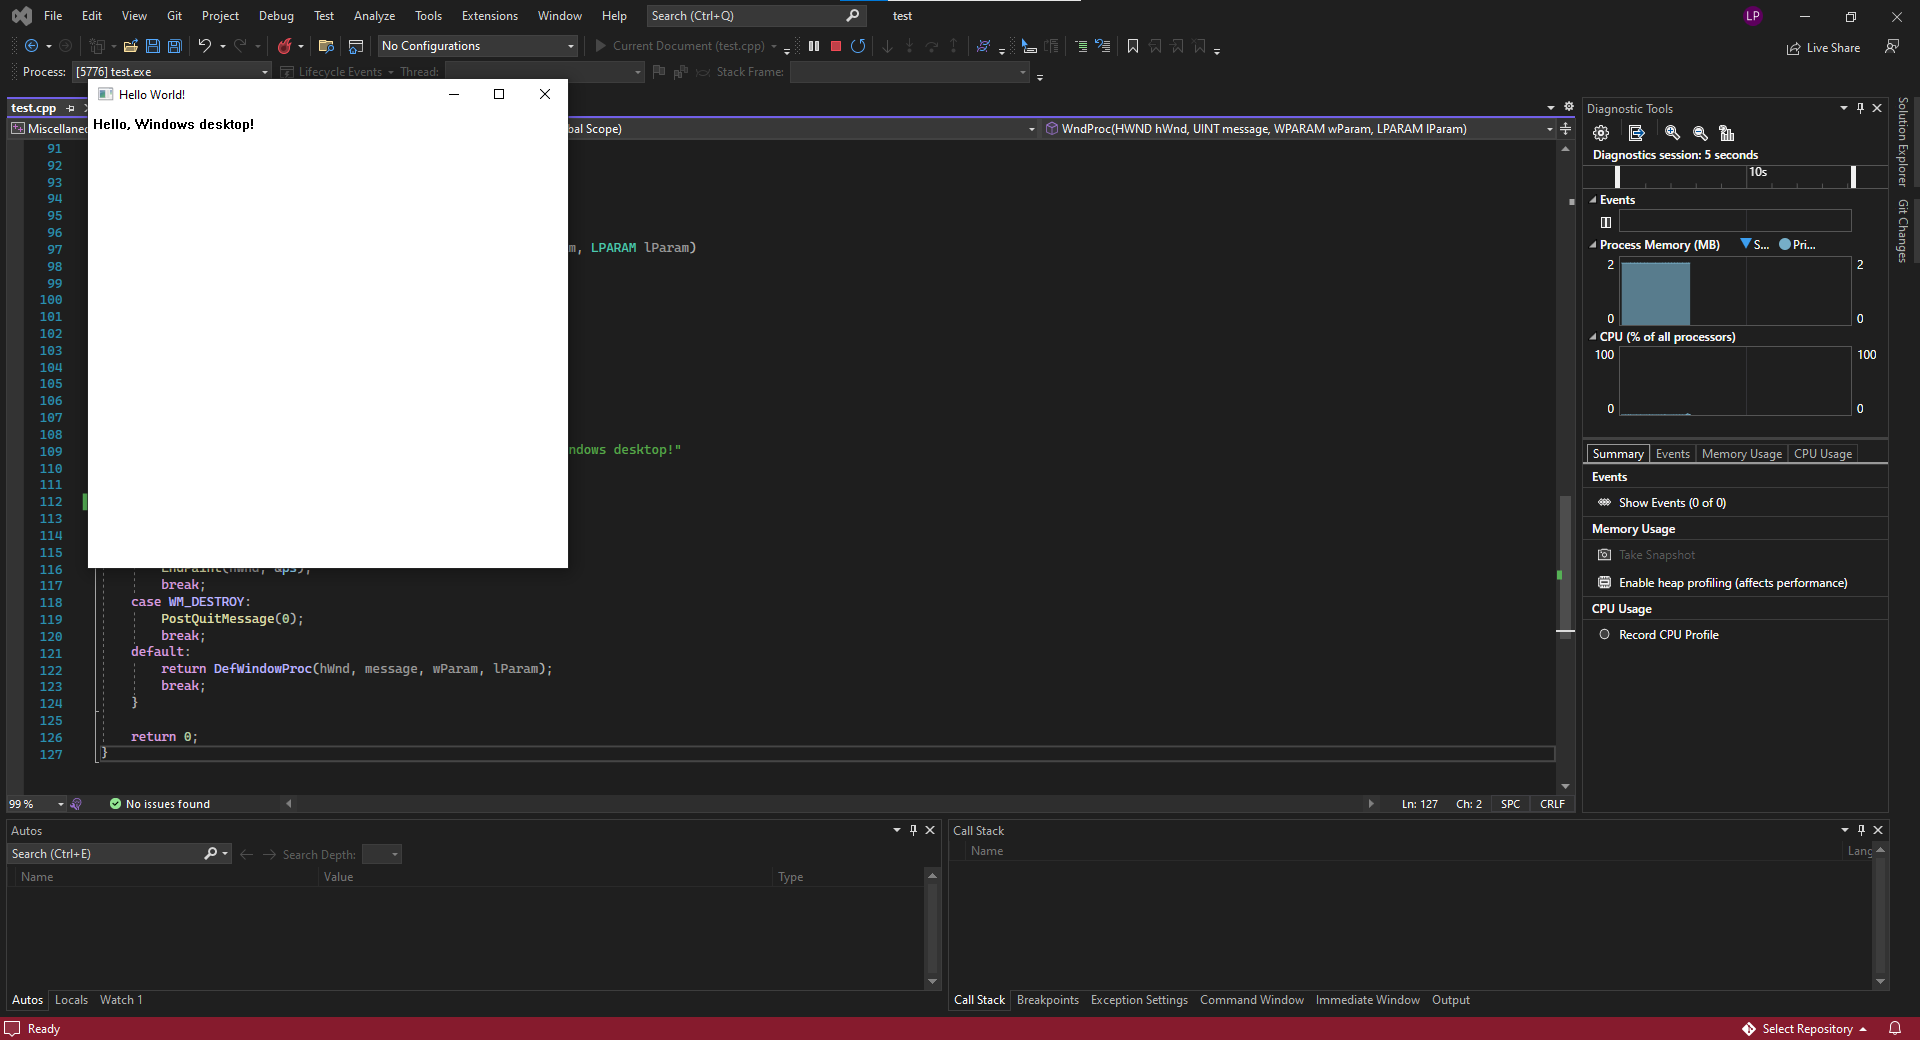
代码截图:
- [外链图片转存失败,源站可能有防盗链机制,建议将图片保存下来直接上传(img-vzbaaxKi-1660453573875)(https://f.pz.al/pzal/2022/08/14/22f23be857c3c.png)]
-
调试记录
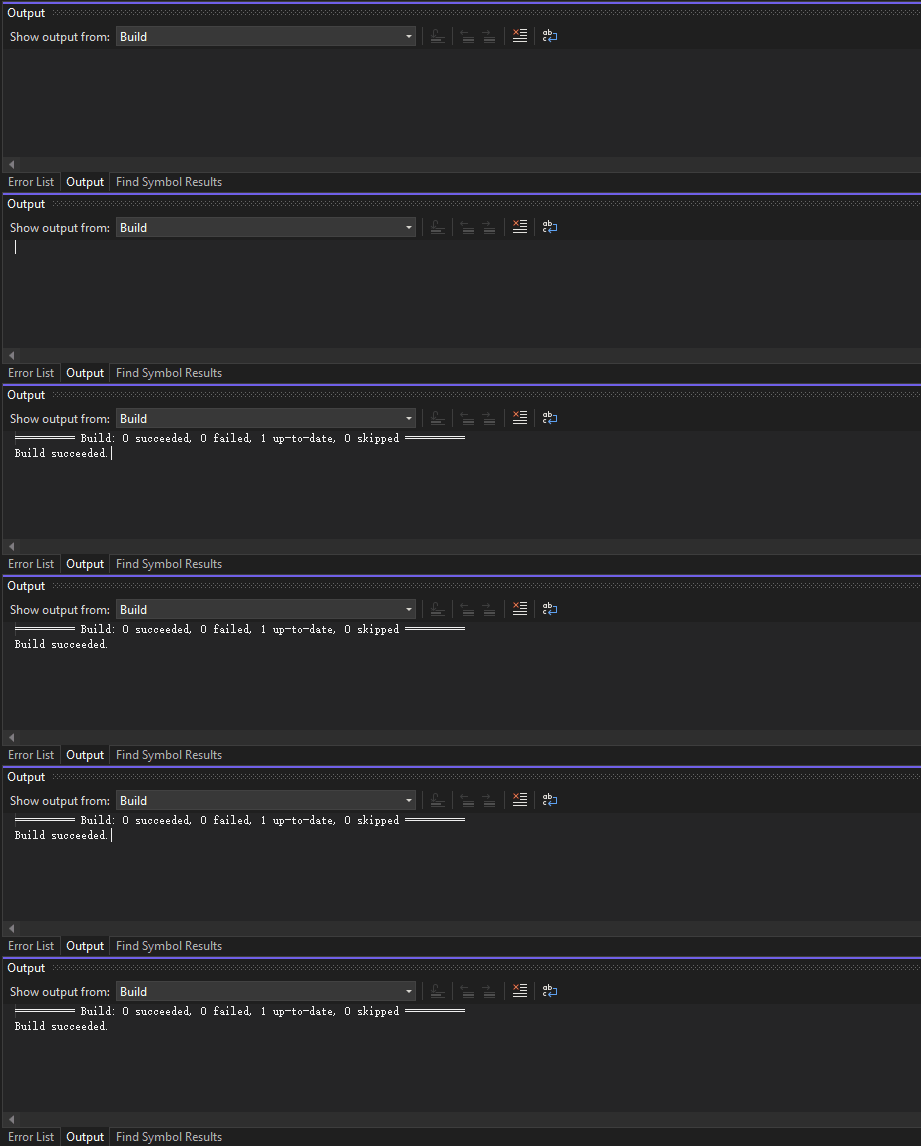
- 调试方法其实非常简单
- 将
cpp文件进行构建(可使用快捷键Ctrl+B) - 按
F5运行即可
- 将
-
相关阅读:
[Mono Depth/3DOD]单目3D检测基础
量子计算机-初级入门
[HFCTF2020]EasyLogin
[附源码]java毕业设计基于Java的护肤品网站
数字图像处理实验(一)|图像的基本操作和基本统计指标计算
SpringBoot @InitBinder注解实现Bean国际化校验
Sentinel 流控注解使用
接上篇文章,完成Hadoop集群部署实验
那些年跟领导聊过的数据归档【DB篇】:从梳理到落地-DB单表千万级归档详细流程讲解
dayjs 笔记
- 原文地址:https://blog.csdn.net/dxfjdvsijdfhiv/article/details/126330639

- 最新文章
-
【FHE】我们如何实现同态加密推理(八):SiLU 的密文化——两条路径,和一个 8 字节的开关
SQLcl 中 c/old/new 替换变量为何失效?先定位再替换
不让模型写作文,直接从它脑子里读答案:Jev 决策在 .NET 的两条路线
Halo插件:支持GitHub的图床附件策略
电视投屏界的“一股清流”!SimpleTVCast 6.0.0-beta 抢先体验:无需TV端App,界面大换血!✨
华三VXLAN集中式网关实战指南:Spine多活网关 + 双活接入(M-LAG)
软件更好写之后口碑会更重要
大 O、大 Omega、大 Theta 的区别,O(n) 复杂度是什么意思
Java标签跳转:一个鲜为人知但却很实用的小技巧
多智能体系统论文速读