-
浅读一下dotenv的主干逻辑的源码
start
- 前面学习了 process.env
- 有用到 这么一个插件:
dotenv - 看一下
dotenv的源码
之前如何使用的?
let a = require('dotenv').config() console.log(process.env.a)- 1
- 2
- 3
开始
- 下载
npm i dotenv- 1
-
直奔主题
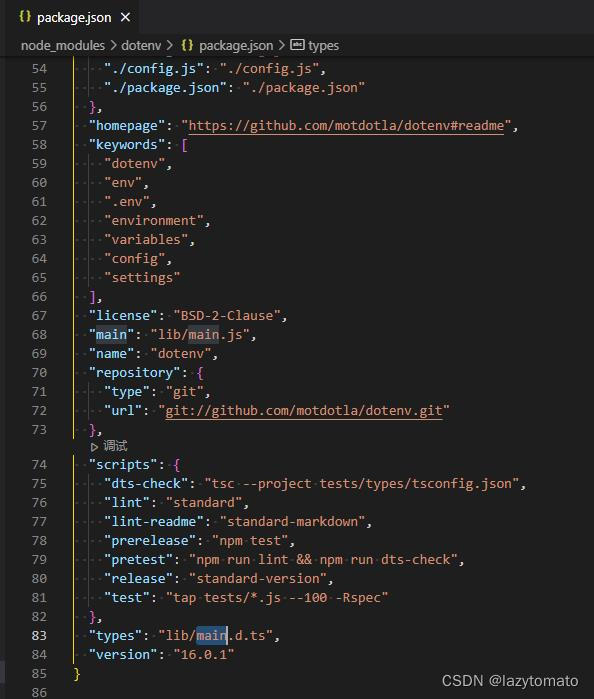
- package.json
- main 属性对应的文件

-
阅读源码
main.js
const fs = require('fs') const path = require('path') const os = require('os') const LINE = /(?:^|^)\s*(?:export\s+)?([\w.-]+)(?:\s*=\s*?|:\s+?)(\s*'(?:\\'|[^'])*'|\s*"(?:\\"|[^"])*"|\s*`(?:\\`|[^`])*`|[^#\r\n]+)?\s*(?:#.*)?(?:$|$)/gm // Parser src into an Object 解析src为一个对象 function parse(src) { const obj = {} // Convert buffer to string let lines = src.toString() // Convert line breaks to same format lines = lines.replace(/\r\n?/gm, '\n') let match while ((match = LINE.exec(lines)) != null) { const key = match[1] // Default undefined or null to empty string let value = match[2] || '' // Remove whitespace value = value.trim() // Check if double quoted const maybeQuote = value[0] // Remove surrounding quotes value = value.replace(/^(['"`])([\s\S]*)\1$/gm, '$2') // Expand newlines if double quoted if (maybeQuote === '"') { value = value.replace(/\\n/g, '\n') value = value.replace(/\\r/g, '\r') } // Add to object obj[key] = value } return obj } function _log(message) { console.log(`[dotenv][DEBUG] ${message}`) } function _resolveHome(envPath) { return envPath[0] === '~' ? path.join(os.homedir(), envPath.slice(1)) : envPath } // Populates process.env from .env file 从文件 .env 向 process.env 添加数据 function config(options) { // 1. 获取当前进程执行的路径对应的 .env文件 let dotenvPath = path.resolve(process.cwd(), '.env') // 2. 定义编码格式 let encoding = 'utf8' const debug = Boolean(options && options.debug) const override = Boolean(options && options.override) // 3. 接受一些参数,用来修改路径和编码格式 if (options) { if (options.path != null) { dotenvPath = _resolveHome(options.path) } if (options.encoding != null) { encoding = options.encoding } } try { // Specifying an encoding returns a string instead of a buffer 指定编码返回一个字符串而不是一个缓冲区 // 4. 这里读取了文件,返回的字符串,通过 parse 将字符串转换为对象 const parsed = DotenvModule.parse(fs.readFileSync(dotenvPath, { encoding })) // 5. 遍历返回的对象的 key 分别添加到 process.env 中 Object.keys(parsed).forEach(function (key) { if (!Object.prototype.hasOwnProperty.call(process.env, key)) { process.env[key] = parsed[key] } else { // 是否重写原型上的属性 if (override === true) { process.env[key] = parsed[key] } // debug模式 if (debug) { if (override === true) { _log( `"${key}" is already defined in \`process.env\` and WAS overwritten` ) } else { _log( `"${key}" is already defined in \`process.env\` and was NOT overwritten` ) } } } }) // 6. 返回值是 { parsed:parsed } 这里简写了。 return { parsed } } catch (e) { if (debug) { _log(`Failed to load ${dotenvPath} ${e.message}`) } return { error: e } } } const DotenvModule = { config, parse, } module.exports.config = DotenvModule.config module.exports.parse = DotenvModule.parse module.exports = DotenvModule- 1
- 2
- 3
- 4
- 5
- 6
- 7
- 8
- 9
- 10
- 11
- 12
- 13
- 14
- 15
- 16
- 17
- 18
- 19
- 20
- 21
- 22
- 23
- 24
- 25
- 26
- 27
- 28
- 29
- 30
- 31
- 32
- 33
- 34
- 35
- 36
- 37
- 38
- 39
- 40
- 41
- 42
- 43
- 44
- 45
- 46
- 47
- 48
- 49
- 50
- 51
- 52
- 53
- 54
- 55
- 56
- 57
- 58
- 59
- 60
- 61
- 62
- 63
- 64
- 65
- 66
- 67
- 68
- 69
- 70
- 71
- 72
- 73
- 74
- 75
- 76
- 77
- 78
- 79
- 80
- 81
- 82
- 83
- 84
- 85
- 86
- 87
- 88
- 89
- 90
- 91
- 92
- 93
- 94
- 95
- 96
- 97
- 98
- 99
- 100
- 101
- 102
- 103
- 104
- 105
- 106
- 107
- 108
- 109
- 110
- 111
- 112
- 113
- 114
- 115
- 116
- 117
- 118
- 119
- 120
- 121
- 122
- 123
- 124
总结
源码也就 100 多行
- 读取 .env 文件
- 将读取的内容转换成对象
- 遍历读取到的对象,将属性绑定到
process.env上
没啥难度,可能就是正则写的人看不懂。。。。
-
相关阅读:
http协议简介:http各个版本的区别,http与https的区别,http与websocket的区别
CentOS Stream9 安装远程桌面服务 Xrdp
嵌入式系统开发笔记95:安装STM32CubeIDE
SpringBoot2.x简单集成Flowable
百度地图发布2022国庆出行预测
Promethues(五)查询-PromQL 语言-保证易懂好学
virtlet是什么?virtlet如何管理虚拟机?
codemirror6教程
Nie et al. 2010 提出的不等式定理
网站接入微信支付后如何实现退款和取消预约?
- 原文地址:https://blog.csdn.net/wswq2505655377/article/details/126128397
