-
C++/QT生成二维码和扫码二维码
本次使用Qt实现生成二维码和扫瞄二维码

完整代码参考git: https://github.com/lzglocal/QRCODE.git
一. 创建工程项目
-
选择QT Widgets Application

-
类名和选择基类,我这里选择默认的QMainwindow


-
创建完工程后,双击qrcode_app.ui文件,编辑ui
添加三个PushButton 命名分别为generator_qrcode_pbtn、copy_pic_pbtn、qrcode_scan_pbtn
一个Label
一个TextLine

-
自己自由布局

-
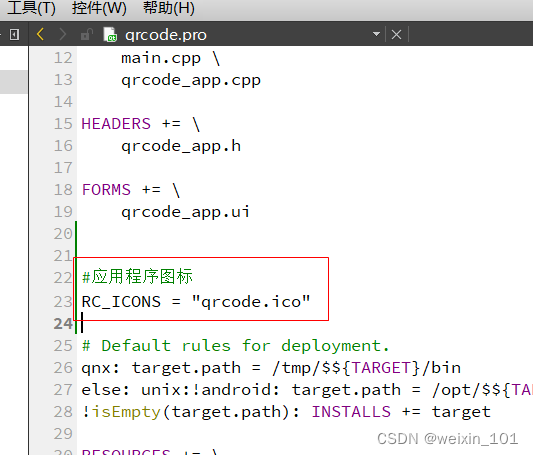
添加qrc资源文件,和添加应用程序图标


二 .QRCODE库
-
生成二维码使用了nayuki 的QR Code码相关的cpp库:git地址:https://github.com/nayuki/QR-Code-generator.git
-
扫码二维码使用了qzxing的git库:git地址: https://github.com/ftylitak/qzxing.git
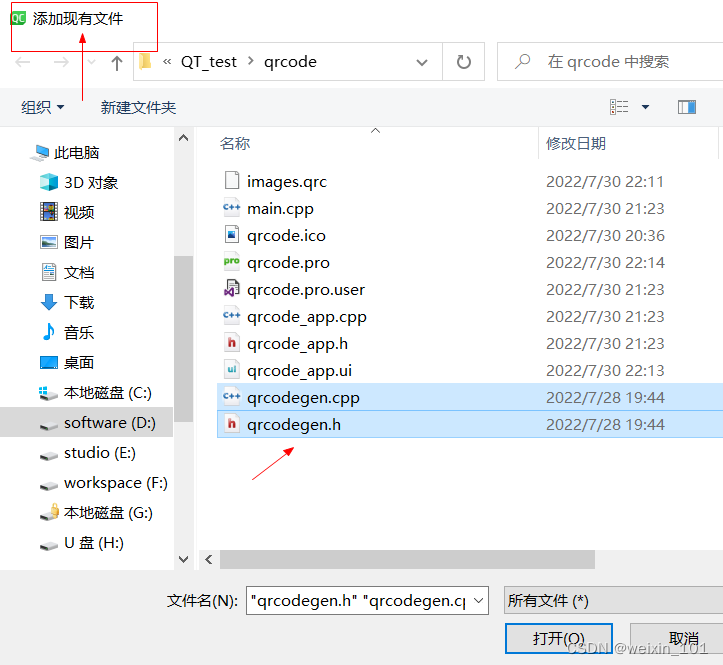
三. 添加生成二维码库
- git clone https://github.com/nayuki/QR-Code-generator.git


四. 生成二维码和复制二维码实现
参考QrCodeGeneratorDemo.cpp
-
Ui文件pushbutton三个按钮转到槽函数


-
编辑头文件qrcode_app.h
#ifndef QRCODE_APP_H #define QRCODE_APP_H #include//#include //#include //#include #include //#include //#include //#include //#include #include "qrcodegen.h" #include #include #include //#include using std::uint8_t; using qrcodegen::QrCode; using qrcodegen::QrSegment; QT_BEGIN_NAMESPACE namespace Ui { class Qrcode_app; } QT_END_NAMESPACE class Qrcode_app : public QMainWindow { Q_OBJECT public: Qrcode_app(QWidget *parent = nullptr); ~Qrcode_app(); private slots: //点击生成二维码槽函数 void on_generator_qrcode_pbtn_clicked(); //点击复制二维码 void on_copy_pic_pbtn_clicked(); //点击选择二维码扫码 void on_qrcode_scan_pbtn_clicked(); private: Ui::Qrcode_app *ui; // QString toSvgString(const QrCode &qr, int border); // void printQr(const QrCode &qr); //生成二维码和复制二维码功能函数 void doBasicDemo(bool is_copy=false); // void doVarietyDemo(); // void doSegmentDemo(); // void doMaskDemo(); }; #endif // QRCODE_APP_H - 1
- 2
- 3
- 4
- 5
- 6
- 7
- 8
- 9
- 10
- 11
- 12
- 13
- 14
- 15
- 16
- 17
- 18
- 19
- 20
- 21
- 22
- 23
- 24
- 25
- 26
- 27
- 28
- 29
- 30
- 31
- 32
- 33
- 34
- 35
- 36
- 37
- 38
- 39
- 40
- 41
- 42
- 43
- 44
- 45
- 46
- 47
- 48
- 49
- 50
- 51
- 编辑源文件qrcode_app.cpp
#include "qrcode_app.h" #include "ui_qrcode_app.h" // Function prototypes //static void doBasicDemo(); #include#include #include Qrcode_app::Qrcode_app(QWidget *parent) : QMainWindow(parent) , ui(new Ui::Qrcode_app) { ui->setupUi(this); } Qrcode_app::~Qrcode_app() { delete ui; } /*---- Demo suite ----*/ // Creates a single QR Code, then prints it to the console. //生成二维码和复制二维码功能函数 void Qrcode_app::doBasicDemo(bool is_copy) { const char *text = (ui->textEdit->toPlainText()).toLocal8Bit(); // User-supplied text const QrCode::Ecc errCorLvl = QrCode::Ecc::LOW; // Error correction level // Make and print the QR Code symbol const QrCode qr = QrCode::encodeText(text, errCorLvl); // printQr(qr); QImage QrCode_Image=QImage(qr.getSize(),qr.getSize(),QImage::Format_RGB888); for (int y = 0; y < qr.getSize(); y++) { for (int x =0; x < qr.getSize(); x++) { if(qr.getModule(x, y)==0){ QrCode_Image.setPixel(x,y,qRgb(255,255,255)); }else{ QrCode_Image.setPixel(x,y,qRgb(0,0,0)); } } } //图像大小转换为适当的大小 QrCode_Image=QrCode_Image.scaled(ui->label->width(),ui->label->height(), Qt::KeepAspectRatio); //转换为QPixmap在Label中显示 ui->label->setPixmap(QPixmap::fromImage(QrCode_Image)); //如果为真,则是拷贝操作 if(is_copy){ QClipboard *clip=QApplication::clipboard(); clip->setPixmap(QPixmap::fromImage(QrCode_Image)); } } Creates a variety of QR Codes that exercise different features of the library, and prints each one to the console. //void Qrcode_app::doVarietyDemo() { // // Numeric mode encoding (3.33 bits per digit) // const QrCode qr0 = QrCode::encodeText("314159265358979323846264338327950288419716939937510", QrCode::Ecc::MEDIUM); // printQr(qr0); // // Alphanumeric mode encoding (5.5 bits per character) // const QrCode qr1 = QrCode::encodeText("DOLLAR-AMOUNT:$39.87 PERCENTAGE:100.00% OPERATIONS:+-*/", QrCode::Ecc::HIGH); // printQr(qr1); // // Unicode text as UTF-8 // const QrCode qr2 = QrCode::encodeText("\xE3\x81\x93\xE3\x82\x93\xE3\x81\xAB\xE3\x81\xA1wa\xE3\x80\x81" // "\xE4\xB8\x96\xE7\x95\x8C\xEF\xBC\x81\x20\xCE\xB1\xCE\xB2\xCE\xB3\xCE\xB4", QrCode::Ecc::QUARTILE); // printQr(qr2); // // Moderately large QR Code using longer text (from Lewis Carroll's Alice in Wonderland) // const QrCode qr3 = QrCode::encodeText( // "Alice was beginning to get very tired of sitting by her sister on the bank, " // "and of having nothing to do: once or twice she had peeped into the book her sister was reading, " // "but it had no pictures or conversations in it, 'and what is the use of a book,' thought Alice " // "'without pictures or conversations?' So she was considering in her own mind (as well as she could, " // "for the hot day made her feel very sleepy and stupid), whether the pleasure of making a " // "daisy-chain would be worth the trouble of getting up and picking the daisies, when suddenly " // "a White Rabbit with pink eyes ran close by her.", QrCode::Ecc::HIGH); // printQr(qr3); //} Creates QR Codes with manually specified segments for better compactness. //void Qrcode_app::doSegmentDemo() { // // Illustration "silver" // const char *silver0 = "THE SQUARE ROOT OF 2 IS 1."; // const char *silver1 = "41421356237309504880168872420969807856967187537694807317667973799"; // const QrCode qr0 = QrCode::encodeText( // (std::string(silver0) + silver1).c_str(), // QrCode::Ecc::LOW); // printQr(qr0); // const QrCode qr1 = QrCode::encodeSegments( // {QrSegment::makeAlphanumeric(silver0), QrSegment::makeNumeric(silver1)}, // QrCode::Ecc::LOW); // printQr(qr1); // // Illustration "golden" // const char *golden0 = "Golden ratio \xCF\x86 = 1."; // const char *golden1 = "6180339887498948482045868343656381177203091798057628621354486227052604628189024497072072041893911374"; // const char *golden2 = "......"; // const QrCode qr2 = QrCode::encodeText( // (std::string(golden0) + golden1 + golden2).c_str(), // QrCode::Ecc::LOW); // printQr(qr2); // std::vector bytes(golden0, golden0 + std::strlen(golden0)); // const QrCode qr3 = QrCode::encodeSegments( // {QrSegment::makeBytes(bytes), QrSegment::makeNumeric(golden1), QrSegment::makeAlphanumeric(golden2)}, // QrCode::Ecc::LOW); // printQr(qr3); // // Illustration "Madoka": kanji, kana, Cyrillic, full-width Latin, Greek characters // const char *madoka = // Encoded in UTF-8 // "\xE3\x80\x8C\xE9\xAD\x94\xE6\xB3\x95\xE5" // "\xB0\x91\xE5\xA5\xB3\xE3\x81\xBE\xE3\x81" // "\xA9\xE3\x81\x8B\xE2\x98\x86\xE3\x83\x9E" // "\xE3\x82\xAE\xE3\x82\xAB\xE3\x80\x8D\xE3" // "\x81\xA3\xE3\x81\xA6\xE3\x80\x81\xE3\x80" // "\x80\xD0\x98\xD0\x90\xD0\x98\xE3\x80\x80" // "\xEF\xBD\x84\xEF\xBD\x85\xEF\xBD\x93\xEF" // "\xBD\x95\xE3\x80\x80\xCE\xBA\xCE\xB1\xEF" // "\xBC\x9F"; // const QrCode qr4 = QrCode::encodeText(madoka, QrCode::Ecc::LOW); // printQr(qr4); // const std::vectorkanjiChars{ // Kanji mode encoding (13 bits per character) // 0x0035, 0x1002, 0x0FC0, 0x0AED, 0x0AD7, // 0x015C, 0x0147, 0x0129, 0x0059, 0x01BD, // 0x018D, 0x018A, 0x0036, 0x0141, 0x0144, // 0x0001, 0x0000, 0x0249, 0x0240, 0x0249, // 0x0000, 0x0104, 0x0105, 0x0113, 0x0115, // 0x0000, 0x0208, 0x01FF, 0x0008, // }; // qrcodegen::BitBuffer bb; // for (int c : kanjiChars) // bb.appendBits(static_cast(kanjiChars.size()), bb)}, // QrCode::Ecc::LOW); // printQr(qr5); //} Creates QR Codes with the same size and contents but different mask patterns. //void Qrcode_app::doMaskDemo() { // // Project Nayuki URL // std::vectorsegs0 = QrSegment::makeSegments("https://www.nayuki.io/"); // printQr(QrCode::encodeSegments(segs0, QrCode::Ecc::HIGH, QrCode::MIN_VERSION, QrCode::MAX_VERSION, -1, true)); // Automatic mask // printQr(QrCode::encodeSegments(segs0, QrCode::Ecc::HIGH, QrCode::MIN_VERSION, QrCode::MAX_VERSION, 3, true)); // Force mask 3 // // Chinese text as UTF-8 // std::vectorsegs1 = QrSegment::makeSegments( // "\xE7\xB6\xAD\xE5\x9F\xBA\xE7\x99\xBE\xE7\xA7\x91\xEF\xBC\x88\x57\x69\x6B\x69\x70" // "\x65\x64\x69\x61\xEF\xBC\x8C\xE8\x81\x86\xE8\x81\xBD\x69\x2F\xCB\x8C\x77\xC9\xAA" // "\x6B\xE1\xB5\xBB\xCB\x88\x70\x69\xCB\x90\x64\x69\x2E\xC9\x99\x2F\xEF\xBC\x89\xE6" // "\x98\xAF\xE4\xB8\x80\xE5\x80\x8B\xE8\x87\xAA\xE7\x94\xB1\xE5\x85\xA7\xE5\xAE\xB9" // "\xE3\x80\x81\xE5\x85\xAC\xE9\x96\x8B\xE7\xB7\xA8\xE8\xBC\xAF\xE4\xB8\x94\xE5\xA4" // "\x9A\xE8\xAA\x9E\xE8\xA8\x80\xE7\x9A\x84\xE7\xB6\xB2\xE8\xB7\xAF\xE7\x99\xBE\xE7" // "\xA7\x91\xE5\x85\xA8\xE6\x9B\xB8\xE5\x8D\x94\xE4\xBD\x9C\xE8\xA8\x88\xE7\x95\xAB"); // printQr(QrCode::encodeSegments(segs1, QrCode::Ecc::MEDIUM, QrCode::MIN_VERSION, QrCode::MAX_VERSION, 0, true)); // Force mask 0 // printQr(QrCode::encodeSegments(segs1, QrCode::Ecc::MEDIUM, QrCode::MIN_VERSION, QrCode::MAX_VERSION, 1, true)); // Force mask 1 // printQr(QrCode::encodeSegments(segs1, QrCode::Ecc::MEDIUM, QrCode::MIN_VERSION, QrCode::MAX_VERSION, 5, true)); // Force mask 5 // printQr(QrCode::encodeSegments(segs1, QrCode::Ecc::MEDIUM, QrCode::MIN_VERSION, QrCode::MAX_VERSION, 7, true)); // Force mask 7 //} ///*---- Utilities ----*/ Returns a string of SVG code for an image depicting the given QR Code, with the given number of border modules. The string always uses Unix newlines (\n), regardless of the platform. //QString Qrcode_app::toSvgString(const QrCode &qr, int border) { // if (border < 0) // throw std::domain_error("Border must be non-negative"); // if (border > INT_MAX / 2 || border * 2 > INT_MAX - qr.getSize()) // throw std::overflow_error("Border too large"); // QString sb; // sb + "\n"; // sb + "\n"; // sb + "\n"; // return sb; //} Prints the given QrCode object to the console. //void Qrcode_app::printQr(const QrCode &qr) { // QImage QrCode_Image=QImage(qr.getSize(),qr.getSize(),QImage::Format_RGB888); // for (int y = 0; y < qr.getSize(); y++) { // for (int x = 0; x < qr.getSize(); x++) { // if(qr.getModule(x, y)==0){ // QrCode_Image.setPixel(x,y,qRgb(255,255,255)); // }else{ // QrCode_Image.setPixel(x,y,qRgb(0,0,0)); // } // } // //图像大小转换为适当的大小 // QrCode_Image=QrCode_Image.scaled(ui->label->width(),ui->label->height(), // Qt::KeepAspectRatio); // //转换为QPixmap在Label中显示 // ui->label->setPixmap(QPixmap::fromImage(QrCode_Image)); // } // qDebug()<- 1
- 2
- 3
- 4
- 5
- 6
- 7
- 8
- 9
- 10
- 11
- 12
- 13
- 14
- 15
- 16
- 17
- 18
- 19
- 20
- 21
- 22
- 23
- 24
- 25
- 26
- 27
- 28
- 29
- 30
- 31
- 32
- 33
- 34
- 35
- 36
- 37
- 38
- 39
- 40
- 41
- 42
- 43
- 44
- 45
- 46
- 47
- 48
- 49
- 50
- 51
- 52
- 53
- 54
- 55
- 56
- 57
- 58
- 59
- 60
- 61
- 62
- 63
- 64
- 65
- 66
- 67
- 68
- 69
- 70
- 71
- 72
- 73
- 74
- 75
- 76
- 77
- 78
- 79
- 80
- 81
- 82
- 83
- 84
- 85
- 86
- 87
- 88
- 89
- 90
- 91
- 92
- 93
- 94
- 95
- 96
- 97
- 98
- 99
- 100
- 101
- 102
- 103
- 104
- 105
- 106
- 107
- 108
- 109
- 110
- 111
- 112
- 113
- 114
- 115
- 116
- 117
- 118
- 119
- 120
- 121
- 122
- 123
- 124
- 125
- 126
- 127
- 128
- 129
- 130
- 131
- 132
- 133
- 134
- 135
- 136
- 137
- 138
- 139
- 140
- 141
- 142
- 143
- 144
- 145
- 146
- 147
- 148
- 149
- 150
- 151
- 152
- 153
- 154
- 155
- 156
- 157
- 158
- 159
- 160
- 161
- 162
- 163
- 164
- 165
- 166
- 167
- 168
- 169
- 170
- 171
- 172
- 173
- 174
- 175
- 176
- 177
- 178
- 179
- 180
- 181
- 182
- 183
- 184
- 185
- 186
- 187
- 188
- 189
- 190
- 191
- 192
- 193
- 194
- 195
- 196
- 197
- 198
- 199
- 200
- 201
- 202
- 203
- 204
- 205
- 206
- 207
- 208
- 209
- 210
- 211
- 212
- 213
- 214
- 215
- 216
- 217
- 218
- 219
- 220
- 221
- 222
- 223
- 224
- 225
- 226
- 227
- 228
- 229
- 230
- 231
- 232
- 233
- 234
- 235
- 236
- 测试
打开绘图工具粘贴,复制二维码也没有问题
五. 添加扫码二维码库
git clone https://github.com/ftylitak/qzxing.git


-
把源码添加到工程目录

-
工程文件pro中包含

六. 扫码二维码代码实现
- 源文件文件qrcode_app.cpp中
添加头文件 #include “QZXing.h”
#include "QZXing.h"- 1

- 点击槽函数代码实现

//扫码二维码槽函数 void Qrcode_app::on_qrcode_scan_pbtn_clicked() { //选择图片文件 QString filename = QFileDialog::getOpenFileName(this,"file","./","any files(*.*)"";;any files(*.png)"); QImage img; if(!(img.load(filename))){ return; } img = img.scaled(ui->label->width(),ui->label->height(),Qt::KeepAspectRatio); //加载选择的图片显示到label标签 ui->label->setPixmap(QPixmap::fromImage(img)); // QImage imageToDecode(filename); QZXing decoder; decoder.setDecoder( QZXing::DecoderFormat_QR_CODE | QZXing::DecoderFormat_EAN_13 ); decoder.setSourceFilterType(QZXing::SourceFilter_ImageNormal); decoder.setTryHarderBehaviour(QZXing::TryHarderBehaviour_ThoroughScanning | QZXing::TryHarderBehaviour_Rotate); // decoder.setDecoder( QZXing::DecoderFormat_CODE_128 | QZXing::DecoderFormat_QR_CODE); QString result = decoder.decodeImage(img); if(result.isEmpty()){ QMessageBox::about(this,"warning","Wrong picture format!"); return; } //扫码结果显示textEdit ui->textEdit->setText(result); }- 1
- 2
- 3
- 4
- 5
- 6
- 7
- 8
- 9
- 10
- 11
- 12
- 13
- 14
- 15
- 16
- 17
- 18
- 19
- 20
- 21
- 22
- 23
- 24
- 25
- 26
- 27
- 28
- 29
- main函数编写只能运行一个程序
#include "qrcode.h" #include#include int main(int argc, char *argv[]) { QApplication a(argc, argv); //创建运行时只允许存在一个程序 static QSharedMemory *shareMem = new QSharedMemory("SingleAPP"); //判断如果存在存直接退出 if(!shareMem->create(1)){ qApp->quit(); return -1; }else{ int result = -1; while (result !=0) { Create_qrcode w; w.setWindowIcon(QIcon(":/images/main_logo.ico")); w.show(); result= a.exec(); //!退出时如果为零,正常退出,否则重启程序 } return result; } } - 1
- 2
- 3
- 4
- 5
- 6
- 7
- 8
- 9
- 10
- 11
- 12
- 13
- 14
- 15
- 16
- 17
- 18
- 19
- 20
- 21
- 22
- 23
- 24
完整代码参考git: https://github.com/lzglocal/QRCODE.git
七. 测试
选择刚刚保存的二维码
八. 打包发布
参考1:生成有一个应用安装包
参考2:生成一个执行程序
-
-
相关阅读:
【教程】微信推文怎么添加附件文档 (如word文档、excel表格、pdf文件)
阿里巴巴面试题- - -Java体系最新面试题(4)
4.1 声明式事务之JdbcTemplate
《动手学深度学习 Pytorch版》 5.4 自定义层
麻了,代码改成多线程,竟有9大问题
入手评测AMD锐龙r7 6800u和酷睿i7 1260p选哪个 r76800u和i71260p对比
Bootstrap Modal
深入理解Java集合框架:构建高效、灵活的数据管理方案
数据结构:线性表(栈的实现)
Python环境安装及Selenium引入
- 原文地址:https://blog.csdn.net/weixin_41560737/article/details/126077753
