-
zabbix部署及监控
一、部署zabbix服务
操作系统——RockyLinux8.6
配置国内yum源并备份原yum源
http://t.zoukankan.com/wswind-p-15469768.html

关闭防火墙和selinux

安装常用软件
[root@localhost ~]# yum install lrzsz wget vim net-tools tree psmisc bash-completion dos2unix -y时间同步
[root@localhost ~]# yum install chrony -y
[root@localhost ~]# vim /etc/chrony.conf
[root@localhost ~]# systemctl restart chronyd
[root@localhost ~]# systemctl enable chronyd
[root@localhost ~]# chronyc sources


关机做快照

RPM包安装
1. 配置安装yum源
[root@localhost ~]# dnf localinstall https://repo.huaweicloud.com/zabbix/zabbix/5.4/rhel/8/x86_64/zabbix-release-5.4-1.el8.noarch.rpm [root@localhost yum.repos.d]# vim zabbix.repo [root@localhost yum.repos.d]# cat zabbix.repo [zabbix] name=Zabbix Official Repository - $basearch baseurl=https://repo.zabbix.com/zabbix/5.4/rhel/8/$basearch/ enabled=1 gpgcheck=1 gpgkey=file:///etc/pki/rpm-gpg/RPM-GPG-KEY-ZABBIX-A14FE591 [zabbix-non-supported] name=Zabbix Official Repository non-supported - $basearch baseurl=https://repo.zabbix.com/non-supported/rhel/8/$basearch/ enabled=1 gpgkey=file:///etc/pki/rpm-gpg/RPM-GPG-KEY-ZABBIX gpgcheck=1 >>>>>>>>>>>>>>修改url<<<<<<<<<<<<<< [root@localhost yum.repos.d]# sed -i 's#https://repo.zabbix.com#https://repo.huaweicloud.com/zabbix#' /etc/yum.repos.d/zabbix.repo [root@localhost yum.repos.d]# cat zabbix.repo [zabbix] name=Zabbix Official Repository - $basearch baseurl=https://repo.huaweicloud.com/zabbix/zabbix/5.4/rhel/8/$basearch/ enabled=1 gpgcheck=1 gpgkey=file:///etc/pki/rpm-gpg/RPM-GPG-KEY-ZABBIX-A14FE591 [zabbix-non-supported] name=Zabbix Official Repository non-supported - $basearch baseurl=https://repo.huaweicloud.com/zabbix/non-supported/rhel/8/$basearch/ enabled=1 gpgkey=file:///etc/pki/rpm-gpg/RPM-GPG-KEY-ZABBIX gpgcheck=1- 1
- 2
- 3
- 4
- 5
- 6
- 7
- 8
- 9
- 10
- 11
- 12
- 13
- 14
- 15
- 16
- 17
- 18
- 19
- 20
- 21
- 22
- 23
- 24
- 25
- 26
- 27
- 28
- 29
- 30
- 31
- 32
- 33
2. 安装zabbix server
过滤查看zabbix

[root@localhost ~]# dnf install -y zabbix-server-mysql- 1
3. 安装zabbix agent
[root@localhost ~]# dnf install -y zabbix-agent2- 1
4. 安装zabbix web
[root@localhost ~]# dnf install -y zabbix-web-mysql httpd zabbix-apache-conf zabbix-sql-scripts.noarch- 1
5. 安装数据库
[root@localhost ~]# dnf install -y mariadb-server- 1
6. 部署数据库
启动数据库 [root@localhost ~]# systemctl enable --now mariadb Created symlink /etc/systemd/system/mysql.service → /usr/lib/systemd/system/mariadb.service. Created symlink /etc/systemd/system/mysqld.service → /usr/lib/systemd/system/mariadb.service. Created symlink /etc/systemd/system/multi-user.target.wants/mariadb.service → /usr/lib/systemd/system/mariadb.service. ----------------------------------------------------- 配置数据库 [root@localhost ~]# mysql -e "create database zabbix character set utf8 collate utf8_bin;" [root@localhost ~]# mysql -e "create user 'zabbix'@'localhost' identified by 'zabbix';" [root@localhost ~]# mysql -e "grant all privileges on zabbix.* to 'zabbix'@'localhost';" [root@localhost ~]# mysql mysql mysqld_multi mysql_fix_extensions mysql_setpermission mysqlaccess mysqld_safe mysqlhotcopy mysqlshow mysqladmin mysqld_safe_helper mysqlimport mysqlslap mysqlbinlog mysqldump mysql_install_db mysql_tzinfo_to_sql mysqlcheck mysqldumpslow mysql_plugin mysql_upgrade mysql_convert_table_format mysql_find_rows mysql_secure_installation mysql_waitpid [root@localhost ~]# mysql_secure_installation NOTE: RUNNING ALL PARTS OF THIS SCRIPT IS RECOMMENDED FOR ALL MariaDB SERVERS IN PRODUCTION USE! PLEASE READ EACH STEP CAREFULLY! In order to log into MariaDB to secure it, we'll need the current password for the root user. If you've just installed MariaDB, and you haven't set the root password yet, the password will be blank, so you should just press enter here. Enter current password for root (enter for none): OK, successfully used password, moving on... Setting the root password ensures that nobody can log into the MariaDB root user without the proper authorisation. Set root password? [Y/n] y New password: Re-enter new password: Password updated successfully! Reloading privilege tables.. ... Success! 后面的全选择YES -------------------------------------------- 登录数据库 [root@localhost ~]# mysql -uroot -p123456 Welcome to the MariaDB monitor. Commands end with ; or \g. Your MariaDB connection id is 17 Server version: 10.3.32-MariaDB MariaDB Server Copyright (c) 2000, 2018, Oracle, MariaDB Corporation Ab and others. Type 'help;' or '\h' for help. Type '\c' to clear the current input statement. MariaDB [(none)]> grant all privileges on zabbix.* to zabbix@localhost identified by 'zabbix'; Query OK, 0 rows affected (0.001 sec) MariaDB [(none)]> \q Bye- 1
- 2
- 3
- 4
- 5
- 6
- 7
- 8
- 9
- 10
- 11
- 12
- 13
- 14
- 15
- 16
- 17
- 18
- 19
- 20
- 21
- 22
- 23
- 24
- 25
- 26
- 27
- 28
- 29
- 30
- 31
- 32
- 33
- 34
- 35
- 36
- 37
- 38
- 39
- 40
- 41
- 42
- 43
- 44
- 45
- 46
- 47
- 48
- 49
- 50
- 51
- 52
- 53
- 54
- 55
- 56
- 57
- 58
导入数据 [root@localhost ~]# rpm -ql zabbix-sql-scripts /usr/share/doc/zabbix-sql-scripts /usr/share/doc/zabbix-sql-scripts/AUTHORS /usr/share/doc/zabbix-sql-scripts/COPYING /usr/share/doc/zabbix-sql-scripts/ChangeLog /usr/share/doc/zabbix-sql-scripts/NEWS /usr/share/doc/zabbix-sql-scripts/README /usr/share/doc/zabbix-sql-scripts/mysql/create.sql.gz /usr/share/doc/zabbix-sql-scripts/mysql/double.sql /usr/share/doc/zabbix-sql-scripts/mysql/schema.sql.gz /usr/share/doc/zabbix-sql-scripts/postgresql/create.sql.gz /usr/share/doc/zabbix-sql-scripts/postgresql/double.sql /usr/share/doc/zabbix-sql-scripts/postgresql/schema.sql.gz /usr/share/doc/zabbix-sql-scripts/postgresql/timescaledb.sql.gz /usr/share/doc/zabbix-sql-scripts/sqlite3/schema.sql.gz [root@localhost ~]# cd /usr/share/doc/zabbix-sql-scripts/mysql/ [root@localhost mysql]# ll total 2492 -rw-r--r-- 1 root root 2529922 Apr 4 20:17 create.sql.gz -rw-r--r-- 1 root root 282 Apr 4 20:17 double.sql -rw-r--r-- 1 root root 14827 Apr 4 20:17 schema.sql.gz [root@localhost mysql]# zcat /usr/share/doc/zabbix-sql-scripts/mysql/create.sql.gz | mysql -uzabbix -pzabbix zabbix [root@localhost mysql]# mysql -uzabbix -pzabbix zabbix MariaDB [zabbix]> show tables; +----------------------------+ | Tables_in_zabbix | +----------------------------+ | acknowledges | | actions | .......................... | valuemap_mapping | | widget | | widget_field | +----------------------------+ 166 rows in set (0.001 sec) MariaDB [zabbix]> \q Bye- 1
- 2
- 3
- 4
- 5
- 6
- 7
- 8
- 9
- 10
- 11
- 12
- 13
- 14
- 15
- 16
- 17
- 18
- 19
- 20
- 21
- 22
- 23
- 24
- 25
- 26
- 27
- 28
- 29
- 30
- 31
- 32
- 33
- 34
- 35
- 36
- 37
- 38
- 39
- 40
- 41
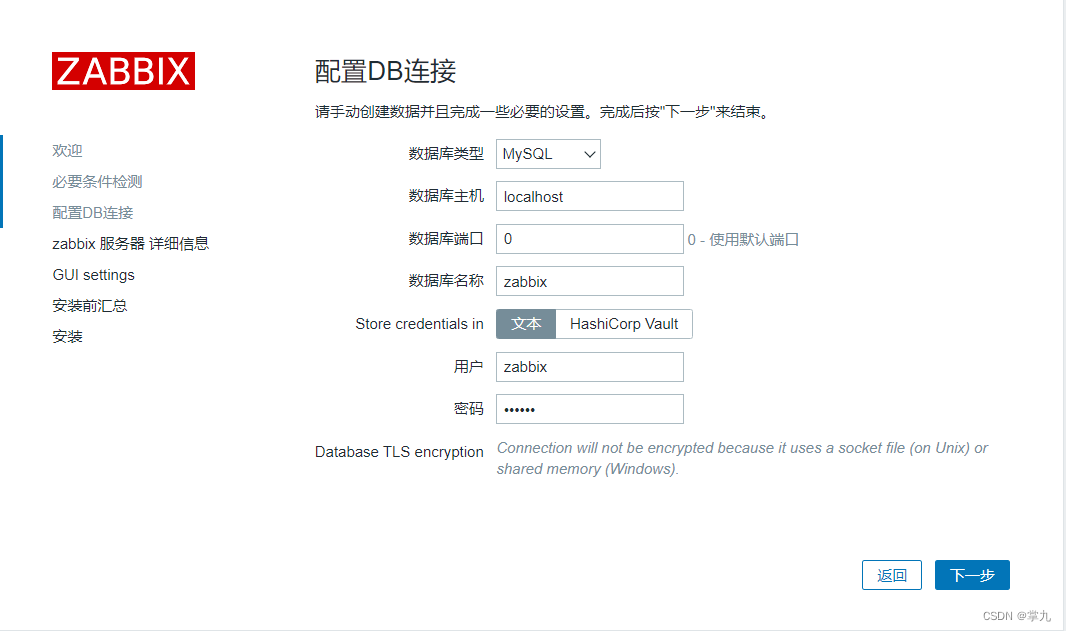
7. 为zabbix server配置数据库
[root@localhost ~]# vim /etc/zabbix/zabbix_server.conf 修改下两项即可 ### Option: DBHost # Database host name. # If set to localhost, socket is used for MySQL. # If set to empty string, socket is used for PostgreSQL. # If set to empty string, the Net Service Name connection method is used to connect to Oracle database; also see # the TNS_ADMIN environment variable to specify the directory where the tnsnames.ora file is located. # # Mandatory: no # Default: DBHost=localhost ### Option: DBPassword # Database password. # Comment this line if no password is used. # # Mandatory: no # Default: DBPassword=zabbix 过滤查看 [root@localhost ~]# grep ^DB /etc/zabbix/zabbix_server.conf DBHost=localhost DBName=zabbix DBUser=zabbix DBPassword=zabbix- 1
- 2
- 3
- 4
- 5
- 6
- 7
- 8
- 9
- 10
- 11
- 12
- 13
- 14
- 15
- 16
- 17
- 18
- 19
- 20
- 21
- 22
- 23
- 24
- 25
- 26
- 27
- 28
- 29
- 30
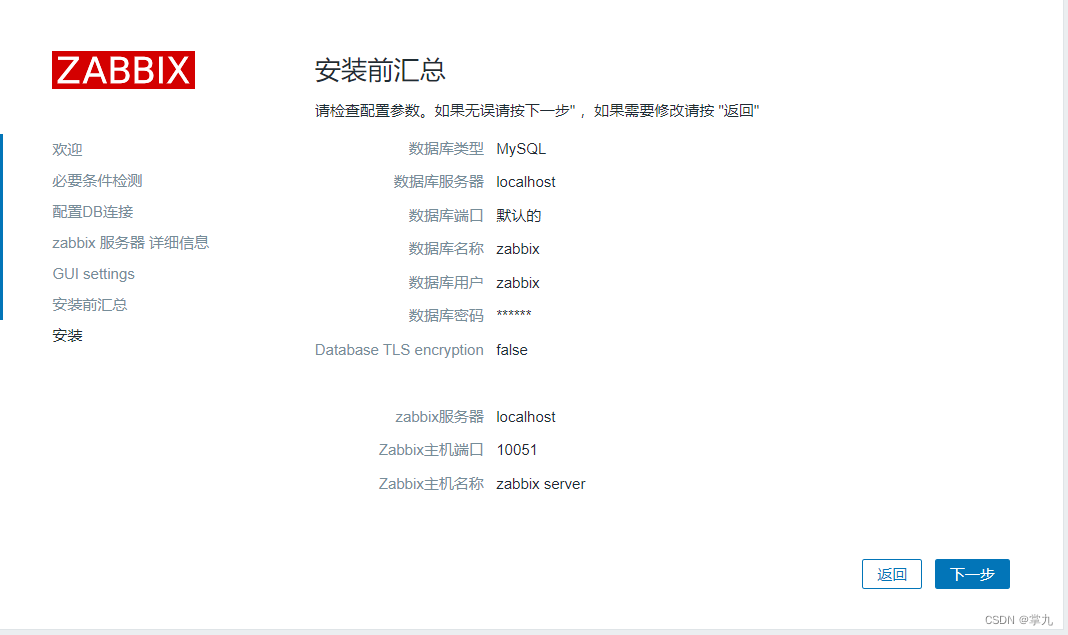
8.启动服务,web界面安装
[root@localhost ~]# systemctl enable --now httpd.service php-fpm.service zabbix-server.service zabbix-agent2.service Created symlink /etc/systemd/system/multi-user.target.wants/httpd.service → /usr/lib/systemd/system/httpd.service. Created symlink /etc/systemd/system/multi-user.target.wants/php-fpm.service → /usr/lib/systemd/system/php-fpm.service. Created symlink /etc/systemd/system/multi-user.target.wants/zabbix-server.service → /usr/lib/systemd/system/zabbix-server.service. Created symlink /etc/systemd/system/multi-user.target.wants/zabbix-agent2.service → /usr/lib/systemd/system/zabbix-agent2.service.- 1
- 2
- 3
- 4
- 5
- 6


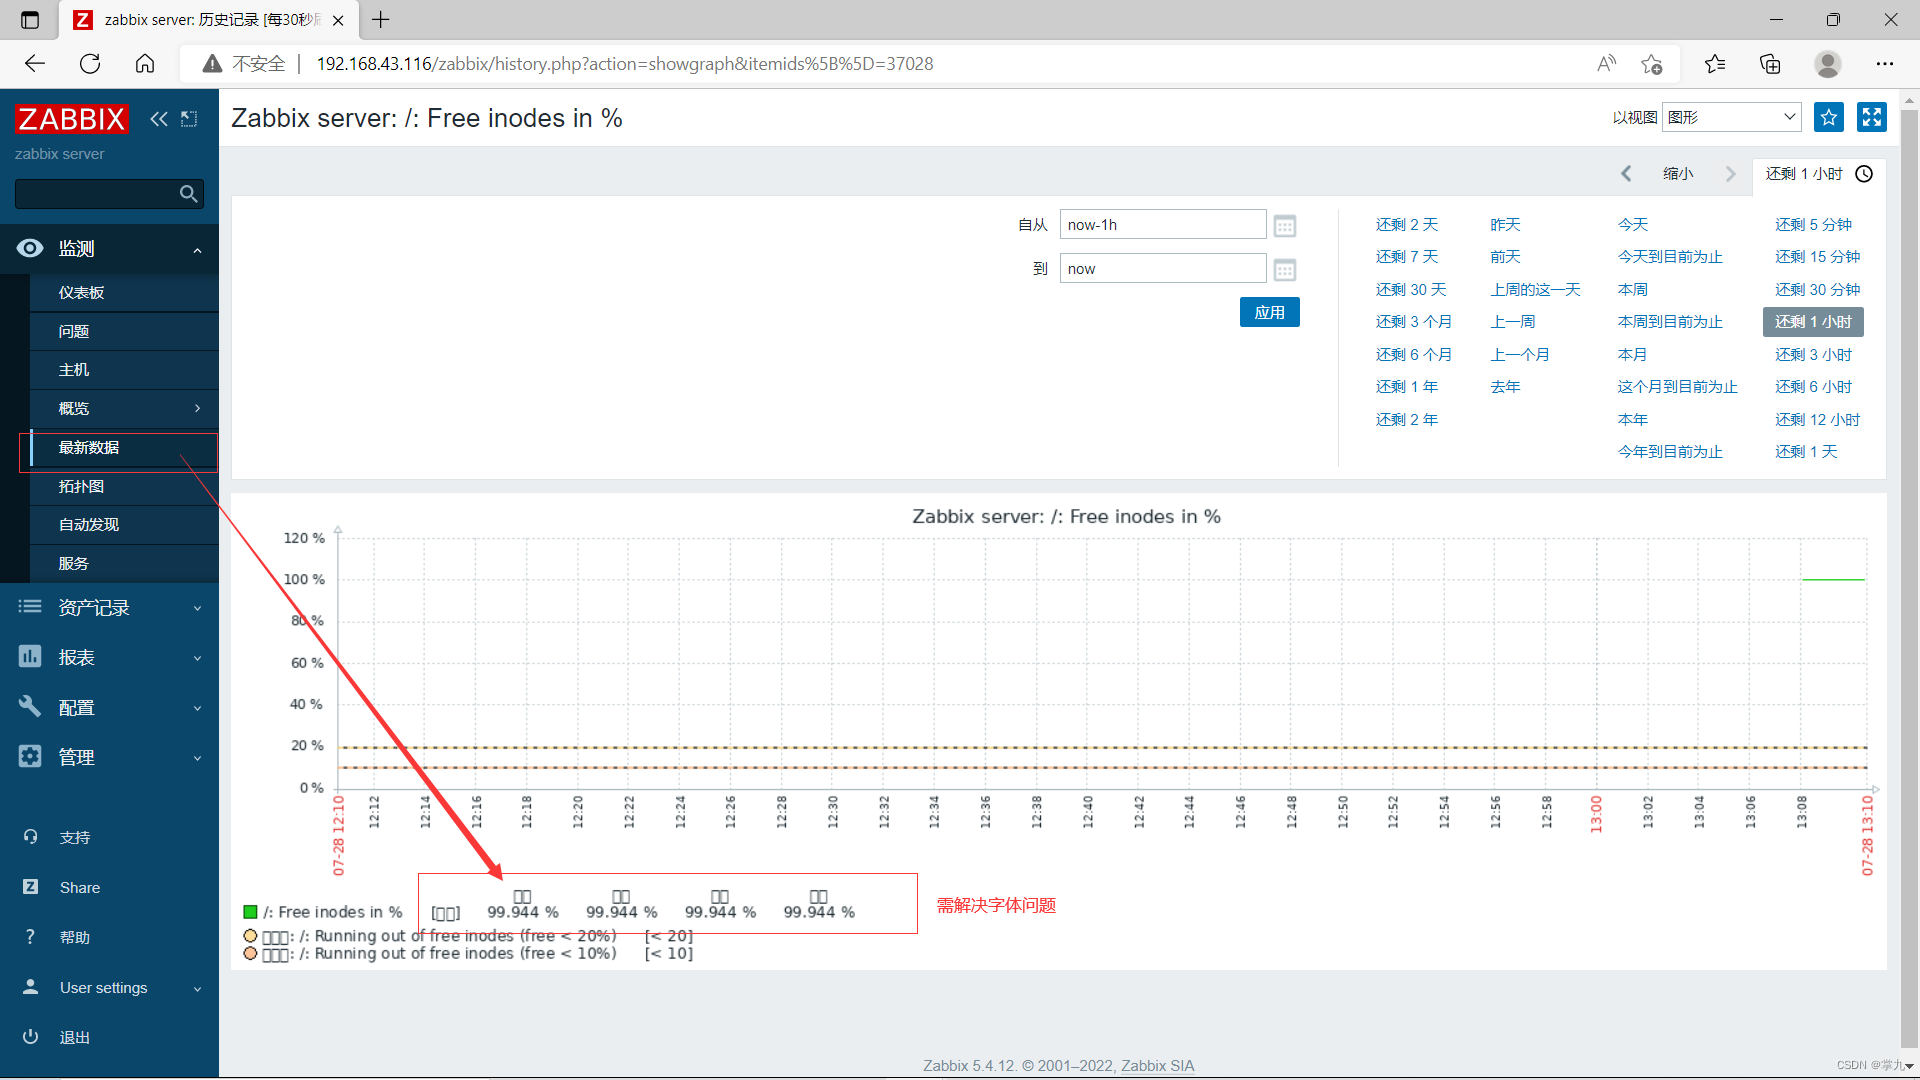
[root@localhost ~]# ll /usr/share/zabbix/assets/fonts/ total 0 lrwxrwxrwx 1 root root 33 Jul 28 19:33 graphfont.ttf -> /etc/alternatives/zabbix-web-font [root@localhost ~]# ll /etc/alternatives/zabbix-web-font lrwxrwxrwx 1 root root 38 Jul 28 19:33 /etc/alternatives/zabbix-web-font -> /usr/share/fonts/dejavu/DejaVuSans.ttf [root@localhost ~]# cd /usr/share/fonts/dejavu- 1
- 2
- 3
- 4
- 5
- 6
进入本地电脑 C:\Windows\Fonts 本文用的 “仿宋 常规“ 复制到桌面再用xshell传 [root@localhost dejavu]# rz -E rz waiting to receive.- 1
- 2
- 3

[root@localhost dejavu]# ll total 15848 -rw-r--r-- 1 root root 641716 May 17 2015 DejaVuSans-BoldOblique.ttf -rw-r--r-- 1 root root 704128 May 17 2015 DejaVuSans-Bold.ttf -rw-r--r-- 1 root root 610260 May 17 2015 DejaVuSansCondensed-BoldOblique.ttf -rw-r--r-- 1 root root 663468 May 17 2015 DejaVuSansCondensed-Bold.ttf -rw-r--r-- 1 root root 597708 May 17 2015 DejaVuSansCondensed-Oblique.ttf -rw-r--r-- 1 root root 679256 May 17 2015 DejaVuSansCondensed.ttf -rw-r--r-- 1 root root 355204 May 17 2015 DejaVuSans-ExtraLight.ttf -rw-r--r-- 1 root root 633836 May 17 2015 DejaVuSans-Oblique.ttf -rw-r--r-- 1 root root 756072 May 17 2015 DejaVuSans.ttf -rw-r--r-- 1 root root 10578152 Oct 15 2019 simfang.ttf [root@localhost dejavu]# mv DejaVuSans.ttf{,.bak} [root@localhost dejavu]# mv simfang.ttf DejaVuSans.ttf- 1
- 2
- 3
- 4
- 5
- 6
- 7
- 8
- 9
- 10
- 11
- 12
- 13
- 14

二、安装zabbix-agent监控linux和windows。
监控linux
客户端
启用一台centos7
关闭防火墙和selinux [root@localhost ~]# getenforce Disabled [root@localhost ~]# firewall-cmd --state not running 下载7版本的zabbix [root@localhost ~]# yum localinstall https://repo.huaweicloud.com/zabbix/zabbix/5.4/rhel/7/x86_64/zabbix-agent2-5.4.0-8.el7.x86_64.rpm [root@localhost ~]# vim /etc/zabbix/zabbix_agent2.conf ### Option: Server # List of comma delimited IP addresses, optionally in CIDR notation, or DNS names of Zabbix servers and Zabbix proxies. # Incoming connections will be accepted only from the hosts listed here. # If IPv6 support is enabled then '127.0.0.1', '::127.0.0.1', '::ffff:127.0.0.1' are treated equally # and '::/0' will allow any IPv4 or IPv6 address. # '0.0.0.0/0' can be used to allow any IPv4 address. # Example: Server=127.0.0.1,192.168.1.0/24,::1,2001:db8::/32,zabbix.example.com # # Mandatory: yes, if StartAgents is not explicitly set to 0 # Default: # Server= Server=192.168.43.116 ------------------------------------------------------------------------------------------------------------------------------------------------------------- ### Option: ServerActive # List of comma delimited IP:port (or DNS name:port) pairs of Zabbix servers and Zabbix proxies for active checks. # If port is not specified, default port is used. # IPv6 addresses must be enclosed in square brackets if port for that host is specified. # If port is not specified, square brackets for IPv6 addresses are optional. # If this parameter is not specified, active checks are disabled. # Example: ServerActive=127.0.0.1:20051,zabbix.domain,[::1]:30051,::1,[12fc::1] # # Mandatory: no # Default: # ServerActive= ServerActive=192.168.43.116 ------------------------------------------------------------------------------------------------------------------------------------------------------------- ### Option: Hostname # List of comma delimited unique, case sensitive hostnames. # Required for active checks and must match hostnames as configured on the server. # Value is acquired from HostnameItem if undefined. # # Mandatory: no # Default: # Hostname= Hostname=localhost ========================================================================================== 启动服务并设置为开机自起 [root@localhost ~]# systemctl enable --now zabbix-agent2.service Created symlink from /etc/systemd/system/multi-user.target.wants/zabbix-agent2.service to /usr/lib/systemd/system/zabbix-agent2.service. [root@localhost ~]# netstat -lnupt | grep 10050 tcp6 0 0 :::10050 :::* LISTEN 1489/zabbix_agent2- 1
- 2
- 3
- 4
- 5
- 6
- 7
- 8
- 9
- 10
- 11
- 12
- 13
- 14
- 15
- 16
- 17
- 18
- 19
- 20
- 21
- 22
- 23
- 24
- 25
- 26
- 27
- 28
- 29
- 30
- 31
- 32
- 33
- 34
- 35
- 36
- 37
- 38
- 39
- 40
- 41
- 42
- 43
- 44
- 45
- 46
- 47
- 48
- 49
- 50
- 51
- 52
- 53
- 54
- 55
服务端
[root@localhost ~]# dnf install zabbix-get.x86_64- 1

监控windows
略
-
相关阅读:
博世XC事业部李胤:自动驾驶降温不意外,但这条路肯定会走下去
【InternLM实战营---第七节课笔记】
Python科学计算库练习题
【Java基础】面向对象进阶(二)
云之家群组机器人如何定时自动发消息?
【HDFS】社区Router透传Client IP相关ISSUE的梳理及源码
基于深度学习的车道检测(一)
基于jeecg-boot的flowable流程历史记录显示修改
PLC-Recorder离线分析软件Ana里为什么不能显示变量的编号?
7-8 梯云纵
- 原文地址:https://blog.csdn.net/zhuangjiu/article/details/126033403
