-
SpringBoot学习(二)
四、整合和集成
4.1、整合JDBC
创建项目,选中JDBC API,Mysql Dirver,发现在项目pom.xml中增加了
<dependency> <groupId>org.springframework.bootgroupId> <artifactId>spring-boot-starter-jdbcartifactId> dependency> <dependency> <groupId>mysqlgroupId> <artifactId>mysql-connector-javaartifactId> <scope>runtimescope> dependency>- 1
- 2
- 3
- 4
- 5
- 6
- 7
- 8
- 9
- 10
- 11
配置yaml
spring: datasource: username: root password: 123456 url: jdbc:mysql://localhost:3306/mybatis?serverTimezone=UTC&characterEncoding=utf8&useUnicode=true&useSSL=false driver-class-name: com.mysql.cj.jdbc.Driver- 1
- 2
- 3
- 4
- 5
- 6
配置完这一些东西后,我们就可以直接去使用了,因为SpringBoot已经默认帮我们进行了自动配置;去测试类测试一下
@SpringBootTest class SpringbootDataJdbcApplicationTests { //DI注入数据源 @Autowired DataSource dataSource; @Test public void contextLoads() throws SQLException { //看一下默认数据源 System.out.println(dataSource.getClass()); //获得连接 Connection connection = dataSource.getConnection(); System.out.println(connection); //关闭连接 connection.close(); } }- 1
- 2
- 3
- 4
- 5
- 6
- 7
- 8
- 9
- 10
- 11
- 12
- 13
- 14
- 15
- 16
- 17
- 18
结果:我们可以看到他默认给我们配置的数据源为 : class com.zaxxer.hikari.HikariDataSource , 我们并没有手动配置
HikariDataSource 号称 Java WEB 当前速度最快的数据源,相比于传统的 C3P0 、DBCP、Tomcat jdbc 等连接池更加优秀;
可以使用 spring.datasource.type 指定自定义的数据源类型,值为 要使用的连接池实现的完全限定名。
JDBCTemplate
1、有了数据源(com.zaxxer.hikari.HikariDataSource),然后可以拿到数据库连接(java.sql.Connection),有了连接,就可以使用原生的 JDBC 语句来操作数据库;
2、即使不使用第三方第数据库操作框架,如 MyBatis等,Spring 本身也对原生的JDBC 做了轻量级的封装,即JdbcTemplate。
3、数据库操作的所有 CRUD 方法都在 JdbcTemplate 中。
4、Spring Boot 不仅提供了默认的数据源,同时默认已经配置好了 JdbcTemplate 放在了容器中,程序员只需自己注入即可使用
5、JdbcTemplate 的自动配置是依赖 org.springframework.boot.autoconfigure.jdbc 包下的 JdbcTemplateConfiguration 类
JdbcTemplate主要提供以下几类方法:
- execute方法:可以用于执行任何SQL语句,一般用于执行DDL语句;
- update方法及batchUpdate方法:update方法用于执行新增、修改、删除等语句;batchUpdate方法用于执行批处理相关语句;
- query方法及queryForXXX方法:用于执行查询相关语句;
- call方法:用于执行存储过程、函数相关语句。
4.2、整合Druid
Druid 是阿里巴巴开源平台上一个数据库连接池实现,结合了 C3P0、DBCP 等 DB 池的优点,同时加入了日志监控。
Druid 可以很好的监控 DB 池连接和 SQL 的执行情况,天生就是针对监控而生的 DB 连接池。
Druid已经在阿里巴巴部署了超过600个应用,经过一年多生产环境大规模部署的严苛考验。
Spring Boot 2.0 以上默认使用 Hikari 数据源,可以说 Hikari 与 Driud 都是当前 Java Web 上最优秀的数据源,我们来重点介绍 Spring Boot 如何集成 Druid 数据源,如何实现数据库监控。
Github地址:https://github.com/alibaba/druid/
com.alibaba.druid.pool.DruidDataSource 基本配置参数如下:
[外链图片转存失败,源站可能有防盗链机制,建议将图片保存下来直接上传(img-IFKwhyly-1658828975508)(D:\program files\TyporaImg\image-20220715193707471.png)]
[外链图片转存失败,源站可能有防盗链机制,建议将图片保存下来直接上传(img-iQhFxAVh-1658828975509)(D:\program files\TyporaImg\image-20220715193617387.png)]
导入依赖
<dependency> <groupId>com.alibabagroupId> <artifactId>druidartifactId> <version>1.2.11version> dependency>- 1
- 2
- 3
- 4
- 5
- 6
设置数据源连接属性
spring: datasource: username: root password: 123456 url: jdbc:mysql://localhost:3306/mybatis?serverTimezone=UTC&characterEncoding=utf8&useUnicode=true&useSSL=false driver-class-name: com.mysql.cj.jdbc.Driver # 连接池类型:使用druid type: com.alibaba.druid.pool.DruidDataSource #Spring Boot 默认是不注入这些属性值的,需要自己绑定 #druid 数据源专有配置 initialSize: 5 minIdle: 5 maxActive: 20 maxWait: 60000 timeBetweenEvictionRunsMillis: 60000 minEvictableIdleTimeMillis: 300000 validationQuery: SELECT 1 FROM DUAL testWhileIdle: true testOnBorrow: false testOnReturn: false poolPreparedStatements: true #配置监控统计拦截的filters,stat:监控统计、log4j:日志记录、wall:防御sql注入 #如果允许时报错 java.lang.ClassNotFoundException: org.apache.log4j.Priority #则导入 log4j 依赖即可,Maven 地址:https://mvnrepository.com/artifact/log4j/log4j filters: stat,wall,log4j maxPoolPreparedStatementPerConnectionSize: 20 useGlobalDataSourceStat: true connectionProperties: druid.stat.mergeSql=true;druid.stat.slowSqlMillis=500- 1
- 2
- 3
- 4
- 5
- 6
- 7
- 8
- 9
- 10
- 11
- 12
- 13
- 14
- 15
- 16
- 17
- 18
- 19
- 20
- 21
- 22
- 23
- 24
- 25
- 26
- 27
- 28
- 29
- 30
导入依赖
<dependency> <groupId>log4jgroupId> <artifactId>log4jartifactId> <version>1.2.17version> dependency>- 1
- 2
- 3
- 4
- 5
- 6
编写DruidConfig类,使用其监控功能
package com.rui.config; import com.alibaba.druid.pool.DruidDataSource; import com.alibaba.druid.support.http.StatViewServlet; import com.alibaba.druid.support.http.WebStatFilter; import org.springframework.boot.context.properties.ConfigurationProperties; import org.springframework.boot.web.servlet.FilterRegistrationBean; import org.springframework.boot.web.servlet.ServletRegistrationBean; import org.springframework.context.annotation.Bean; import org.springframework.context.annotation.Configuration; import javax.sql.DataSource; import java.util.HashMap; @Configuration public class DruidConfig { @ConfigurationProperties(prefix = "spring.datasource") @Bean public DataSource druidDataSource(){ return new DruidDataSource(); } //后台监控功能 :web.xml ServletRegistrationBean //因为SpringBoot 内置了servlet容器,所以没有web.xml, 替代方法ServletRegistrationBean //Druid 数据源具有监控的功能,并提供了一个 web 界面方便用户查看,类似安装 路由器 时,人家也提供了一个默认的 web 页面。 @Bean public ServletRegistrationBean statViewServlet(){ ServletRegistrationBean<StatViewServlet> bean = new ServletRegistrationBean<>(new StatViewServlet(), "/druid/*"); HashMap<String, String> initParameter = new HashMap<>(); //增加配置 initParameter.put("loginUsername","admin"); initParameter.put("loginPassword","123456"); //允许谁可以访问 initParameter.put("allow",""); //deny:Druid 后台拒绝谁访问 //initParams.put("rui", "192.168.1.20");表示禁止此ip访问 //设置初始化参数 bean.setInitParameters(initParameter); return bean; } //配置 Druid 监控 之 web 监控的 filter//WebStatFilter:用于配置Web和Druid数据源之间的管理关联监控统计 @Bean public FilterRegistrationBean webStatFilter(){ FilterRegistrationBean bean = new FilterRegistrationBean(); bean.setFilter(new WebStatFilter()); HashMap<String, String> initParameter = new HashMap<>(); //这些东西不进行统计 initParameter.put("exclusions","*.js,*.css,/druid/*"); //设置初始化参数 bean.setInitParameters(initParameter); return bean; } }- 1
- 2
- 3
- 4
- 5
- 6
- 7
- 8
- 9
- 10
- 11
- 12
- 13
- 14
- 15
- 16
- 17
- 18
- 19
- 20
- 21
- 22
- 23
- 24
- 25
- 26
- 27
- 28
- 29
- 30
- 31
- 32
- 33
- 34
- 35
- 36
- 37
- 38
- 39
- 40
- 41
- 42
- 43
- 44
- 45
- 46
- 47
- 48
- 49
- 50
- 51
- 52
- 53
- 54
- 55
- 56
- 57
- 58
- 59
- 60
我们可以选择访问 :http://localhost:8080/druid/login.html,就可以看到它强大的监控功能了。
4.3、整合MyBatis
导入 MyBatis 所需要的依赖
<dependency> <groupId>org.mybatis.spring.bootgroupId> <artifactId>mybatis-spring-boot-starterartifactId> <version>2.1.1version> dependency>- 1
- 2
- 3
- 4
- 5
配置数据库连接信息
spring.datasource.driver-class-name=com.mysql.cj.jdbc.Driver spring.datasource.name=defaultDataSource spring.datasource.url=jdbc:mysql://localhost:3306/mybatis?serverTimezone=UTC spring.datasource.username=root spring.datasource.password=123456- 1
- 2
- 3
- 4
- 5
导入lombok,编写pojo类User
@Data @NoArgsConstructor @AllArgsConstructor public class User { private int id; private String name; private String pwd; }- 1
- 2
- 3
- 4
- 5
- 6
- 7
- 8
编写UserMapper
//这个注解表示这个类是mybatis的mapper类:dao @Mapper @Repository public interface UserMapper { List<User> queryUserList(); User queryUserById(int id); int addUser(User user); int updateUser(User user); int deleteUser(int id); }- 1
- 2
- 3
- 4
- 5
- 6
- 7
- 8
- 9
- 10
整合mybatis配置信息
mybatis.type-aliases-package=com.rui.pojo mybatis.mapper-locations=classpath:mybatis/mapper/*.xml- 1
- 2
在resources文件夹下创建mybatis/mapper/UserMapper.xml
DOCTYPE mapper PUBLIC "-//mybatis.org//DTD Mapper 3.0//EN" "http://mybatis.org/dtd/mybatis-3-mapper.dtd"> <mapper namespace="com.rui.mapper.UserMapper"> <select id="queryUserList" resultType="User"> select * from user; select> <select id="queryUserById" resultType="User"> select * from user where id = #{id}; select> <insert id="addUser" parameterType="User"> insert into user values (#{id},#{name},#{pwd}); insert> <update id="updateUser" parameterType="User"> update user set name=#{name},pwd=#{pwd} where id = #{id}; update> <delete id="deleteUser" parameterType="int"> delete from user where id = #{id}; delete> mapper>- 1
- 2
- 3
- 4
- 5
- 6
- 7
- 8
- 9
- 10
- 11
- 12
- 13
- 14
- 15
- 16
- 17
- 18
- 19
- 20
- 21
- 22
- 23
- 24
- 25
- 26
- 27
- 28
编写UserController
package com.rui.controller; import com.rui.mapper.UserMapper; import com.rui.pojo.User; import org.springframework.beans.factory.annotation.Autowired; import org.springframework.web.bind.annotation.GetMapping; import org.springframework.web.bind.annotation.PathVariable; import org.springframework.web.bind.annotation.RestController; import java.util.List; @RestController public class UserController { @Autowired private UserMapper userMapper; @GetMapping("/getlist") public List<User> getEmployees(){ return userMapper.queryUserList(); } @GetMapping("/add") public int add(){ User user = new User(10, "小王", "666"); return userMapper.addUser(user); } @GetMapping("/update") public int update(){ User user = new User(10, "xiaownag", "666"); return userMapper.updateUser(user); } @GetMapping("/get/{id}") public User get(@PathVariable("id") Integer id){ return userMapper.queryUserById(id); } @GetMapping("/delete/{id}") public int delete(@PathVariable("id") Integer id){ return userMapper.deleteUser(id); } }- 1
- 2
- 3
- 4
- 5
- 6
- 7
- 8
- 9
- 10
- 11
- 12
- 13
- 14
- 15
- 16
- 17
- 18
- 19
- 20
- 21
- 22
- 23
- 24
- 25
- 26
- 27
- 28
- 29
- 30
- 31
- 32
- 33
- 34
- 35
- 36
- 37
- 38
- 39
- 40
- 41
- 42
- 43
- 44
- 45
- 46
测试…
4.4、集成SpringSecurity
Spring Security 是针对Spring项目的安全框架,也是Spring Boot底层安全模块默认的技术选型,他可以实现强大的Web安全控制,对于安全控制,我们仅需要引入 spring-boot-starter-security 模块,进行少量的配置,即可实现强大的安全管理!
记住几个类:
- WebSecurityConfigurerAdapter:自定义Security策略
- AuthenticationManagerBuilder:自定义认证策略
- @EnableWebSecurity:开启WebSecurity模式
Spring Security的两个主要目标是 “认证” 和 “授权”(访问控制)。
“认证”(Authentication)
身份验证是关于验证您的凭据,如用户名/用户ID和密码,以验证您的身份。
身份验证通常通过用户名和密码完成,有时与身份验证因素结合使用。
“授权” (Authorization)
授权发生在系统成功验证您的身份后,最终会授予您访问资源(如信息,文件,数据库,资金,位置,几乎任何内容)的完全权限。
这个概念是通用的,而不是只在Spring Security 中存在。
环境搭建
静态资源地址:https://gitee.com/ENNRIAAA/spring-security-material?_from=gitee_search
编写路由跳转实现类RouterController
package com.rui.controller; import org.springframework.stereotype.Controller; import org.springframework.web.bind.annotation.PathVariable; import org.springframework.web.bind.annotation.RequestMapping; @Controller public class RouterController { @RequestMapping({"/","/index"}) public String index(){ return "index"; } @RequestMapping({"/toLogin"}) public String toLogin(){ return "views/login"; } @RequestMapping({"/level1/{id}"}) public String level1(@PathVariable("id") int id){ return "views/level1/"+id; } @RequestMapping({"/level2/{id}"}) public String level2(@PathVariable("id") int id){ return "views/level2/"+id; } @RequestMapping({"/level3/{id}"}) public String level3(@PathVariable("id") int id){ return "views/level3/"+id; } }- 1
- 2
- 3
- 4
- 5
- 6
- 7
- 8
- 9
- 10
- 11
- 12
- 13
- 14
- 15
- 16
- 17
- 18
- 19
- 20
- 21
- 22
- 23
- 24
- 25
- 26
- 27
- 28
- 29
- 30
- 31
- 32
导入Spring Security 模块
<dependency> <groupId>org.springframework.bootgroupId> <artifactId>spring-boot-starter-securityartifactId> dependency>- 1
- 2
- 3
- 4
编写 Spring Security 配置类SecurityConfig 配置认证和授权信息
package com.rui.config; import org.springframework.security.config.annotation.authentication.builders.AuthenticationManagerBuilder; import org.springframework.security.config.annotation.web.builders.HttpSecurity; import org.springframework.security.config.annotation.web.configuration.EnableWebSecurity; import org.springframework.security.config.annotation.web.configuration.WebSecurityConfigurerAdapter; import org.springframework.security.crypto.bcrypt.BCryptPasswordEncoder; // aop:拦截器 @EnableWebSecurity// 开启WebSecurity模式 public class SecurityConfig extends WebSecurityConfigurerAdapter { @Override protected void configure(HttpSecurity http) throws Exception { //首页所有人可以访问,但是功能也需要有对应的权限的人才能访问 //请求授权的规则 http.authorizeRequests() .antMatchers("/").permitAll() .antMatchers("/level1/**").hasRole("vip1") .antMatchers("/level2/**").hasRole("vip2") .antMatchers("/level3/**").hasRole("vip3"); //没有权限回到登录页面,需要开启登录的页面 http.formLogin().loginPage("/toLogin") .usernameParameter("user").passwordParameter("pwd") .loginProcessingUrl("/login"); //关闭csrf功能:跨站请求伪造,默认只能通过post方式提交logout请求 http.csrf().disable(); //开启注销功能,跳到首页 http.logout().logoutSuccessUrl("/"); //开启记住我功能 cookie,默认保存14天 自定义接受前端的参数 http.rememberMe().rememberMeParameter("remember"); } //认证 //密码编码:passwordEncoder @Override protected void configure(AuthenticationManagerBuilder auth) throws Exception { //从内存中读:inMemoryAuthentication auth.inMemoryAuthentication().passwordEncoder(new BCryptPasswordEncoder()) .withUser("yechen").password(new BCryptPasswordEncoder().encode("123456")).roles("vip1") .and() .withUser("admin").password(new BCryptPasswordEncoder().encode("123456")).roles("vip2","vip3") .and() .withUser("root").password(new BCryptPasswordEncoder().encode("123456")).roles("vip1","vip2","vip3"); } //应该从数据库中读取用户信息 // @Autowired // private DataSource dataSource; // @Override // protected void configure(AuthenticationManagerBuilder auth) throws Exception { // User.UserBuilder users =User.withDefaultPasswordEncoder(); // auth.jdbcAuthentication().dataSource(dataSource) // .withDefaultSchema() // .withUser(users.username("user").password("123456").roles("vip1")) // .withUser(users.username("admin").password("123456").roles("vip1","vip2")); // // } }- 1
- 2
- 3
- 4
- 5
- 6
- 7
- 8
- 9
- 10
- 11
- 12
- 13
- 14
- 15
- 16
- 17
- 18
- 19
- 20
- 21
- 22
- 23
- 24
- 25
- 26
- 27
- 28
- 29
- 30
- 31
- 32
- 33
- 34
- 35
- 36
- 37
- 38
- 39
- 40
- 41
- 42
- 43
- 44
- 45
- 46
- 47
- 48
- 49
- 50
- 51
- 52
- 53
- 54
- 55
- 56
- 57
- 58
- 59
- 60
- 61
- 62
- 63
- 64
- 65
- 66
其中对应的登录页面的表单数据为
<form th:action="@{/login}" method="post"> <div class="field"> <label>Usernamelabel> <div class="ui left icon input"> <input type="text" placeholder="Username" name="user"> <i class="user icon">i> div> div> <div class="field"> <label>Passwordlabel> <div class="ui left icon input"> <input type="password" name="pwd"> <i class="lock icon">i> div> div> <div class="field"> <input type="checkbox" name="remember">记住我 div> <input type="submit" class="ui blue submit button"/> form>- 1
- 2
- 3
- 4
- 5
- 6
- 7
- 8
- 9
- 10
- 11
- 12
- 13
- 14
- 15
- 16
- 17
- 18
- 19
- 20
导入依赖Security-thymeleaf整合包
<dependency> <groupId>org.thymeleaf.extrasgroupId> <artifactId>thymeleaf-extras-springsecurity5artifactId> <version>3.0.4.RELEASEversion> dependency>- 1
- 2
- 3
- 4
- 5
在需要的html中添加命名空间
xmlns:sec="http://www.thymeleaf.org/extras/spring-security"- 1
登录,注销按钮
sec:authorize="!isAuthenticated()"展示属性值sec:authentication="name"sec:authentication="principal.authorities"<div class="right menu"> <div sec:authorize="!isAuthenticated()"> <a class="item" th:href="@{/toLogin}"> <i class="address card icon">i> 登录 a> div> <div sec:authorize="isAuthenticated()"> <a class="item" th:href="@{/logout}"> 用户名:<span sec:authentication="name">span> 角色:<span sec:authentication="principal.authorities">span> a> div> <div sec:authorize="isAuthenticated()"> <a class="item" th:href="@{/logout}"> <i class="sign-out icon">i> 注销 a> div> div>- 1
- 2
- 3
- 4
- 5
- 6
- 7
- 8
- 9
- 10
- 11
- 12
- 13
- 14
- 15
- 16
- 17
- 18
- 19
- 20
- 21
根据用户权限来展示模板数据
sec:authorize="hasRole('vip1')"<div class="ui three column stackable grid"> <div class="column" sec:authorize="hasRole('vip1')"> <div class="ui raised segment"> <div class="ui"> <div class="content"> <h5 class="content">Level 1h5> <hr> <div><a th:href="@{/level1/1}"><i class="bullhorn icon">i> Level-1-1a>div> <div><a th:href="@{/level1/2}"><i class="bullhorn icon">i> Level-1-2a>div> <div><a th:href="@{/level1/3}"><i class="bullhorn icon">i> Level-1-3a>div> div> div> div> div> <div class="column" sec:authorize="hasRole('vip2')"> <div class="ui raised segment"> <div class="ui"> <div class="content"> <h5 class="content">Level 2h5> <hr> <div><a th:href="@{/level2/1}"><i class="bullhorn icon">i> Level-2-1a>div> <div><a th:href="@{/level2/2}"><i class="bullhorn icon">i> Level-2-2a>div> <div><a th:href="@{/level2/3}"><i class="bullhorn icon">i> Level-2-3a>div> div> div> div> div> <div class="column" sec:authorize="hasRole('vip3')"> <div class="ui raised segment"> <div class="ui"> <div class="content"> <h5 class="content">Level 3h5> <hr> <div><a th:href="@{/level3/1}"><i class="bullhorn icon">i> Level-3-1a>div> <div><a th:href="@{/level3/2}"><i class="bullhorn icon">i> Level-3-2a>div> <div><a th:href="@{/level3/3}"><i class="bullhorn icon">i> Level-3-3a>div> div> div> div> div> div>- 1
- 2
- 3
- 4
- 5
- 6
- 7
- 8
- 9
- 10
- 11
- 12
- 13
- 14
- 15
- 16
- 17
- 18
- 19
- 20
- 21
- 22
- 23
- 24
- 25
- 26
- 27
- 28
- 29
- 30
- 31
- 32
- 33
- 34
- 35
- 36
- 37
- 38
- 39
- 40
- 41
- 42
- 43
- 44
- 45
- 46
测试…
4.5、集成Shiro
Shiro详细简介: Shiro 关于_w3cschool
分析shiro快速搭建的Maven项目,得到
Subject currentSubject = SecurityUtils.getSubject(); Session session = currentSubject.getSession(); currentSubject.isAuthenticated(); currentSubject.getPrincipal(); currentSubject.hasRole(""); currentSubject.isPermitted(""); currentSubject.logout();- 1
- 2
- 3
- 4
- 5
- 6
- 7
当然这些在Spring Security中都有
在springboot中使用(默认已实现数据库连接…通过姓名查找对象userService.queryUserByName(String name);)
导入项目关键的shiro,thymeleaf所需依赖
<dependency> <groupId>com.github.theborakompanionigroupId> <artifactId>thymeleaf-extras-shiroartifactId> <version>2.0.0version> dependency> <dependency> <groupId>org.apache.shirogroupId> <artifactId>shiro-springartifactId> <version>1.9.0version> dependency> <dependency> <groupId>org.springframework.bootgroupId> <artifactId>spring-boot-starter-thymeleafartifactId> dependency>- 1
- 2
- 3
- 4
- 5
- 6
- 7
- 8
- 9
- 10
- 11
- 12
- 13
- 14
- 15
- 16
- 17
编写UserRealm类继承AuthorizingRealm
- 授权
doGetAuthorizationInfo - 认证
doGetAuthenticationInfo
package com.rui.config; import com.rui.pojo.User; import com.rui.service.UserServiceImpl; import org.apache.shiro.SecurityUtils; import org.apache.shiro.authc.*; import org.apache.shiro.authz.AuthorizationInfo; import org.apache.shiro.authz.SimpleAuthorizationInfo; import org.apache.shiro.realm.AuthorizingRealm; import org.apache.shiro.session.Session; import org.apache.shiro.subject.PrincipalCollection; import org.apache.shiro.subject.Subject; import org.springframework.beans.factory.annotation.Autowired; public class UserRealm extends AuthorizingRealm { @Autowired UserServiceImpl userService; //授权 @Override protected AuthorizationInfo doGetAuthorizationInfo(PrincipalCollection principalCollection) { System.out.println("执行->授权doGetAuthorizationInfo"); //SimpleAuthorizationInfo SimpleAuthorizationInfo info = new SimpleAuthorizationInfo(); // info.addStringPermission("user:add"); //拿到当前登录的这个对象 Subject subject = SecurityUtils.getSubject(); User currentUser = (User)subject.getPrincipal(); //设置当前用户的权限 info.addStringPermission(currentUser.getPerms()); return info; } //认证 @Override protected AuthenticationInfo doGetAuthenticationInfo(AuthenticationToken token) throws AuthenticationException { System.out.println("执行->认证doGetAuthenticationInfo"); UsernamePasswordToken userToken = (UsernamePasswordToken) token; User user = userService.queryUserByName(userToken.getUsername()); if(user==null){ return null;//UnknownAccountException } Subject currentSubject = SecurityUtils.getSubject(); Session session = currentSubject.getSession(); session.setAttribute("loginUser",user); // if(!userToken.getUsername().equals(name)){ // return null; // } //可以加密 md5加密 md5盐值加密 //密码认证:shiro自己做 return new SimpleAuthenticationInfo(user,user.getPwd(),""); } }- 1
- 2
- 3
- 4
- 5
- 6
- 7
- 8
- 9
- 10
- 11
- 12
- 13
- 14
- 15
- 16
- 17
- 18
- 19
- 20
- 21
- 22
- 23
- 24
- 25
- 26
- 27
- 28
- 29
- 30
- 31
- 32
- 33
- 34
- 35
- 36
- 37
- 38
- 39
- 40
- 41
- 42
- 43
- 44
- 45
- 46
- 47
- 48
- 49
- 50
- 51
- 52
- 53
编写ShiroConfig类,注册ShiroFilterFactoryBean,DefaultWebSecurityManager,realm ,ShiroDialect
package com.rui.config; import at.pollux.thymeleaf.shiro.dialect.ShiroDialect; import org.apache.shiro.spring.web.ShiroFilterFactoryBean; import org.apache.shiro.web.mgt.DefaultWebSecurityManager; import org.springframework.beans.factory.annotation.Qualifier; import org.springframework.context.annotation.Bean; import org.springframework.context.annotation.Configuration; import java.util.HashMap; import java.util.Map; @Configuration public class ShiroConfig { //ShiroFilterFactoryBean @Bean public ShiroFilterFactoryBean getShiroFilterFactoryBean(@Qualifier("getDefaultWebSecurityManager") DefaultWebSecurityManager defaultWebSecurityManager){ ShiroFilterFactoryBean bean = new ShiroFilterFactoryBean(); //关联DefaultWebSecurityManager bean.setSecurityManager(defaultWebSecurityManager); //添加shiro的内置过滤器 /* anno:无需认证就可以访问 authc:必须认证才可以访问 user:必须拥有记住我功能才能访问 perms:拥有对某个资源的权限才能访问 role:拥有某个角色权限才能访问 */ //登录拦截 Map<String, String> filterMap =new HashMap<>(); //授权,401错误:正常情况下,未授权跳到未授权页面 filterMap.put("/user/add","perms[user:add]"); filterMap.put("/user/update","perms[user:update]"); filterMap.put("/user/*","authc"); bean.setFilterChainDefinitionMap(filterMap); //设置登录请求 bean.setLoginUrl("/toLogin"); //未授权的页面 bean.setUnauthorizedUrl("/noauth"); return bean; } //DefaultWebSecurityManager @Bean public DefaultWebSecurityManager getDefaultWebSecurityManager(@Qualifier("userRealm") UserRealm userRealm){ DefaultWebSecurityManager securityManager = new DefaultWebSecurityManager(); //关联UserRealm securityManager.setRealm(userRealm); return securityManager; } //创建realm对象,需要自定义 @Bean public UserRealm userRealm(){ return new UserRealm(); } //整合ShiroDialect:用来整合shiro thymeleaf @Bean public ShiroDialect getShiroDialect(){ return new ShiroDialect(); } }- 1
- 2
- 3
- 4
- 5
- 6
- 7
- 8
- 9
- 10
- 11
- 12
- 13
- 14
- 15
- 16
- 17
- 18
- 19
- 20
- 21
- 22
- 23
- 24
- 25
- 26
- 27
- 28
- 29
- 30
- 31
- 32
- 33
- 34
- 35
- 36
- 37
- 38
- 39
- 40
- 41
- 42
- 43
- 44
- 45
- 46
- 47
- 48
- 49
- 50
- 51
- 52
- 53
- 54
- 55
- 56
- 57
- 58
- 59
- 60
- 61
- 62
在html使用shiro,需要导入命名空间
xmlns:shiro="http://www.thymeleaf.org/thymeleaf-extras-shiro"- 1
shiro:hasPermission=""是否拥有权限
如,在index.html首页中
DOCTYPE html> <html lang="en" xmlns:th="http://www.thymeleaf.org" xmlns:shiro="http://www.thymeleaf.org/thymeleaf-extras-shiro"> <head> <meta charset="UTF-8"> <title>Titletitle> head> <body> <h1>首页h1> <div th:if="session.loginUser==null"> <a th:href="@{/toLogin}">登录a> div> <p th:text="${msg}">p> <hr> <div shiro:hasPermission="user:add"> <a th:href="@{/user/add}">adda> div> <div shiro:hasPermission="user:update"> <a th:href="@{/user/update}">updatea> div> body> html>- 1
- 2
- 3
- 4
- 5
- 6
- 7
- 8
- 9
- 10
- 11
- 12
- 13
- 14
- 15
- 16
- 17
- 18
- 19
- 20
- 21
- 22
- 23
- 24
- 25
编写MyController类,在MyController中控制路由
package com.rui.controller; import org.apache.shiro.SecurityUtils; import org.apache.shiro.authc.IncorrectCredentialsException; import org.apache.shiro.authc.LockedAccountException; import org.apache.shiro.authc.UnknownAccountException; import org.apache.shiro.authc.UsernamePasswordToken; import org.apache.shiro.session.Session; import org.apache.shiro.subject.Subject; import org.springframework.stereotype.Controller; import org.springframework.ui.Model; import org.springframework.web.bind.annotation.RequestMapping; import org.springframework.web.bind.annotation.ResponseBody; @Controller public class MyController { @RequestMapping({"/","/index"}) public String toIndex(Model model){ model.addAttribute("msg","hello,Shiro"); return "index"; } @RequestMapping("/user/add") public String add(){ return "user/add"; } @RequestMapping("/user/update") public String update(){ return "user/update"; } @RequestMapping("/toLogin") public String toLogin(){ return "login"; } @RequestMapping("/login") public String login(String username,String password,Model model){ //获取当前用户 Subject subject = SecurityUtils.getSubject(); //封装用户的登录数据 UsernamePasswordToken token = new UsernamePasswordToken(username, password); try{ subject.login(token);//执行登录的方法 return "index"; }catch (UnknownAccountException e) { model.addAttribute("msg","用户名错误"); return "login"; } catch (IncorrectCredentialsException e) { model.addAttribute("msg","密码错误"); return "login"; } } @RequestMapping("/noauth") @ResponseBody public String unauthorized(){ return "未经授权无法访问此页面"; } }- 1
- 2
- 3
- 4
- 5
- 6
- 7
- 8
- 9
- 10
- 11
- 12
- 13
- 14
- 15
- 16
- 17
- 18
- 19
- 20
- 21
- 22
- 23
- 24
- 25
- 26
- 27
- 28
- 29
- 30
- 31
- 32
- 33
- 34
- 35
- 36
- 37
- 38
- 39
- 40
- 41
- 42
- 43
- 44
- 45
- 46
- 47
- 48
- 49
- 50
- 51
- 52
- 53
- 54
- 55
- 56
- 57
- 58
- 59
- 60
- 61
- 62
- 63
- 64
测试…
4.6、集成Swagger终极版
官网:https://swagger.io/
导入Swagger3相关依赖
<dependency> <groupId>io.springfoxgroupId> <artifactId>springfox-boot-starterartifactId> <version>3.0.0version> <dependency>- 1
- 2
- 3
- 4
- 5
编写SwaggerConfig配置Swagger
package com.rui.config; import org.springframework.context.annotation.Bean; import org.springframework.context.annotation.Configuration; import org.springframework.core.env.Environment; import org.springframework.core.env.Profiles; import org.springframework.web.servlet.config.annotation.EnableWebMvc; import springfox.documentation.builders.PathSelectors; import springfox.documentation.builders.RequestHandlerSelectors; import springfox.documentation.oas.annotations.EnableOpenApi; import springfox.documentation.service.ApiInfo; import springfox.documentation.service.Contact; import springfox.documentation.spi.DocumentationType; import springfox.documentation.spring.web.plugins.Docket; import java.util.ArrayList; @Configuration //@EnableSwagger2 //开启Swagger2 @EnableOpenApi // 开启swagger3的支持 @EnableWebMvc public class SwaggerConfig { //Swagger实例Bean是Docket,所以通过配置Docket实例来配置Swaggger。 @Bean public Docket docket(Environment environment){ //环境准备:创建application-dev.properties,application-pro.properties,在application.properties中配置spring.profiles.active=dev //设置要显示的Swagger Profiles profiles = Profiles.of("dev","test"); //获取项目的环境:通过environment.acceptsProfiles判断是否满足自己想要的 boolean flag = environment.acceptsProfiles(profiles); return new Docket(DocumentationType.SWAGGER_2) .apiInfo(apiInfo()) .enable(flag)//是否启用Swagger .select()// 通过.select()方法,去配置扫描接口,RequestHandlerSelectors配置如何扫描接口 //RequestHandlerSelectors配置要扫描的包 //basePackage()指定要扫描的包 //any()扫描全部 //none()都不扫描 //withClassAnnotation()扫描类上的注解,参数是一个注解的反射对象 //withMethodAnnotation()扫描包上的注解 .apis(RequestHandlerSelectors.basePackage("com.rui.conrtoller")) //paths配置过滤路径 PathSelector有以下方法: // any() // 任何请求都扫描 // none() // 任何请求都不扫描 // regex(final String pathRegex) // 通过正则表达式控制 // ant(final String antPattern) // 通过ant()控制 // .paths(PathSelectors.ant("/rui/**")) .paths(PathSelectors.any()) .build() .groupName("叶辰"); } //配置Swagger信息=apiInfo public ApiInfo apiInfo(){ Contact contact = new Contact("叶辰", "https://www.baidu.com/", "qijingjing01@126.com"); return new ApiInfo("叶辰的swaggerApi文档", "你尽管努力,剩下的交给天意", "1.0", "www.baidu.com", contact, "Apache 2.0", "http://localhost:8080/tmall/admin", new ArrayList()); } //groupName分组 @Bean public Docket docket1(){ return new Docket(DocumentationType.SWAGGER_2).groupName("AAA"); } @Bean public Docket docket2(){ return new Docket(DocumentationType.SWAGGER_2).groupName("BBB"); } }- 1
- 2
- 3
- 4
- 5
- 6
- 7
- 8
- 9
- 10
- 11
- 12
- 13
- 14
- 15
- 16
- 17
- 18
- 19
- 20
- 21
- 22
- 23
- 24
- 25
- 26
- 27
- 28
- 29
- 30
- 31
- 32
- 33
- 34
- 35
- 36
- 37
- 38
- 39
- 40
- 41
- 42
- 43
- 44
- 45
- 46
- 47
- 48
- 49
- 50
- 51
- 52
- 53
- 54
- 55
- 56
- 57
- 58
- 59
- 60
- 61
- 62
- 63
- 64
- 65
- 66
- 67
- 68
- 69
- 70
- 71
- 72
- 73
- 74
- 75
- 76
- 77
- 78
- 79
访问测试 : http://localhost:8080/swagger-ui/index.html
常用注解
Swagger注解 简单说明 @Api(tags = “xxx模块说明”) 作用在模块类上 @ApiOperation(“xxx接口说明”) 作用在接口方法上 @ApiModel(“xxxPOJO说明”) 作用在模型类上:如VO、BO @ApiModelProperty(value = “xxx属性说明”,hidden = true) 作用在类方法和属性上,hidden设置为true可以隐藏该属性 @ApiParam(“xxx参数说明”) 作用在参数、方法和字段上,类似@ApiModelPropert 例如:创建的pojo类中
import io.swagger.annotations.ApiModel; import io.swagger.annotations.ApiModelProperty; @ApiModel("用户实体类") public class User { @ApiModelProperty("用户名") public String name; @ApiModelProperty("密码") public String password; }- 1
- 2
- 3
- 4
- 5
- 6
- 7
- 8
- 9
- 10
- 11
在HelloController中的方法
@ApiOperation("hello控制") @GetMapping("/hello") public String hello(@ApiParam("用户名") String name){ return "hello"+name; }- 1
- 2
- 3
- 4
- 5
4.7、Dubbo和Zookeeper集成
五、其他
5.1、异步、定时、邮件任务
异步任务
在service类中的方法上添加
@Async注解;告诉Spring这是一个异步方法在SpringBoot主程序上添加
@EnableAsync开启异步注解功能定时任务
在service类中的方法上添加
@Scheduled(cron="")注解;在SpringBoot主程序上添加
@EnableScheduling开启基于注解的定时任务Cron表达式介绍
下表为Cron表达式中六个域能够取的值以及支持的特殊字符。
域 是否必需 取值范围 特殊字符 秒 是 [0, 59] * , - / 分钟 是 [0, 59] * , - / 小时 是 [0, 23] * , - / 日期 是 [1, 31] * , - / ? L W 月份 是 [1, 12]或[JAN, DEC] * , - / 星期 是 [1, 7]或[MON, SUN]。若您使用[1, 7]表达方式, 1代表星期一,7代表星期日。* , - / ? L # 年 否 [当前年份,2099] * , - / Cron表达式中的每个域都支持一定数量的特殊字符,每个特殊字符有其特殊含义。
特殊字符 含义 示例 *所有可能的值。 在月域中, *表示每个月;在星期域中,*表示星期的每一天。,列出枚举值。 在分钟域中, 5,20表示分别在5分钟和20分钟触发一次。-范围。 在分钟域中, 5-20表示从5分钟到20分钟之间每隔一分钟触发一次。/指定数值的增量。 在分钟域中, 0/15表示从第0分钟开始,每15分钟。在分钟域中3/20表示从第3分钟开始,每20分钟。?不指定值,仅日期和星期域支持该字符。 当日期或星期域其中之一被指定了值以后,为了避免冲突,需要将另一个域的值设为 ?。L单词Last的首字母,表示最后一天,仅日期和星期域支持该字符。说明 指定 L字符时,避免指定列表或者范围,否则,会导致逻辑问题。在日期域中, L表示某个月的最后一天。在星期域中,L表示一个星期的最后一天,也就是星期日(SUN)。如果在L前有具体的内容,例如,在星期域中的6L表示这个月的最后一个星期六。W除周末以外的有效工作日,在离指定日期的最近的有效工作日触发事件。 W字符寻找最近有效工作日时不会跨过当前月份,连用字符LW时表示为指定月份的最后一个工作日。在日期域中 5W,如果5日是星期六,则将在最近的工作日星期五,即4日触发。如果5日是星期天,则将在最近的工作日星期一,即6日触发;如果5日在星期一到星期五中的一天,则就在5日触发。#确定每个月第几个星期几,仅星期域支持该字符。 在星期域中, 4#2表示某月的第二个星期四。常用的Cron表达式
(1)0/2 * * * * ? 表示每2秒 执行任务 (1)0 0/2 * * * ? 表示每2分钟 执行任务 (1)0 0 2 1 * ? 表示在每月的1日的凌晨2点调整任务 (2)0 15 10 ? * MON-FRI 表示周一到周五每天上午10:15执行作业 (3)0 15 10 ? 6L 2002-2006 表示2002-2006年的每个月的最后一个星期五上午10:15执行作 (4)0 0 10,14,16 * * ? 每天上午10点,下午2点,4点 (5)0 0/30 9-17 * * ? 朝九晚五工作时间内每半小时 (6)0 0 12 ? * WED 表示每个星期三中午12点 (7)0 0 12 * * ? 每天中午12点触发 (8)0 15 10 ? * * 每天上午10:15触发 (9)0 15 10 * * ? 每天上午10:15触发 (10)0 15 10 * * ? 每天上午10:15触发 (11)0 15 10 * * ? 2005 2005年的每天上午10:15触发 (12)0 * 14 * * ? 在每天下午2点到下午2:59期间的每1分钟触发 (13)0 0/5 14 * * ? 在每天下午2点到下午2:55期间的每5分钟触发 (14)0 0/5 14,18 * * ? 在每天下午2点到2:55期间和下午6点到6:55期间的每5分钟触发 (15)0 0-5 14 * * ? 在每天下午2点到下午2:05期间的每1分钟触发 (16)0 10,44 14 ? 3 WED 每年三月的星期三的下午2:10和2:44触发 (17)0 15 10 ? * MON-FRI 周一至周五的上午10:15触发 (18)0 15 10 15 * ? 每月15日上午10:15触发 (19)0 15 10 L * ? 每月最后一日的上午10:15触发 (20)0 15 10 ? * 6L 每月的最后一个星期五上午10:15触发 (21)0 15 10 ? * 6L 2002-2005 2002年至2005年的每月的最后一个星期五上午10:15触发 (22)0 15 10 ? * 6#3 每月的第三个星期五上午10:15触发- 1
- 2
- 3
- 4
- 5
- 6
- 7
- 8
- 9
- 10
- 11
- 12
- 13
- 14
- 15
- 16
- 17
- 18
- 19
- 20
- 21
- 22
- 23
- 24
邮件任务
添加依赖
<dependency> <groupId>org.springframework.bootgroupId> <artifactId>spring-boot-starter-mailartifactId> dependency>- 1
- 2
- 3
- 4
配置文件application.properties
spring.mail.username=206875469@qq.com spring.mail.password=kfkbbiypkawobijj spring.mail.host=smtp.qq.com # qq需要配置ssl spring.mail.properties.mail.smtp.ssl.enable=true- 1
- 2
- 3
- 4
- 5
在测试类中编写代码使用
@Autowired JavaMailSenderImpl mailSender; @Test public void contextLoads() { //邮件设置1:一个简单的邮件 SimpleMailMessage message = new SimpleMailMessage(); message.setSubject("通知-明天来狂神这听课"); message.setText("今晚7:30开会"); message.setTo("206875469@qq.com"); message.setFrom("206875469@qq.com"); mailSender.send(message); } @Test public void contextLoads2() throws MessagingException { //邮件设置2:一个复杂的邮件 MimeMessage mimeMessage = mailSender.createMimeMessage(); MimeMessageHelper helper = new MimeMessageHelper(mimeMessage, true); helper.setSubject("通知-明天来狂神这听课"); helper.setText("今天 7:30来开会",true); //发送附件 helper.addAttachment("1.jpg",new File("")); helper.addAttachment("2.jpg",new File("")); helper.setTo("206875469@qq.com"); helper.setFrom("206875469@qq.com"); mailSender.send(mimeMessage); }- 1
- 2
- 3
- 4
- 5
- 6
- 7
- 8
- 9
- 10
- 11
- 12
- 13
- 14
- 15
- 16
- 17
- 18
- 19
- 20
- 21
- 22
- 23
- 24
- 25
- 26
- 27
- 28
- 29
- 30
- 31
- 32
- 33
5.2、富文本编辑器
简介
思考:我们平时在博客园,或者CSDN等平台进行写作的时候,有同学思考过他们的编辑器是怎么实现的吗?
在博客园后台的选项设置中,可以看到一个文本编辑器的选项:

其实这个就是富文本编辑器,市面上有许多非常成熟的富文本编辑器,比如:
-
Editor.md——功能非常丰富的编辑器,左端编辑,右端预览,非常方便,完全免费
-
- 官网:https://pandao.github.io/editor.md/
-
wangEditor——基于javascript和css开发的 Web富文本编辑器, 轻量、简洁、界面美观、易用、开源免费。
-
- 官网:http://www.wangeditor.com/
-
TinyMCE——TinyMCE是一个轻量级的基于浏览器的所见即所得编辑器,由JavaScript写成。它对IE6+和Firefox1.5+都有着非常良好的支持。功能齐全,界面美观,就是文档是英文的,对开发人员英文水平有一定要求。
-
- 官网:https://www.tiny.cloud/docs/demo/full-featured/
- 博客园
-
百度ueditor——UEditor是由百度web前端研发部开发所见即所得富文本web编辑器,具有轻量,功能齐全,可定制,注重用户体验等特点,开源基于MIT协议,允许自由使用和修改代码,缺点是已经没有更新了
-
- 官网:https://ueditor.baidu.com/website/onlinedemo.html
-
kindeditor——界面经典。
-
- 官网:http://kindeditor.net/demo.php
-
Textbox——Textbox是一款极简但功能强大的在线文本编辑器,支持桌面设备和移动设备。主要功能包含内置的图像处理和存储、文件拖放、拼写检查和自动更正。此外,该工具还实现了屏幕阅读器等辅助技术,并符合WAI-ARIA可访问性标准。
-
- 官网:https://textbox.io/
-
CKEditor——国外的,界面美观。
-
- 官网:https://ckeditor.com/ckeditor-5/demo/
-
quill——功能强大,还可以编辑公式等
-
- 官网:https://quilljs.com/
-
simditor——界面美观,功能较全。
-
- 官网:https://simditor.tower.im/
-
summernote——UI好看,精美
-
- 官网:https://summernote.org/
-
jodit——功能齐全
-
- 官网:https://xdsoft.net/jodit/
-
froala Editor——界面非常好看,功能非常强大,非常好用(非免费)
-
- 官网:https://www.froala.com/wysiwyg-editor
总之,目前可用的富文本编辑器有很多…这只是其中的一部分
Editor.md
我这里使用的就是Editor.md,作为一个资深码农,Mardown必然是我们程序猿最喜欢的格式,看下面,就爱上了!

我们可以在官网下载它:https://pandao.github.io/editor.md/ , 得到它的压缩包!
解压以后,在examples目录下面,可以看到他的很多案例使用!学习,其实就是看人家怎么写的,然后进行模仿就好了!
我们可以将整个解压的文件倒入我们的项目,将一些无用的测试和案例删掉即可!
基础工程搭建
数据库设计
article:文章表
字段 备注 id int 文章的唯一ID author varchar 作者 title varchar 标题 content longtext 文章的内容 建表SQL:
CREATE TABLE `article` ( `id` int(10) NOT NULL AUTO_INCREMENT COMMENT 'int文章的唯一ID', `author` varchar(50) NOT NULL COMMENT '作者', `title` varchar(100) NOT NULL COMMENT '标题', `content` longtext NOT NULL COMMENT '文章的内容', PRIMARY KEY (`id`) ) ENGINE=InnoDB DEFAULT CHARSET=utf8- 1
- 2
- 3
- 4
- 5
- 6
- 7
基础项目搭建
1、建一个SpringBoot项目配置
spring: datasource: username: root password: 123456 #?serverTimezone=UTC解决时区的报错 url: jdbc:mysql://localhost:3306/springboot?serverTimezone=UTC&useUnicode=true&characterEncoding=utf-8 driver-class-name: com.mysql.cj.jdbc.Driver- 1
- 2
- 3
- 4
- 5
- 6
- 7
<resources> <resource> <directory>src/main/javadirectory> <includes> <include>**/*.xmlinclude> includes> <filtering>truefiltering> resource> resources>- 1
- 2
- 3
- 4
- 5
- 6
- 7
- 8
- 9
2、实体类:
//文章类 @Data @NoArgsConstructor @AllArgsConstructor public class Article implements Serializable { private int id; //文章的唯一ID private String author; //作者名 private String title; //标题 private String content; //文章的内容 }- 1
- 2
- 3
- 4
- 5
- 6
- 7
- 8
- 9
- 10
- 11
- 12
3、mapper接口:
@Mapper @Repository public interface ArticleMapper { //查询所有的文章 ListqueryArticles(); //新增一个文章 int addArticle(Article article); //根据文章id查询文章 Article getArticleById(int id); //根据文章id删除文章 int deleteArticleById(int id); } - 1
- 2
- 3
- 4
- 5
- 6
- 7
- 8
- 9
- 10
- 11
- 12
- 13
- 14
- 15
- 16
DOCTYPE mapper PUBLIC "-//mybatis.org//DTD Mapper 3.0//EN" "http://mybatis.org/dtd/mybatis-3-mapper.dtd"> <mapper namespace="com.kuang.mapper.ArticleMapper"> <select id="queryArticles" resultType="Article"> select * from article select> <select id="getArticleById" resultType="Article"> select * from article where id = #{id} select> <insert id="addArticle" parameterType="Article"> insert into article (author,title,content) values (#{author},#{title},#{content}); insert> <delete id="deleteArticleById" parameterType="int"> delete from article where id = #{id} delete> mapper>- 1
- 2
- 3
- 4
- 5
- 6
- 7
- 8
- 9
- 10
- 11
- 12
- 13
- 14
- 15
- 16
- 17
- 18
- 19
- 20
- 21
- 22
- 23
既然已经提供了 myBatis 的映射配置文件,自然要告诉 spring boot 这些文件的位置
mybatis: mapper-locations: classpath:com/kuang/mapper/*.xml type-aliases-package: com.kuang.pojo- 1
- 2
- 3
编写一个Controller测试下,是否ok;
文章编辑整合(重点)
1、导入 editor.md 资源 ,删除多余文件
2、编辑文章页面 editor.html、需要引入 jQuery;
DOCTYPE html> <html class="x-admin-sm" lang="zh" xmlns:th="http://www.thymeleaf.org"> <head> <meta charset="UTF-8"> <title>秦疆'Blogtitle> <meta name="renderer" content="webkit"> <meta http-equiv="X-UA-Compatible" content="IE=edge,chrome=1"> <meta name="viewport" content="width=device-width,user-scalable=yes, minimum-scale=0.4, initial-scale=0.8,target-densitydpi=low-dpi" /> <link rel="stylesheet" th:href="@{/editormd/css/editormd.css}"/> <link rel="shortcut icon" href="https://pandao.github.io/editor.md/favicon.ico" type="image/x-icon" /> head> <body> <div class="layui-fluid"> <div class="layui-row layui-col-space15"> <div class="layui-col-md12"> <form name="mdEditorForm"> <div> 标题:<input type="text" name="title"> div> <div> 作者:<input type="text" name="author"> div> <div id="article-content"> <textarea name="content" id="content" style="display:none;"> textarea> div> form> div> div> div> body> <script th:src="@{/editormd/lib/jquery.min.js}">script> <script th:src="@{/editormd/editormd.js}">script> <script type="text/javascript"> var testEditor; //window.onload = function(){ } $(function() { testEditor = editormd("article-content", { width : "95%", height : 400, syncScrolling : "single", path : "../editormd/lib/", saveHTMLToTextarea : true, // 保存 HTML 到 Textarea emoji: true, theme: "dark",//工具栏主题 previewTheme: "dark",//预览主题 editorTheme: "pastel-on-dark",//编辑主题 tex : true, // 开启科学公式TeX语言支持,默认关闭 flowChart : true, // 开启流程图支持,默认关闭 sequenceDiagram : true, // 开启时序/序列图支持,默认关闭, //图片上传 imageUpload : true, imageFormats : ["jpg", "jpeg", "gif", "png", "bmp", "webp"], imageUploadURL : "/article/file/upload", onload : function() { console.log('onload', this); }, /*指定需要显示的功能按钮*/ toolbarIcons : function() { return ["undo","redo","|", "bold","del","italic","quote","ucwords","uppercase","lowercase","|", "h1","h2","h3","h4","h5","h6","|", "list-ul","list-ol","hr","|", "link","reference-link","image","code","preformatted-text", "code-block","table","datetime","emoji","html-entities","pagebreak","|", "goto-line","watch","preview","fullscreen","clear","search","|", "help","info","releaseIcon", "index"] }, /*自定义功能按钮,下面我自定义了2个,一个是发布,一个是返回首页*/ toolbarIconTexts : { releaseIcon : "发布", index : "返回首页", }, /*给自定义按钮指定回调函数*/ toolbarHandlers:{ releaseIcon : function(cm, icon, cursor, selection) { //表单提交 mdEditorForm.method = "post"; mdEditorForm.action = "/article/addArticle";//提交至服务器的路径 mdEditorForm.submit(); }, index : function(){ window.location.href = '/'; }, } }); }); script> html>- 1
- 2
- 3
- 4
- 5
- 6
- 7
- 8
- 9
- 10
- 11
- 12
- 13
- 14
- 15
- 16
- 17
- 18
- 19
- 20
- 21
- 22
- 23
- 24
- 25
- 26
- 27
- 28
- 29
- 30
- 31
- 32
- 33
- 34
- 35
- 36
- 37
- 38
- 39
- 40
- 41
- 42
- 43
- 44
- 45
- 46
- 47
- 48
- 49
- 50
- 51
- 52
- 53
- 54
- 55
- 56
- 57
- 58
- 59
- 60
- 61
- 62
- 63
- 64
- 65
- 66
- 67
- 68
- 69
- 70
- 71
- 72
- 73
- 74
- 75
- 76
- 77
- 78
- 79
- 80
- 81
- 82
- 83
- 84
- 85
- 86
- 87
- 88
- 89
- 90
- 91
- 92
- 93
- 94
- 95
- 96
- 97
- 98
- 99
- 100
- 101
3、编写Controller,进行跳转,以及保存文章
@Controller @RequestMapping("/article") public class ArticleController { @GetMapping("/toEditor") public String toEditor(){ return "editor"; } @PostMapping("/addArticle") public String addArticle(Article article){ articleMapper.addArticle(article); return "editor"; } }- 1
- 2
- 3
- 4
- 5
- 6
- 7
- 8
- 9
- 10
- 11
- 12
- 13
- 14
- 15
- 16
图片上传问题
1、前端js中添加配置
//图片上传 imageUpload : true, imageFormats : ["jpg", "jpeg", "gif", "png", "bmp", "webp"], imageUploadURL : "/article/file/upload", // //这个是上传图片时的访问地址- 1
- 2
- 3
- 4
2、后端请求,接收保存这个图片, 需要导入 FastJson 的依赖!
//博客图片上传问题 @RequestMapping("/file/upload") @ResponseBody public JSONObject fileUpload(@RequestParam(value = "editormd-image-file", required = true) MultipartFile file, HttpServletRequest request) throws IOException { //上传路径保存设置 //获得SpringBoot当前项目的路径:System.getProperty("user.dir") String path = System.getProperty("user.dir")+"/upload/"; //按照月份进行分类: Calendar instance = Calendar.getInstance(); String month = (instance.get(Calendar.MONTH) + 1)+"月"; path = path+month; File realPath = new File(path); if (!realPath.exists()){ realPath.mkdir(); } //上传文件地址 System.out.println("上传文件保存地址:"+realPath); //解决文件名字问题:我们使用uuid; String filename = "ks-"+UUID.randomUUID().toString().replaceAll("-", ""); //通过CommonsMultipartFile的方法直接写文件(注意这个时候) file.transferTo(new File(realPath +"/"+ filename)); //给editormd进行回调 JSONObject res = new JSONObject(); res.put("url","/upload/"+month+"/"+ filename); res.put("success", 1); res.put("message", "upload success!"); return res; }- 1
- 2
- 3
- 4
- 5
- 6
- 7
- 8
- 9
- 10
- 11
- 12
- 13
- 14
- 15
- 16
- 17
- 18
- 19
- 20
- 21
- 22
- 23
- 24
- 25
- 26
- 27
- 28
- 29
- 30
- 31
- 32
- 33
- 34
- 35
3、解决文件回显显示的问题,设置虚拟目录映射!在我们自己拓展的MvcConfig中进行配置即可!
@Configuration public class MyMvcConfig implements WebMvcConfigurer { // 文件保存在真实目录/upload/下, // 访问的时候使用虚路径/upload,比如文件名为1.png,就直接/upload/1.png就ok了。 @Override public void addResourceHandlers(ResourceHandlerRegistry registry) { registry.addResourceHandler("/upload/**") .addResourceLocations("file:"+System.getProperty("user.dir")+"/upload/"); } }- 1
- 2
- 3
- 4
- 5
- 6
- 7
- 8
- 9
- 10
- 11
- 12
表情包问题
自己手动下载,emoji 表情包,放到图片路径下:
修改editormd.js文件
// Emoji graphics files url path editormd.emoji = { path : "../editormd/plugins/emoji-dialog/emoji/", ext : ".png" };- 1
- 2
- 3
- 4
- 5
文章展示
1、Controller 中增加方法
@GetMapping("/{id}") public String show(@PathVariable("id") int id,Model model){ Article article = articleMapper.getArticleById(id); model.addAttribute("article",article); return "article"; }- 1
- 2
- 3
- 4
- 5
- 6
2、编写页面 article.html
DOCTYPE html> <html lang="en" xmlns:th="http://www.thymeleaf.org"> <head> <meta charset="UTF-8"> <meta name="viewport" content="width=device-width, initial-scale=1, maximum-scale=1"> <title th:text="${article.title}">title> head> <body> <div> <h2 style="margin: auto 0" th:text="${article.title}">h2> 作者:<span style="float: left" th:text="${article.author}">span> <div id="doc-content"> <textarea style="display:none;" placeholder="markdown" th:text="${article.content}">textarea> div> div> <link rel="stylesheet" th:href="@{/editormd/css/editormd.preview.css}" /> <script th:src="@{/editormd/lib/jquery.min.js}">script> <script th:src="@{/editormd/lib/marked.min.js}">script> <script th:src="@{/editormd/lib/prettify.min.js}">script> <script th:src="@{/editormd/lib/raphael.min.js}">script> <script th:src="@{/editormd/lib/underscore.min.js}">script> <script th:src="@{/editormd/lib/sequence-diagram.min.js}">script> <script th:src="@{/editormd/lib/flowchart.min.js}">script> <script th:src="@{/editormd/lib/jquery.flowchart.min.js}">script> <script th:src="@{/editormd/editormd.js}">script> <script type="text/javascript"> var testEditor; $(function () { testEditor = editormd.markdownToHTML("doc-content", {//注意:这里是上面DIV的id htmlDecode: "style,script,iframe", emoji: true, taskList: true, tocm: true, tex: true, // 默认不解析 flowChart: true, // 默认不解析 sequenceDiagram: true, // 默认不解析 codeFold: true });}); script> body> html>- 1
- 2
- 3
- 4
- 5
- 6
- 7
- 8
- 9
- 10
- 11
- 12
- 13
- 14
- 15
- 16
- 17
- 18
- 19
- 20
- 21
- 22
- 23
- 24
- 25
- 26
- 27
- 28
- 29
- 30
- 31
- 32
- 33
- 34
- 35
- 36
- 37
- 38
- 39
- 40
- 41
- 42
- 43
- 44
- 45
- 46
- 47
重启项目,访问进行测试!大功告成!
5.3、Dubbo和Zookeeper集成
zookeeper官网: https://zookeeper.apache.org
Apache Dubbo官网:https://dubbo.incubator.apache.org/zh/index.html
什么是RPC?阅读文章:https://www.jianshu.com/p/2accc2840a1b
项目创建
1.启动zookeeper !
- IDEA创建一个空项目;
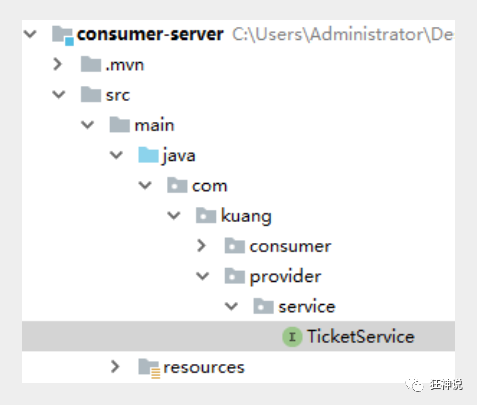
3.创建一个模块,实现服务提供者:provider-server , 选择web依赖即可
4.项目创建完毕,我们写一个服务,比如卖票的服务;
编写接口
package com.kuang.provider.service; public interface TicketService { public String getTicket(); }- 1
- 2
- 3
- 4
- 5
编写实现类
package com.kuang.provider.service; public class TicketServiceImpl implements TicketService { @Override public String getTicket() { return "《狂神说Java》"; } }- 1
- 2
- 3
- 4
- 5
- 6
- 7
- 8
5.创建一个模块,实现服务消费者:consumer-server , 选择web依赖即可
6.项目创建完毕,我们写一个服务,比如用户的服务;
编写service
package com.kuang.consumer.service; public class UserService { //我们需要去拿去注册中心的服务 }- 1
- 2
- 3
- 4
- 5
需求:现在我们的用户想使用买票的服务,这要怎么弄呢 ?
1、将服务提供者注册到注册中心,我们需要整合Dubbo和zookeeper,所以需要导包
我们从dubbo官网进入github,看下方的帮助文档,找到dubbo-springboot,找到依赖包
<dependency> <groupId>org.apache.dubbogroupId> <artifactId>dubbo-spring-boot-starterartifactId> <version>2.7.3version> dependency>- 1
- 2
- 3
- 4
- 5
- 6
zookeeper的包我们去maven仓库下载,zkclient;
<dependency> <groupId>com.github.sgroschupfgroupId> <artifactId>zkclientartifactId> <version>0.1version> dependency>- 1
- 2
- 3
- 4
- 5
- 6
【新版的坑】zookeeper及其依赖包,解决日志冲突,还需要剔除日志依赖;
<dependency> <groupId>org.apache.curatorgroupId> <artifactId>curator-frameworkartifactId> <version>2.12.0version> dependency> <dependency> <groupId>org.apache.curatorgroupId> <artifactId>curator-recipesartifactId> <version>2.12.0version> dependency> <dependency> <groupId>org.apache.zookeepergroupId> <artifactId>zookeeperartifactId> <version>3.4.14version> <exclusions> <exclusion> <groupId>org.slf4jgroupId> <artifactId>slf4j-log4j12artifactId> exclusion> exclusions> dependency>- 1
- 2
- 3
- 4
- 5
- 6
- 7
- 8
- 9
- 10
- 11
- 12
- 13
- 14
- 15
- 16
- 17
- 18
- 19
- 20
- 21
- 22
- 23
2、在springboot配置文件中配置dubbo相关属性!
#当前应用名字 dubbo.application.name=provider-server #注册中心地址 dubbo.registry.address=zookeeper://127.0.0.1:2181 #扫描指定包下服务 dubbo.scan.base-packages=com.kuang.provider.service- 1
- 2
- 3
- 4
- 5
- 6
3、在service的实现类中配置服务注解,发布服务!注意导包问题
import org.apache.dubbo.config.annotation.Service; import org.springframework.stereotype.Component; @Service //将服务发布出去 @Component //放在容器中 public class TicketServiceImpl implements TicketService { @Override public String getTicket() { return "《狂神说Java》"; } }- 1
- 2
- 3
- 4
- 5
- 6
- 7
- 8
- 9
- 10
- 11
逻辑理解 :应用启动起来,dubbo就会扫描指定的包下带有@component注解的服务,将它发布在指定的注册中心中!
服务消费者
1、导入依赖,和之前的依赖一样;
<dependency> <groupId>org.apache.dubbogroupId> <artifactId>dubbo-spring-boot-starterartifactId> <version>2.7.3version> dependency> <dependency> <groupId>com.github.sgroschupfgroupId> <artifactId>zkclientartifactId> <version>0.1version> dependency> <dependency> <groupId>org.apache.curatorgroupId> <artifactId>curator-frameworkartifactId> <version>2.12.0version> dependency> <dependency> <groupId>org.apache.curatorgroupId> <artifactId>curator-recipesartifactId> <version>2.12.0version> dependency> <dependency> <groupId>org.apache.zookeepergroupId> <artifactId>zookeeperartifactId> <version>3.4.14version> <exclusions> <exclusion> <groupId>org.slf4jgroupId> <artifactId>slf4j-log4j12artifactId> exclusion> exclusions> dependency>- 1
- 2
- 3
- 4
- 5
- 6
- 7
- 8
- 9
- 10
- 11
- 12
- 13
- 14
- 15
- 16
- 17
- 18
- 19
- 20
- 21
- 22
- 23
- 24
- 25
- 26
- 27
- 28
- 29
- 30
- 31
- 32
- 33
- 34
- 35
- 36
- 37
2、配置参数
#当前应用名字 dubbo.application.name=consumer-server #注册中心地址 dubbo.registry.address=zookeeper://127.0.0.1:2181- 1
- 2
- 3
- 4
- 本来正常步骤是需要将服务提供者的接口打包,然后用pom文件导入,我们这里使用简单的方式,直接将服务的接口拿过来,路径必须保证正确,即和服务提供者相同;
- 完善消费者的服务类
package com.kuang.consumer.service; import com.kuang.provider.service.TicketService; import org.apache.dubbo.config.annotation.Reference; import org.springframework.stereotype.Service; @Service //注入到容器中 public class UserService { @Reference //远程引用指定的服务,他会按照全类名进行匹配,看谁给注册中心注册了这个全类名 TicketService ticketService; public void bugTicket(){ String ticket = ticketService.getTicket(); System.out.println("在注册中心买到"+ticket); } }- 1
- 2
- 3
- 4
- 5
- 6
- 7
- 8
- 9
- 10
- 11
- 12
- 13
- 14
- 15
- 16
- 17
- 18
- 测试类编写;
@RunWith(SpringRunner.class) @SpringBootTest public class ConsumerServerApplicationTests { @Autowired UserService userService; @Test public void contextLoads() { userService.bugTicket(); } }- 1
- 2
- 3
- 4
- 5
- 6
- 7
- 8
- 9
- 10
- 11
- 12
- 13
- 14
- 15
启动测试
1. 开启zookeeper
2. 打开dubbo-admin实现监控【可以不用做】
3. 开启服务者
4. 消费者消费测试,结果:

监控中心 :

ok , 这就是SpingBoot + dubbo + zookeeper实现分布式开发的应用,其实就是一个服务拆分的思想;
-
相关阅读:
【前端笔记】Ant Design Form组件 resetFields() 与 setFieldsValue() 之比较
Foundation对于模态框以及Subsystems的深入运用的理解心得
依赖倒置原则(Dependence Inversion Principle)
[翻译] FXGL Assets/资源
C++类和对象(上)
关于SAP APO RPMCALL 指定生产订单的BOM更新
iOS OpenGL ES3.0入门实践
JS有哪些基本数据类型,它们的区别?
C# 实现 Linux 视频会议(源码,支持信创环境,银河麒麟,统信UOS)
在代码评审中用好这7招,很容易就能建立起你的反对同盟
- 原文地址:https://blog.csdn.net/qq_52143183/article/details/126000128
