-
Ardunio开发——I2C协议通讯——控制2x16LCD
介绍
- 串口通信:必须是1对1通信
- 需求:
- 如果一个传感器被多个微控制器控制
- 仅仅通过两根导线连接多个传感器
- I2C协议应运而生,又称为双线接口
- 是总线型协议,允许灵活链接
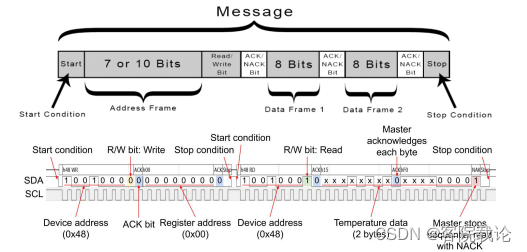
- I2C协议使用双线:
- SCL:Serial Clock串行时钟
- SDA:Serail Data串行数据
- 主要原理:
- 串行时钟在所有的连接设备上创建统一的时钟
- 每一个bit都会根据全局时钟进行发送和读取
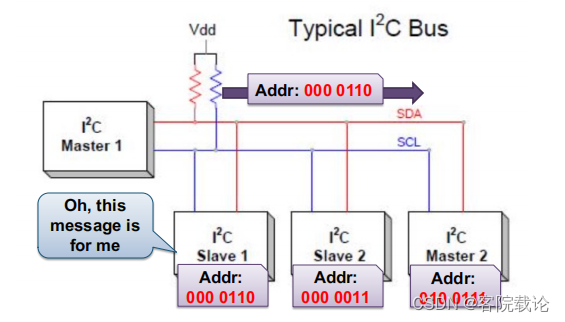
- 同时对每一个设备都会分配对应地址,通过地址辨别设别,在报文中会指定数据来源的地址
使用设备

- LCD背面有一个小芯片,是使用I2C协议的。正常的LCD使用十多个阵脚,通过使用I2C协议能够减少阵脚的使用。可以清晰地看到有SDA和SCL两个阵脚。
相关实验
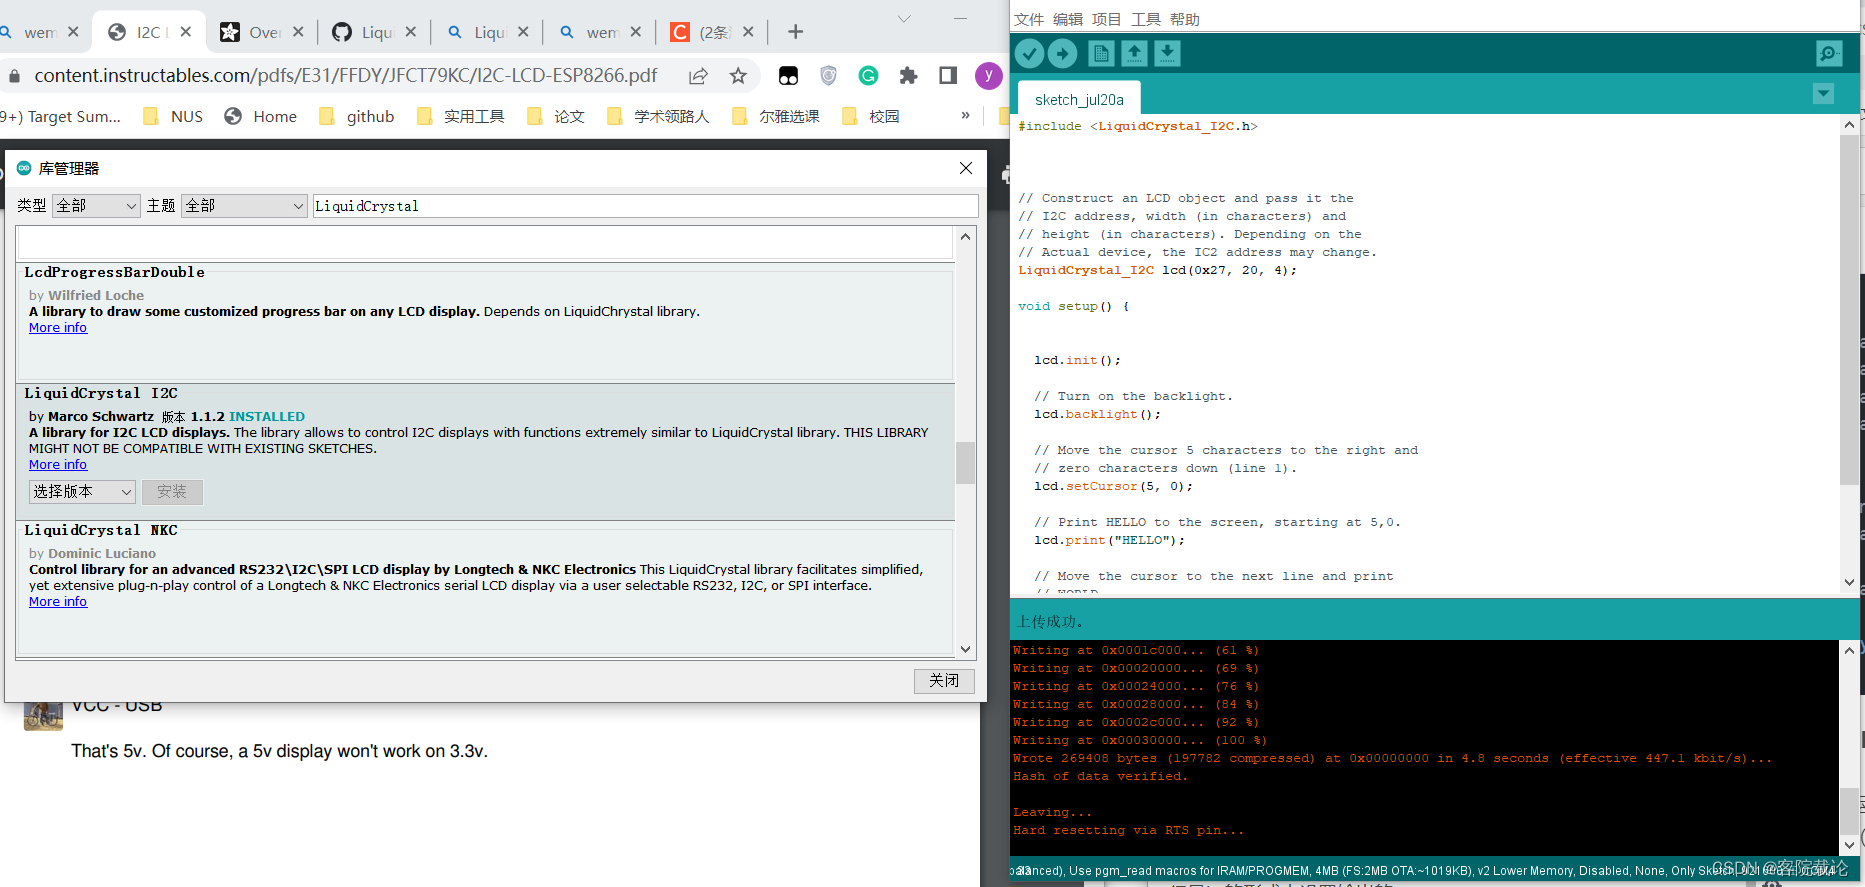
安装开发对应I2CLCD的相关库
- 工具》》管理库》》LiquidCrystal I2C,进行安装即可
获取LCD的地址
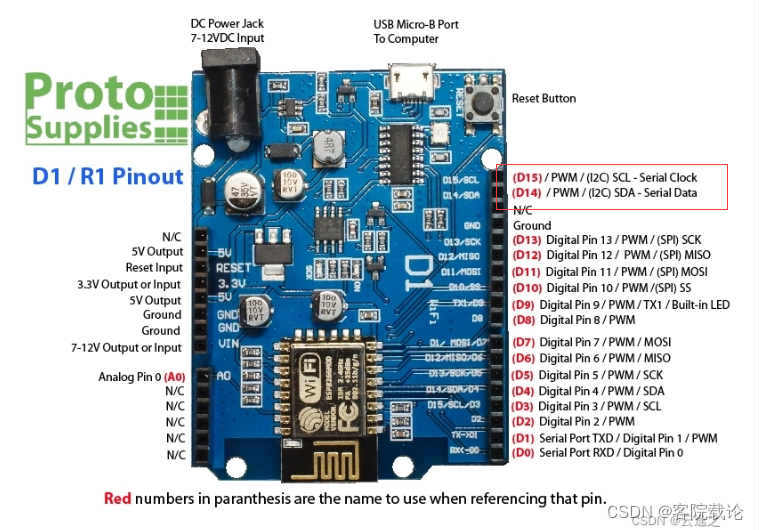
- 将LCD的相关引脚按照上述图示进行接线,注意I2C是有标注的,并不是所有的SCL和SDA都能够被标注,运行如下代码查看I2C的正确地址。
- I2C是一个两个导线的协议,能够使用两个微控制器上两个阵脚操作多个设备。它是通过设置总线上每一个设备的地址来实现的相关操作,但是并不是每一个I2CLCD都拥有同样的地址。
#includevoid setup() { Wire.begin(); Serial.begin(9600); Serial.println("\nI2C Scanner"); } void loop() { byte error, address; int nDevices; Serial.println("Scanning..."); nDevices = 0; for(address = 1; address < 127; address++ ) { Wire.beginTransmission(address); error = Wire.endTransmission(); if (error == 0) { Serial.print("I2C device found at address 0x"); if (address<16) Serial.print("0"); Serial.print(address,HEX); Serial.println(" !"); nDevices++; } else if (error==4) { Serial.print("Unknow error at address 0x"); if (address<16) Serial.print("0"); Serial.println(address,HEX); } } if (nDevices == 0) Serial.println("No I2C devices found\n"); else Serial.println("done\n"); delay(2000); } - 1
- 2
- 3
- 4
- 5
- 6
- 7
- 8
- 9
- 10
- 11
- 12
- 13
- 14
- 15
- 16
- 17
- 18
- 19
- 20
- 21
- 22
- 23
- 24
- 25
- 26
- 27
- 28
- 29
- 30
- 31
- 32
- 33
- 34
- 35
- 36
- 37
- 38
- 39
- 40
- 41
- 42
- 43
- 44
- 45
- 46
- 47
- 48
- 49
- 50
在LCD上输出文字
-
运行如下代码尝试在LCD上输出文字。关键点在于是按照(列号,行号)的形式去设置输出的
-
下述为输出helloworld的样例。
#include// Construct an LCD object and pass it the // I2C address, width (in characters) and // height (in characters). Depending on the // Actual device, the IC2 address may change. LiquidCrystal_I2C lcd(0x27, 20, 4); void setup() { lcd.init(); // Turn on the backlight. lcd.backlight(); // Move the cursor 5 characters to the right and // zero characters down (line 1). lcd.setCursor(5, 0); // Print HELLO to the screen, starting at 5,0. lcd.print("HELLO"); // Move the cursor to the next line and print // WORLD. lcd.setCursor(5, 1); lcd.print("WORLD"); } void loop() { } - 1
- 2
- 3
- 4
- 5
- 6
- 7
- 8
- 9
- 10
- 11
- 12
- 13
- 14
- 15
- 16
- 17
- 18
- 19
- 20
- 21
- 22
- 23
- 24
- 25
- 26
- 27
- 28
- 29
- 30
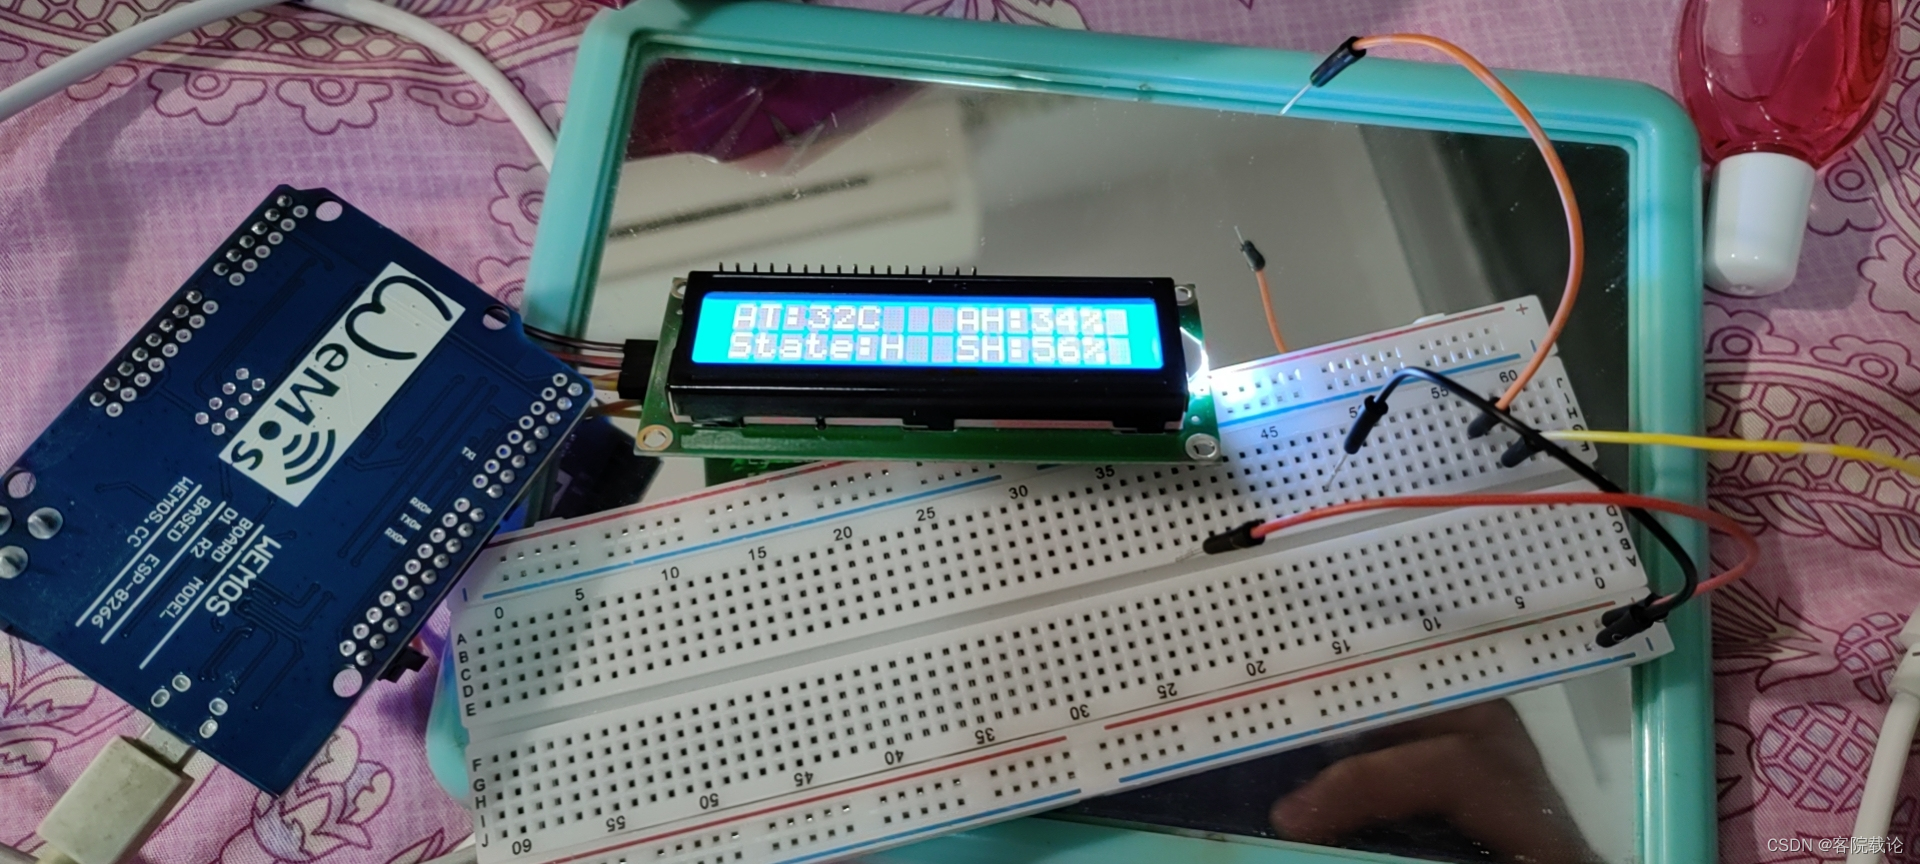
实验效果图
-
相关阅读:
网络模型与细节思维方式
同事:这个页面的逻辑没什么能复用的,不抽组件也没什么影响吧?
golang工程——gRPC keep alive 配置
FFmpeg常用结构体分析
@RequestMapping 用法详解
一文了解JVM(中)
【Vue + Koa 前后端分离项目实战5】使用开源框架==>快速搭建后台管理系统 -- part5 后端实现最新期刊列表管理【增删查改】
8月Node服务的3场事故
Win10中安装多个MySQL8.0
fail-fast 和 fail-safe 快速学习
- 原文地址:https://blog.csdn.net/Blackoutdragon/article/details/125895871
