-
Vue——消息的订阅与发布
消息订阅与发布
1.订阅消息∶消息名
2.发布消息︰消息内容消息订阅与发布的工作流程:
(A是订阅者,B是发布者)

消息订阅与发布的作用
一种组件间通信的方式,适用于
任意组件间通信。消息订阅与发布的实现
需要借助第三方库
这里使用
pubsub-js库。- 安装:
npm i pubsub-js - 引入:
import pubsub from 'pubsub-js' - 订阅者订阅:
mounted() { // 订阅消息,编写回调函数 this.pubsubId = pubsub.subscribe('hello',(msgName,data)=>{ console.log(`有人发布了${msgName}消息,消息内容是:${data}`) }) },- 1
- 2
- 3
- 4
- 5
- 6
- 发布者发布
sendStudentName() { // 发布事件 pubsub.publish('hello',666) }- 1
- 2
- 3
- 4
- 订阅者取消订阅
beforeDestroy() { pubsub.unsubscribe(this.pubsubId) }- 1
- 2
- 3
代码演示
School.vue
<template> <div class="demo"> <h2>学校名字:{{ name }}h2> <h2 class="fonty">地址:{{ address }}h2> <hr> div> template> <script> import pubsub from 'pubsub-js' export default { name: 'SchoolVue', data() { return { name: "nefu", address: "哈尔滨", }; }, mounted() { // 订阅消息,编写回调函数 this.pubsubId = pubsub.subscribe('hello',(msgName,data)=>{ console.log(`有人发布了${msgName}消息,消息内容是:${data}`) }) }, beforeDestroy() { pubsub.unsubscribe(this.pubsubId) } } script> <style scoped lang="less"> .demo{ background: skyblue; } style>- 1
- 2
- 3
- 4
- 5
- 6
- 7
- 8
- 9
- 10
- 11
- 12
- 13
- 14
- 15
- 16
- 17
- 18
- 19
- 20
- 21
- 22
- 23
- 24
- 25
- 26
- 27
- 28
- 29
- 30
- 31
- 32
- 33
- 34
- 35
Student.vue
<template> <div class="demo"> <h2>名字:{{ name}}h2> <h2>性别:{{ sex }}h2> <button @click="sendStudentName">把学生姓名给schoolbutton> <hr> div> template> <script> import pubsub from 'pubsub-js' export default { name:'StudentVue', data() { console.log(this) return { name:"yang123", sex:"男" } }, methods: { sendStudentName() { // 发布事件 pubsub.publish('hello',666) } } } script> <style scoped> .demo{ background: lightsalmon; } style>- 1
- 2
- 3
- 4
- 5
- 6
- 7
- 8
- 9
- 10
- 11
- 12
- 13
- 14
- 15
- 16
- 17
- 18
- 19
- 20
- 21
- 22
- 23
- 24
- 25
- 26
- 27
- 28
- 29
- 30
- 31
- 32
- 33
- 34
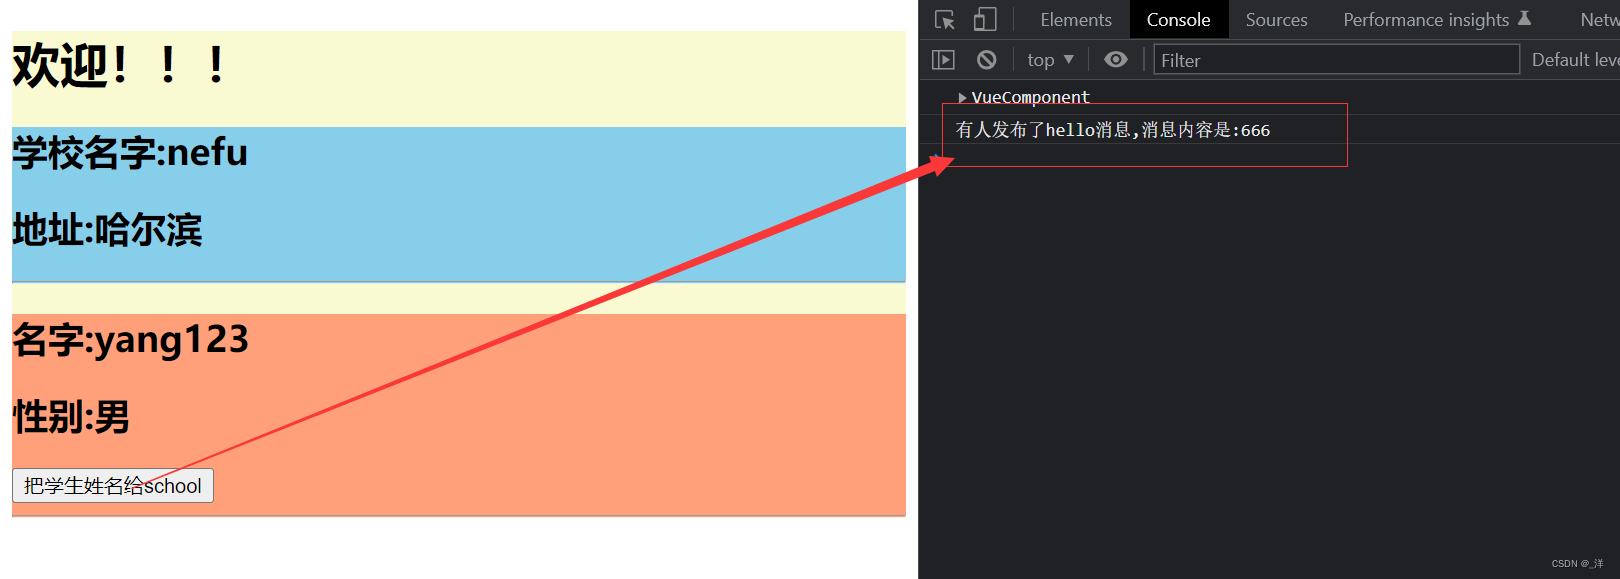
效果:
- 安装:
-
相关阅读:
DOM的增删改
号码认证平台有哪些?号码认证平台费用?
「项目管理」如何做好项目进度管理计划?
nginx配置代理转发,顺便写点负载均衡
npm简单介绍
Openpyxl笔记
用户登录功能
深入理解移动语义
Kafka简单入门02——ISR机制
力扣第455题 分发饼干 c++ 贪心 经典题
- 原文地址:https://blog.csdn.net/mantou_riji/article/details/125897666
