-
ConstraintLayout 你真的会用了吗
ConstraintLayout 即约束布局,也是 Android Studio 的默认布局,它可以减少布局的层级,改善布局性能。不夸张地说,它基本上可以实现任何你想要的布局效果,下面,咱们一起来瞧瞧吧~
基本属性
可以让本View的一个方向置于目标View的一个方向,比如
layout_constraintBottom_toBottomOf:本View的下面置于目标View的下面,与此类似的还有 layout_constraintEnd_toEndOf,
layout_constraintStart_toStartOf,layout_constraintTop_toTopOf,layout_constraintBottom_toTopOf 等等。例如,B放在A的上面,就可以让B的下面置于A的上面
<?xml version="1.0" encoding="utf-8"?> <androidx.constraintlayout.widget.ConstraintLayout xmlns:android="http://schemas.android.com/apk/res/android" xmlns:app="http://schemas.android.com/apk/res-auto" xmlns:tools="http://schemas.android.com/tools" android:layout_width="match_parent" android:layout_height="match_parent" tools:context=".MainActivity"> <TextView android:id="@+id/a" android:layout_width="100dp" android:layout_height="100dp" android:background="@color/purple_200" android:gravity="center" android:text="@string/a" android:textColor="@color/white" android:textSize="30sp" app:layout_constraintBottom_toBottomOf="parent" app:layout_constraintEnd_toEndOf="parent" app:layout_constraintStart_toStartOf="parent" app:layout_constraintTop_toTopOf="parent" /> <TextView android:id="@+id/b" android:layout_width="100dp" android:layout_height="100dp" android:background="@color/purple_200" android:gravity="center" android:text="@string/b" android:textColor="@color/white" android:textSize="30sp" app:layout_constraintBottom_toTopOf="@id/a" app:layout_constraintEnd_toEndOf="parent" app:layout_constraintStart_toStartOf="parent" app:layout_constraintTop_toTopOf="parent" /> </androidx.constraintlayout.widget.ConstraintLayout>- 1
- 2
- 3
- 4
- 5
- 6
- 7
- 8
- 9
- 10
- 11
- 12
- 13
- 14
- 15
- 16
- 17
- 18
- 19
- 20
- 21
- 22
- 23
- 24
- 25
- 26
- 27
- 28
- 29
- 30
- 31
- 32
- 33
- 34
- 35
- 36
- 37

还有一个属性就是 layout_constraintBaseline_toBaselineOf,这个可以让其内部文字对齐。
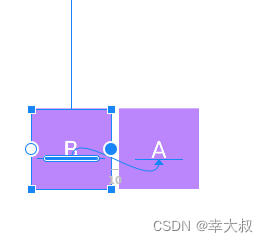
约束强度
利用 layout_constraintHorizontal_bias 和 layout_constraintVertical_bias,可以设置控件在水平和垂直方向上的偏移量,值为0-1
比如,让一个控件居中显示,我们会这样写<?xml version="1.0" encoding="utf-8"?> <androidx.constraintlayout.widget.ConstraintLayout xmlns:android="http://schemas.android.com/apk/res/android" xmlns:app="http://schemas.android.com/apk/res-auto" xmlns:tools="http://schemas.android.com/tools" android:layout_width="match_parent" android:layout_height="match_parent" tools:context=".MainActivity"> <TextView android:id="@+id/a" android:layout_width="100dp" android:layout_height="100dp" android:background="@color/purple_200" android:gravity="center" android:text="@string/a" android:textColor="@color/white" android:textSize="30sp" app:layout_constraintBottom_toBottomOf="parent" app:layout_constraintEnd_toEndOf="parent" app:layout_constraintStart_toStartOf="parent" app:layout_constraintTop_toTopOf="parent" /> </androidx.constraintlayout.widget.ConstraintLayout>- 1
- 2
- 3
- 4
- 5
- 6
- 7
- 8
- 9
- 10
- 11
- 12
- 13
- 14
- 15
- 16
- 17
- 18
- 19
- 20
- 21
- 22
- 23
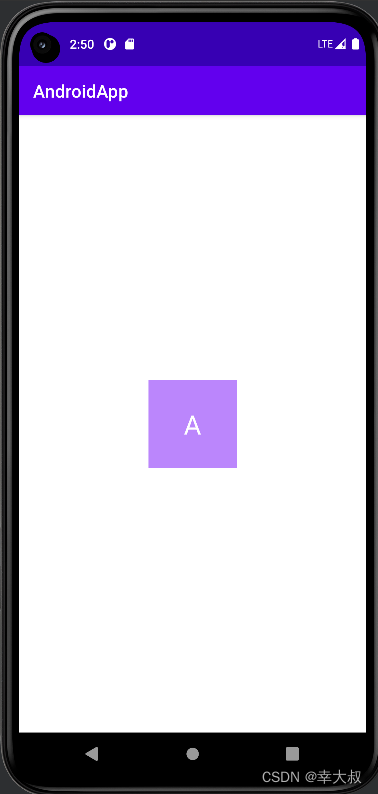
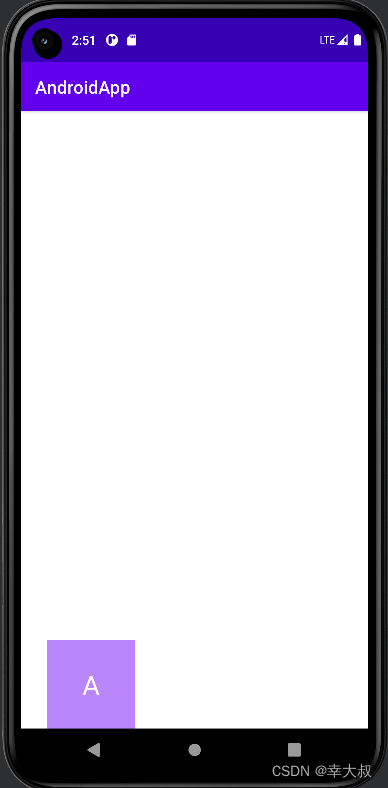
现在,它的上下左右的剩余空间都占50%,现在我想让它的左侧剩余空间从50%变成10%,上面的剩余空间从50%变成100%,可以这么干
<?xml version="1.0" encoding="utf-8"?> <androidx.constraintlayout.widget.ConstraintLayout xmlns:android="http://schemas.android.com/apk/res/android" xmlns:app="http://schemas.android.com/apk/res-auto" xmlns:tools="http://schemas.android.com/tools" android:layout_width="match_parent" android:layout_height="match_parent" tools:context=".MainActivity"> <TextView android:id="@+id/a" android:layout_width="100dp" android:layout_height="100dp" android:background="@color/purple_200" android:gravity="center" android:text="@string/a" android:textColor="@color/white" android:textSize="30sp" app:layout_constraintBottom_toBottomOf="parent" app:layout_constraintEnd_toEndOf="parent" app:layout_constraintHorizontal_bias="0.1" app:layout_constraintStart_toStartOf="parent" app:layout_constraintTop_toTopOf="parent" app:layout_constraintVertical_bias="1" /> </androidx.constraintlayout.widget.ConstraintLayout>- 1
- 2
- 3
- 4
- 5
- 6
- 7
- 8
- 9
- 10
- 11
- 12
- 13
- 14
- 15
- 16
- 17
- 18
- 19
- 20
- 21
- 22
- 23
- 24
- 25
Visibility属性
在 ConstraintLayout 布局,visibility 属性设置为 gone 的话,可以理解为该View被缩小成一个不可见的小点,而其他对其有约束的View依照该点来进行定位。
比如,现在有两个TextView
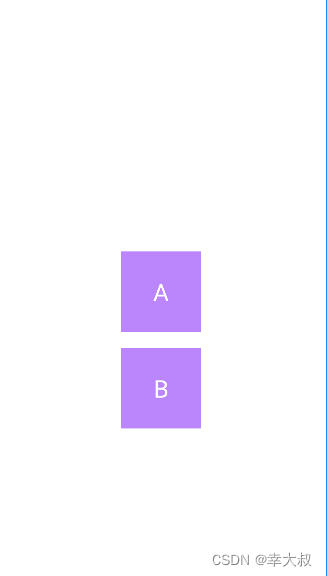
如果这时,将A设置成不可见,那B的位置会有些改变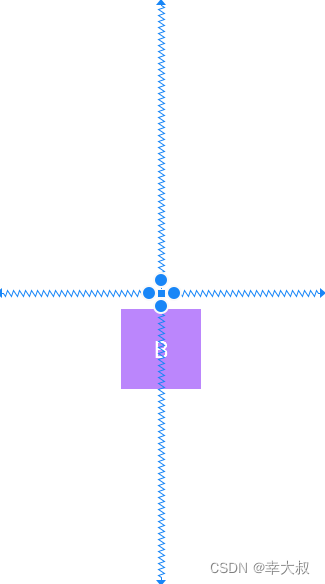
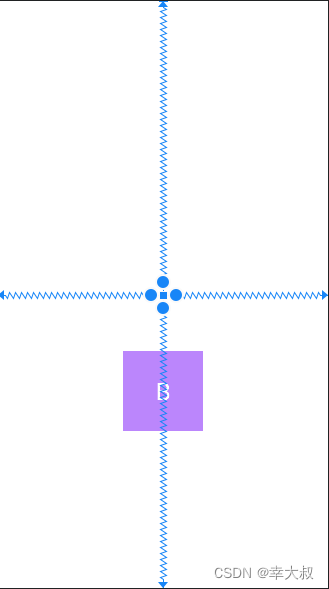
这时,我们可以通过layout_goneMarginTop,layout_goneMarginBottom,layout_goneMarginStart,layout_goneMarginEnd属性来设置与之的距离,这类属性只有在A的visibility属性为gone时才会生效。<?xml version="1.0" encoding="utf-8"?> <androidx.constraintlayout.widget.ConstraintLayout xmlns:android="http://schemas.android.com/apk/res/android" xmlns:app="http://schemas.android.com/apk/res-auto" xmlns:tools="http://schemas.android.com/tools" android:layout_width="match_parent" android:layout_height="match_parent" tools:context=".MainActivity"> <TextView android:id="@+id/a" android:layout_width="100dp" android:layout_height="100dp" android:background="@color/purple_200" android:gravity="center" android:text="@string/a" android:textColor="@color/white" android:textSize="30sp" android:visibility="gone" app:layout_constraintBottom_toBottomOf="parent" app:layout_constraintEnd_toEndOf="parent" app:layout_constraintStart_toStartOf="parent" app:layout_constraintTop_toTopOf="parent" /> <TextView android:id="@+id/b" android:layout_width="100dp" android:layout_height="100dp" android:layout_marginTop="20dp" android:background="@color/purple_200" android:gravity="center" android:text="@string/b" android:textColor="@color/white" android:textSize="30sp" app:layout_constraintEnd_toEndOf="parent" app:layout_constraintStart_toStartOf="parent" app:layout_constraintTop_toBottomOf="@+id/a" app:layout_goneMarginTop="70dp" /> </androidx.constraintlayout.widget.ConstraintLayout>- 1
- 2
- 3
- 4
- 5
- 6
- 7
- 8
- 9
- 10
- 11
- 12
- 13
- 14
- 15
- 16
- 17
- 18
- 19
- 20
- 21
- 22
- 23
- 24
- 25
- 26
- 27
- 28
- 29
- 30
- 31
- 32
- 33
- 34
- 35
- 36
- 37
- 38
- 39
控件宽高比
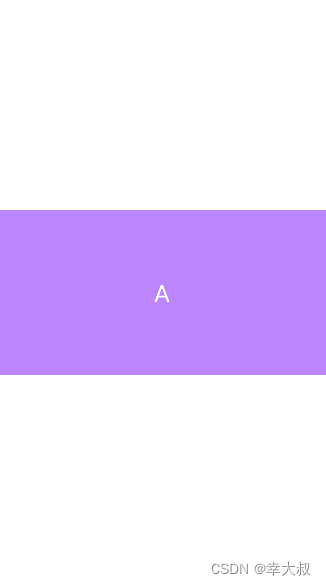
如果想实现固定宽高比的话,可以使用 layout_constraintDimensionRatio 属性,至少设置 layout_width 或 layout_height 为0
<?xml version="1.0" encoding="utf-8"?> <androidx.constraintlayout.widget.ConstraintLayout xmlns:android="http://schemas.android.com/apk/res/android" xmlns:app="http://schemas.android.com/apk/res-auto" xmlns:tools="http://schemas.android.com/tools" android:layout_width="match_parent" android:layout_height="match_parent" tools:context=".MainActivity"> <TextView android:id="@+id/a" android:layout_width="0dp" android:layout_height="0dp" android:background="@color/purple_200" android:gravity="center" android:text="@string/a" android:textColor="@color/white" android:textSize="30sp" app:layout_constraintBottom_toBottomOf="parent" app:layout_constraintDimensionRatio="4:2" app:layout_constraintEnd_toEndOf="parent" app:layout_constraintStart_toStartOf="parent" app:layout_constraintTop_toTopOf="parent" /> </androidx.constraintlayout.widget.ConstraintLayout>- 1
- 2
- 3
- 4
- 5
- 6
- 7
- 8
- 9
- 10
- 11
- 12
- 13
- 14
- 15
- 16
- 17
- 18
- 19
- 20
- 21
- 22
- 23
- 24
- 25
子控件之间的宽高占比
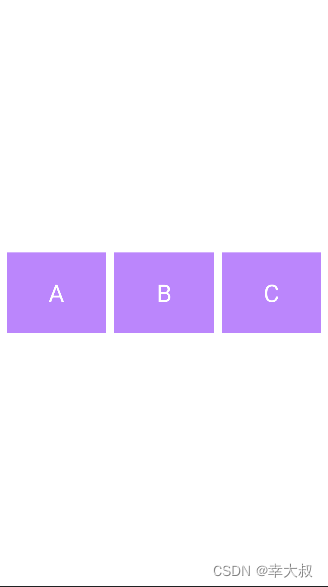
我们知道,LinearLayout 可以为子控件设置 layout_weight 属性,控制子控件之间的宽高占比,ConstraintLayout也可以,对应的属性是 layout_constraintHorizontal_weight,layout_constraintVertical_weight
<?xml version="1.0" encoding="utf-8"?> <androidx.constraintlayout.widget.ConstraintLayout xmlns:android="http://schemas.android.com/apk/res/android" xmlns:app="http://schemas.android.com/apk/res-auto" xmlns:tools="http://schemas.android.com/tools" android:layout_width="match_parent" android:layout_height="match_parent" tools:context=".MainActivity"> <TextView android:id="@+id/a" android:layout_width="0dp" android:layout_height="100dp" android:layout_marginStart="10dp" android:background="@color/purple_200" android:gravity="center" android:text="@string/a" android:textColor="@color/white" android:textSize="30sp" app:layout_constraintBottom_toBottomOf="parent" app:layout_constraintEnd_toStartOf="@+id/b" app:layout_constraintHorizontal_weight="1" app:layout_constraintStart_toStartOf="parent" app:layout_constraintTop_toTopOf="parent" /> <TextView android:id="@+id/b" android:layout_width="0dp" android:layout_height="100dp" android:layout_marginStart="10dp" android:background="@color/purple_200" android:gravity="center" android:text="@string/b" android:textColor="@color/white" android:textSize="30sp" app:layout_constraintBottom_toBottomOf="parent" app:layout_constraintEnd_toStartOf="@+id/c" app:layout_constraintHorizontal_weight="1" app:layout_constraintStart_toEndOf="@+id/a" app:layout_constraintTop_toTopOf="parent" /> <TextView android:id="@+id/c" android:layout_width="0dp" android:layout_height="100dp" android:layout_marginStart="10dp" android:layout_marginEnd="10dp" android:background="@color/purple_200" android:gravity="center" android:text="@string/c" android:textColor="@color/white" android:textSize="30sp" app:layout_constraintBottom_toBottomOf="parent" app:layout_constraintEnd_toEndOf="parent" app:layout_constraintHorizontal_weight="1" app:layout_constraintStart_toEndOf="@+id/b" app:layout_constraintTop_toTopOf="parent" /> </androidx.constraintlayout.widget.ConstraintLayout>- 1
- 2
- 3
- 4
- 5
- 6
- 7
- 8
- 9
- 10
- 11
- 12
- 13
- 14
- 15
- 16
- 17
- 18
- 19
- 20
- 21
- 22
- 23
- 24
- 25
- 26
- 27
- 28
- 29
- 30
- 31
- 32
- 33
- 34
- 35
- 36
- 37
- 38
- 39
- 40
- 41
- 42
- 43
- 44
- 45
- 46
- 47
- 48
- 49
- 50
- 51
- 52
- 53
- 54
- 55
- 56
- 57
- 58
锚向指示线
当我们需要任意位置的锚点时,可以使用Guideline来帮助定位,它的宽度和高度均为0,可见性也为GONE,它是为了帮助其他View定位而存在的,并不会出现在实际页面上。
<androidx.constraintlayout.widget.Guideline android:id="@+id/guideline_horizontal" android:layout_width="wrap_content" android:layout_height="wrap_content" android:orientation="horizontal" app:layout_constraintGuide_percent="0.2" /> <androidx.constraintlayout.widget.Guideline android:id="@+id/guideline_vertical" android:layout_width="wrap_content" android:layout_height="wrap_content" android:orientation="vertical" app:layout_constraintGuide_begin="100dp" />- 1
- 2
- 3
- 4
- 5
- 6
- 7
- 8
- 9
- 10
- 11
- 12
- 13
Chains链
Chain 链是一种特殊的约束,是用来分发链条剩余空间位置的。几个View之间通过双向连接而互相约束对方的位置的,就叫链条,像这种
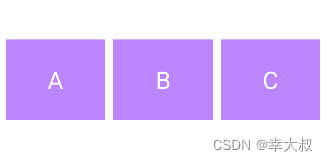
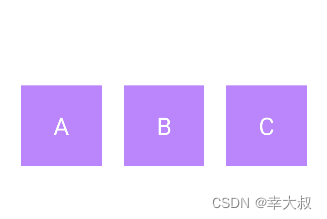
链条分为水平链条和竖直链条,分别用 layout_constraintHorizontal_chainStyle 和 layout_constraintVertical_chainStyle 两个属性来设置。 属性值有三种:spread,spread_inside,packed
layout_constraintHorizontal_chainStyle=“spread”
layout_constraintHorizontal_chainStyle=“spread_inside”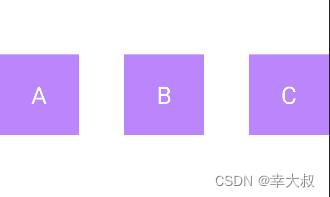
layout_constraintHorizontal_chainStyle=“packed”
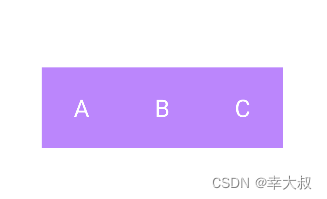
<?xml version="1.0" encoding="utf-8"?> <androidx.constraintlayout.widget.ConstraintLayout xmlns:android="http://schemas.android.com/apk/res/android" xmlns:app="http://schemas.android.com/apk/res-auto" xmlns:tools="http://schemas.android.com/tools" android:layout_width="match_parent" android:layout_height="match_parent" tools:context=".MainActivity"> <TextView android:id="@+id/a" android:layout_width="100dp" android:layout_height="100dp" android:background="@color/purple_200" android:gravity="center" android:text="@string/a" android:textColor="@color/white" android:textSize="30sp" app:layout_constraintBottom_toBottomOf="parent" app:layout_constraintEnd_toStartOf="@+id/b" app:layout_constraintHorizontal_chainStyle="packed" app:layout_constraintStart_toStartOf="parent" app:layout_constraintTop_toTopOf="parent" /> <TextView android:id="@+id/b" android:layout_width="100dp" android:layout_height="100dp" android:background="@color/purple_200" android:gravity="center" android:text="@string/b" android:textColor="@color/white" android:textSize="30sp" app:layout_constraintBottom_toBottomOf="parent" app:layout_constraintEnd_toStartOf="@+id/c" app:layout_constraintHorizontal_chainStyle="packed" app:layout_constraintStart_toEndOf="@+id/a" app:layout_constraintTop_toTopOf="parent" /> <TextView android:id="@+id/c" android:layout_width="100dp" android:layout_height="100dp" android:background="@color/purple_200" android:gravity="center" android:text="@string/c" android:textColor="@color/white" android:textSize="30sp" app:layout_constraintBottom_toBottomOf="parent" app:layout_constraintEnd_toEndOf="parent" app:layout_constraintHorizontal_chainStyle="packed" app:layout_constraintStart_toEndOf="@+id/b" app:layout_constraintTop_toTopOf="parent" /> </androidx.constraintlayout.widget.ConstraintLayout>- 1
- 2
- 3
- 4
- 5
- 6
- 7
- 8
- 9
- 10
- 11
- 12
- 13
- 14
- 15
- 16
- 17
- 18
- 19
- 20
- 21
- 22
- 23
- 24
- 25
- 26
- 27
- 28
- 29
- 30
- 31
- 32
- 33
- 34
- 35
- 36
- 37
- 38
- 39
- 40
- 41
- 42
- 43
- 44
- 45
- 46
- 47
- 48
- 49
- 50
- 51
- 52
- 53
- 54
-
相关阅读:
GC0053-STM32单片机NTC热敏电阻温度采集及控制LCD1602
Surfer与Voxler数据处理及可视化
选择适宜的工业设计公司,是协作的第一步
报名仅剩十天!又一开发者公布高分方案源代码,助力软件杯选手高效解题
swagger
接口自动化测试实战之接口框架修改与动态参数化与数据伪造
探索 Electron Egg:构建跨平台桌面应用的理想选择
Java项目中将MySQL改为8.0以上
java毕业生设计大学生网络创业就业管理系统计算机源码+系统+mysql+调试部署+lw
2、开发环境安装
- 原文地址:https://blog.csdn.net/qq_45485851/article/details/125602895
