-
Spring 框架 、注解开发(二)
注解开发可以简化很多配置文件的工作,从而提高开发效率,这篇文章就是依靠注解简化开发
1.配置扫描驱动
<context:component-scan base-package="com.zx"></context:component-scan>2.bean定义注解
一共有四个请牢记,面试的时候会问这个已经是基础中的基础了,这个四个注解都可以让spring加载为bean对象,这四个的功能都是一样的,只不过在实际项目之中我们可以根据这些注解区分类的作用
- //@Component("myService")
- @Service("myService")
- //@Controller
- //@Repository
- public class UserserviceImpl3 implements Userservice {
这边用注解和配置文件做一个对比,功能都是一样的,只是一个注解一个是配置文件

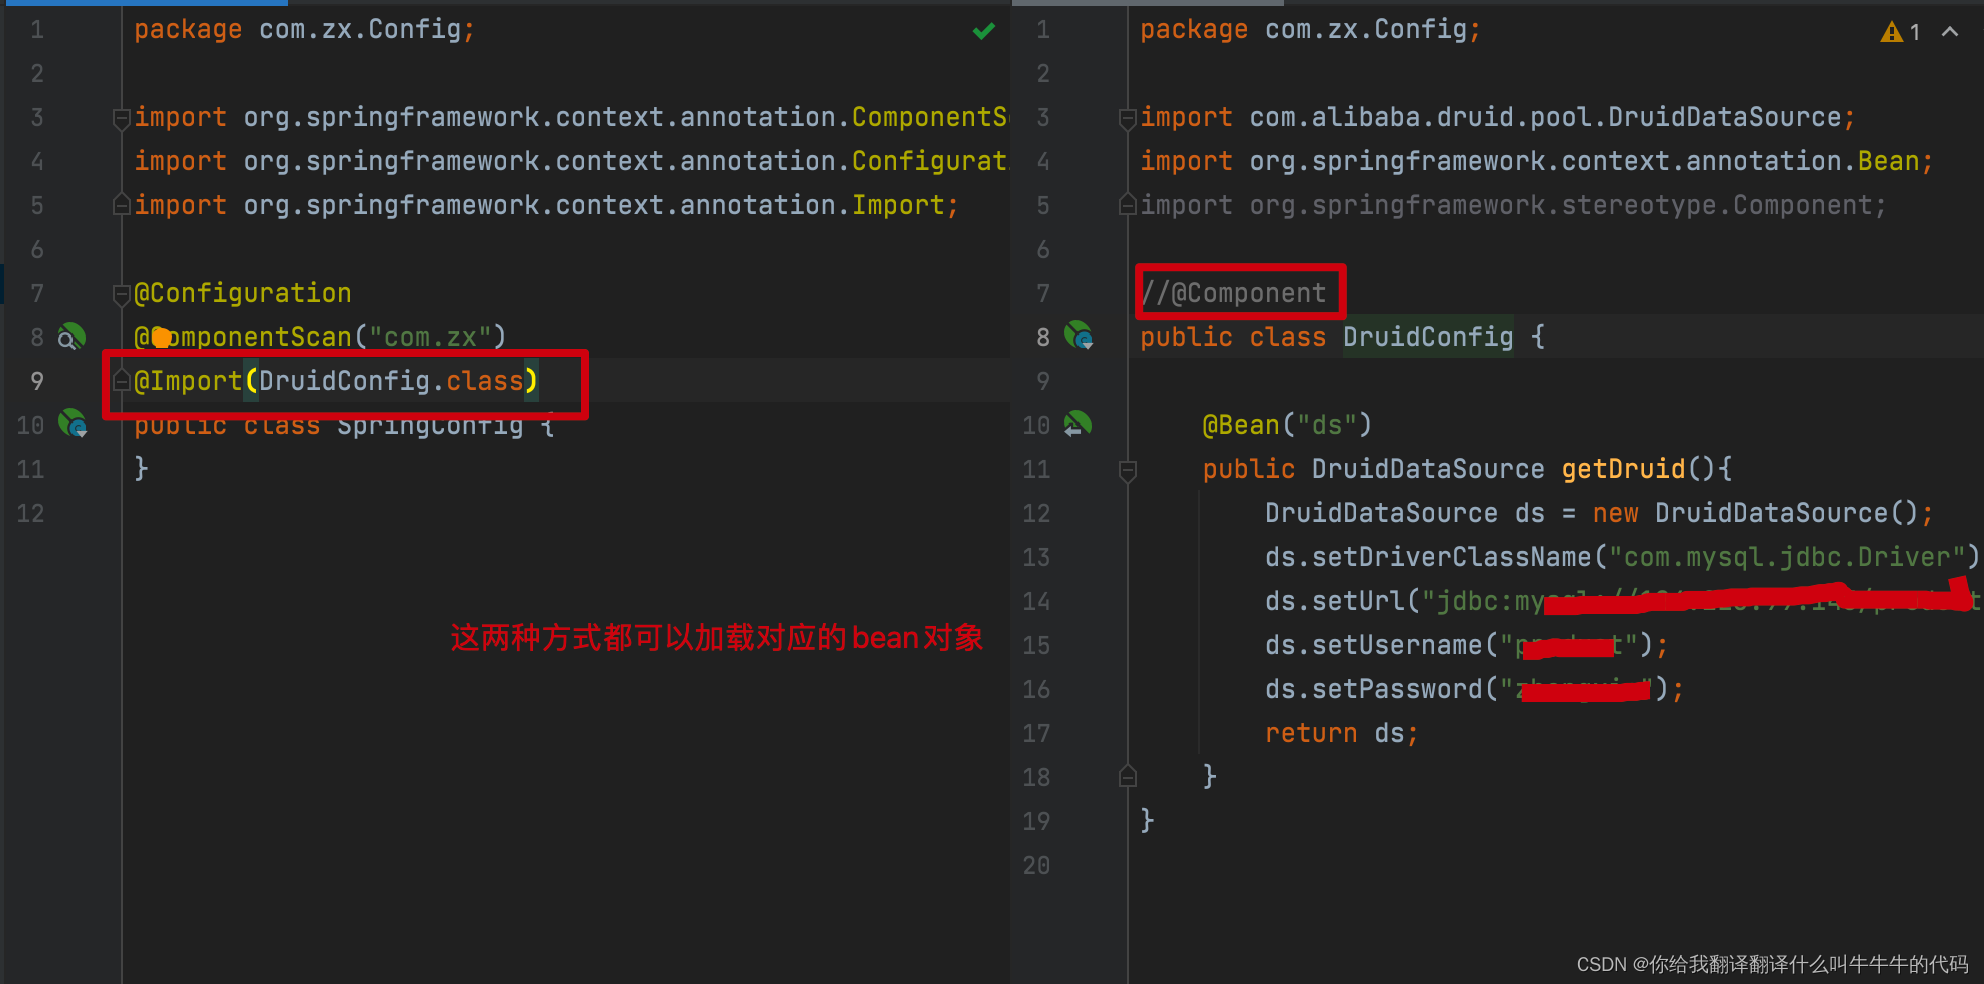
3.加载三方的bean
这边举例子加载Druid连接池,注意这两个注解都不能少,少一个就获取不到

4.引入变量
@Value只能引入常量,引用变量就是@Autowired


5.注解引入配置文件

6.加载配置文件方式
- /**
- * 加载配置文件
- */
- ClassPathXmlApplicationContext classPathXmlApplicationContext = new ClassPathXmlApplicationContext("applicationContext.xml");
- /**
- * 用注解加载配置类
- */
- ApplicationContext applicationContext = new AnnotationConfigApplicationContext(SpringConfig.class);
7. 加载bean
8. 控制加载bean的顺序

加载配置类的顺序,其实知道怎么玩的就行,脑子里有个印象
 最后有个延迟加载@lazy,用到的时候才会加载,启动的时候是不会加载的。
9.拓展知识 spring 整合 Junit
引入坐标
- <dependency>
- <groupId>junit</groupId>
- <artifactId>junit</artifactId>
- <scope>4.12</scope>
- </dependency>
- <dependency>
- <groupId>org.springframework</groupId>
- <artifactId>spring-test</artifactId>
- <version>5.1.9.RELEASE</version>
- </dependency>
- //固定写法
- @RunWith(SpringJUnit4ClassRunner.class)
- //这个是spring的配置类
- @ContextConfiguration(classes = {SpringConfig.class})
- public class SpringTest {
- @Autowired
- private UserDao userDao;
- @Test//test注解
- public void testSave(){
- userDao.Save();
- }
- }
-
相关阅读:
IP 地址详解(IPv4、IPv6)
【数据分享】北京市共享单车数据(300余万条数据)
FastDFS学习(四)
DNS协议
正则表达式(自用)
Elasticsearch7.x.x开启X-pack鉴权,按步骤执行就能成功!
Swift学习笔记四(function 篇)
唯品会商品详情API接口(item_get-获得vip商品详情接口)
Geogebra 教程之 02 Geogebra初学者的 8 个基本要素
iNFTnews | NFT或将彻底改变音乐产业
- 原文地址:https://blog.csdn.net/zdreamLife/article/details/125363062