- 前言
- 安装环境
- 1. 下载Freeswitch
- 2. 开始安装前的工作
- 3. 检查Freeswitch编译环境
- 3.1 出现问题以及解决方法
- 3.1.1. checking for spandsp >= 3.0... configure: error: no usable spandsp; please install spandsp3 devel package or equivalent
- 3.1.2. configure: error: You need to either install libldns-dev or disable mod_enum in modules.conf
- 3.1.2. configure: error: You need to either install libedit-dev (>= 2.11) or configure with --disable-core-libedit-support
- 如遇此类问题
- 3.1 出现问题以及解决方法
- 4. 编译Freeswitch
- 5. Freeswitch 启动!
前言
Centos7.x系统已于2024年6月30日起停止维护更新,如此这般随着时间的推移,系统可能会出现越来越多的故障和漏洞问题等,这就会导致操作系统会暴露在网络攻击的威胁之下。
这就不得不迫使我转移学习资料和项目到更新的版本或者其他的操作系统。在当今国产化的浪潮中,我选择了由华为主导的openEuler操作系统。原因如下:
- 拥有活跃的开源社区支持:
- 活跃社区:openEuler拥有一个活跃的开源社区,众多企业和开发者参与其中,共同促进技术的进步和生态的繁荣。
- 持续更新:得益于社区的贡献,也能够持续获得更新,包括功能增强、性能优化和安全补丁。
- 拥有强大的兼容性与生态支持:
- 兼容性强:具有良好的兼容性,能够很好的兼容Centos 7迁移过来的项目和支持多种硬件架构和软件应用。
- 丰富的生态:华为与众多软硬件厂商合作,构建了较为完善的生态系统。
基于以上的原因以及还未列出的原因,openEuler操作系统是可以满足我的需求的。
安装环境
| 操作系统 | 处理器 | 硬盘大小 | 内存大小 |
|---|---|---|---|
| openEuler 22.03 LTS-SP4 | J4125 | 120G | 8G |

1. 下载Freeswitch
1.1 git clone 下载freeswitch库
[root@localhost data]# git clone https://github.com/signalwire/freeswitch.git
正克隆到 'freeswitch'...
remote: Enumerating objects: 321005, done.
remote: Counting objects: 100% (553/553), done.
remote: Compressing objects: 100% (372/372), done.
remote: Total 321005 (delta 288), reused 330 (delta 153), pack-reused 320452
接收对象中: 100% (321005/321005), 132.64 MiB | 895.00 KiB/s, done.
处理 delta 中: 100% (250772/250772), done.
1.2 官网下载
curl -o freeswitch-1.10.11.-release.tar.gz https://files.freeswitch.org/releases/freeswitch/freeswitch-1.10.11.-release.tar.gz
2. 开始安装前的工作
2.1 安装编译时需要的环境【先安装这个!】
yum -y install tar gcc-c++ nasm yasm make libtool libtool-devel uuid-devel libtiff-devel libjpeg-devel cmake libuuid-devel libatomic sqlite-devel libcurl libcurl-devel pcre pcre-devel speex speex-devel speexdsp speexdsp-devel ldns-devel libedit-devel libsndfile-devel
2.2 configure前需要安装的库
freeswitch官方把spandsp和sofia-sip从FreeSWITCH代码仓库单独弄出来了,所以编译前要单独编译安装。
2.2.1. spandsp
这个我真是踩了大坑,由于spandsp一直在更新,所以要用一个稳定版本才行。
git clone https://github.com/freeswitch/spandsp.git
cd spandsp/
git checkout e1e33ecd2b6325fc4f2542da2184c834fa77c5c8
./bootstrap.sh
./configure
make -j$(nproc) && make install

vi /etc/profile
# 文末添加以下内容:
export PKG_CONFIG_PATH=/usr/local/lib/pkgconfig:$PKG_CONFIG_PATH
source /etc/profile
2.2.2. sofia-sip
git clone https://github.com/freeswitch/sofia-sip.git
cd sofia-sip
./bootstrap.sh
./configure
make -j$(nproc) && make install
2.2.3. libks
git clone https://github.com/signalwire/libks.git
cd libks
cmake .
make -j$(nproc) && make install
这里有个坑,要将libks2.pc链接或者复制到前面spandsp设置的PKG_CONFIG_PATH中的目录里面去,要不然下面signalwire-c会报错 Package 'libks2', required by 'virtual:world', not found
find /usr -name 'libks2.pc' # 如果不知道libks2.pc的路径就搜索。
ln -sf /usr/lib/pkgconfig/libks2.pc /usr/local/lib/pkgconfig/libks2.pc
2.2.4. signalwire-c
git clone https://github.com/signalwire/signalwire-c.git
cd signalwire-c/
cmake .
make -j$(nproc) && make install
# find /usr -name 'signalwire_client2.pc' # 如果不知道路径就搜索。
2.2.5 x264
git clone https://git.videolan.org/git/x264.git
cd x264
./configure --enable-shared --enable-static --disable-opencl
make -j$(nproc) && make install
cp /usr/local/lib/pkgconfig/x264.pc /usr/lib64/pkgconfig
2.2.6. libav
git clone https://github.com/libav/libav.git
cd libav
git checkout v12.3
./configure --enable-pic --enable-shared  --enable-libx264 --enable-gpl --extra-libs="-ldl"
make -j$(nproc) && make install
cp /usr/local/lib/pkgconfig/libavcodec.pc    /usr/lib64/pkgconfig/
cp /usr/local/lib/pkgconfig/libavdevice.pc   /usr/lib64/pkgconfig/
cp /usr/local/lib/pkgconfig/libavfilter.pc   /usr/lib64/pkgconfig/
cp /usr/local/lib/pkgconfig/libavformat.pc   /usr/lib64/pkgconfig/
cp /usr/local/lib/pkgconfig/libavresample.pc /usr/lib64/pkgconfig/
cp /usr/local/lib/pkgconfig/libavutil.pc     /usr/lib64/pkgconfig/
cp /usr/local/lib/pkgconfig/libswscale.pc    /usr/lib64/pkgconfig/
ldconfig # 切记,复制完一定要执行刷新
2.2.6.1 可能出现的错误一
libavcodec/libx264.c: 在函数‘X264_frame’中:
libavcodec/libx264.c:142:9: 错误:‘x264_bit_depth’未声明(在此函数内第一次使用)
  142 |     if (x264_bit_depth > 8)
      |         ^~~~~~~~~~~~~~
libavcodec/libx264.c:142:9: 附注:每个未声明的标识符在其出现的函数内只报告一次
libavcodec/libx264.c: 在函数‘X264_init_static’中:
libavcodec/libx264.c:577:9: 错误:‘x264_bit_depth’未声明(在此函数内第一次使用)
  577 |     if (x264_bit_depth == 8)
      |         ^~~~~~~~~~~~~~
make: *** [Makefile:44:libavcodec/libx264.o] 错误 1
make: *** 正在等待未完成的任务....

解决方法
sed -i 's/x264_bit_depth/X264_BIT_DEPTH/g' libavcodec/libx264.c
2.2.6.2 可能出现的错误二
这里有个坑...,当我执行make install时输出如下。然后我去安装yasm然后make clean重新跑一下就可以了
INSTALL doc/avconv.1
INSTALL doc/avprobe.1
INSTALL libavdevice/libavdevice.a
make: *** 没有规则可制作目标“util.asm”,由“libavresample/x86/audio_convert.o” 需求。 停止。
解决方法
yum -y install yasm
2.2.7. opus
git clone https://freeswitch.org/stash/scm/sd/opus.git
# 官方仓库有问题可以下载第三方镜像源http://freeswitch.clx.fun:12130/src-releases/libs/opus-1.1-p2.tar.gz或者去官网https://www.opus-codec.org/downloads/
cd opus
./autogen.sh
./configure
make -j4 && make install
cp /usr/local/lib/pkgconfig/opus.pc /usr/lib64/pkgconfig
3. 检查Freeswitch编译环境
tar zxvf freeswitch-1.10.11.-release.tar.gz
cd freeswitch-1.10.11.-release/
./configure --prefix=/usr/local/freeswitch
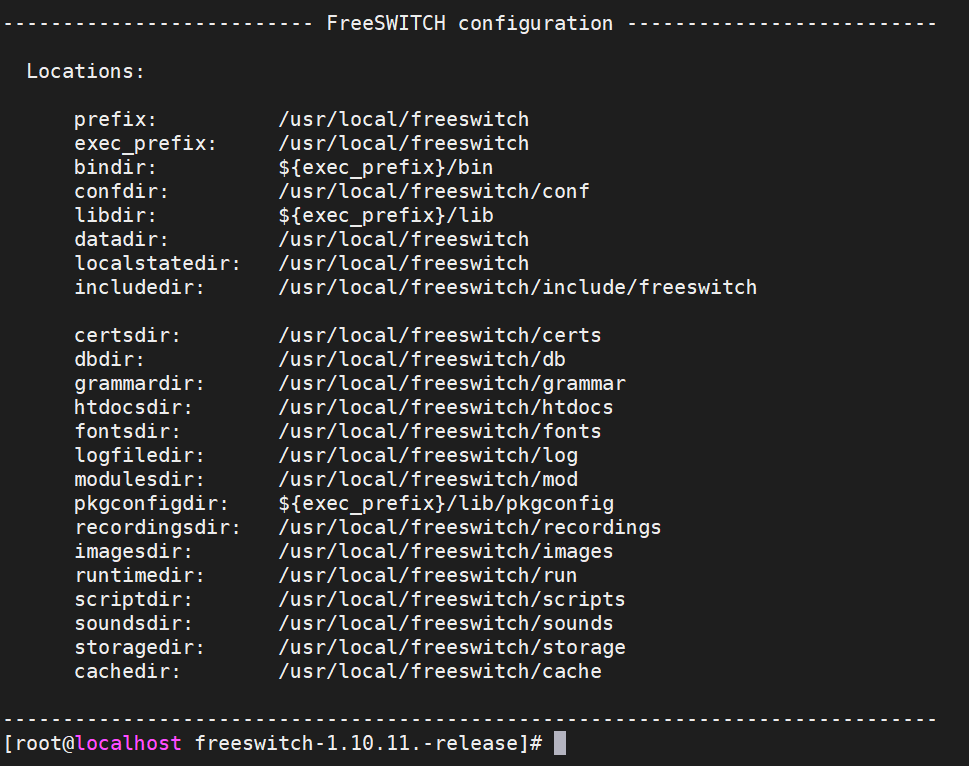
这里我是采用1.2 官网下载的方式下载官网的压缩包,出现下图的数据就是检查完成了。
3.1 出现问题以及解决方法
3.1.1. checking for spandsp >= 3.0... configure: error: no usable spandsp; please install spandsp3 devel package or equivalent
检查2.2.1. spandsp有无安装失败
3.1.2. configure: error: You need to either install libldns-dev or disable mod_enum in modules.conf
检查2.1 安装编译时需要的环境有无安装全
3.1.2. configure: error: You need to either install libedit-dev (>= 2.11) or configure with --disable-core-libedit-support
同上解决方案
如遇此类问题
按理来说执行完2.1 安装编译时需要的环境应该就可以了,但是如果还由错误,可以截图留言讨论讨论。
4. 编译Freeswitch
4.1 暂时屏蔽了mod_av、mod_lua
会导致编译不通过,暂时未找到原因【待排查】,尝试过了安装ffmpeg和ffmpeg-devel,未果。
2024年7月18日晚下班时分思来想去,这两个问题不解决我估计今晚都睡不着了,下定决定全力以赴解决它,幸得皇天不负有些人,当然啦,还有我聪明的小脑袋终于解决了,下面是问题的原因和解决的方法。
问题1、mod_av编译时报错libswresample/swresample.h: No such file or directory
问题原因:默认安装的yum -y install ffmpeg ffmpeg-devel头文件在/usr/include/ffmpeg/下,而freeswitch默认是在/usr/local/include/中寻找。
解决方法:将/usr/include/ffmpeg/里面的文件夹复制到/usr/local/include/即可。
cp -r /usr/include/ffmpeg/lib* /usr/local/include/
在freeswitch-1.10.11.-release/modules.conf下可以选择需要编译的mod
4.2 编译安装
在./configure之后才能执行编译
cd freeswitch-1.10.11.-release/
make -j$(nproc) && make install
出现下图这样就是安装成功了,接下来就可以开启Freeswitch之旅了

编译过程中如果遇到以下错误可以按照下列方法检查
You must install libopus-dev to build mod_opus,就执行一遍 2.2.7. opus然后重新./configure
You must install libsndfile-dev to build mod_sndfile,就执行yum安装libsndfile-devel然后重新./configure
4.3 验证安装
将freeswitch和fs_cli链接到/usr/local/bin/,这样我们就可以直接在命令行输入命令执行啦。
ln -sf /usr/local/freeswitch/bin/freeswitch /usr/local/bin/
ln -sf /usr/local/freeswitch/bin/fs_cli /usr/local/bin/
输入freeswitch -version输出下面版本号就是正常得了
FreeSWITCH version: 1.10.11-release~64bit (-release 64bit)
5. Freeswitch 启动!
freeswitch -nc # 后台无console启动
fs_cli # freeswitch自带命令行

__EOF__
