-
Stable Diffusion部署教程,开启你的AI绘图之路
本文环境
系统:Ubuntu 20.04 64位
内存:32G
环境安装
2.1 安装GPU驱动
在英伟达官网根据显卡型号、操作系统、CUDA等查询驱动版本。官网查询链接https://www.nvidia.com/Download/index.aspx?lang=en-us
注意这里的CUDA版本,如未安装CUDA可以先选择一个版本,稍后再安装CUDA.
点击Search
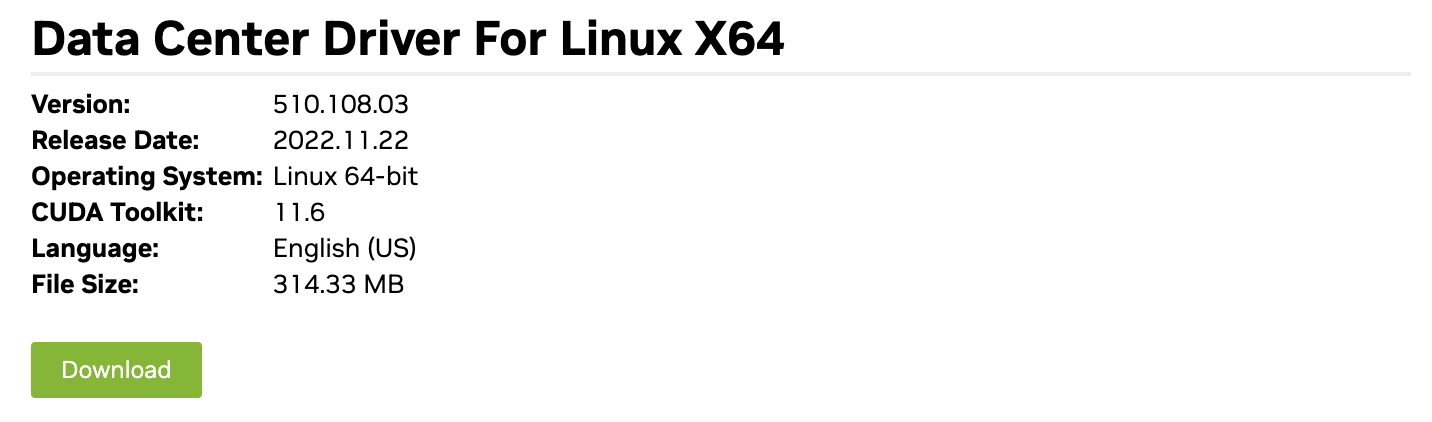
如上图,查询到合适的版本为510. 然后可以使用apt安装对应驱动版本,使用apt安装更方便一些。- # 安装510版本驱动
- sudo apt install nvidia-driver-510
- # 查看驱动信息
- nvidia-smi
当然你也可以使用官网下载的run文件进行安装
sudo chmod +x NVIDIA-Linux-x86_64-510.108.03.run安装
sudo ./NVIDIA-Linux-x86_64-510.108.03.run安装步骤操作之后就可以完成安装了
输入nvidia-smi查看显卡
- chen@chen:~$ nvidia-smi
- Sat Jun 22 08:50:27 2024
- +-----------------------------------------------------------------------------+
- | NVIDIA-SMI 510.39.01 Driver Version: 510.39.01 CUDA Version: 11.6 |
- |-------------------------------+----------------------+----------------------+
- | GPU Name Persistence-M| Bus-Id Disp.A | Volatile Uncorr. ECC |
- | Fan Temp Perf Pwr:Usage/Cap| Memory-Usage | GPU-Util Compute M. |
- | | | MIG M. |
- |===============================+======================+======================|
- | 0 Tesla M40 On | 00000000:01:00.0 Off | 0 |
- | N/A 53C P8 17W / 250W | 3MiB / 11520MiB | 0% Default |
- | | | N/A |
- +-------------------------------+----------------------+----------------------+
- +-----------------------------------------------------------------------------+
- | Processes: |
- | GPU GI CI PID Type Process name GPU Memory |
- | ID ID Usage |
- |=============================================================================|
- | No running processes found |
- +-----------------------------------------------------------------------------+
安装CUDA
访问英伟达开发者网站先选择CUDA版本(版本要对应2.1中GPU驱动支持的CUDA版本),再根据操作系统选择对应CUDA安装命令,访问链接https://developer.nvidia.com/cuda-toolkit-archive
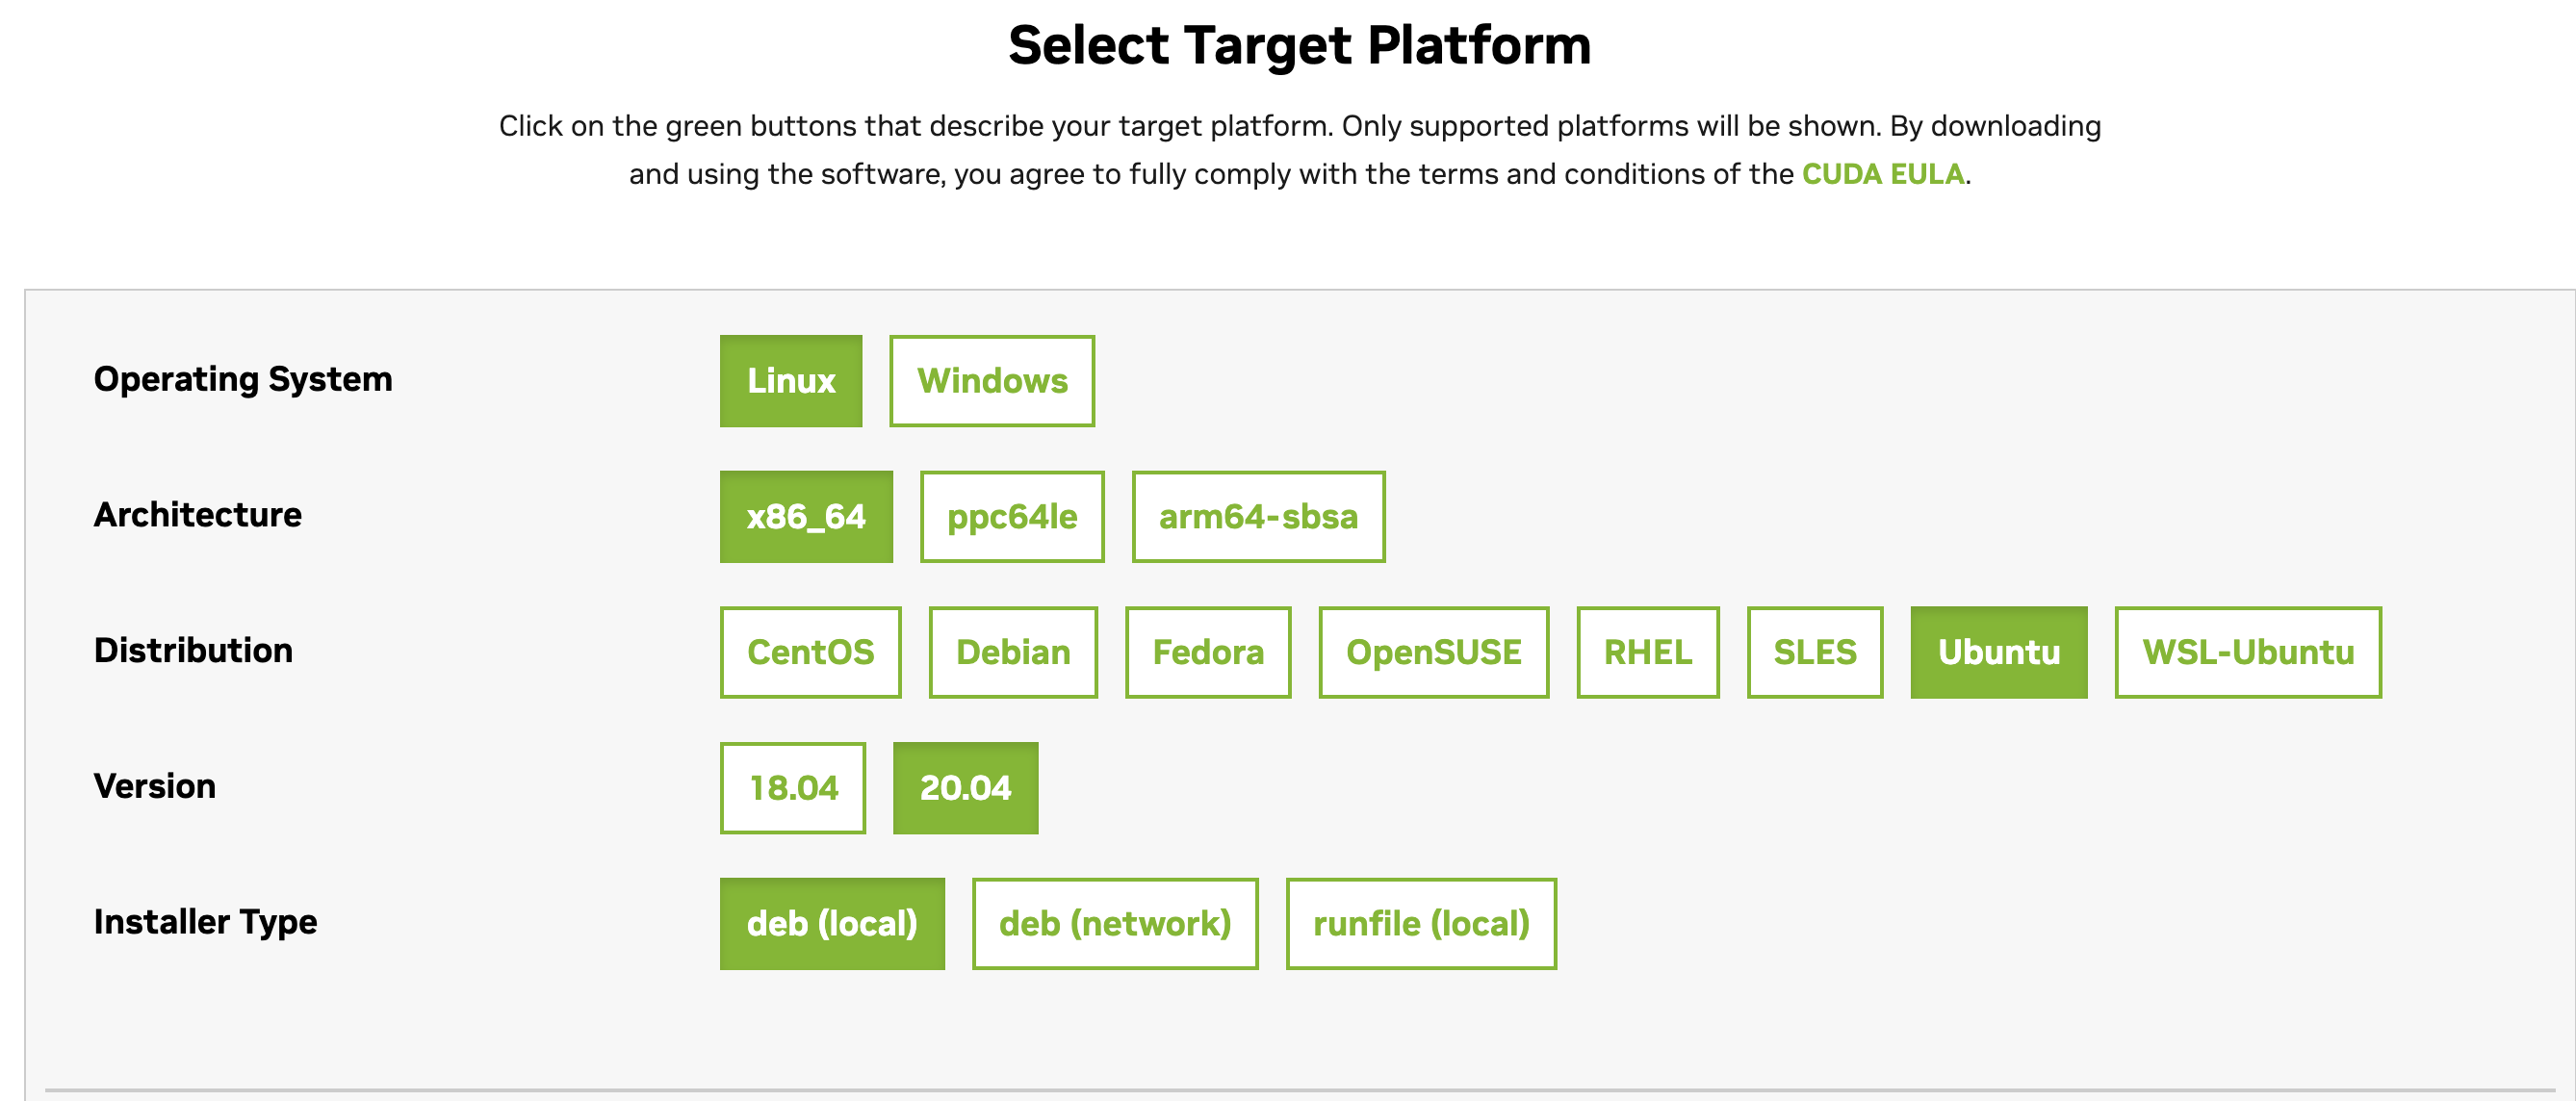
如上面安装确定所选择驱动对应的CUDA版本为11.6,根据安装命令安装, 以下命令适用Ubuntu 20.04 x86_64, GPU驱动510版本
- wget https://developer.download.nvidia.com/compute/cuda/repos/ubuntu2004/x86_64/cuda-ubuntu2004.pin
- sudo mv cuda-ubuntu2004.pin /etc/apt/preferences.d/cuda-repository-pin-600
- wget https://developer.download.nvidia.com/compute/cuda/11.6.2/local_installers/cuda-repo-ubuntu2004-11-6-local_11.6.2-510.47.03-1_amd64.deb
- sudo dpkg -i cuda-repo-ubuntu2004-11-6-local_11.6.2-510.47.03-1_amd64.deb
- sudo apt-key add /var/cuda-repo-ubuntu2004-11-6-local/7fa2af80.pub
- sudo apt-get update
- sudo apt-get -y install cuda
2.3 安装Python 3.10
Stable Diffusion WebUI目前最低支持Python 3.10,所以直接安装3.10版本,安装命令:
- apt install software-properties-common
- add-apt-repository ppa:deadsnakes/ppa
- apt update
- apt install python3.10
- python3.10 --verison
PIP设置国内源,由于默认源在国外,所以安装可能经常会出现timeout等问题,使用国内源可以很大程度避免下载包timeout的情况。将如下内容复制到文件
~/.pip/pip.conf当中,如没有该文件,先创建touch ~/.pip/pip.conf。- [global]
- index-url = https://pypi.tuna.tsinghua.edu.cn/simple
- [install]
- trusted-host = https://pypi.tuna.tsinghua.edu.cn
但是有一种比较推荐的方法就是使用 Anaconda
安装Anaconda
非常推荐使用Anaconda。Anaconda可以便捷获取包且对包能够进行管理,同时对Python环境可以统一管理的发行版本。安装命令也很简单:
- wget https://repo.anaconda.com/archive/Anaconda3-5.3.1-Linux-x86_64.sh
- bash ./Anaconda3-5.3.1-Linux-x86_64.sh
安装步骤安装Anaconda,最后一部选择是否要安装vscode可以选N
建Python3.10.9环境,并使用该环境
- conda create -n python3.10.9 python==3.10.9
- conda activate python3.10.9
2.5 安装PyTorch
首先在PyTorch官网查询对应CUDA版本的Torch,如上述章节2.2中CUDA 11.6需要安装pytorch1.13.1
- # 使用conda安装,两种安装方式二选一
- conda install pytorch==1.13.1 torchvision==0.14.1 torchaudio==0.13.1 pytorch-cuda=11.6 -c pytorch -c nvidia
- # 使用pip安装,两种安装方式二选一
- pip install torch==1.13.1+cu116 torchvision==0.14.1+cu116 torchaudio==0.13.1 --extra-index-url https://download.pytorch.org/whl/cu116
我是使用pip安装的
三、部署Stable Diffusion WebUI
3.1 下载stable-diffusion-webui
注意首先激活Python3.10环境:
conda activate python3.10.9然后下载stable-diffusion-webui
sudo git clone https://github.com/AUTOMATIC1111/stable-diffusion-webui.git如果遇到项目clone不下来可以使用我下面的加速地址
sudo git clone https://github.moeyy.xyz/https://github.com/AUTOMATIC1111/stable-diffusion-webui.git安装依赖
cd到stable-diffusion-webui目录安装相应的依赖,如有访问网络超时、失败等,注意按照章节2.3中设置国内源,如果再次失败,重试几次一般都可完成安装。
- cd stable-diffusion-webui
- pip install -r requirements_versions.txt
- pip install -r requirements.txt
启动stable-diffusion-webui
安装完成后,执行如下启动命令:
python launch.py --listen --enable-insecure-extension-access这一步骤会下载一些常用模型,如果遇到下载失败,根据报错提示在huggingface.co下载模型放到对应目录,如下载stable-diffusion-v1-5模型,搜索找到https://huggingface.co/runwayml/stable-diffusion-v1-5/tree/main
每次启动都需要输入一长串命令,比较麻烦,可以写一个shell
sudo vim start.sh里面输入
sudo /home/chen/anaconda3/envs/python3.10.9/bin/python launch.py --listen --enable-insecure-extension-access/home/chen是当前我的用户目录,anaconda3创建的虚拟环境是python3.10.9 就写这个python路径anaconda3/envs/python3.10.9
sudo chmod +x start.sh启动项目
- chen@chen:/data/stable-diffusion-webui$ ./start.sh
- [sudo] password for chen:
- Sorry, try again.
- [sudo] password for chen:
- Python 3.10.9 (main, Mar 8 2023, 10:47:38) [GCC 11.2.0]
- Version: v1.9.4
- Commit hash: feee37d75f1b168768014e4634dcb156ee649c05
- Launching Web UI with arguments: --listen --enable-insecure-extension-access
- no module 'xformers'. Processing without...
- No SDP backend available, likely because you are running in pytorch versions < 2.0. In fact, you are using PyTorch 1.13.1+cu116. You might want to consider upgrading.
- no module 'xformers'. Processing without...
- No module 'xformers'. Proceeding without it.
- ==============================================================================
- You are running torch 1.13.1+cu116.
- The program is tested to work with torch 2.1.2.
- To reinstall the desired version, run with commandline flag --reinstall-torch.
- Beware that this will cause a lot of large files to be downloaded, as well as
- there are reports of issues with training tab on the latest version.
- Use --skip-version-check commandline argument to disable this check.
- ==============================================================================
- Loading weights [63d370e256] from /data/stable-diffusion-webui/models/Stable-diffusion/a31_style.safetensors
- Running on local URL: http://0.0.0.0:7860
- To create a public link, set `share=True` in `launch()`.
- Startup time: 14.5s (prepare environment: 2.3s, import torch: 4.9s, import gradio: 1.3s, setup paths: 1.3s, initialize shared: 0.3s, other imports: 1.3s, list SD models: 0.2s, load scripts: 1.5s, create ui: 0.8s, gradio launch: 0.6s).
- Creating model from config: /data/stable-diffusion-webui/configs/v1-inference.yaml
- /home/chen/anaconda3/envs/python3.10.9/lib/python3.10/site-packages/huggingface_hub/file_download.py:1132: FutureWarning: `resume_download` is deprecated and will be removed in version 1.0.0. Downloads always resume when possible. If you want to force a new download, use `force_download=True`.
- warnings.warn(
访问服务器ip:7860
随便画一张图试试

-
相关阅读:
Java培训了6个月,我竟然是第一个拿到offer的
【TSP问题】基于蜜蜂算法解决旅行商问题附Matlab代码
go每日一题——内嵌,json.Marshal函数
【记录】算法 - C/C++版
前端面试(手写题)
try catch 中的finally什么时候运行
我们在讲的 Database Plus,到底能解决什么样的问题?
神经网络前向和后向传播推导(一):概览
Python数学基础2
思科认证 | 思科认证考点汇总及常见考试注意事项
- 原文地址:https://blog.csdn.net/cjj2006/article/details/139884769
- 最新文章
-
沪漂五周年了:我越来越迷茫了
Agentic Skill Routing 实战:别再把所有 Skill 塞进 AI Agent 上下文
MySQL-Seconds_behind_master的精度误差
[MAF预定义ChatClient中间件-03]CachingChatClient——利用缓存省钱省时间
AI的至暗历史:从万众期待到被政府撤资,AI的两次死亡徘徊
Agent OS :五种驯服不确定性的范式
PortSwigger SQL注入LAB11
数据库即时编译JIT
[Begin]AI Learn Data Day 0
深度学习进阶(二十七)现代 LLM 的核心架构设计其二:SwiGLU