-
spring boot 整合j2cache 基础操作
spring boot 整合缓存的内容呢 已经学了好久了
那么 今天 我们开始学习 j2cache这个技术 并不是一个缓存 而是一个框架 我们可以将其他缓存配到这套框架上来
那么 我们就还是弄最熟悉的 ehcache + redis进行整合
首先 我们启动 redis

然后 我们打开项目 pom.xml 注入依赖<dependency> <groupId>net.oschina.j2cachegroupId> <artifactId>j2cache-coreartifactId> <version>2.8.4-releaseversion> dependency> <dependency> <groupId>net.oschina.j2cachegroupId> <artifactId>j2cache-spring-boot2-starterartifactId> <version>2.8.0-releaseversion> dependency> <dependency> <groupId>net.sf.ehcachegroupId> <artifactId>ehcacheartifactId> dependency>- 1
- 2
- 3
- 4
- 5
- 6
- 7
- 8
- 9
- 10
- 11
- 12
- 13
- 14
- 15
第一个 是 j2cache 的核心包 第二个是 j2cache与spring bott整合的工具
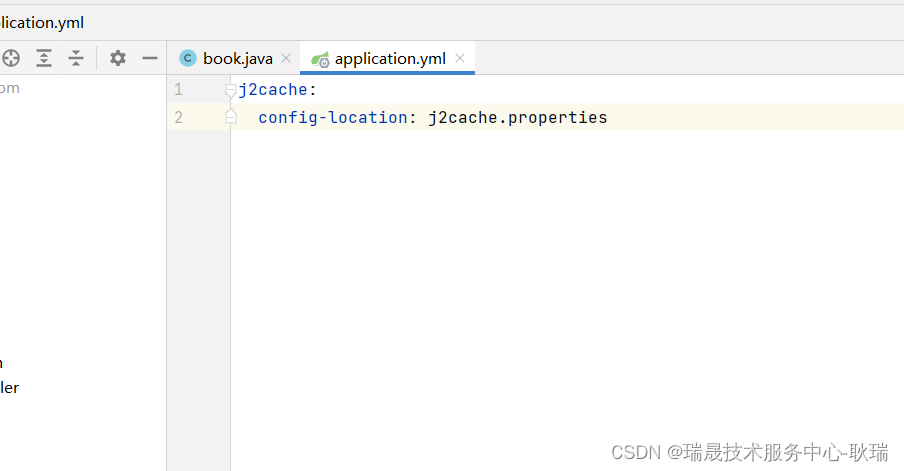
然后 最后是 ehcache的包 因为我们还需要用 ehcache配置文件 application.yml 加入如下内容
j2cache: config-location: j2cache.properties- 1
- 2
然后 我们在 resources 目录下创建一个文件 如下图

叫 j2cache.properties
这就是 j2cache 配置文件了然后 同目录 我们再创建一个 ehcache.xml
编写 ehcache的配置
编写代码如下<ehcache xmlns:xsi="http://www.w3.org/2001/XMLSchema-instance" xsi:noNamespaceSchemaLocation="https://www.ehcache.org/ehcache.xsd" updateCheck="false"> <diskStore path="D:\ehcache" /> <defaultCache eternal="false" diskPersistent="false" maxElementsInMemory="1000" overflowToDisk="false" timeToIdleSeconds="60" timeToLiveSeconds="60" memoryStoreEvictionPolicy="LRU" /> <cache name="smscode" eternal="false" diskPersistent="false" maxElementsInMemory="1000" overflowToDisk="false" timeToIdleSeconds="10" timeToLiveSeconds="10" memoryStoreEvictionPolicy="LRU" /> ehcache>- 1
- 2
- 3
- 4
- 5
- 6
- 7
- 8
- 9
- 10
- 11
- 12
- 13
- 14
- 15
- 16
- 17
- 18
- 19
- 20
- 21
- 22
- 23
- 24
- 25
- 26
- 27
- 28
- 29
- 30
- 31
- 32
- 33
- 34

j2cache.properties 编写代码如下# 1级缓存 j2cache.L1.provider_class = ehcache ehcache.configXml = ehcache.xml # 2级缓存 j2cache.L2.provider_class =net.oschina.j2cache.cache.support.redis.SpringRedisProvider j2cache.L2.config_section = redis redis.hosts = localhost:6379 # 1级缓存中的数据如何到达2级缓存 j2cache.broadcast =net.oschina.j2cache.cache.support.redis.SpringRedisPubSubPolicy- 1
- 2
- 3
- 4
- 5
- 6
- 7
- 8
- 9
- 10
- 11
简单说 就是 告诉它 你第一个用什么 我们用 ehcache 然后 第二级缓存 用 redis
然后 我们要在实现这个逻辑的 地方 条件装配一个 CacheChannel

@GetMapping("/get") public String getMin(){ String code2 = cacheChannel.get("book", "1").asString(); System.out.println(code2); return code2; } @RequestMapping(value = "/set", method = RequestMethod.POST) @ResponseBody public String setBook(@RequestBody book bindata) { cacheChannel.set("book","1",bindata.getName()); return bindata.getName(); }- 1
- 2
- 3
- 4
- 5
- 6
- 7
- 8
- 9
- 10
- 11
- 12
- 13
简单说 拿着我们的 cacheChannel 对象 调用 set方法
set接受三个参数 名称 key表示 数据
get 接受 名称 key表示 然后返回的 我们可以通过 asString 转为字符串类型
然后读出来

然后 我们启动项目

然后 我们先执行set

再来get

然后 我们到 redis 中 keys *
执行

这边 也明显查到了 -
相关阅读:
1600*A. Linova and Kingdom(DFS&优先队列&贪心)
SQL注入漏洞(postgresql注入)
递归经典例题 --- 青蛙跳台阶(图文详解)
nodejs+vue+ElementUi废品废弃资源回收系统
PKI/TLS 工具之CFSSL —— 筑梦之路
套接字、信号、管道、消息队列、信号量、共享内存的使用场景
一款云渗透工具 - Sea Moon
013-第二代上位机开发环境搭建
蔚来-软件开发工程师一面记录
python DevOps
- 原文地址:https://blog.csdn.net/weixin_45966674/article/details/137143992
