-
【Java项目介绍和界面搭建】拼图小游戏——打乱图片顺序
- 🍬 博主介绍
- 👨🎓 博主介绍:大家好,我是 hacker-routing ,很高兴认识大家~
- ✨主攻领域:【渗透领域】【应急响应】 【Java】 【VulnHub靶场复现】【面试分析】
- 🎉点赞➕评论➕收藏 == 养成习惯(一键三连)😋
- 🎉欢迎关注💗一起学习👍一起讨论⭐️一起进步📝文末有彩蛋
- 🙏作者水平有限,欢迎各位大佬指点,相互学习进步!
目录
拼图小游戏

练习
创建主界面1
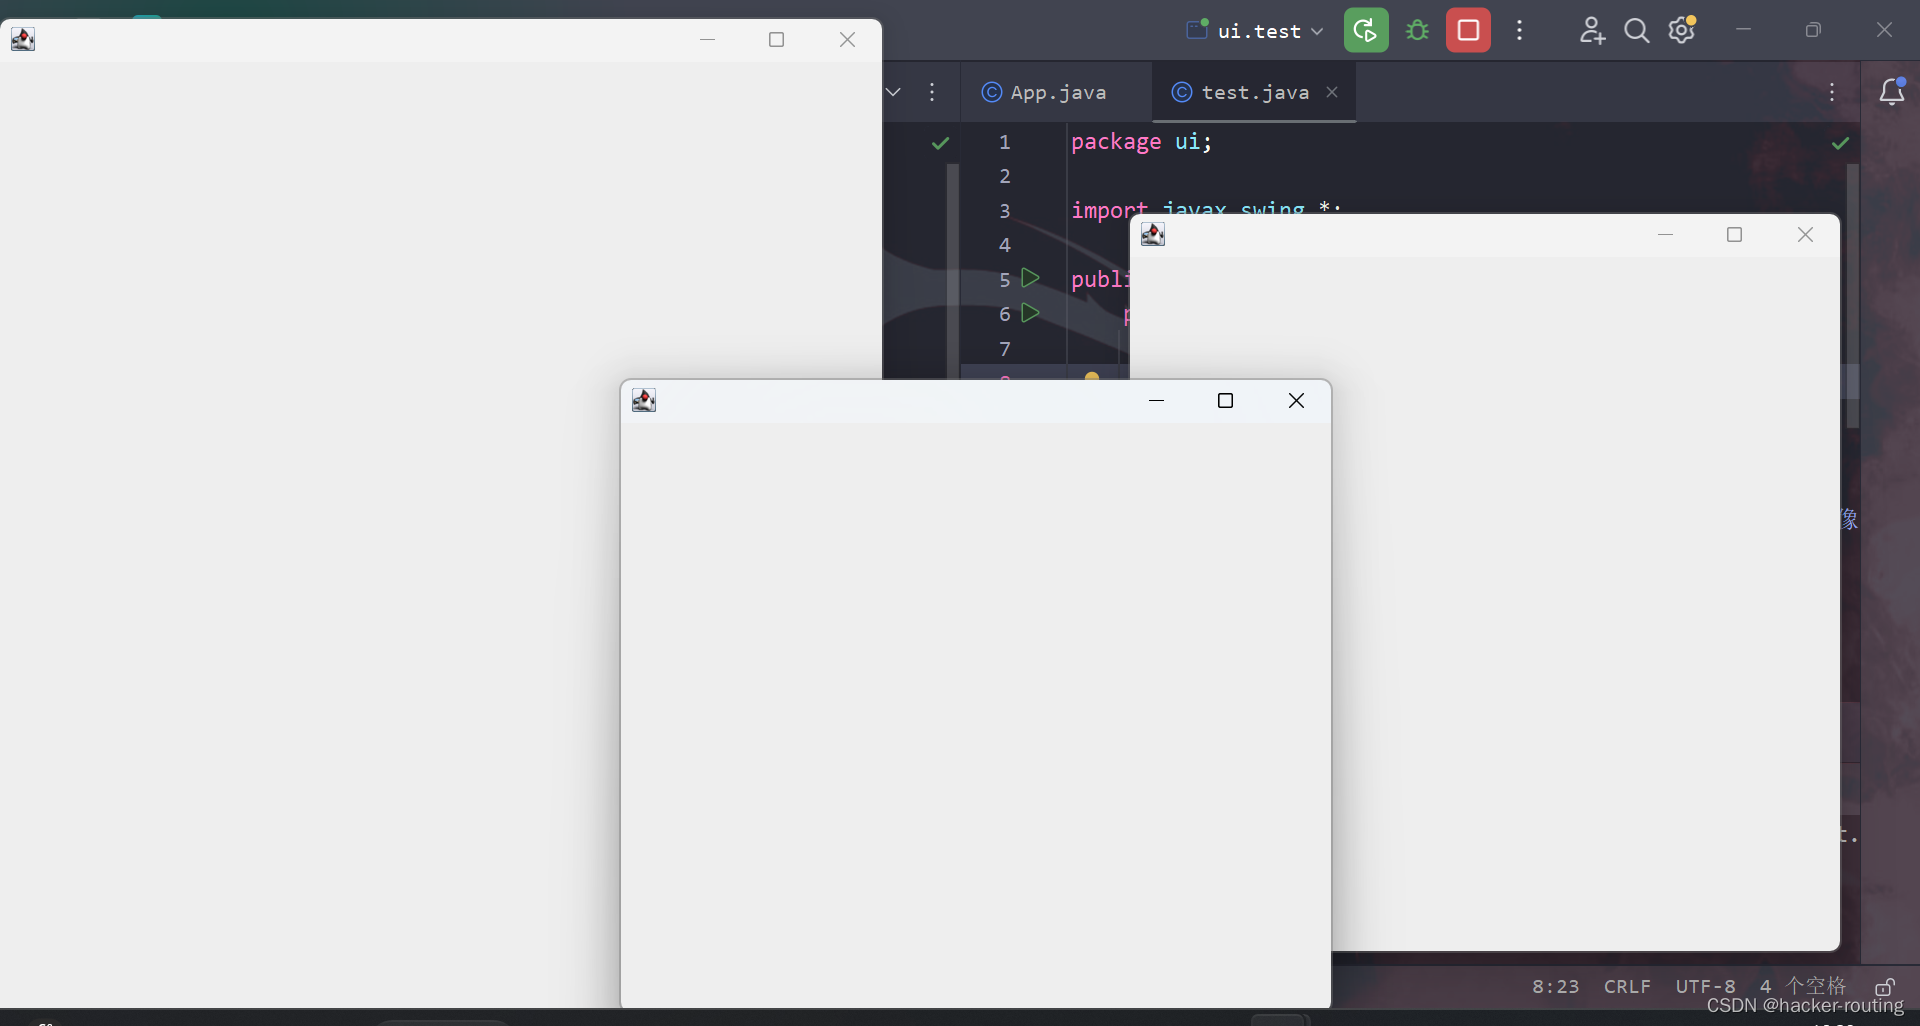
- 到idea中创建一个宽603像素,高680像素的游戏主界面
- 到idea中创建一个宽488像素,高430像素的登录界面
- 到idea中创建一个宽488像素,高500像素的注册界面
代码
测试类:test ,在这个测试类中,我们直接把三个Java用户图形化界面生成了,但是这样三个功能界面全部都写在同一个main函数里面,对于我们以后的代码修改很不方便。
所以我们这里进行修改下,分别写成单独的类中。
- package ui;
- import javax.swing.*;
- public class test {
- public static void main(String[] args) {
- //JFrame是JavaBean类描述界面的
- //属性 (宽 高) 行为
- //1.创建一个游戏的主界面
- JFrame gameJFrame = new JFrame();
- gameJFrame.setSize(603,680);//单位是像素
- gameJFrame.setVisible(true);
- //2.创建一个登陆界面
- JFrame loginJFrame = new JFrame();
- loginJFrame.setSize(488,430);
- loginJFrame.setVisible(true);
- //3.创建一个注册界面
- JFrame registerJFrame = new JFrame();
- registerJFrame.setSize(488,500);
- registerJFrame.setVisible(true);
- }
- }

注册界面:RegisterJFrame
- package ui;
- import javax.swing.*;
- public class RegisterJFrame extends JFrame {
- //跟相关注册界面的代码,都写里面
- public RegisterJFrame(){
- this.setSize(488,500);
- this.setVisible(true);
- }
- }
登录界面:loginJFrame
- package ui;
- import javax.swing.*;
- public class loginJFrame extends JFrame {
- //loginJFrame 表示登录界面
- //以后所以跟登录相关的代码,都写里面
- public loginJFrame(){
- this.setSize(488,430);
- this.setVisible(true);
- }
- }
游戏界面:GameJFrame
- package ui;
- import javax.swing.*;
- public class GameJFrame extends JFrame {
- //JFrame 界面,窗体
- //子类呢?也表示界面,窗体
- //规定:GameJFrame这个界面表示的就是游戏的主界面
- //以后跟游戏相关的所有逻辑都写在这个类中
- public GameJFrame(){
- this.setSize(603,680);//单位是像素
- this.setVisible(true);
- }
- }
程序的启动入口:App
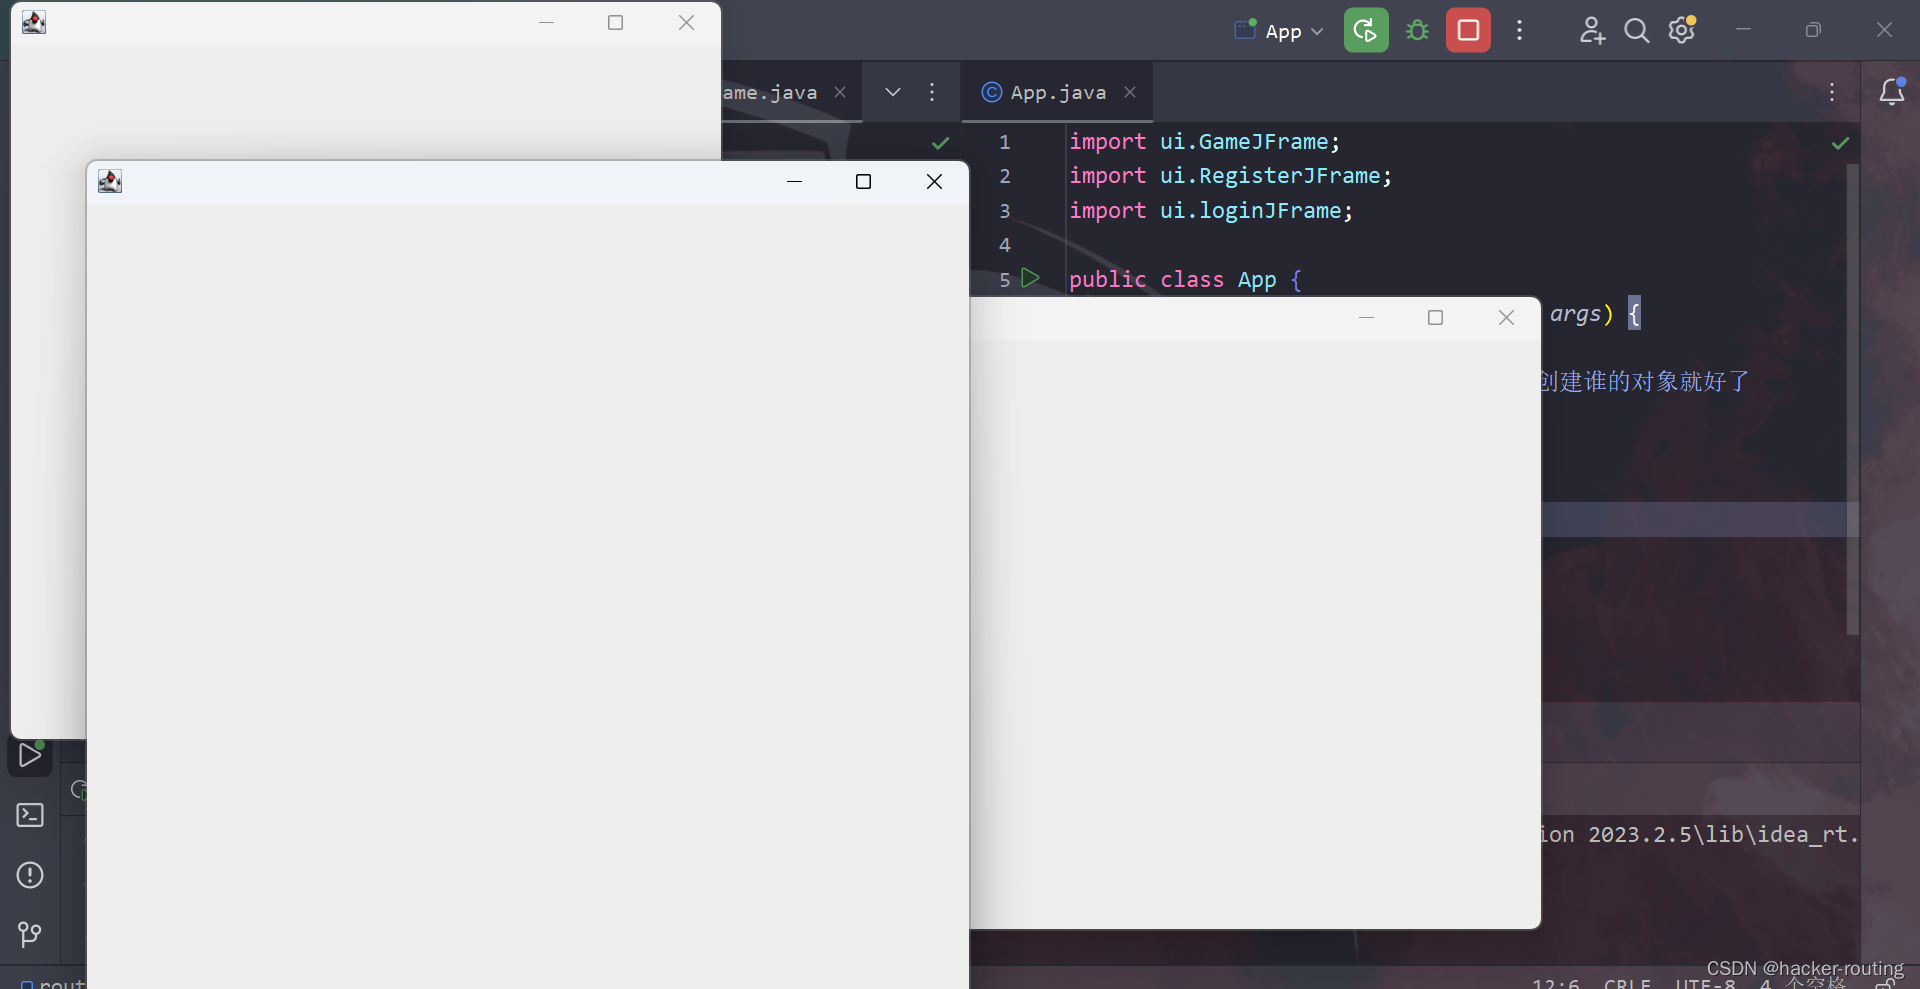
我们可以把test这个类删掉了,我们可以直接俄利用App这个程序的启动入口,我们需要启动哪个界面,我们直接创建谁就可以了。
- import ui.GameJFrame;
- import ui.RegisterJFrame;
- import ui.loginJFrame;
- public class App {
- public static void main(String[] args) {
- //表示程序的启动入口
- //如果我们想要开启一个界面,就创建谁的对象就好了
- new RegisterJFrame();
- new GameJFrame();
- new loginJFrame();
- }
- }

创建主界面2
简单初始化界面
- public RegisterJFrame(){
- this.setSize(488,500);
- //设置界面的标题
- this.setTitle("拼图 注册");
- //设置界面置顶
- this.setAlwaysOnTop(true);
- //设置界面居中
- this.setLocationRelativeTo(null);
- //设置关闭模式
- this.setDefaultCloseOperation(WindowConstants.EXIT_ON_CLOSE);
- //让界面显示出来
- this.setVisible(true);
菜单制作

在游戏界面中添加菜单

代码
游戏界面:GameJFrame
- package ui;
- import javax.swing.*;
- public class GameJFrame extends JFrame {
- //JFrame 界面,窗体
- //子类呢?也表示界面,窗体
- //规定:GameJFrame这个界面表示的就是游戏的主界面
- //以后跟游戏相关的所有逻辑都写在这个类中
- public GameJFrame(){
- //初始化界面
- initJFrame();
- //初始化菜单
- initJMenuBar();
- //让界面显示出来,最后写
- this.setVisible(true);
- }
- private void initJMenuBar() {
- //初始化菜单
- //创建整个的菜单对象
- JMenuBar jMenuBar = new JMenuBar();
- //创建菜单上面的两个选项的对象 (功能 关于我们)
- JMenu fuctionJMenu = new JMenu("功能");
- JMenu aboutJMenu = new JMenu("关于我们");
- //创建选项下面的条目对象
- JMenuItem replayItem = new JMenuItem("重新游戏");
- JMenuItem reloginItem = new JMenuItem("重新登录");
- JMenuItem closeItem = new JMenuItem("关闭游戏");
- JMenuItem accountItem = new JMenuItem("公众号");
- //将每一个选项下的条目添加到对应的选项中
- fuctionJMenu.add(replayItem);
- fuctionJMenu.add(reloginItem);
- fuctionJMenu.add(closeItem);
- aboutJMenu.add(accountItem);
- //将菜单里面的两个选项添加到菜单中
- jMenuBar.add(fuctionJMenu);
- jMenuBar.add(aboutJMenu);
- //给整个界面设置菜单
- this.setJMenuBar(jMenuBar);
- }
- private void initJFrame() {
- //设置界面的宽高
- this.setSize(603,680);//单位是像素
- //设置界面的标题
- this.setTitle("拼图单机版 v1.0");
- //设置界面置顶
- this.setAlwaysOnTop(true);
- //设置界面居中
- this.setLocationRelativeTo(null);
- //设置关闭模式
- this.setDefaultCloseOperation(WindowConstants.EXIT_ON_CLOSE);
- }
- }
测试类:App
- import ui.GameJFrame;
- import ui.RegisterJFrame;
- import ui.loginJFrame;
- public class App {
- public static void main(String[] args) {
- //表示程序的启动入口
- //如果我们想要开启一个界面,就创建谁的对象就好了
- new GameJFrame();
- // new RegisterJFrame();
- // new loginJFrame();
- }
- }
添加图片
- 默认添加图片显示在正中央

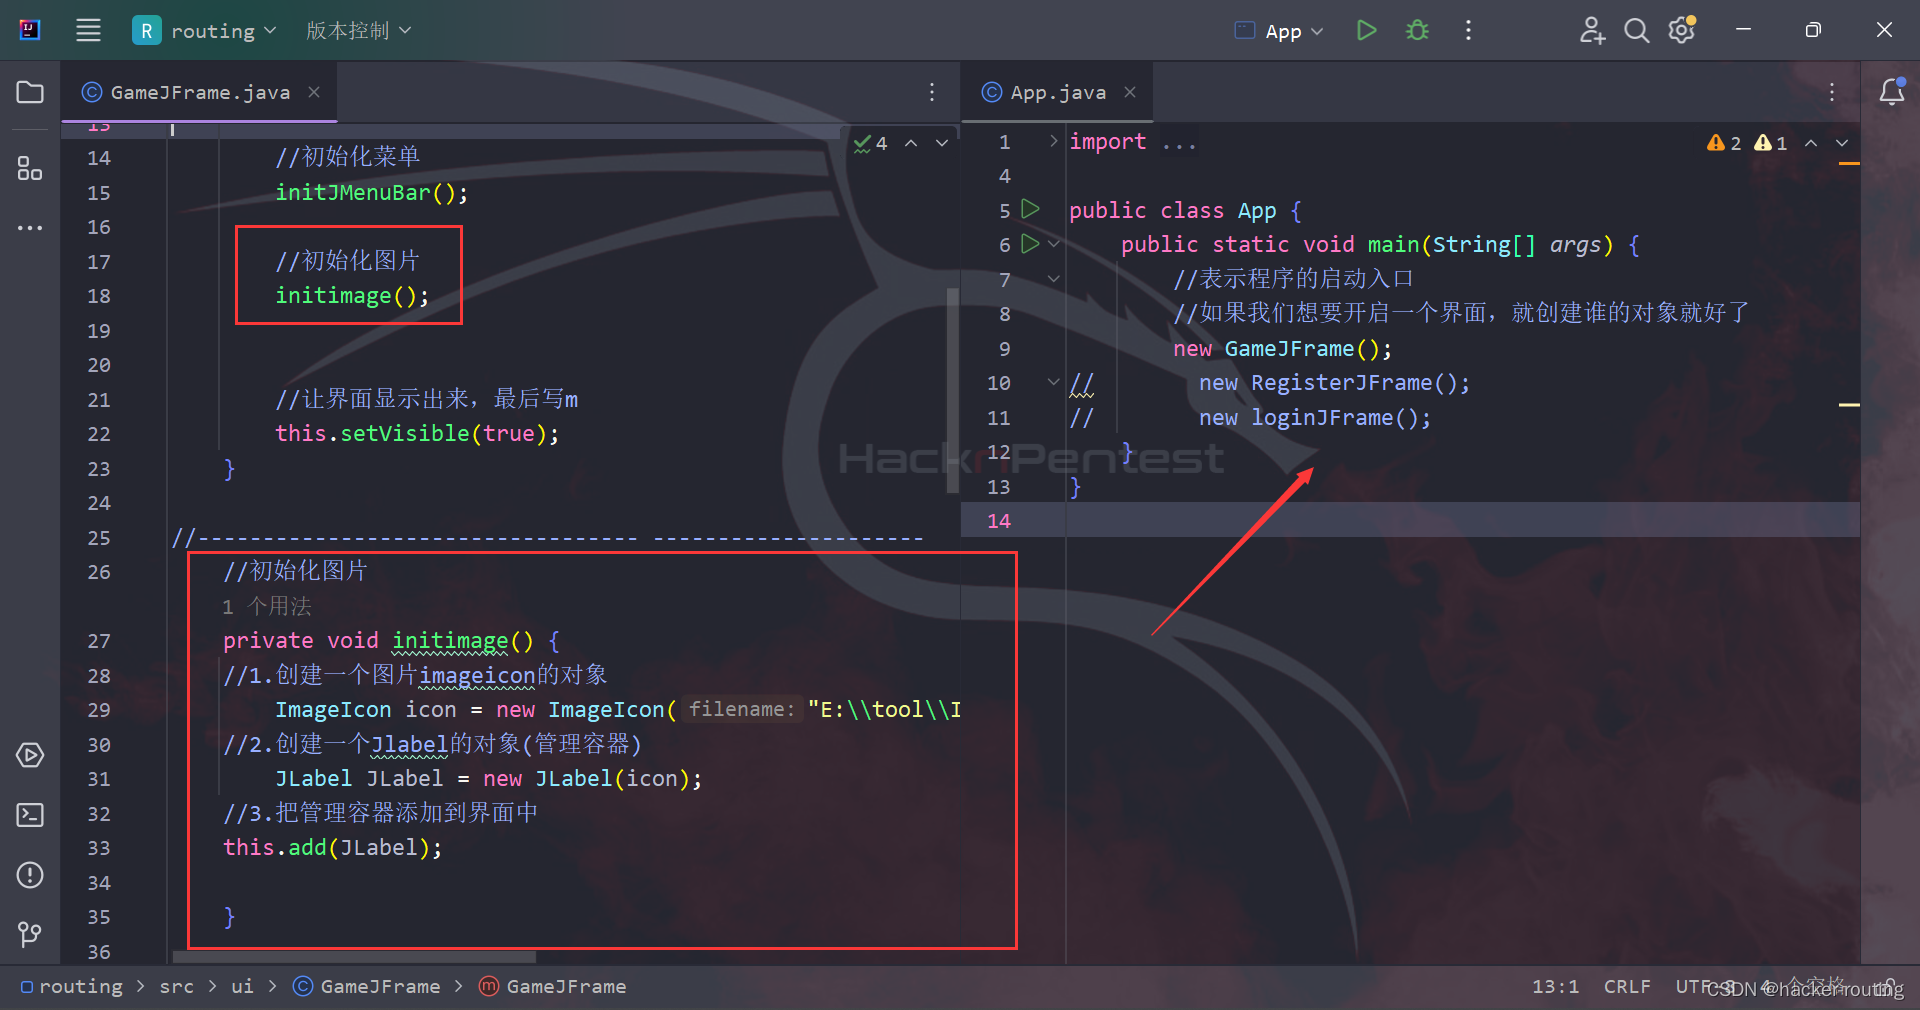
多写一个初始化图片

- package ui;
- import javax.swing.*;
- public class GameJFrame extends JFrame {
- //JFrame 界面,窗体
- //子类呢?也表示界面,窗体
- //规定:GameJFrame这个界面表示的就是游戏的主界面
- //以后跟游戏相关的所有逻辑都写在这个类中
- public GameJFrame(){
- //初始化界面
- initJFrame();
- //初始化菜单
- initJMenuBar();
- //初始化图片
- initimage();
- //让界面显示出来,最后写m
- this.setVisible(true);
- }
- //---------------------------------- ---------------------
- //初始化图片
- private void initimage() {
- //1.创建一个图片imageicon的对象
- ImageIcon icon = new ImageIcon("E:\\tool\\IDEA-java\\java代码\\routing\\image\\animal\\animal3\\3.jpg");
- //2.创建一个Jlabel的对象(管理容器)
- JLabel JLabel = new JLabel(icon);
- //3.把管理容器添加到界面中
- this.add(JLabel);
- }
- private void initJMenuBar() {
- //初始化菜单
- //创建整个的菜单对象
- JMenuBar jMenuBar = new JMenuBar();
- //创建菜单上面的两个选项的对象 (功能 关于我们)
- JMenu fuctionJMenu = new JMenu("功能");
- JMenu aboutJMenu = new JMenu("关于我们");
- //创建选项下面的条目对象
- JMenuItem replayItem = new JMenuItem("重新游戏");
- JMenuItem reloginItem = new JMenuItem("重新登录");
- JMenuItem closeItem = new JMenuItem("关闭游戏");
- JMenuItem accountItem = new JMenuItem("公众号");
- //将每一个选项下的条目添加到对应的选项中
- fuctionJMenu.add(replayItem);
- fuctionJMenu.add(reloginItem);
- fuctionJMenu.add(closeItem);
- aboutJMenu.add(accountItem);
- //将菜单里面的两个选项添加到菜单中
- jMenuBar.add(fuctionJMenu);
- jMenuBar.add(aboutJMenu);
- //给整个界面设置菜单
- this.setJMenuBar(jMenuBar);
- }
- private void initJFrame() {
- //设置界面的宽高
- this.setSize(603,680);//单位是像素
- //设置界面的标题
- this.setTitle("拼图单机版 v1.0");
- //设置界面置顶
- this.setAlwaysOnTop(true);
- //设置界面居中
- this.setLocationRelativeTo(null);
- //设置关闭模式
- this.setDefaultCloseOperation(WindowConstants.EXIT_ON_CLOSE);
- }
- }
app运行:
- import ui.GameJFrame;
- import ui.RegisterJFrame;
- import ui.loginJFrame;
- public class App {
- public static void main(String[] args) {
- //表示程序的启动入口
- //如果我们想要开启一个界面,就创建谁的对象就好了
- new GameJFrame();
- // new RegisterJFrame();
- // new loginJFrame();
- }
- }

游戏主界面添加组件

代码
- //初始化图片
- private void initimage() {
- //外循环 --把内循环重复执行了4次
- int number = 1;
- for (int i = 0; i < 4; i++) {
- //内循环 --表示在一行添加4张图片
- for (int j = 0; j < 4; j++) {
- //1.创建一个Jlabel的对象(管理容器)
- JLabel JLabel = new JLabel(new ImageIcon("E:\\\\tool\\\\IDEA-java\\\\java代码\\\\routing\\\\image\\\\animal\\\\animal3\\\\" + number +".jpg"));
- //2.指定图片的位置
- JLabel.setBounds(105 * i,105 * j,105,105);
- //3.把管理容器添加到界面中
- this.getContentPane().add(JLabel);
- number++;
- }
- }
App 运行
- import ui.GameJFrame;
- import ui.RegisterJFrame;
- import ui.loginJFrame;
- public class App {
- public static void main(String[] args) {
- //表示程序的启动入口
- //如果我们想要开启一个界面,就创建谁的对象就好了
- new GameJFrame();
- // new RegisterJFrame();
- // new loginJFrame();
- }
- }

打乱图片顺序

练习
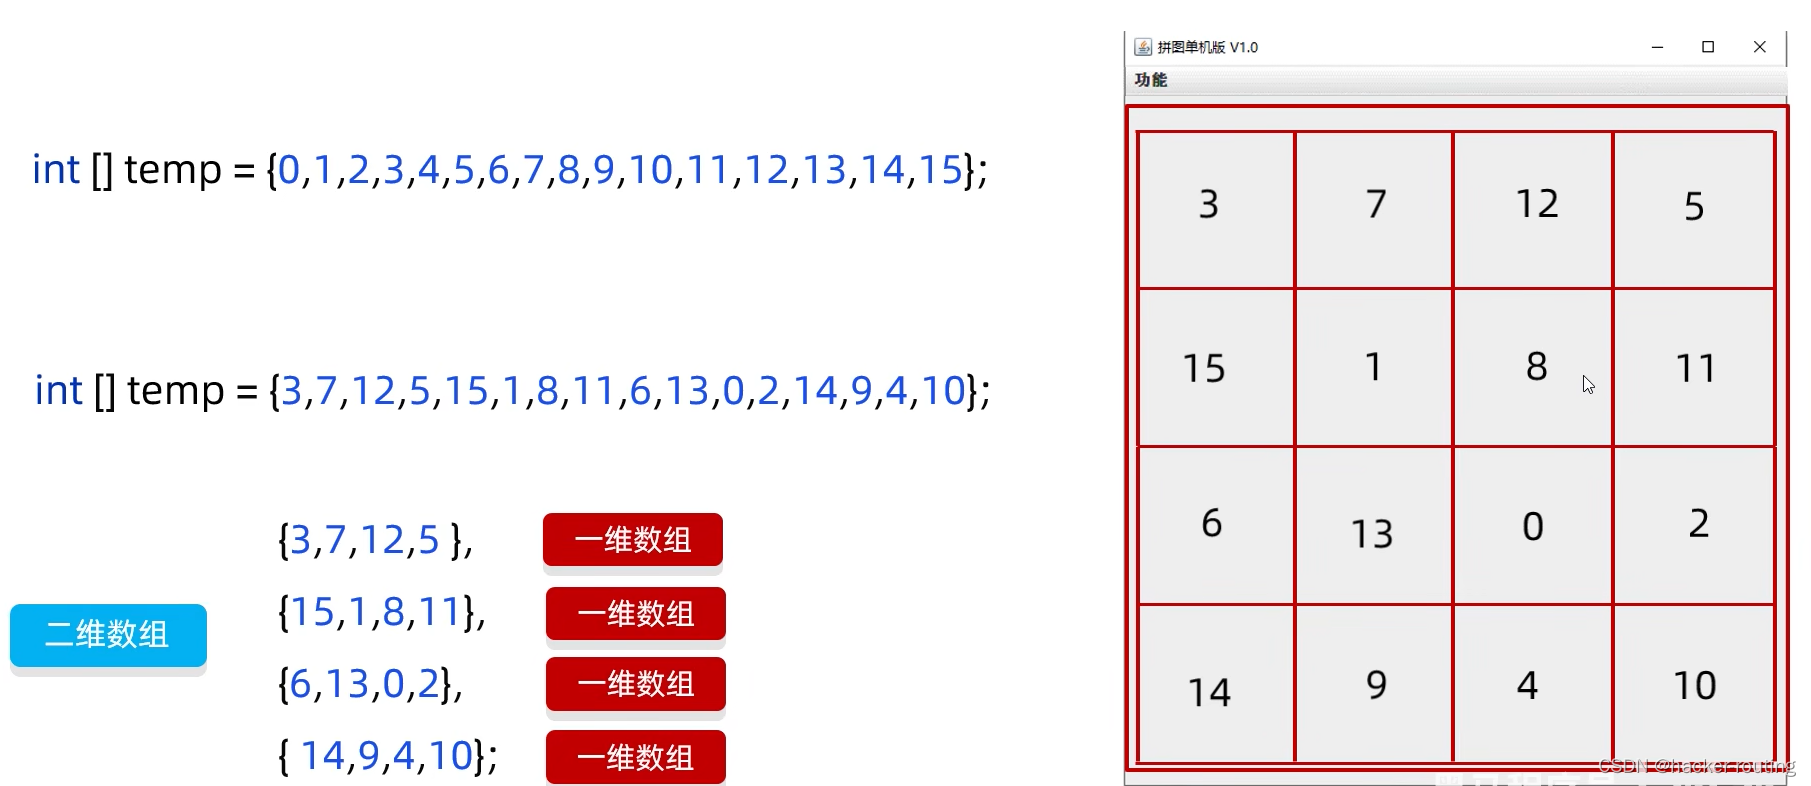
打乱一维数组中的数据
int[] tempArr={0,1,2,3,4,5,6,7,8,9,10,11,12,13,14,15};
要求:打乱一维数组中的数据,并按照4个一组的方式添加到二维数组中。
解法一:
- package test;
- import java.util.Random;
- public class test1 {
- public static void main(String[] args) {
- //1.定义一个一维数组
- int[] temArr = {0,1,2,3,4,5,6,7,8,9,10,11,12,13,14,15};
- //2.打乱数组中的顺序
- //遍历数组,得到每一个元素,拿着每一个元素跟随机索引上的数据进行交换
- Random r = new Random();
- for (int i = 0; i < temArr.length; i++) {
- //获取到随机索引
- int index = r.nextInt(temArr.length);
- //拿着每一个元素跟随机索引上的数据进行交换
- int temp = temArr[i];
- temArr[i] = temArr[index];
- temArr[index] = temp;
- }
- //3.遍历数组
- for (int i = 0; i < temArr.length; i++) {
- System.out.print(temArr[i] + " ");
- }
- System.out.println();
- //4.创建一个二维数组
- int[][] data = new int[4][4];
- //5.给二维数组添加数据
- //解法一:
- //遍历一维数组tempArr得到每一个元素,把每一个元素依次添加到数组当中
- for (int i = 0; i < temArr.length; i++) {
- data[i / 4][i % 4] = temArr[i];
- }
- //遍历二维数组
- for (int i = 0; i < data.length; i++) {
- for (int j = 0; j < data[i].length; j++) {
- System.out.print(data[i][j] + " ");
- }
- System.out.println();
- }
- }
- }
解法二:
- package test;
- import java.util.Random;
- public class test2 {
- public static void main(String[] args) {
- //1.定义一个一维数组
- int[] temArr = {0,1,2,3,4,5,6,7,8,9,10,11,12,13,14,15};
- //2.打乱数组中的顺序
- //遍历数组,得到每一个元素,拿着每一个元素跟随机索引上的数据进行交换
- Random r = new Random();
- for (int i = 0; i < temArr.length; i++) {
- //获取到随机索引
- int index = r.nextInt(temArr.length);
- //拿着每一个元素跟随机索引上的数据进行交换
- int temp = temArr[i];
- temArr[i] = temArr[index];
- temArr[index] = temp;
- }
- //3.遍历数组
- for (int i = 0; i < temArr.length; i++) {
- System.out.print(temArr[i] + " ");
- }
- System.out.println();
- //4.创建一个二维数组
- int[][] data = new int[4][4];
- //5.给二维数组添加数据
- //解法二:
- //遍历二维数组,给里面的每一个数据赋值
- int index = 0;
- for (int i = 0; i < data.length; i++) {
- for (int j = 0; j < data[i].length; j++) {
- data[i][j] = temArr[index];
- index++;
- }
- }
- //遍历二维数组
- for (int i = 0; i < data.length; i++) {
- for (int j = 0; j < data[i].length; j++) {
- System.out.print(data[i][j] + " ");
- }
- System.out.println();
- }
- }
- }

在GameJFrame编写
- package ui;
- import javax.swing.*;
- import java.util.Random;
- public class GameJFrame extends JFrame {
- //JFrame 界面,窗体
- //子类呢?也表示界面,窗体
- //规定:GameJFrame这个界面表示的就是游戏的主界面
- //以后跟游戏相关的所有逻辑都写在这个类中
- //创建一个二维数组
- //目的:加载图片
- int[][] data = new int[4][4];
- public GameJFrame(){
- //初始化界面
- initJFrame();
- //初始化菜单
- initJMenuBar();
- //初始化数据(打乱)
- initdata();
- //初始化图片(根据打乱之后的数据结果加载图片)
- initimage();
- //让界面显示出来,最后写m
- this.setVisible(true);
- }
- //---------------------------------- ---------------------
- private void initdata() {
- //1.定义一个一维数组
- int[] temArr = {0,1,2,3,4,5,6,7,8,9,10,11,12,13,14,15};
- //2.打乱数组中的顺序
- //遍历数组,得到每一个元素,拿着每一个元素跟随机索引上的数据进行交换
- Random r = new Random();
- for (int i = 0; i < temArr.length; i++) {
- //获取到随机索引
- int index = r.nextInt(temArr.length);
- //拿着每一个元素跟随机索引上的数据进行交换
- int temp = temArr[i];
- temArr[i] = temArr[index];
- temArr[index] = temp;
- }
- //3.给二维数组添加数据
- //遍历一维数组tempArr得到每一个元素,把每一个元素依次添加到数组当中
- for (int i = 0; i < temArr.length; i++) {
- data[i / 4][i % 4] = temArr[i];
- }
- }
- //初始化图片
- private void initimage() {
- //外循环 --把内循环重复执行了4次
- for (int i = 0; i < 4; i++) {
- //内循环 --表示在一行添加4张图片
- for (int j = 0; j < 4; j++) {
- //获取当前要加载图片的序号
- int num = data[i][j];
- //创建一个Jlabel的对象(管理容器)
- JLabel JLabel = new JLabel(new ImageIcon("E:\\\\tool\\\\IDEA-java\\\\java代码\\\\routing\\\\image\\\\animal\\\\animal3\\\\" + num +".jpg"));
- //指定图片的位置
- JLabel.setBounds(105 * i,105 * j,105,105);
- //把管理容器添加到界面中
- this.getContentPane().add(JLabel);
- }
- }
- //------------------------------------------------------
- }
- private void initJMenuBar() {
- //初始化菜单
- //创建整个的菜单对象
- JMenuBar jMenuBar = new JMenuBar();
- //创建菜单上面的两个选项的对象 (功能 关于我们)
- JMenu fuctionJMenu = new JMenu("功能");
- JMenu aboutJMenu = new JMenu("关于我们");
- //创建选项下面的条目对象
- JMenuItem replayItem = new JMenuItem("重新游戏");
- JMenuItem reloginItem = new JMenuItem("重新登录");
- JMenuItem closeItem = new JMenuItem("关闭游戏");
- JMenuItem accountItem = new JMenuItem("公众号");
- //将每一个选项下的条目添加到对应的选项中
- fuctionJMenu.add(replayItem);
- fuctionJMenu.add(reloginItem);
- fuctionJMenu.add(closeItem);
- aboutJMenu.add(accountItem);
- //将菜单里面的两个选项添加到菜单中
- jMenuBar.add(fuctionJMenu);
- jMenuBar.add(aboutJMenu);
- //给整个界面设置菜单
- this.setJMenuBar(jMenuBar);
- }
- private void initJFrame() {
- //设置界面的宽高
- this.setSize(603,680);//单位是像素
- //设置界面的标题
- this.setTitle("拼图单机版 v1.0");
- //设置界面置顶
- this.setAlwaysOnTop(true);
- //设置界面居中
- this.setLocationRelativeTo(null);
- //设置关闭模式
- this.setDefaultCloseOperation(WindowConstants.EXIT_ON_CLOSE);
- //取消默认的居中位置,只有取消了才会按照XY轴的形式添加组件
- this.setLayout(null);
- }
- }
App 测试
- import ui.GameJFrame;
- import ui.RegisterJFrame;
- import ui.loginJFrame;
- public class App {
- public static void main(String[] args) {
- //表示程序的启动入口
- //如果我们想要开启一个界面,就创建谁的对象就好了
- new GameJFrame();
- // new RegisterJFrame();
- // new loginJFrame();
- }
- }
现在就每次运行的结果都不一样了

-
相关阅读:
在LEAP系统中,如果我想预测中国天然气需求,除了考虑人口、城镇化率、GDP等五个因素还需要考虑其他因素吗?
mac上使用虚拟机vm, 里面的镜像挂起会占用电脑的内存吗, 挂起和关机的区别是什么, 会影响正常电脑的内存和硬盘使用吗
Impala解决cast导致UDF ERROR: Decimal expression overflowed
Fastflow——基于golang的轻量级工作流框架
计算机毕业设计:基于HTML学校后台用户登录界面模板源码
STM32-CAN
python实现梯度距离平方反比法GIDS
硬件视频会议升级方案
Spring七大模块详解
TinyOs操作系统---第3章 任务中断间的共享资源保护
- 原文地址:https://blog.csdn.net/SENMINGya/article/details/136412067