-
opencv判断灰化情况
目的
先说说理论:
在图像处理中,用RGB三个分量(R:Red,G:Green,B:Blue),即红、绿、蓝三原色来表示真彩色,R分量,G分量,B分量的取值范围均为0~255,比如电脑屏幕上的一个红色的像素点的三个分量的值分别为:255,0,0。
那么什么叫图片的灰度化呢?其实很简单,就是让像素点矩阵中的每一个像素点都满足下面的关系:R=G=B(就是红色变量的值,绿色变量的值,和蓝色变量的值,这三个值相等,“=”的意思不是程序语言中的赋值,是数学中的相等),此时的这个值叫做灰度值。
这是理论,实际在Opencv中,灰度化就是单通道图了,因为RGB都一样了,没必要都存储了。
再说说具体目的:
目的就是判断一个图片是否灰化了。
网上,包括,AI上很多方法都不行。分析
先把一张简单的图片进行灰化操作:
void productGrayImage() { cv::Mat image(10, 10, CV_8UC3); // 遍历图像的每个像素 for (int x = 0; x < image.rows; ++x) { for (int y = 0; y < image.cols; ++y) { // 获取像素的指针 cv::Vec3b& pixel = image.at<cv::Vec3b>(x, y); // 为BGR通道分别赋值 pixel[0] = 255; // 蓝色通道 (B) pixel[1] = 9; // 绿色通道 (G) pixel[2] = 10; // 红色通道 (R) } } image.at<cv::Vec3b>(0, 0)[0] = 255; image.at<cv::Vec3b>(0, 0)[1] = 255; image.at<cv::Vec3b>(0, 0)[2] = 255; printf("image.type=%d\n", image.type()); // 显示图像 cv::imshow("Colored Image", image); cv::cvtColor(image, image, cv::COLOR_BGR2GRAY); printf("image.type=%d\n", image.type()); for (int x = 0; x < image.rows; ++x) { for (int y = 0; y < image.cols; ++y) { // 获取像素的指针 int pixel = image.at<uchar>(x, y); printf("%d ",pixel); } printf("\n"); } // cv::imwrite("gray.jpg", image); cv::imshow("gray Image", image); cv::imwrite("gray.bmp", image); }- 1
- 2
- 3
- 4
- 5
- 6
- 7
- 8
- 9
- 10
- 11
- 12
- 13
- 14
- 15
- 16
- 17
- 18
- 19
- 20
- 21
- 22
- 23
- 24
- 25
- 26
- 27
- 28
- 29
- 30
- 31
- 32
- 33
- 34
- 35
- 36
运行情况:

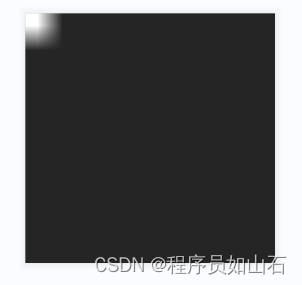
生成gray.bmp的情况:

下面判断是否灰化:
void judgeGrayImageInfo(QString imagePath) { //cv::Mat image = cv::imread(imagePath.toStdString(), cv::IMREAD_GRAYSCALE); // 加载图像 QImage image = QImage(imagePath); qDebug()<<"image.colorCount="<<image.colorCount(); qDebug()<<"image.format="<<image.format(); cv::Mat mat = cv::imread(imagePath.toStdString()); // 加载图像 qDebug()<<"mat.type="<<mat.type(); for (int i = 0; i < mat.rows; i++) { for (int j = 0; j < mat.cols; j++) { if(mat.type() == 16) { cv::Vec3b pixel = mat.at<cv::Vec3b>(i, j); printf("%d,%d,%d ", pixel[0], pixel[1], pixel[2]); } else { int pixel = mat.at<uchar>(i, j); printf("%d ", pixel); } } printf("\n"); } if (isGrayImage(mat)) { std::cout << "The image is grayscale." << std::endl; } else { std::cout << "The image is not grayscale." << std::endl; } cv::imshow("gray Image", mat); cv::Mat mats[3]; split(mat,mats); cv::imshow("gray gray Image", mat); mat = mats[0]; int uniqueColors = cv::countNonZero(mat); qDebug()<<"uniqueColors="<<uniqueColors; qDebug()<<"mat.type="<<mat.type(); if(mat.type() == 0) { mat.at<uchar>(0, 1) = 255; mat.at<uchar>(0, 2) = 255; } for (int i = 0; i < mat.rows; i++) { for (int j = 0; j < mat.cols; j++) { if(mat.type() == 16) { cv::Vec3b pixel = mat.at<cv::Vec3b>(i, j); printf("%d,%d,%d ", pixel[0], pixel[1], pixel[2]); } else { int pixel = mat.at<uchar>(i, j); printf("%d ", pixel); } } printf("\n"); } }- 1
- 2
- 3
- 4
- 5
- 6
- 7
- 8
- 9
- 10
- 11
- 12
- 13
- 14
- 15
- 16
- 17
- 18
- 19
- 20
- 21
- 22
- 23
- 24
- 25
- 26
- 27
- 28
- 29
- 30
- 31
- 32
- 33
- 34
- 35
- 36
- 37
- 38
- 39
- 40
- 41
- 42
- 43
- 44
- 45
- 46
- 47
- 48
- 49
- 50
- 51
- 52
- 53
- 54
- 55
- 56
- 57
- 58
- 59
- 60
- 61
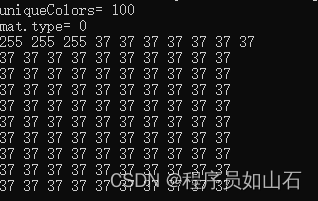
运行情况:


可以见得,能正确判断是否灰化
总结
灰化是怎么判断的呢?
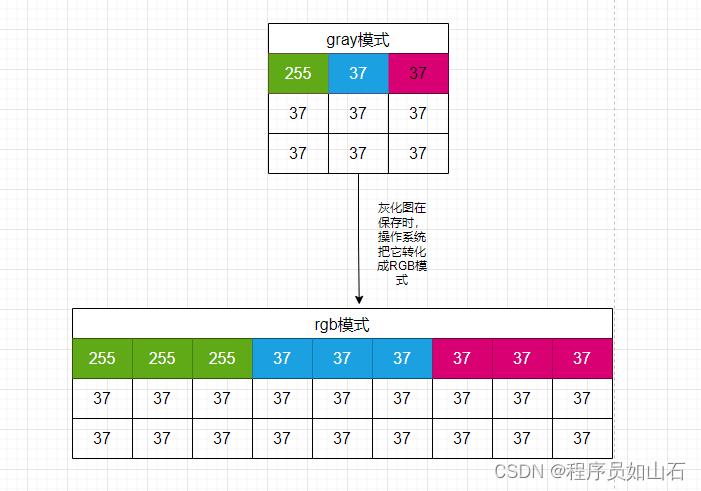
灰化图在opencv中是单通道图,但保存时,会转化成RGB模式的图。
所以,再加载,通过通道数,判断是否是灰度图,这样是不对的。
解决方法:
首先,一个图片在保存时,其实是以RGB模式保存的,这也是操作系统默认的保存方式。
那一个灰化图在保存时,会默认转化为RGB模式,怎么转化,其就是把一个灰化值重复为三份,分别对应RGB,这样就可以了。
如图所示:

知道这个情况了:
就知道如何判断一个图是否灰化了:
那就是:R=G=B就可以了。
具体代码见:
https://download.csdn.net/download/maokexu123/88862864 -
相关阅读:
修改huggingface的缓存路径
HTML <th> 标签
Qt OpenGL 2D图像文字
软件测试/测试开发丨利用人工智能ChatGPT自动生成架构图
第06章 移动端微量神经网络模型
(算法设计与分析)第四章贪心算法-第一节:贪心算法概述
Codeforces Round #802 (Div. 2)
UE5.1_自定义配置文件读取
【全志T113-S3_100ask】14-1 linux采集usb摄像头实现拍照(FFmpeg、fswebcam)
.Net 8.0 下的新RPC,IceRPC之接口定义语言 [Slice] VS [Protobuf]
- 原文地址:https://blog.csdn.net/maokexu123/article/details/136237831