-
VScode 调试 linux内核
VScode 调试 linux内核
这里调试的 linux 内核是通过 Linux+SD卡(rootfs)运行的内核
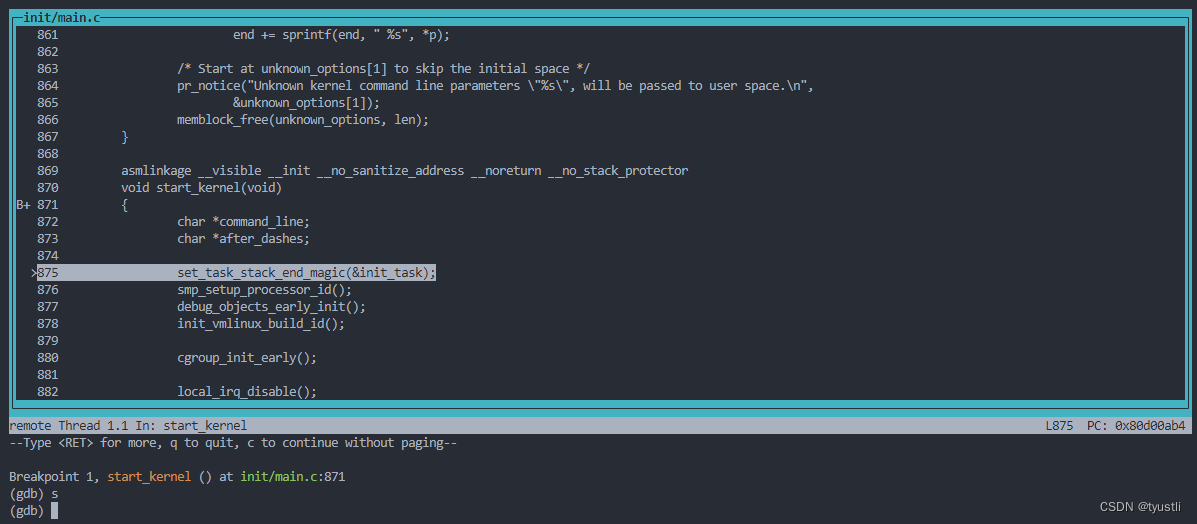
gdb 命令行调试
编辑
/home/tyustli/.gdbinit文件,参考 【GDB】 .gdbinit 文件set auto-load safe-path /home/tyustli/code/open_source/kernel/linux-6.5.7/.gdbinit- 1
在 linux 源码项目的根目录新建
.gdbinit文件target remote localhost:1234 b start_kernel layout src c- 1
- 2
- 3
- 4
先启动 linux 内核,让其等待 GDB 连接
# 启动之后等待 GDB 连接 sudo qemu-system-arm -M vexpress-a9 -m 512M -kernel arch/arm/boot/zImage -dtb arch/arm/boot/dts/arm/vexpress-v2p-ca9.dtb -nographic \ -append "root=/dev/mmcblk0 rw console=ttyAMA0" -sd /home/tyustli/code/open_source/busybox/rootfs.ext3 -s -S # -dtb 指定设备树,否则会失败- 1
- 2
- 3
- 4
- 5
在编译 linux 的当前路径输入
arm-none-linux-gnueabihf-gdb vmlinux -se vmlinux- 1
如果没有设置
/home/tyustli/.gdbinit文件,那么对应的命令为arm-none-linux-gnueabihf-gdb vmlinux -se vmlinux -x .gdbinit- 1
即指定 .gdbinit 的文件为当前路径。需要注意的是,如果指定了
/home/tyustli/.gdbinit文件,就不能加-x .gdbinit调试界面信息

VScode 调试
要想调试 kernel 只需要再添加一个 kernel 的配置即可
{ "version": "0.2.0", "configurations": [ { // qemu 裸机调试配置 "name": "qemu_bare", "type": "cppdbg", "request": "launch", "program": "${workspaceFolder}/qemu_code/bare/example/0020_mmu/bsp.elf", "args": [], "stopAtEntry": true, "cwd": "${workspaceFolder}/qemu_code/bare", "environment": [], "externalConsole": false, "MIMode": "gdb", "miDebuggerPath": "/home/tyustli/cross_tool/gcc-arm-10.3-2021.07-x86_64-arm-none-linux-gnueabihf/bin/arm-none-linux-gnueabihf-gdb", "miDebuggerServerAddress": "localhost:1234", }, { // u-boot 调试配置 "name": "u-boot", "type": "cppdbg", "request": "launch", "program": "${workspaceFolder}/open_source/u-boot/u-boot", "args": [], "stopAtEntry": true, "cwd": "${workspaceFolder}/open_source/u-boot", "environment": [], "externalConsole": false, "MIMode": "gdb", "miDebuggerPath": "/home/tyustli/cross_tool/gcc-arm-10.3-2021.07-x86_64-arm-none-linux-gnueabihf/bin/arm-none-linux-gnueabihf-gdb", "miDebuggerServerAddress": "localhost:1234", }, { // linux kernel 调试配置 "name": "linux_kernel", "type": "cppdbg", "request": "launch", "program": "${workspaceFolder}/open_source/kernel/linux-6.5.7/vmlinux", "args": [], "stopAtEntry": true, "cwd": "${workspaceFolder}/open_source/kernel/linux-6.5.7", "environment": [], "externalConsole": false, "MIMode": "gdb", "miDebuggerPath": "/home/tyustli/cross_tool/gcc-arm-10.3-2021.07-x86_64-arm-none-linux-gnueabihf/bin/arm-none-linux-gnueabihf-gdb", "miDebuggerServerAddress": "localhost:1234", } ] }- 1
- 2
- 3
- 4
- 5
- 6
- 7
- 8
- 9
- 10
- 11
- 12
- 13
- 14
- 15
- 16
- 17
- 18
- 19
- 20
- 21
- 22
- 23
- 24
- 25
- 26
- 27
- 28
- 29
- 30
- 31
- 32
- 33
- 34
- 35
- 36
- 37
- 38
- 39
- 40
- 41
- 42
- 43
- 44
- 45
- 46
- 47
- 48
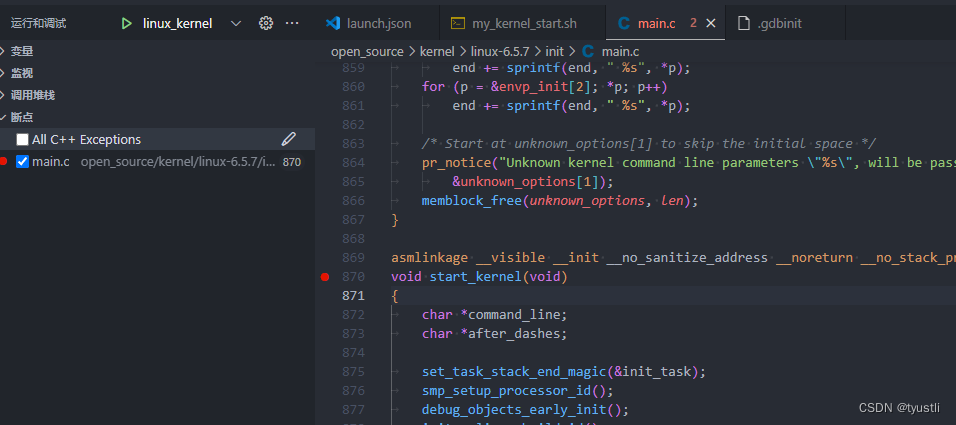
有一点需要注意,如果使用 vscode 调试,就不能指定
/home/tyustli/.gdbinit文件,或者将/home/tyustli/code/open_source/kernel/linux-6.5.7/.gdbinit文件的内容清空先在
start_kernel打好断点

先启动 linux 内核,让其等待 GDB 连接# 启动之后等待 GDB 连接 sudo qemu-system-arm -M vexpress-a9 -m 512M -kernel arch/arm/boot/zImage -dtb arch/arm/boot/dts/arm/vexpress-v2p-ca9.dtb -nographic \ -append "root=/dev/mmcblk0 rw console=ttyAMA0" -sd /home/tyustli/code/open_source/busybox/rootfs.ext3 -s -S- 1
- 2
- 3
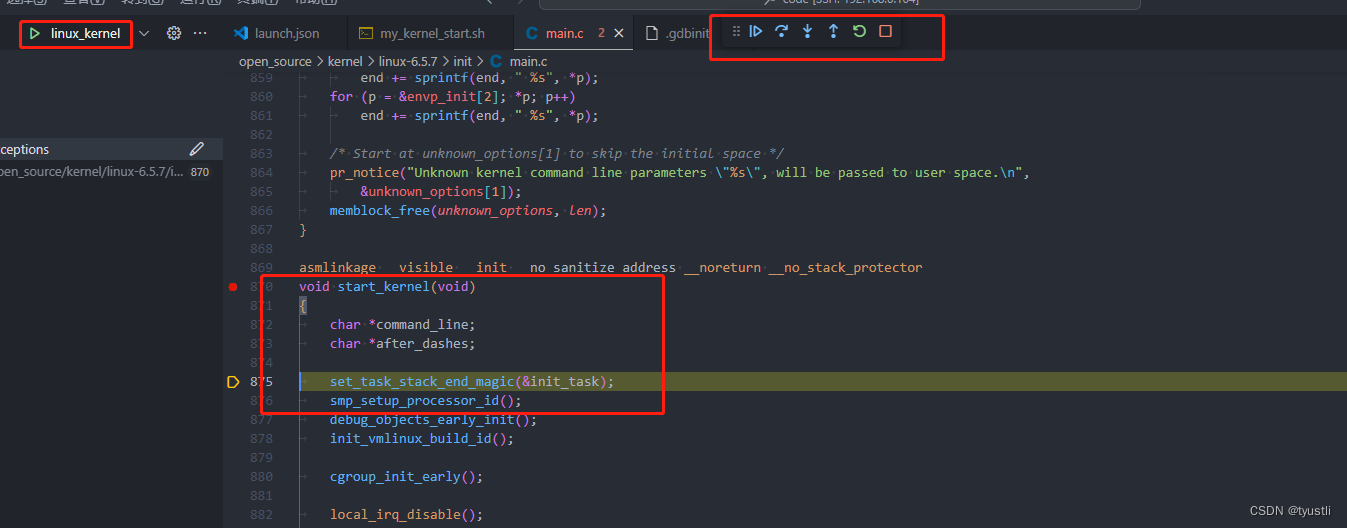
启动调试

-
相关阅读:
测试/开发程序员有8大好处,自我实现和自我超越......
软考高项--第一章项目整体管理
导入(excel)+导出(excel)+国际化(i18n)+
Apache的安装与目录结构详细解说
Java集合框架
crossover23.6闪亮登场发布啦,2023最新功能解析
杨表
Python API+Postman+jmeter
C++ Qt开发:MdiArea多窗体组件
面试问JUC(java.util.concurrent)的常见类你能答出来几句?
- 原文地址:https://blog.csdn.net/tyustli/article/details/134096376
