-
HTML选项框的设计以及根据不同选项的值对应不同的事件
HTML选项框的设计
在前端页面的设计中,
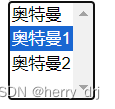
多选框的设计用select标签完成实现- 全部选项都显示的选项框
<form> <select multiple="multiple"> <option>option> <option>奥特曼option> <option>奥特曼1option> <option>奥特曼2option> select> form>- 1
- 2
- 3
- 4
- 5
- 6
- 7
- 8
效果:

- 展示只有一个块,选择通过下拉列表选择
<select name="fruit"> <option value="apple">苹果option> <option value="banana">香蕉option> <option value="orange">橙子option> select>- 1
- 2
- 3
- 4
- 5
效果图:

JS根据不同的选项框对应出不同的事件
- 先找对
select标签对应的元素 - 再找到
select标签被选中的索引 - 然后根据索引和标签进行设置不同的
事件 - 简易流程:
var mySelect = document.getElementById("testSelect"); //定位id(获取select) var index = mySelect.selectedIndex; //选中索引(选取select中option选中的第几个) var text = mySelect.options[index].text; //获取选中文本 var value = mySelect.options[index].value; //获取选中值 mySelect.options[index].selected //判断select中的某个option是否选中,true为选中,false为未选中- 1
- 2
- 3
- 4
- 5
一个实际例子:
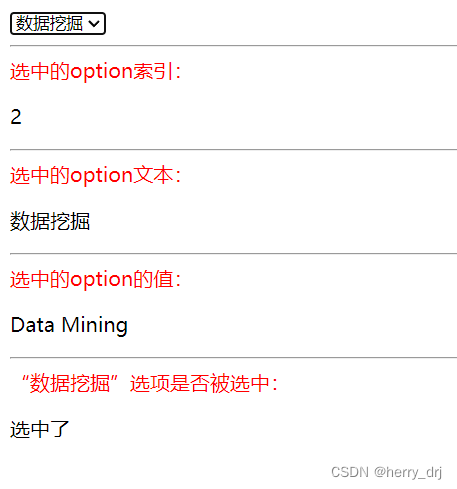
<html> <head> <script> function sel() { var mySelect = document.getElementById("testSelect"); //定位id(获取select) var index = mySelect.selectedIndex; //选中索引(选取select中option选中的第几个) var text = mySelect.options[index].text; //获取选中文本,即option标签对之间的文字 var value = mySelect.options[index].value; //获取选中值 document.getElementById("show_index").innerHTML = index; document.getElementById("show_text").innerHTML = text; document.getElementById("show_value").innerHTML = value; if (mySelect.options[2].selected) { //注意index是从0开始的 document.getElementById("show_isSelected").innerHTML = "选中了"; } else { document.getElementById("show_isSelected").innerHTML = "没选中"; } } script> head> <body> <select id="testSelect" onchange="sel()"> <option id="op_1" value="Deep Learning">深度学习option> <option id="op_2" value="Machine Learning">机器学习option> <option id="op_3" value="Data Mining">数据挖掘option> <option id="op_4" value="Image Processing">图像处理option> select> <br> <hr><font color="red">选中的option索引:font><p id="show_index">p> <hr><font color="red">选中的option文本:font><p id="show_text">p> <hr><font color="red">选中的option的值:font><p id="show_value">p> <hr><font color="red">“数据挖掘”选项是否被选中:font><p id="show_isSelected">p> body> html>- 1
- 2
- 3
- 4
- 5
- 6
- 7
- 8
- 9
- 10
- 11
- 12
- 13
- 14
- 15
- 16
- 17
- 18
- 19
- 20
- 21
- 22
- 23
- 24
- 25
- 26
- 27
- 28
- 29
- 30
- 31
- 32
- 33
- 34
效果图:

-
相关阅读:
android开发连接网络
【AI视野·今日Robot 机器人论文速览 第五十四期】Fri, 13 Oct 2023
js 不同域iframe 与父页面消息通信
帷幄匠心面试题 一面
【游戏编程扯淡精粹】工作两年总结
【微服务】springboot整合neo4j使用详解
SpringBoot实现多数据源的两种方式
云数据库技术行业动态@2022-09-30
Linux - 系统性能监控命令
微信小程序-day01
- 原文地址:https://blog.csdn.net/m0_63669388/article/details/133966317