-
力扣一.链表的运用
一.合并生序链表
将两个升序链表合并为一个新的 升序 链表并返回。新链表是通过拼接给定的两个链表的所有节点组成的。
示例 1:

输入:l1 = [1,2,4], l2 = [1,3,4]
输出:[1,1,2,3,4,4]
输入:l1 = [], l2 = []
输出:[]
输入:l1 = [], l2 = [0]
输出:[0]
提示:
- 两个链表的节点数目范围是
[0, 50] -100 <= Node.val <= 100l1和l2均按 非递减顺序 排列
【方法一】迭代
- public class Solution {
- public ListNode MergeTwoLists(ListNode l1, ListNode l2) {
- ListNode prehead = new ListNode(-1);
- ListNode prev = prehead;
- while (l1 != null && l2 != null) {
- if (l1.val <= l2.val) {
- prev.next = l1;
- l1 = l1.next;
- } else {
- prev.next = l2;
- l2 = l2.next;
- }
- prev = prev.next;
- }
- // 合并后 l1 和 l2 最多只有一个还未被合并完,我们直接将链表末尾指向未合并完的链表即可
- prev.next = l1 == null ? l2 : l1;
- return prehead.next;
- }
- }
【方法二】递归
- public class Solution {
- public ListNode MergeTwoLists(ListNode l1, ListNode l2) {
- if (l1 == null) {
- return l2;
- } else if (l2 == null) {
- return l1;
- } else if (l1.val < l2.val) {
- l1.next = MergeTwoLists(l1.next, l2);
- return l1;
- } else {
- l2.next = MergeTwoLists(l1, l2.next);
- return l2;
- }
- }
- }
【方法三】基本
- struct ListNode* mergeTwoLists(struct ListNode* l1, struct ListNode* l2){
- if (l1==NULL)
- return l2;
- if (l2==NULL)
- return l1;
- struct ListNode* h = (struct ListNode*)malloc(sizeof(struct ListNode));
- struct ListNode *t = h;
- while (l1 && l2){
- if (l1->val <= l2->val){
- t->next = l1;
- l1 = l1->next;
- }
- else{
- t->next = l2;
- l2 = l2->next;
- }
- t = t->next;
- }
- if (l1==NULL) t->next = l2;
- else if (l2==NULL) t->next = l1;
- return h->next;
- }
二.删除重复元素
给定一个已排序的链表的头
head, 删除所有重复的元素,使每个元素只出现一次 。返回 已排序的链表 。示例 1:
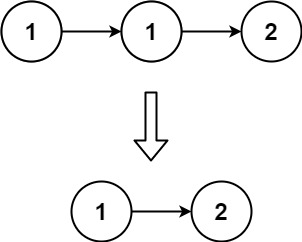
输入:head = [1,1,2]
输出:[1,2]
示例 2:
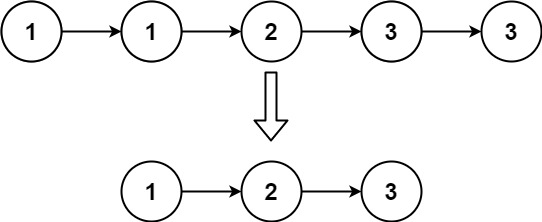
输入:head = [1,1,2,3,3]
输出:[1,2,3]
提示:
- 链表中节点数目在范围
[0, 300]内 -100 <= Node.val <= 100- 题目数据保证链表已经按升序 排列
- /**
- * Definition for singly-linked list.
- * struct ListNode {
- * int val;
- * struct ListNode *next;
- * };
- */
- struct ListNode* deleteDuplicates(struct ListNode* head){
- if(!head){
- return head;
- }
- struct ListNode* p=head;
- while(p->next){
- if(p->val==p->next->val){
- p->next=p->next->next;
- }
- else {
- p=p->next;
- }
- }
- return head;
- }
三.环形链表
给你一个链表的头节点
head,判断链表中是否有环。如果链表中有某个节点,可以通过连续跟踪
next指针再次到达,则链表中存在环。 为了表示给定链表中的环,评测系统内部使用整数pos来表示链表尾连接到链表中的位置(索引从 0 开始)。注意:pos不作为参数进行传递 。仅仅是为了标识链表的实际情况。如果链表中存在环 ,则返回
true。 否则,返回false。示例 1:

输入:head = [3,2,0,-4], pos = 1
输出:true
解释:链表中有一个环,其尾部连接到第二个节点。
示例 2:

输入:head = [1,2], pos = 0
输出:true
解释:链表中有一个环,其尾部连接到第一个节点。
示例 3:

输入:head = [1], pos = -1
输出:false
解释:链表中没有环。
提示:
- 链表中节点的数目范围是
[0, 104] -105 <= Node.val <= 105pos为-1或者链表中的一个 有效索引 。-
- /**
- * Definition for singly-linked list.
- * struct ListNode {
- * int val;
- * struct ListNode *next;
- * };
- */
- bool hasCycle(struct ListNode *head) {
- if(head==NULL ||head->next==NULL){
- return false;
- }
- struct ListNode* slow=head;
- struct ListNode* fast=head->next;
- while(slow!=fast){
- if(fast==NULL||fast->next==NULL){
- return false;
- }
- slow=slow->next;
- fast=fast->next->next;
- }
- return true;
- }
- 两个链表的节点数目范围是
-
相关阅读:
文档管理软件将办公室的业务模式转变为无纸化远程业务模式,提高员工生产力和保留率
声明 Array List 的3种方式 ArrayList、Collection、List 的区别
QQ第三方登录-python_web开发_django框架
远程桌面连接下拉框IP地址删除
Spark SQL简介
企业数字化办公选SaaS服务还是私有化服务?
vue的两种服务器端渲染方案
预测和分类钻孔的毛刺钻孔切削ANN预测
提高工作效率的神器:基于前端表格实现Chrome Excel扩展插件
10.前端打包与nginx部署
- 原文地址:https://blog.csdn.net/m0_74161592/article/details/133963891
