-
Springboot整合整合Swagger3
常用注解
- @Api:用在请求的类上,表示对类的说明
- tags=“说明该类的作用,可以在UI界面上看到的注解”
- value=“该参数没什么意义,在UI界面上也看到,所以不需要配置”
- @ApiOperation:用在请求的方法上,说明方法的用途、作用
- value=“说明方法的用途、作用”
- notes=“方法的备注说明”
- @ApiImplicitParams:用在请求的方法上,表示一组参数说明
- @ApiImplicitParam:用在@ApiImplicitParams注解中,指定一个请求参数的各个方面
- name:参数名
- value:参数的汉字说明、解释
- required:参数是否必须传
- paramType:参数放在哪个地方
- header --> 请求参数的获取:@RequestHeader
- query --> 请求参数的获取:@RequestParam
- path(用于restful接口)–> 请求参数的获取:@PathVariable
- body(不常用)
- form(不常用)
- dataType:参数类型,默认String,其它值dataType=“Integer”
- defaultValue:参数的默认值
- @ApiResponses:用在请求的方法上,表示一组响应
- @ApiResponse:用在@ApiResponses中,一般用于表达一个错误的响应信息
- code:数字,例如400
- message:信息,例如"请求参数没填好"
- response:抛出异常的类
- @ApiModel:用于响应类上,表示一个返回响应数据的信息
- (这种一般用在post创建的时候,使用@RequestBody这样的场景,
- 请求参数无法使用@ApiImplicitParam注解进行描述的时候)
- @ApiModelProperty:用在属性上,描述响应类的属性
基本示例
第一步:创建Springboot项目,添加依赖:
<dependency> <groupId>io.springfoxgroupId> <artifactId>springfox-swagger2artifactId> <version>3.0.0version> dependency> <dependency> <groupId>io.springfoxgroupId> <artifactId>springfox-swagger-uiartifactId> <version>3.0.0version> dependency>- 1
- 2
- 3
- 4
- 5
- 6
- 7
- 8
- 9
- 10
- 11
- 12
第二步:修改application.yml
springdoc: swagger-ui: enabled: true operationsSorter: alpha tags-sorter: alpha api-docs: enabled: true- 1
- 2
- 3
- 4
- 5
- 6
- 7
第三步:编写Swagger配置文件
@Configuration public class SwaggerConfig { /** 接口信息 */ @Bean public OpenAPI apiInfo() { License license = new License().name("Apache 2.0").url("https://www.wego.com"); Info info = new Info() .title("微购商城API文档") .version("2.0.0") .description("微型购物商城") .license(license); SecurityScheme securityScheme = new SecurityScheme() .type(SecurityScheme.Type.HTTP) .scheme("bearer") .bearerFormat("JWT"); Components components = new Components().addSecuritySchemes("Authorization", securityScheme); return new OpenAPI().components(components).info(info); } /** * 接口分组-系统接口 * * @return */ @Bean public GroupedOpenApi groupedOpenApi() { String paths[] = {"/**"}; String packagesToScan[] = {"com.wego.controller"}; return GroupedOpenApi.builder() .group("系统接口") .packagesToScan(packagesToScan) .pathsToMatch(paths) .build(); } }- 1
- 2
- 3
- 4
- 5
- 6
- 7
- 8
- 9
- 10
- 11
- 12
- 13
- 14
- 15
- 16
- 17
- 18
- 19
- 20
- 21
- 22
- 23
- 24
- 25
- 26
- 27
- 28
- 29
- 30
- 31
- 32
- 33
- 34
- 35
- 36
- 37
- 38
- 39
第三步:Dept类
```java @Data @NoArgsConstructor @AllArgsConstructor @Builder @ApiModel(value = "Dept",description = "部门信息") public class Dept implements Serializable { private static final long serialVersionUID = -4383838089518165322L; /** * 部门编号 */ @ApiModelProperty("部门编号") private Integer deptno; /** * 部门名称 */ @ApiModelProperty("部门名称") private String dname; /** * 部门地址 */ @ApiModelProperty("部门地址") private String loc; }- 1
- 2
- 3
- 4
- 5
- 6
- 7
- 8
- 9
- 10
- 11
- 12
- 13
- 14
- 15
- 16
- 17
- 18
- 19
- 20
- 21
- 22
- 23
- 24
- 25
- 26
- 27
- 28
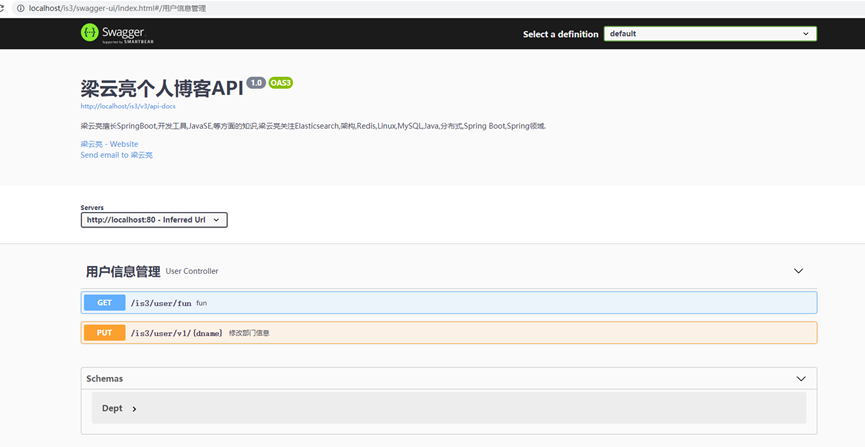
### 第四步:测试Controller ```java @Api(tags = "用户信息管理", value = "用户接口") @RestController @RequestMapping("/user") public class UserController { @ApiResponse(message = "测试", code = 200) @ApiOperation(value = "fun", notes = "测试方法fun", httpMethod = "GET") @GetMapping("/fun") public String fun() { return "fun"; } @PutMapping(value = "/v1/{dname}") @ApiOperation(value = "修改部门信息", notes = "", httpMethod = "PUT") @ApiImplicitParams({ @ApiImplicitParam(paramType = "header", name = "token", value = "token", required = true, dataType = "String", dataTypeClass = String.class), @ApiImplicitParam(paramType = "query", name = "deptno", value = "部门ID", required = true, dataType = "Integer", dataTypeClass = Integer.class), @ApiImplicitParam(paramType = "path", name = "dname", value = "部门名称", required = true, dataType = "String", dataTypeClass = String.class), @ApiImplicitParam(paramType = "body", name = "dept", value = "用户实体", required = true, dataType = "Dept", dataTypeClass = Dept.class) }) public String fun(@RequestParam(name = "deptno", value = "deptno", required = false) Integer deptno, @PathVariable(value = "dname", required = true) String dname, @RequestBody(required = true) Dept dept, HttpServletRequest request) { String token = request.getHeader("token"); return token + " " + deptno + " " + dname + " " + dept; } }- 1
- 2
- 3
- 4
- 5
- 6
- 7
- 8
- 9
- 10
- 11
- 12
- 13
- 14
- 15
- 16
- 17
- 18
- 19
- 20
- 21
- 22
- 23
- 24
- 25
- 26
- 27
- 28
- 29
- 30
- 31
访问页面http://localhost/is3/swagger-ui/index.html,效果:
引入Knife4jUI界面
第一步:添加依赖:
<dependency> <groupId>com.github.xiaoymingroupId> <artifactId>knife4j-spring-boot-starterartifactId> <version>3.0.3version> dependency>- 1
- 2
- 3
- 4
- 5
第二步:修改application.yml文件,添加如下内容:
#配置swagger配置 knife4j: basic: username: admin password: 666666 enable: true #开启认证 production: false #默认是false ,屏蔽所有Swagger的相关资源 enable: true #是否开启swagger- 1
- 2
- 3
- 4
- 5
- 6
- 7
- 8
访问网页:http://localhost/is3/doc.html#/home效果:
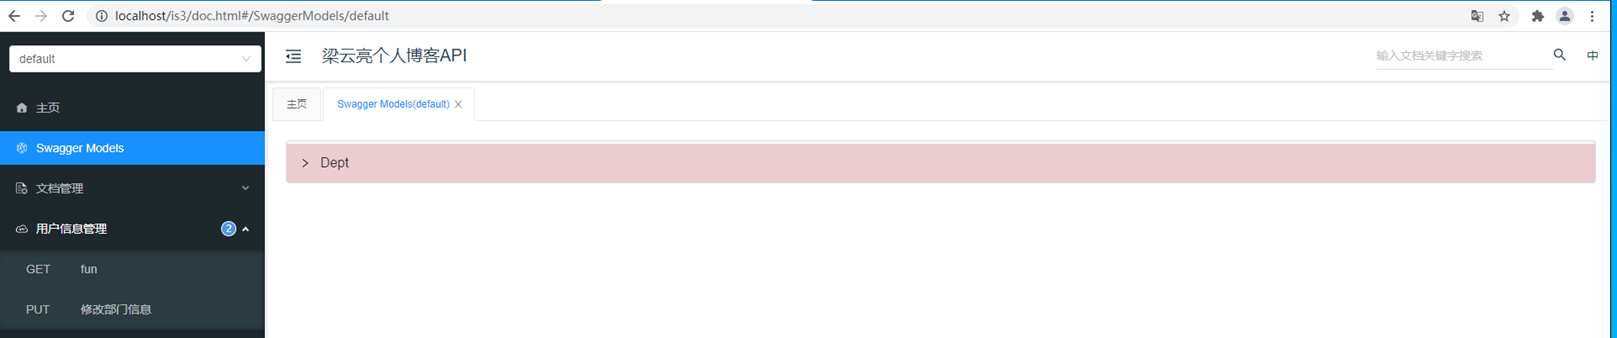
备注:swagger和knife两种技术可以共同使用,也可以只使用其中的任何一种。
- @Api:用在请求的类上,表示对类的说明
-
相关阅读:
Cocos3.4.2版本 获取手指滑动到的区域的Label文本并记录文本内容进行判定操作
ros2知识:在单个进程中布置多个节点
【ElasticSearch】学习笔记
对双STA-双连接的一些思考
vue3(二)
在Spring Boot中使用进程内缓存和Cache注解
【快速解决】实验四 对话框 《Android程序设计》实验报告
calcite物化视图详解
Linux 下静态库与动态库的制作与使用
【C++风云录】开源金融与科技库探索:优化计算与高效分析
- 原文地址:https://blog.csdn.net/lianghecai52171314/article/details/132864581