-
vue cli 打包、生产环境http-proxy-middleware代理
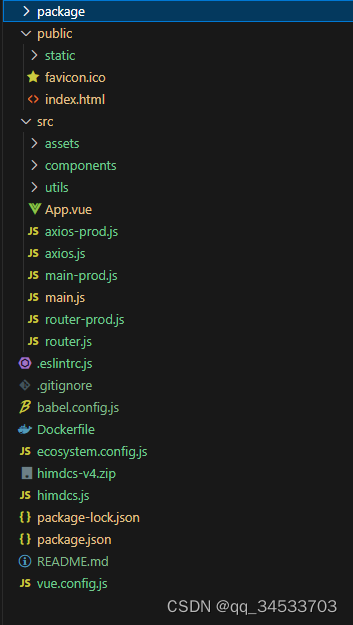
结构树
版本

1、创建vue.config.js
- const path = require('path');
- const UglifyJsPlugin = require('uglifyjs-webpack-plugin')
- //压缩
- const CompressionWebpackPlugin = require('compression-webpack-plugin')
- const isProduction = process.env.NODE_ENV !== 'development';
- module.exports = {
- // 将 examples 目录添加为新的页面
- pages: {
- index: {
- // page 的入口
- entry: process.env.NODE_ENV === 'production' ? 'src/main-prod.js' : 'src/main.js',
- // 模板来源
- template: 'public/index.html',
- // 输出文件名
- filename: 'index.html'
- }
- },
- runtimeCompiler: true,
- publicPath: "./", // 官方要求修改路径在这里做更改,默认是根目录下,可以自行配置
- outputDir: 'dist', //标识是打包哪个文件
- productionSourceMap: false,
- configureWebpack: config => {
- if (isProduction) {
- //移除代码中的打印
- config.plugins.push(
- new UglifyJsPlugin({
- uglifyOptions: {
- output: {
- comments: false, // 去掉注释
- },
- warnings: false,
- compress: {
- drop_console: true,
- drop_debugger: false,
- pure_funcs: ['console.log']//移除console
- }
- }
- })
- )
- //压缩大于200k的文件
- config.plugins.push(
- new CompressionWebpackPlugin({
- filename: '[path][base].gz',
- algorithm: 'gzip',
- // test: /\.js$|\.html$|\.json$|\.css/,
- test: /\.js$|\.json$|\.css/,
- threshold: 204800, // 只有大小大于该值的资源会被处理
- minRatio: 0.8, // 只有压缩率小于这个值的资源才会被处理
- // deleteOriginalAssets: true // 删除原文件
- }))
- }
- console.log("------------------------------" + isProduction)
- },
- chainWebpack: config => {
- // 发布模式 优化首次加载 采用本地cdn(若需要更多优化可自行添加)
- config.when(process.env.NODE_ENV === 'production', config => {
- config.set('externals', {
- axios: 'axios',
- 'vue-router': 'VueRouter',
- })
- })
- },
- devServer: {
- proxy: {
- '/config': {
- target: 'http://xxx.xxx.xx.xxx:xxx',//代理地址,这里设置的地址会代替axios中设置的baseURL
- //changeOrigin: true,// 如果接口跨域,需要进行这个参数配置
- //ws: true, // proxy websockets
- //pathRewrite方法重写url
- pathRewrite: {
- '^/config': '/config'
- //pathRewrite: {'^/api': '/'} 重写之后url为
- //pathRewrite: {'^/api': '/api'} 重写之后url为 /api/xxxx
- }
- }
- , '/guacamole': {
- target: 'ws://xxx.xxx.xx.xxx:xxx',
- pathRewrite: {
- '^/guacamole': '/guacamole'
- }
- },
- }
- },
- css: {
- loaderOptions: {
- less: {
- lessOptions: {
- modifyVars: {},
- javascriptEnabled: true,
- },
- },
- },
- },
- }
如果采用了本地cdn则index.html
- <% if (process.env.NODE_ENV==='production' ) { %>
- <script src="./static/axios.0.21.1.min.js">script>
- <script src="./static/vue-router.min.js">script>
- <% } %>
2、创建ecosystem.config.js
- module.exports = {
- apps: [{
- // 测试环境
- name: "test",
- script: "himdcs.js",
- env: {
- "NODE_ENV": "test"
- }
- }
- ]
- }
3、创建himdcs.js
- const express = require('express'); //npm下载并引入express模块 npm -express -D
- const proxy = require('http-proxy-middleware');
- // 导入压缩包
- const compression = require('compression');
- const cors = require('cors');
- const app = express();
- app.use(cors())
- // 启用中间件 要写在静态资源托管之前 用于静态文件压缩包
- app.use(compression());
- app.use(express.static('./dist')) // ./dist 为vue打包后dist文件夹的路径
- app.listen(1897,function(err){ //8080 想要监听项目的端口号
- if(err){
- console.log(err)
- }else {
- console.log('项目启动成功')
- }
- })
- //用于服务部署时的代理
- app.use(
- ['*/config/*'],
- proxy.createProxyMiddleware({
- target:'http://xxx.xxx.xx.xxx:xxxx', // 服务器api地址目录
- changeOrigin: true,
- secure: false,
- xfwd:true,//添加x-forward请求头
- pathRewrite: {
- '/config': '/config' // rewrite path
- }
- }));
- //websocket
- app.use(
- ['/beat'],
- proxy.createProxyMiddleware({
- target:'ws://xxx.xxx.xx.xxx:xxxx', // 服务器api地址目录
- changeOrigin: true,
- ws: true,
- xfwd:true,
- pathRewrite: {
- '/beat': '/beat' // rewrite path
- }
- }));
4、修改package.json
- {
- "name": "",
- "version": "3.0.0",
- "private": true,
- "scripts": {
- "dev": "vue-cli-service serve --mode development",
- "prod": "vue-cli-service build --mode production",
- "serve": "vue-cli-service serve",
- "build": "vue-cli-service build --mode production",
- "lint": "vue-cli-service lint"
- },
- "dependencies": {...}
- ...
- }
5、部署到docker
- FROM keymetrics/pm2:latest-alpine
- # Bundle APP files
- RUN mkdir -p /home/
- WORKDIR /home/
- #COPY src src/
- #COPY package.json .
- COPY . /home/
- # Install app dependencies
- ENV NPM_CONFIG_LOGLEVEL warn
- # Show current folder structure in logs
- #RUN ls -al -R
- CMD pm2-docker start ecosystem.config.js --only $NODE_ENV --watch
6、http-proxy-middleware参数说明
option.target:url字符串将与url模块解析
option.forward:url字符串将与url模块解析
option.target:传递给http(s)请求的对象(参阅Node https代理和http代理对象)
option.ssl:传递给https.createServer()的对象
option.ws:true / false,如果你想要代理websockets
option.xfwd:true / false,添加x-forward请求头
option.secure:true / false,如果你想要验证SSL证书
option.toProxy:true / false,将绝对URL作为path(对代理使用代理时很有用)
option.prependPath:true / false,默认:true-指定是否要将目标的路径预置到代理路径
option.ignorePath:true / false,默认:false-指定是否要忽略传入请求的代理路径(注意:如果需要,您将必须附加/手动)。
option.localAddress:用于传出连接的本地接口字符串
option.changeOrigin:true / false,默认值:false - 将主机头的源更改为目标URL
option.auth:基本认证,即“用户:密码”来计算授权头。
option.hostRewrite:重写(301/302/307/308)重定向的位置主机名。
option.autoRewrite:根据请求的主机/端口重写(301/302/307/308)重定向的位置主机/端口。默认值:false。
option.protocolRewrite:重写位置协议(301/302/307/308)重定向到’http’或’https’。默认值:null。
option.cookieDomainRewrite:重写set-cookie标头的域。可能的值:
-false(默认):禁止重写cookie
- 字符串:新域名,比如说cookieDomainRewrite:"new.domain"。使用cookieDomainRewrite:""删除域名。
- 对象:域名到新域名的映射,用”*”匹配所有域名。
举个栗子:保持一个域名不变,重写一个域名并且删除其他的:
cookieDomainRewrite: {
"unchanged.domain": "unchanged.domain",
"old.domain": "new.domain",
"*": ""
}
option.headers:对象,添加请求头。(比如:{host:'www.example.org'})
option.proxyTimeout:超时时间(毫秒)当代理接收不到目标服务器的返回
-
相关阅读:
拦截器与过滤器的区别
全流量分析应用运行和访问情况
用DIV+CSS技术设计的明星个人网站制作(基于HTML+CSS+JavaScript制作明星彭于晏网页)
苍穹外卖-day12 - 工作台 - Apache POI - 导出运营数据Excel报表
Linksys RE7000 “AccessControlList ”命令执行漏洞(CVE-2024-25852 )
【软考 系统架构设计师】计算机组成与体系结构③ 存储管理
redis配制redis-static-server
注解的知识和应用案例
线上动态解析protobuf文件,实现动态热更新
4、Java——循环案例代码详解(1)
- 原文地址:https://blog.csdn.net/qq_34533703/article/details/132859622
