-
Linux之基于HTTPS的静态网站
目录
案例1 --- 搭建HTTP+SSL的加密认证的web服务器
Linux之基于HTTPS的静态网站
定义
超文本传输协议HTTP协议备用于在Web浏览器和网站服务器之间传递信息
HTTP协议以明文方式发送内容,不提供任何方式的数据加密,如果攻击者截取了Web浏览器和网站服务器之间的传输报文,就可以直接读懂其中的信息,因此HTTP协议不适合传输一些敏感信息,比如信用卡号、密码等。为了解决HTTP协议的这一缺陷,需要使用另一种协议:安全套接字层超文本传输协议HTTPS
HTTPS(全称:Hyper Text Transfer Protocol over Secure Socket Layer 或 Hypertext TransferProtocol Secure,超文本传输安全协议),是以安全为目标的HTTP通道
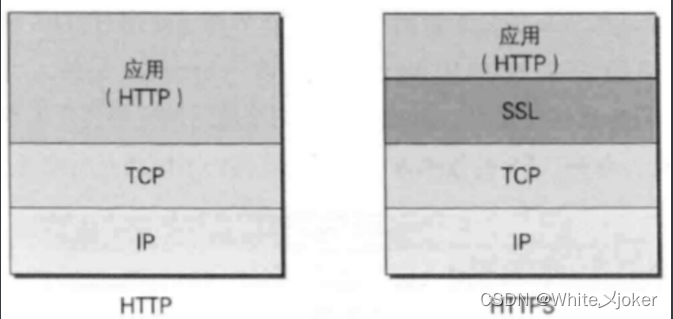
HTTPS并不是一个新协议,而是HTTP+SSL(TLS)。原本HTTP先和TCP(假定传输层是TCP协议)直接通信,而加了SSL后,就变成HTTP先和SSL通信,再由SSL和TCP通信,相当于SSL被嵌在了HTTP和TCP之间
SSL协议
定义
SSL --- 是“Secure Sockets Layer”的缩写,中文叫做“安全套接层”。它是在上世纪90年代中期,由网景公司设计的。到了1999年,SSL 应用广泛,已经成为互联网上的事实标准。IETF 就把SSL 标准化。标准化之后SSL被改为 TLS(Transport Layer Security传输层安全协议)
SSL协议分层
SSL记录协议 (SSL Record Protocol)它建立在可靠的传输协议(如TCP)之上,为高层协议提供数据封装、压缩、加密等基本功能
SSL握手协议(SSL Handshake Protocol):它建立在SSL记录协议之上,用于在实际的数据传输开始前,通讯双方进行身份认证、协商加密算法、交换加密密钥等
SSL协议提供的服务
-
认证用户和服务器,确保数据发送到正确的客户机和服务器
-
加密数据以防止数据中途被窃取
-
维护数据的完整性,确保数据在传输过程中不被改变
使用Apache+mod_ssl组件的加密认证网站
mod_ssl模组
mod_ssl组件 --- 是apache的一个模块,以openssl的工具箱为基础专门为apache提供密码保护的一种组件模块
安装
[root@www conf.d]# yum install mod_ssl -y配置文件
-
主配置文件 --- /etc/httpd/conf.d/ssl.conf
-
证书文件 --- /etc/pki/tls/certs/xxxx.crt
-
私钥文件 ---/etc/pki/tls/private/xxxx.key
ssl配置文件的主要参数
[root@www /]# vim /etc/httpd/conf.d/ssl.conf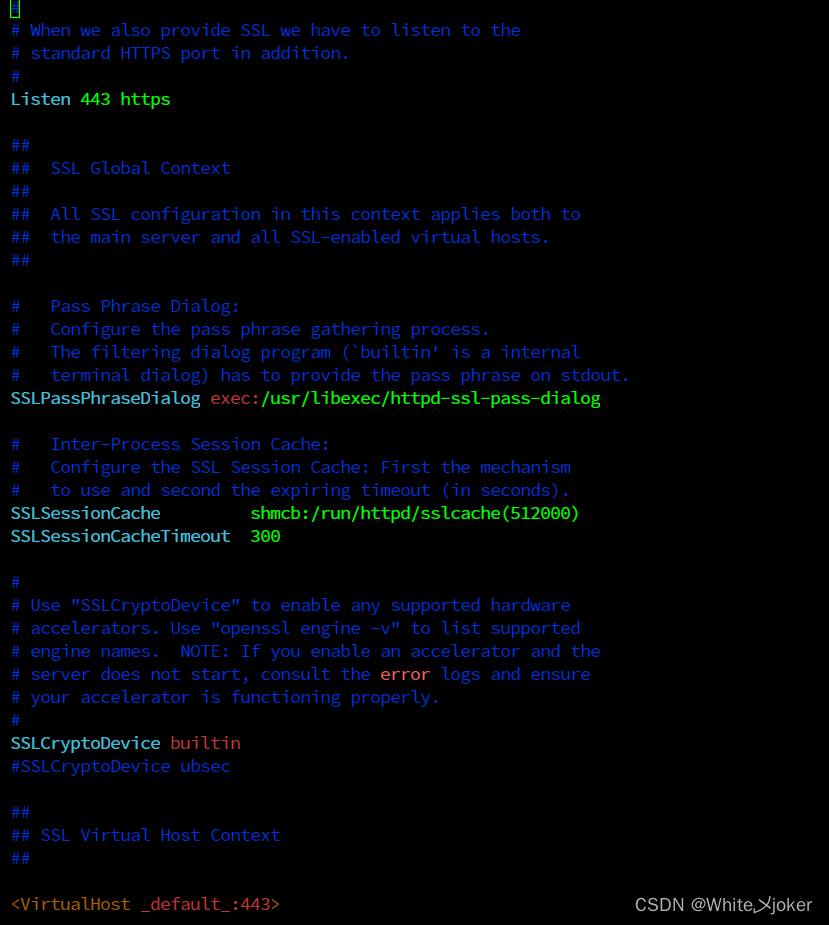
- # 常用参数如下:
- 5 Listen 443 https # 监听的端口号
- 18 SSLPassPhraseDialog exec:/usr/libexec/httpd-ssl-pass-dialog # 存储证书的密码信息
- 23 SSLSessionCache shmcb:/run/httpd/sslcache(512000) # ssl的缓存,位置
- 24 SSLSessionCacheTimeout 300 # 换存的超时时长
- 40
443> # 重要,定义虚拟主机的信息 - 48 ErrorLog logs/ssl_error_log # 错误日志
- 49 TransferLog logs/ssl_access_log # 传输日志
- 50 LogLevel warn # 日志等级
- 54 SSLEngine on # ssl引擎开启
- 66 SSLHonorCipherOrder on # 协商算法
- 85 SSLCertificateFile /etc/pki/tls/certs/localhost.crt # 证书存储路径
- 93 SSLCertificateKeyFile /etc/pki/tls/private/localhost.key # 私钥文件路径
- 202 # 虚拟主机结束定义
案例
案例1 --- 搭建HTTP+SSL的加密认证的web服务器
创建存储网页的目录,xftp上传网页数据
- [root@www /]# mkdir -p /test/zy
- [root@www /]# cd /test/zy/
- [root@www zy]# vim index.html
- [root@www zy]# cat index.html
- this is zy
在/etc/pki/tls/private/目录中生成私钥文件
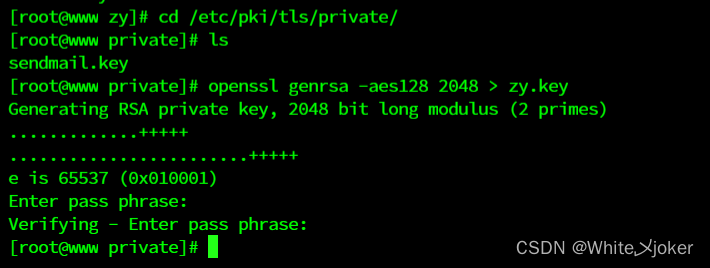
- [root@www zy]# cd /etc/pki/tls/private/
- [root@www private]# ls
- sendmail.key
- [root@www private]# openssl genrsa -aes128 2048 > zy.key
- Generating RSA private key, 2048 bit long modulus (2 primes)
- .............+++++
- ........................+++++
- e is 65537 (0x010001)
- Enter pass phrase: # 设置对私钥加密的密码,123456
- Verifying - Enter pass phrase: # 在输入一遍
- [root@www private]#
在/etc/pki/tls/certs/目录中新建数字证书
- [root@www private]# cd /etc/pki/tls/certs/
- [root@www certs]# ls
- ca-bundle.crt ca-bundle.trust.crt sendmail.pem
- [root@www certs]# openssl req -utf8 -new -key /etc/pki/tls/private/zy.key -x509 -days 365 -out zy.crt
- Enter pass phrase for /etc/pki/tls/private/zy.key: # 输入私钥加密的密码
- You are about to be asked to enter information that will be incorporated
- into your certificate request.
- What you are about to enter is what is called a Distinguished Name or a DN.
- There are quite a few fields but you can leave some blank
- For some fields there will be a default value,
- If you enter '.', the field will be left blank.
- -----
- Country Name (2 letter code) [XX]:86 # 国家代码
- State or Province Name (full name) []:shanxi # 省份
- Locality Name (eg, city) [Default City]:xi'an # 城市
- Organization Name (eg, company) [Default Company Ltd]:tiandi # 公司
- Organizational Unit Name (eg, section) []:Hcip # 部门
- Common Name (eg, your name or your server's hostname) []:192.168.149.130 # 主机名
- Email Address []:145246820@qq.com # 邮件地址
编辑配置文件
- [root@www certs]# cd ~
- [root@www ~]# vim /etc/httpd/conf.d/ssl.conf
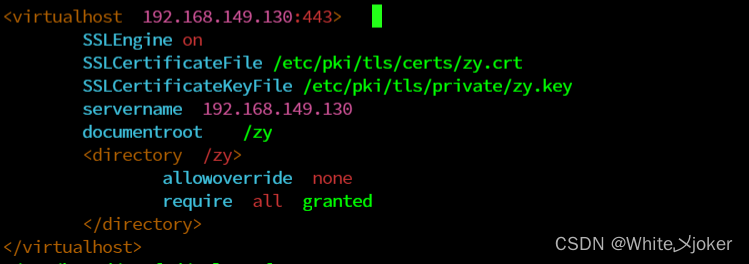
192.168.149.130:443> # https的虚拟主机设置 - SSLEngine on # 开启引擎
- SSLCertificateFile /etc/pki/tls/certs/zy.crt # 证书存储路径
- SSLCertificateKeyFile /etc/pki/tls/private/zy.key # 私钥文件存储路径
- servername 192.168.149.130 # 域名
- documentroot /test/zy # 启动目录
# 启动目录权限设置 - allowoverride none
- require all granted
重启服务
- [root@localhost ~]# systemctl restart httpd
- Enter TLS private key passphrase for 192.168.149.128:443 (RSA) : ****** #密码为先前设置的123456


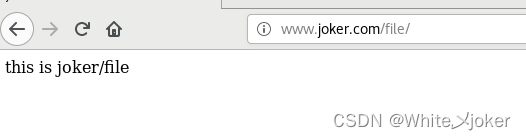
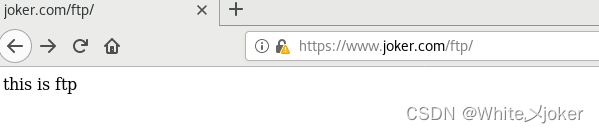
案例2 --- 组建多个子目录的网站www.joker.com,该网站下有2个子目录www.joker.com/file和www.joker.com/ftp,要求file数据使用http读取,ftp数据使用https读取
安装mod_ssl已经Apache
- [root@localhost ~]# yum install httpd
- [root@localhost ~]# yum install mod_ssl -y
- #关闭selinux以及防火墙
- [root@localhost ~]# setenforce 0
- [root@localhost ~]# systemctl stop firewalld
新建网页目录,并创建文件
- [root@localhost ~]# mkdir -p /www/file
- [root@localhost ~]# mkdir -p /www/ftp
- [root@localhost ~]# vim /www/file/index.html
- [root@localhost ~]# vim /www/ftp/index.html
- [root@localhost ~]# cat /www/file/index.html
- this is joker/file
- [root@localhost ~]# cat /www/ftp/index.html
- this is ftp

修改/etc/hosts的映射
[root@localhost ~]# vim /etc/hosts
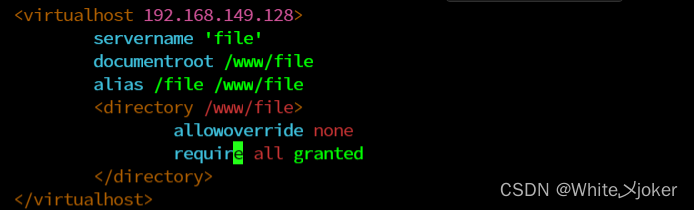
建立file网站
- [root@localhost ~]# vim /etc/httpd/conf/httpd.conf
192.168.149.128> - servername 'file'
- documentroot /www/file
- alias /file /www/file
- allowoverride none
- require all granted
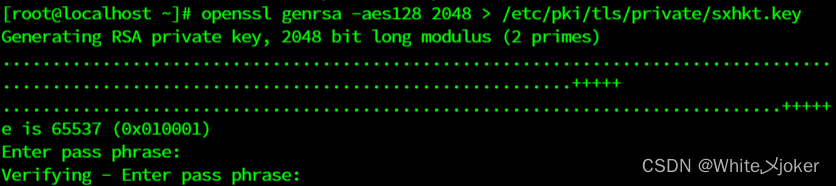
建立https的ftp网站
- [root@localhost ~]# openssl genrsa -aes128 2048 > /etc/pki/tls/private/sxhkt.key
- Generating RSA private key, 2048 bit long modulus (2 primes)
- ............................................................................................................................................+++++
- ..............................................................................+++++e is 65537 (0x010001)
- Enter pass phrase: #密码123456
- Verifying - Enter pass phrase:
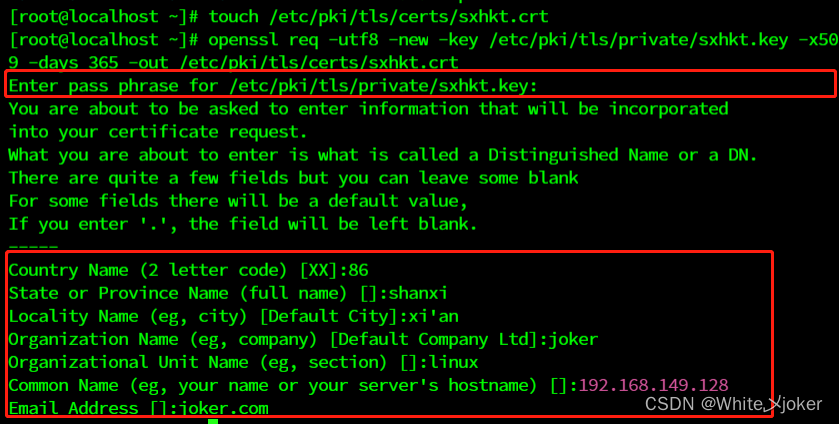
- [root@localhost ~]# touch /etc/pki/tls/certs/sxhkt.crt
- [root@localhost ~]# openssl req -utf8 -new -key /etc/pki/tls/private/sxhkt.key -x509 -days 365 -out /etc/pki/tls/certs/sxhkt.crt
- Enter pass phrase for /etc/pki/tls/private/sxhkt.key:
- You are about to be asked to enter information that will be incorporated
- into your certificate request.
- What you are about to enter is what is called a Distinguished Name or a DN.
- There are quite a few fields but you can leave some blank
- For some fields there will be a default value,
- If you enter '.', the field will be left blank.
- -----
- Country Name (2 letter code) [XX]:86
- State or Province Name (full name) []:shanxi
- Locality Name (eg, city) [Default City]:xi'an
- Organization Name (eg, company) [Default Company Ltd]:joker
- Organizational Unit Name (eg, section) []:linux
- Common Name (eg, your name or your server's hostname) []:192.168.149.128
- Email Address []:joker.com
编辑配置文件
- [root@localhost ~]# vim /etc/httpd/conf.d/ssl.conf
192.168.149.128:443> - sslengine on
- SSLCertificateFile /etc/pki/tls/certs/sxhkt.crt
- SSLCertificateKeyFile /etc/pki/tls/private/sxhkt.key
- servername 'ftp'
- documentroot /www/ftp
- alias /ftp /www/ftp # 设置别名访问二级目录
- allowoverride none
- require all granted
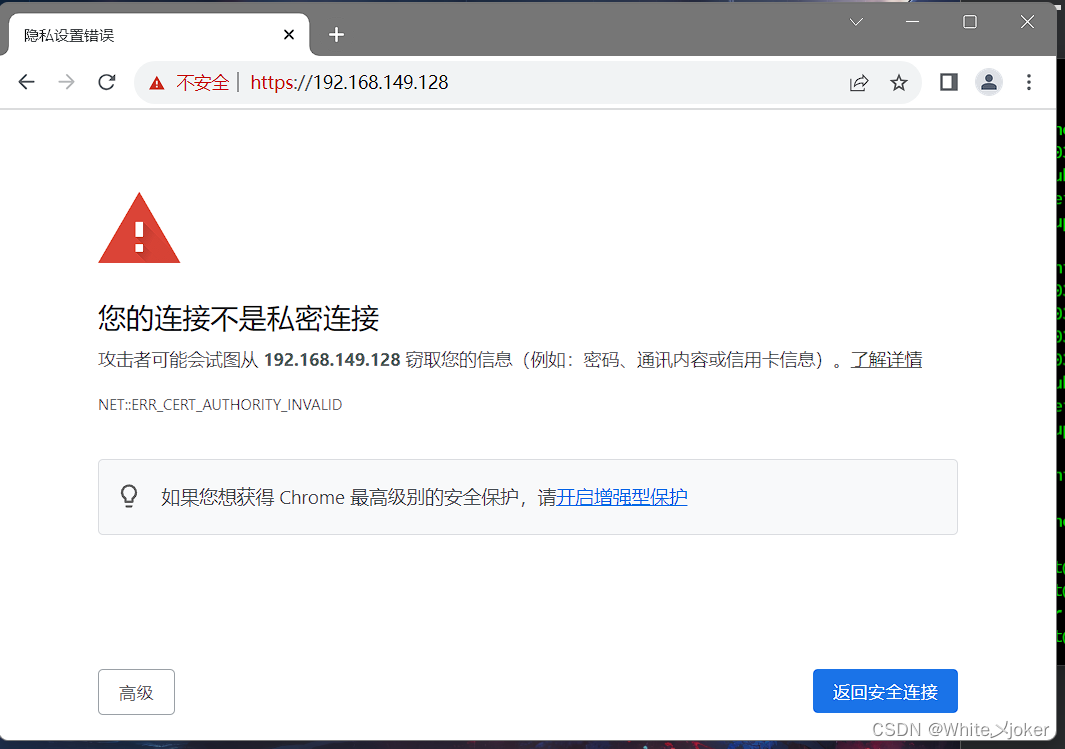
重启服务,测试
[root@localhost ~]# systemctl restart httpd
-
-
相关阅读:
Java实现一个Redis可视化工具
【网站架构】一招搞定90%的分布式事务,实打实介绍数据库事务、分布式事务的工作原理应用场景
linux下安装qt、qt触摸屏校准tslib
java毕业生设计医院住院综合服务管理系统计算机源码+系统+mysql+调试部署+lw
动态规划 Ⅱ
开始打击了
HDFS完全分布式搭建及Hadoop HA集群搭建
浮动优缺点及清除浮动的方法
论文阅读 Dynamic Network Embedding by Modeling Triadic Closure Process
day03-拉取在线用户&无异常退出功能
- 原文地址:https://blog.csdn.net/qq_57289939/article/details/132664961
