-
sslpinning笔记


1.生成服务端/客户端证书
╰─$ openssl genrsa -out server.key 1024 ╰─$ openssl req -new -x509 -key server.key -out server.crt -days 3650 ╰─$ openssl genrsa -out client.key 1024 ╰─$ openssl req -new -x509 -key client.key -out client.crt -days 3650 将client.key和client.crt合成client.p12。p12文件可以认为是一对公私钥的合体文件,通常会有密码保护;可以通过openssl命令生成(将公私钥两个文件合成得到一个p12文件) ╰─$ openssl pkcs12 -export -clcerts -in client.crt -inkey client.key -out client.p12 ╰─$ ls client.crt client.key client.p12 server.crt server.key- 1
- 2
- 3
- 4
- 5
- 6
- 7
- 8
- 9
- 10
- 11
最关键的是域名信息Common Name,这里需要填写服务器的域名地址,比如test.com;也可以填写泛域名,比如*.test.com;如果没有域名,可以直接填写服务端ip地址。
2.启动flask接口
from flask import Flask app = Flask(__name__) from flask import request @app.route("/") def hello(): print(dict(request.headers)) print('客户端证书: ' + request.headers.get('X-SSL-Client-Cert', '').replace('\n\t', '\n')) print('证书序列号: ' + request.headers.get('X-SSL-serial', '')) print('证书主体: ' + request.headers.get('cert-subject', '')) return "SSLPinning Test" if __name__ == "__main__": app.run(ssl_context=('/Users/wiliam/temp/certificate/server.crt', '/Users/wiliam/temp/certificate/server.key'))- 1
- 2
- 3
- 4
- 5
- 6
- 7
- 8
- 9
- 10
- 11
- 12
- 13
- 14
- 15
因为用的自签名证书,提示“不安全”是正常的,点击“红色三角形感叹号”可以查看证书


3. mac安装nginx
╰─$ brew install nginx ╰─$ nginx- 1
- 2
访问http://localhost:8080/可以看到nginx的欢迎页面

4. 修改nginx配置文件
使用nginx的 -t 参数进行配置检查,即可知道实际调用的配置文件路径及是否调用有效 ╰─$ nginx -t nginx: the configuration file /opt/homebrew/etc/nginx/nginx.conf syntax is ok nginx: configuration file /opt/homebrew/etc/nginx/nginx.conf test is successful- 1
- 2
- 3
- 4
修改/opt/homebrew/etc/nginx/nginx.conf
#user nobody; worker_processes 1; #error_log logs/error.log; #error_log logs/error.log notice; #error_log logs/error.log info; #pid logs/nginx.pid; events { worker_connections 1024; } http { include mime.types; default_type application/octet-stream; #log_format main '$remote_addr - $remote_user [$time_local] "$request" ' # '$status $body_bytes_sent "$http_referer" ' # '"$http_user_agent" "$http_x_forwarded_for"'; #access_log logs/access.log main; sendfile on; #tcp_nopush on; #keepalive_timeout 0; keepalive_timeout 65; #gzip on; server { listen 8080; server_name localhost; #charset koi8-r; #access_log logs/host.access.log main; location / { root html; index index.html index.htm; } #error_page 404 /404.html; # redirect server error pages to the static page /50x.html # error_page 500 502 503 504 /50x.html; location = /50x.html { root html; } # proxy the PHP scripts to Apache listening on 127.0.0.1:80 # #location ~ \.php$ { # proxy_pass http://127.0.0.1; #} # pass the PHP scripts to FastCGI server listening on 127.0.0.1:9000 # #location ~ \.php$ { # root html; # fastcgi_pass 127.0.0.1:9000; # fastcgi_index index.php; # fastcgi_param SCRIPT_FILENAME /scripts$fastcgi_script_name; # include fastcgi_params; #} # deny access to .htaccess files, if Apache's document root # concurs with nginx's one # #location ~ /\.ht { # deny all; #} } # another virtual host using mix of IP-, name-, and port-based configuration # #server { # listen 8000; # listen somename:8080; # server_name somename alias another.alias; # location / { # root html; # index index.html index.htm; # } #} # HTTPS server # server { listen 443 ssl; server_name localhost; ssl_certificate /Users/wiliam/temp/certificate/server.crt; ssl_certificate_key /Users/wiliam/temp/certificate/server.key; ssl_client_certificate /Users/wiliam/temp/certificate/client.crt; # ssl_verify_client on/optional/optional_no_ca/off; ssl_verify_client optional_no_ca; ssl_session_cache shared:SSL:1m; ssl_session_timeout 5m; ssl_ciphers HIGH:!aNULL:!MD5; ssl_prefer_server_ciphers on; location / { root html; index index.html index.htm; } location /flask/ { proxy_set_header X-Real-IP $remote_addr; proxy_set_header X-Real-PORT $remote_port; proxy_set_header X-SSL-Client-Cert $ssl_client_cert; proxy_set_header X-SSL-serial $ssl_client_serial; proxy_set_header cert-subject $ssl_client_s_dn; proxy_pass https://127.0.0.1:5000/; } } include servers/*; }- 1
- 2
- 3
- 4
- 5
- 6
- 7
- 8
- 9
- 10
- 11
- 12
- 13
- 14
- 15
- 16
- 17
- 18
- 19
- 20
- 21
- 22
- 23
- 24
- 25
- 26
- 27
- 28
- 29
- 30
- 31
- 32
- 33
- 34
- 35
- 36
- 37
- 38
- 39
- 40
- 41
- 42
- 43
- 44
- 45
- 46
- 47
- 48
- 49
- 50
- 51
- 52
- 53
- 54
- 55
- 56
- 57
- 58
- 59
- 60
- 61
- 62
- 63
- 64
- 65
- 66
- 67
- 68
- 69
- 70
- 71
- 72
- 73
- 74
- 75
- 76
- 77
- 78
- 79
- 80
- 81
- 82
- 83
- 84
- 85
- 86
- 87
- 88
- 89
- 90
- 91
- 92
- 93
- 94
- 95
- 96
- 97
- 98
- 99
- 100
- 101
- 102
- 103
- 104
- 105
- 106
- 107
- 108
- 109
- 110
- 111
- 112
- 113
- 114
- 115
- 116
- 117
- 118
- 119
- 120
- 121
- 122
- 123
- 124
- 125
- 126
- 127
- 128
- 129
- 130
- 131
- 132
- 133
这里开启https服务器,
设置ssl_certificate、ssl_certificate_key、ssl_client_certificate、ssl_verify_client,
添加location /flask/,通过proxy_pass转发请求到flask接口,
通过proxy_set_header把证书信息$ssl_client_cert、$ssl_client_serial、$ssl_client_s_dn设置到请求头里供后端查看# 重新启动,热启动,修改配置重启不影响线上 ╰─$ nginx -s reload;- 1
- 2
- 3
此时访问https://localhost/flask/可以看到请求转发成功

5.postman导入客户端证书前后对比
用postman请求https://localhost/flask/
没导入客户端证书时请求,flask日志显示无客户端证书

postman导入客户端证书

postman再次请求

6.开启服务端校验客户端证书
nginx配置文件里设置
ssl_verify_client on;─$ nginx -s reload- 1

此时访问https://localhost/flask/,nginx会提示“No required SSL certificate was sent”7.okhttp携带客户端证书、校验服务端证书
package my.app; import android.util.Log; import okhttp3.CertificatePinner; import okhttp3.OkHttpClient; import javax.net.ssl.*; import java.io.IOException; import java.io.InputStream; import java.security.KeyManagementException; import java.security.KeyStore; import java.security.KeyStoreException; import java.security.NoSuchAlgorithmException; import java.security.SecureRandom; import java.security.UnrecoverableKeyException; import java.security.cert.Certificate; import java.security.cert.CertificateException; import java.security.cert.CertificateFactory; public class OkHttpClintUtil { public static InputStream client_p12 = null; public static InputStream server2_crt = null; public static OkHttpClient getClientByAI(){ try { //服务端证书 CertificateFactory certificateFactory = CertificateFactory.getInstance("X509"); Certificate serverCertificate = certificateFactory.generateCertificate(server2_crt); //keyStore存储服务端证书 KeyStore keyStore = KeyStore.getInstance(KeyStore.getDefaultType()); keyStore.load(null,null); //In order to create an empty keystore, pass null as the stream argument. keyStore.setCertificateEntry("my_server_certificate", serverCertificate); // 创建 TrustManager TrustManagerFactory trustManagerFactory = TrustManagerFactory.getInstance(TrustManagerFactory.getDefaultAlgorithm()); trustManagerFactory.init(keyStore); TrustManager[] trustManagers = trustManagerFactory.getTrustManagers(); // 加载客户端证书文件 KeyStore keyStore2 = KeyStore.getInstance("PKCS12"); keyStore2.load(client_p12, "123456".toCharArray()); // 创建 KeyManager KeyManagerFactory keyManagerFactory = KeyManagerFactory.getInstance(KeyManagerFactory.getDefaultAlgorithm()); keyManagerFactory.init(keyStore2, "123456".toCharArray()); KeyManager[] keyManagers = keyManagerFactory.getKeyManagers(); // 创建 SSLContext SSLContext sslContext = SSLContext.getInstance("TLS"); sslContext.init(keyManagers, trustManagers, new SecureRandom()); //certificatePinner验证服务端证书,可以校验证书,也可以校验证书哈希值 CertificatePinner certificatePinner = new CertificatePinner.Builder().add("172.16.90.134", CertificatePinner.pin(serverCertificate)).build(); CertificatePinner certificatePinner2 = new CertificatePinner.Builder().add("172.16.90.134", "sha256/Rkw2hU165pITX+5rqOJCPrgDL3Y3TRHLPbygl/wxpsY=").build(); // 创建 OkHttpClient OkHttpClient client = new OkHttpClient.Builder() //sslContext携带了客户端证书 //trustManagers[0]信任服务端自签名证书 .sslSocketFactory(sslContext.getSocketFactory(), (X509TrustManager) trustManagers[0]) //可以在这里对hostname进行校验 .hostnameVerifier(new HostnameVerifier() { @Override public boolean verify(String hostname, SSLSession session) { Log.d("my.app", "hostname: " + hostname); try { Certificate[] peerCertificates = session.getPeerCertificates(); for (Certificate c: peerCertificates) { Log.d("my.app", "接收到的服务端证书: \n" + c.toString()); } } catch (SSLPeerUnverifiedException e) { e.printStackTrace(); return false; } return true; } }) //服务端证书绑定 .certificatePinner(certificatePinner2) .build(); return client; } catch (CertificateException | KeyStoreException | KeyManagementException | NoSuchAlgorithmException | IOException | UnrecoverableKeyException e) { e.printStackTrace(); } return null; } }- 1
- 2
- 3
- 4
- 5
- 6
- 7
- 8
- 9
- 10
- 11
- 12
- 13
- 14
- 15
- 16
- 17
- 18
- 19
- 20
- 21
- 22
- 23
- 24
- 25
- 26
- 27
- 28
- 29
- 30
- 31
- 32
- 33
- 34
- 35
- 36
- 37
- 38
- 39
- 40
- 41
- 42
- 43
- 44
- 45
- 46
- 47
- 48
- 49
- 50
- 51
- 52
- 53
- 54
- 55
- 56
- 57
- 58
- 59
- 60
- 61
- 62
- 63
- 64
- 65
- 66
- 67
- 68
- 69
- 70
- 71
- 72
- 73
- 74
- 75
- 76
- 77
- 78
- 79
- 80
- 81
- 82
- 83
- 84
- 85
- 86
- 87
- 88
- 89
- 90
- 91
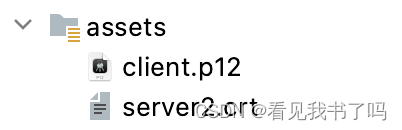
String url = "https://172.16.90.134/flask"; Log.i("my.app", url); try { OkHttpClintUtil.server2_crt = getAssets().open("server2.crt"); OkHttpClintUtil.client_p12 = getAssets().open("client.p12"); } catch (IOException e) { e.printStackTrace(); } OkHttpClient okHttpClient = OkHttpClintUtil.getClientByAI(); Request request = new Request.Builder().url(url).get().build(); Call call = okHttpClient.newCall(request); call.enqueue(new Callback() { @Override public void onFailure(Call call, IOException e) { Log.d("my.app", "okhttp请求失败" + e.toString()); //使用Looper解决在子线程中调用Toast出现异常 Looper.prepare(); Toast.makeText(getApplicationContext(),"okhttp请求失败" + e.toString(),Toast.LENGTH_SHORT).show(); Looper.loop(); } @Override public void onResponse(Call call, Response response) throws IOException { //response.body().string() 获得服务器返回的数据 String res = response.body().string(); Log.d("my.app", "onResponse: " + res); //使用Looper解决在子线程中调用Toast出现异常 Looper.prepare(); Toast.makeText(getApplicationContext(),"onResponse: " + res,Toast.LENGTH_SHORT).show(); Looper.loop(); } });- 1
- 2
- 3
- 4
- 5
- 6
- 7
- 8
- 9
- 10
- 11
- 12
- 13
- 14
- 15
- 16
- 17
- 18
- 19
- 20
- 21
- 22
- 23
- 24
- 25
- 26
- 27
- 28
- 29
- 30
- 31
- 32
结束
生成自签名证书
╰─$ openssl req -x509 -newkey rsa:4096 -nodes -out cert.pem -keyout key.pem -days 365 130 ↵ Generating a RSA private key ..............................................................................................................................................++++ ...............................++++ writing new private key to 'key.pem' ----- You are about to be asked to enter information that will be incorporated into your certificate request. What you are about to enter is what is called a Distinguished Name or a DN. There are quite a few fields but you can leave some blank For some fields there will be a default value, If you enter '.', the field will be left blank. ----- Country Name (2 letter code) [AU]:CN State or Province Name (full name) [Some-State]:GuangDong Locality Name (eg, city) []:GuangZhou Organization Name (eg, company) [Internet Widgits Pty Ltd]:YouMi Organizational Unit Name (eg, section) []:RD Common Name (e.g. server FQDN or YOUR name) []:william Email Address []: ╰─$ ls cert.pem key.pem- 1
- 2
- 3
- 4
- 5
- 6
- 7
- 8
- 9
- 10
- 11
- 12
- 13
- 14
- 15
- 16
- 17
- 18
- 19
- 20
- 21
- 22
- 23
Flask开启https
from flask import Flask app = Flask(__name__) @app.route("/") def hello(): return "SSLPinning Test" if __name__ == "__main__": # app.run(ssl_context='adhoc') # Flask的临时证书并不是那么好,因为每次服务器运行时,都会通过pyOpenSSL动态生成不同的证书 app.run(ssl_context=('/Users/wiliam/temp/cert.pem', '/Users/wiliam/temp/key.pem'))- 1
- 2
- 3
- 4
- 5
- 6
- 7
- 8
- 9
- 10
- 11
- 12
flask不支持验证客户端证书!
(好像可以???看不懂 https://stackoverflow.com/questions/23262768/two-way-ssl-authentication-for-flask)mac安装nginx
╰─$ brew install nginx ╰─$ where nginx /opt/homebrew/bin/nginx 使用nginx的 -t 参数进行配置检查,即可知道实际调用的配置文件路径及是否调用有效 ╰─$ nginx -t nginx: the configuration file /opt/homebrew/etc/nginx/nginx.conf syntax is ok nginx: configuration file /opt/homebrew/etc/nginx/nginx.conf test is successful # 重新启动,热启动,修改配置重启不影响线上 nginx -s reload; # 关闭 nginx -s stop;- 1
- 2
- 3
- 4
- 5
- 6
- 7
- 8
- 9
- 10
- 11
- 12
- 13
- 14
proxy_set_header X-SSL-CERT $ssl_client_cert;
will save the client certificate (from the incoming request to nginx) into ssl_client_cert variable.
NOTE: You’d have to set the
ssl_verify_client on/optional/optional_no_ca/off;
configuration and it should be anything other than off.
on: will do the full verification on client cert, will require the cert from the client side.
optional: cert isn’t required but if cert is provided, will verify it.
optional_no_ca: cert isn’t required, and won’t be verified.
off: turning the option off. (Not asking for the certs so nothing to save in ssl_client_cert)查看证书
╰─$ openssl x509 -in client2.crt -noout -text Certificate: Data: Version: 3 (0x2) Serial Number: 58:79:4c:98:66:2e:49:33:be:e2:49:18:72:73:56:65:8a:59:b6:5d Signature Algorithm: sha256WithRSAEncryption Issuer: C = CN, ST = GuangDong2, L = GuangZhou2, O = YouMi2, OU = RD2, CN = 172.16.90.153 Validity Not Before: Nov 22 05:15:57 2022 GMT Not After : Nov 19 05:15:57 2032 GMT Subject: C = CN, ST = GuangDong2, L = GuangZhou2, O = YouMi2, OU = RD2, CN = 172.16.90.153 Subject Public Key Info: Public Key Algorithm: rsaEncryption RSA Public-Key: (1024 bit) Modulus: 00:c4:ee:f1:5e:9b:7d:cc:1b:e3:de:54:d0:b7:10: fd:a6:c3:4a:91:b8:e1:b8:f1:5b:57:ed:5f:5b:a5: 0e:7a:ec:2b:0a:be:5f:c4:6e:c5:53:a4:4f:b7:95: f0:56:0c:fa:53:c1:0f:7f:2a:9b:f4:53:37:ce:82: 12:84:31:aa:2f:36:5c:1d:98:20:1a:87:9a:07:65: c6:ba:36:77:03:81:4f:10:ca:b8:66:83:37:86:66: 2c:d9:35:fe:a4:a8:4d:1b:46:03:97:05:b5:0f:ff: 0c:01:c0:1d:b4:fc:63:9a:f8:94:a0:79:0f:1a:9a: 07:be:b2:ec:e3:fd:7f:0c:8b Exponent: 65537 (0x10001) X509v3 extensions: X509v3 Subject Key Identifier: D2:26:B2:87:B1:25:73:46:F8:8E:96:AD:5A:4C:9F:5A:FC:52:9C:5F X509v3 Authority Key Identifier: keyid:D2:26:B2:87:B1:25:73:46:F8:8E:96:AD:5A:4C:9F:5A:FC:52:9C:5F X509v3 Basic Constraints: critical CA:TRUE Signature Algorithm: sha256WithRSAEncryption 6d:d1:af:8a:60:7f:1b:24:38:d2:7d:07:71:6e:68:82:8f:55: 60:01:a1:e7:77:a1:9d:e8:52:4a:9f:43:90:64:94:d1:b1:25: 04:36:67:31:e1:8a:86:74:d9:30:21:49:2f:0c:b8:3d:55:be: 75:99:21:c2:03:18:48:96:ee:36:ca:52:e2:06:e7:52:d6:ed: 9b:a4:49:e2:cb:8e:7f:d9:7e:c6:f2:60:ff:90:09:b9:d4:81: 28:16:f4:d8:54:01:79:d5:8b:bf:20:29:bd:79:03:ad:83:e8: d7:08:9e:c6:4d:1f:01:49:7c:e7:d3:4f:10:65:9d:3b:d6:53: 16:ef- 1
- 2
- 3
- 4
- 5
- 6
- 7
- 8
- 9
- 10
- 11
- 12
- 13
- 14
- 15
- 16
- 17
- 18
- 19
- 20
- 21
- 22
- 23
- 24
- 25
- 26
- 27
- 28
- 29
- 30
- 31
- 32
- 33
- 34
- 35
- 36
- 37
- 38
- 39
- 40
- 41
- 42
- 43
7.将服务端/客户端证书转为bks证书
Android平台只识别bks格式的证书文件
打开http://www.bouncycastle.org/latest_releases.html下载bcprov-jdk18on-172.jarkeytool -importcert -v -trustcacerts -alias 位置1 -file 位置2 -keystore 位置3 -storetype BKS -providerclass org.bouncycastle.jce.provider.BouncyCastleProvider -providerpath 位置4 -storepass 位置5- 1
位置1:证书别名
位置2:cer或crt证书文件的路径
位置3:生成的bks文件的路径
位置4:上面下载的JCE Provider包的位置
位置5:bks的密码,用于确保KeyStore文件本身的安全命令执行完以后,会在对应目录生成对应的bks文件。
示例
keytool -importcert -v -trustcacerts -alias my_client -file client.crt -keystore client.bks -storetype BKS -providerclass org.bouncycastle.jce.provider.BouncyCastleProvider -providerpath bcprov-jdk18on-172.jar -storepass 123456 keytool -importcert -v -trustcacerts -alias my_server -file server.crt -keystore server.bks -storetype BKS -providerclass org.bouncycastle.jce.provider.BouncyCastleProvider -providerpath bcprov-jdk18on-172.jar -storepass 123456- 1
- 2
- 3
算出证书的sha256
╰─$ openssl x509 -in server.crt -pubkey -noout | openssl pkey -pubin -outform der | openssl dgst -sha256 -binary | openssl enc -base64 Rkw2hU165pITX+5rqOJCPrgDL3Y3TRHLPbygl/wxpsY=- 1
- 2
Nginx 304 Not Modify
使用缓存即可的意思
关闭缓存etag off; add_header Last-Modified ""; add_header Cache-Control no-cache;- 1
- 2
- 3

-
相关阅读:
一键重装Win10图文版教程
RabbitMQ--交换机
【Vue3】vue3中组合式Api的setup写法快速入门上手起步
Spring事件监听机制
网络中其他重要技术与协议(DNS系统,ICMP协议,NAT技术与代理服务器)
hydra(九头蛇)--参数及常见命令
概率论知识点总结(上)
戏说c语言: 阶段性总结二
黑马JVM总结(二十五)
Linux进程信号
- 原文地址:https://blog.csdn.net/qq_43572758/article/details/127917530


- 最新文章
-
沪漂五周年了:我越来越迷茫了
Agentic Skill Routing 实战:别再把所有 Skill 塞进 AI Agent 上下文
MySQL-Seconds_behind_master的精度误差
[MAF预定义ChatClient中间件-03]CachingChatClient——利用缓存省钱省时间
AI的至暗历史:从万众期待到被政府撤资,AI的两次死亡徘徊
Agent OS :五种驯服不确定性的范式
PortSwigger SQL注入LAB11
数据库即时编译JIT
[Begin]AI Learn Data Day 0
深度学习进阶(二十七)现代 LLM 的核心架构设计其二:SwiGLU