-
JUC P5 自定义线程池,线程池应用 基础+代码
JUC P5 自定义线程池,线程池应用 基础+代码
教程:https://www.bilibili.com/video/BV16J411h7Rd
- ThreadPoolExecutor
- Fork/Join
9. 自定义线程池
Note:
使用线程池的目的:重复利用线程,减少占用内存的占用,减少创建线程的数量,避免频繁的上下文切换。
阻塞队列用于平衡消费者线程和生产者线程。9.1 自定义阻塞队列
Note:
虚假唤醒- 当生产者生产了一件商品,并通知了多个消费者,只有一个消费者能获取该商品,其他的消费者都被虚假唤醒,应该继续等待,并且等待时间就不应该是初始设置的时间了,应该是等待还剩余的时间。
@Slf4j(topic = "c.BlockingQueue") class BlockingQueue<T> { // 1. 任务队列 private final Deque<T> queue = new ArrayDeque<>(); // 2. 锁 private final ReentrantLock lock = new ReentrantLock(); // 3. 生产者条件变量 private final Condition fullWaitSet = lock.newCondition(); // 4. 消费者条件变量 private final Condition emptyWaitSet = lock.newCondition(); // 5. 容量 private int capacity; public BlockingQueue(int capacity) { this.capacity = capacity; } // 带超时的阻塞获取 public T poll(long timeout, TimeUnit unit) { lock.lock(); try { long nanos = unit.toNanos(timeout); // 统一转换为纳秒 while (queue.isEmpty()) { try { if (nanos <= 0) { return null; } nanos = emptyWaitSet.awaitNanos(nanos); // 防止虚假唤醒 } catch (InterruptedException e) { e.printStackTrace(); } } T t = queue.removeFirst(); fullWaitSet.signal(); return t; } finally { lock.unlock(); } } // 阻塞获取 public T take() { lock.lock(); try { while (queue.isEmpty()) { try { emptyWaitSet.await(); // 永久阻塞, 若一直拿不到, 则会一直阻塞 } catch (InterruptedException e) { e.printStackTrace(); } } T t = queue.removeFirst(); fullWaitSet.signal(); return t; } finally { lock.unlock(); } } // 阻塞添加 public void put(T task) { lock.lock(); try { while (queue.size() == capacity) { try { log.debug("等待加入任务队列... {}", task); fullWaitSet.await(); } catch (InterruptedException e) { e.printStackTrace(); } } log.debug("加入任务队列 {}", task); queue.addLast(task); emptyWaitSet.signal(); } finally { lock.unlock(); } } // 带超时时间的阻塞添加 public boolean offer(T task, long timeout, TimeUnit timeUnit) { lock.lock(); try { long nanos = timeUnit.toNanos(timeout); while (queue.size() == capacity) { try { log.debug("等待加入任务队列... {}", task); if (nanos <= 0) { return false; } nanos = fullWaitSet.awaitNanos(nanos); } catch (InterruptedException e) { e.printStackTrace(); } } log.debug("加入任务队列 {}", task); queue.addLast(task); emptyWaitSet.signal(); return true; } finally { lock.unlock(); } } // 获取大小 public int size() { lock.lock(); try { return queue.size(); } finally { lock.unlock(); } } }- 1
- 2
- 3
- 4
- 5
- 6
- 7
- 8
- 9
- 10
- 11
- 12
- 13
- 14
- 15
- 16
- 17
- 18
- 19
- 20
- 21
- 22
- 23
- 24
- 25
- 26
- 27
- 28
- 29
- 30
- 31
- 32
- 33
- 34
- 35
- 36
- 37
- 38
- 39
- 40
- 41
- 42
- 43
- 44
- 45
- 46
- 47
- 48
- 49
- 50
- 51
- 52
- 53
- 54
- 55
- 56
- 57
- 58
- 59
- 60
- 61
- 62
- 63
- 64
- 65
- 66
- 67
- 68
- 69
- 70
- 71
- 72
- 73
- 74
- 75
- 76
- 77
- 78
- 79
- 80
- 81
- 82
- 83
- 84
- 85
- 86
- 87
- 88
- 89
- 90
- 91
- 92
- 93
- 94
- 95
- 96
- 97
- 98
- 99
- 100
- 101
- 102
- 103
- 104
- 105
- 106
- 107
- 108
- 109
- 110
- 111
- 112
- 113
- 114
- 115
- 116
- 117
- 118
9.2 自定义线程池
@Slf4j(topic = "c.MyThreadPool") class ThreadPool { // 任务队列 private final BlockingQueue<Runnable> taskQueue; // 线程集合 private final Set<Worker> workers = new HashSet<>(); // 核心线程数 private final int coreSize; // 获取任务的超时时间 private final long timeout; private final TimeUnit timeUnit; public ThreadPool(int coreSize, long timeout, TimeUnit timeUnit, int queueCapacity) { this.coreSize = coreSize; this.timeout = timeout; this.timeUnit = timeUnit; this.taskQueue = new BlockingQueue<>(queueCapacity); } // 执行任务 public void execute(Runnable task) { // 当任务数不超过 coreSize 时, 直接交给 worker 对象执行 // 如果任务数超过 coreSize 时, 加入任务队列暂存 synchronized (workers) { if (workers.size() < coreSize) { Worker worker = new Worker(task); log.debug("新增 worker {} {}", worker, task); workers.add(worker); worker.start(); } else { taskQueue.put(task); } } } class Worker extends Thread{ private Runnable task; public Worker(Runnable task) { this.task = task; } @Override public void run() { // 执行任务 // case 1: task 不为空, 执行任务 // case 2: 当 task 执行完毕, 接着从任务队列中获取任务并执行 // while (task != null || (task = taskQueue.take()) != null) { while (task != null || (task = taskQueue.poll(timeout, timeUnit)) != null) { try { log.debug("正在执行...{}", task); task.run(); } catch (Exception e) { e.printStackTrace(); } finally { task = null; } } synchronized (workers) { log.debug("移除 worker {}", this); workers.remove(this); } } } }- 1
- 2
- 3
- 4
- 5
- 6
- 7
- 8
- 9
- 10
- 11
- 12
- 13
- 14
- 15
- 16
- 17
- 18
- 19
- 20
- 21
- 22
- 23
- 24
- 25
- 26
- 27
- 28
- 29
- 30
- 31
- 32
- 33
- 34
- 35
- 36
- 37
- 38
- 39
- 40
- 41
- 42
- 43
- 44
- 45
- 46
- 47
- 48
- 49
- 50
- 51
- 52
- 53
- 54
- 55
- 56
- 57
- 58
- 59
- 60
- 61
- 62
- 63
- 64
- 65
- 66
- 67
测试无限时等待执行
设置可执行的线程数为 2,阻塞队列(任务队列)长度为 10。
@Slf4j(topic = "c.InitTest") public class InitTest { public static void main(String[] args) { ThreadPool threadPool = new ThreadPool(2, 1000, TimeUnit.MILLISECONDS, 10); for (int i = 0; i < 5; i++) { int idx = i; threadPool.execute(() -> { log.debug("{}", idx); }); } } }- 1
- 2
- 3
- 4
- 5
- 6
- 7
- 8
- 9
- 10
- 11
- 12

测试有时限等待执行
将
take()方法改为poll()方法:while (task != null || (task = taskQueue.poll(timeout, timeUnit)) != null) { /**.....**/ }- 1
- 2
- 3

9.3 策略模式之拒绝策略
考虑一种情况:当阻塞队列满时,新来的任务应该如何处理?有以下几种方式:
- 死等
- 带超时的等待
- 让调用者放弃任务执行
- 让调用者抛出异常
- 让调用者自己执行
假如说每种方法都实现一个函数就比较冗余了,而且还可能有其他的处理情况,那么就可以采用拒绝策略模式,让调用者决定是什么处理方式。
拒绝策略接口
@FunctionalInterface interface RejectPolicy<T> { void reject(BlockingQueue<T> queue, T task); }- 1
- 2
- 3
- 4
Note:
这里设置为泛型,可以接受 Runnable 还可以接受 Callable阻塞队列中增加 tryPut() 方法
@Slf4j(topic = "c.BlockingQueue") class BlockingQueue<T> { // 1. 任务队列 private final Deque<T> queue = new ArrayDeque<>(); // 2. 锁 private final ReentrantLock lock = new ReentrantLock(); // 3. 生产者条件变量 private final Condition fullWaitSet = lock.newCondition(); // 4. 消费者条件变量 private final Condition emptyWaitSet = lock.newCondition(); // 5. 容量 private int capacity; public BlockingQueue(int capacity) { this.capacity = capacity; } // 带超时的阻塞获取 public T poll(long timeout, TimeUnit unit) { lock.lock(); try { long nanos = unit.toNanos(timeout); // 统一转换为纳秒 while (queue.isEmpty()) { try { if (nanos <= 0) { return null; } nanos = emptyWaitSet.awaitNanos(nanos); // 防止虚假唤醒 } catch (InterruptedException e) { e.printStackTrace(); } } T t = queue.removeFirst(); fullWaitSet.signal(); return t; } finally { lock.unlock(); } } // 阻塞获取 public T take() { lock.lock(); try { while (queue.isEmpty()) { try { emptyWaitSet.await(); // 永久阻塞, 若一直拿不到, 则会一直阻塞 } catch (InterruptedException e) { e.printStackTrace(); } } T t = queue.removeFirst(); fullWaitSet.signal(); return t; } finally { lock.unlock(); } } // 阻塞添加 public void put(T task) { lock.lock(); try { while (queue.size() == capacity) { try { log.debug("等待加入任务队列... {}", task); fullWaitSet.await(); } catch (InterruptedException e) { e.printStackTrace(); } } log.debug("加入任务队列 {}", task); queue.addLast(task); emptyWaitSet.signal(); } finally { lock.unlock(); } } // 带超时时间的阻塞添加 public boolean offer(T task, long timeout, TimeUnit timeUnit) { lock.lock(); try { long nanos = timeUnit.toNanos(timeout); while (queue.size() == capacity) { try { log.debug("等待加入任务队列... {}", task); if (nanos <= 0) { log.debug("取消任务....{}", task); return false; } nanos = fullWaitSet.awaitNanos(nanos); } catch (InterruptedException e) { e.printStackTrace(); } } log.debug("加入任务队列 {}", task); queue.addLast(task); emptyWaitSet.signal(); return true; } finally { lock.unlock(); } } // 获取大小 public int size() { lock.lock(); try { return queue.size(); } finally { lock.unlock(); } } // 自定义拒绝策略的阻塞添加 public void tryPut(RejectPolicy<T> rejectPolicy, T task) { lock.lock(); try { // 判断队列是否满 if (queue.size() == capacity) { rejectPolicy.reject(this, task); } else { // 有空闲 log.debug("加入任务队列 {}", task); queue.addLast(task); emptyWaitSet.signal(); } } finally { lock.unlock(); } } }- 1
- 2
- 3
- 4
- 5
- 6
- 7
- 8
- 9
- 10
- 11
- 12
- 13
- 14
- 15
- 16
- 17
- 18
- 19
- 20
- 21
- 22
- 23
- 24
- 25
- 26
- 27
- 28
- 29
- 30
- 31
- 32
- 33
- 34
- 35
- 36
- 37
- 38
- 39
- 40
- 41
- 42
- 43
- 44
- 45
- 46
- 47
- 48
- 49
- 50
- 51
- 52
- 53
- 54
- 55
- 56
- 57
- 58
- 59
- 60
- 61
- 62
- 63
- 64
- 65
- 66
- 67
- 68
- 69
- 70
- 71
- 72
- 73
- 74
- 75
- 76
- 77
- 78
- 79
- 80
- 81
- 82
- 83
- 84
- 85
- 86
- 87
- 88
- 89
- 90
- 91
- 92
- 93
- 94
- 95
- 96
- 97
- 98
- 99
- 100
- 101
- 102
- 103
- 104
- 105
- 106
- 107
- 108
- 109
- 110
- 111
- 112
- 113
- 114
- 115
- 116
- 117
- 118
- 119
- 120
- 121
- 122
- 123
- 124
- 125
- 126
- 127
- 128
- 129
- 130
- 131
- 132
- 133
- 134
- 135
- 136
修改线程池代码,执行任务方式不写死
@Slf4j(topic = "c.MyThreadPool") class ThreadPool { // 任务队列 private final BlockingQueue<Runnable> taskQueue; // 线程集合 private final Set<Worker> workers = new HashSet<>(); // 核心线程数 private final int coreSize; // 获取任务的超时时间 private final long timeout; private final TimeUnit timeUnit; // 拒绝策略 private final RejectPolicy<Runnable> rejectPolicy; public ThreadPool(int coreSize, long timeout, TimeUnit timeUnit, int queueCapacity, RejectPolicy<Runnable> rejectPolicy) { this.coreSize = coreSize; this.timeout = timeout; this.timeUnit = timeUnit; this.taskQueue = new BlockingQueue<>(queueCapacity); this.rejectPolicy = rejectPolicy; } // 执行任务 public void execute(Runnable task) { // 当任务数不超过 coreSize 时, 直接交给 worker 对象执行 // 如果任务数超过 coreSize 时, 加入任务队列暂存 synchronized (workers) { if (workers.size() < coreSize) { Worker worker = new Worker(task); log.debug("新增 worker {} {}", worker, task); workers.add(worker); worker.start(); } else { // taskQueue.put(task); taskQueue.tryPut(rejectPolicy, task); } } } class Worker extends Thread { private Runnable task; public Worker(Runnable task) { this.task = task; } @Override public void run() { // 执行任务 // case 1: task 不为空, 执行任务 // case 2: 当 task 执行完毕, 接着从任务队列中获取任务并执行 // while (task != null || (task = taskQueue.take()) != null) { while (task != null || (task = taskQueue.poll(timeout, timeUnit)) != null) { try { log.debug("正在执行...{}", task); task.run(); } catch (Exception e) { e.printStackTrace(); } finally { task = null; } } synchronized (workers) { log.debug("移除 worker {}", this); workers.remove(this); } } } }- 1
- 2
- 3
- 4
- 5
- 6
- 7
- 8
- 9
- 10
- 11
- 12
- 13
- 14
- 15
- 16
- 17
- 18
- 19
- 20
- 21
- 22
- 23
- 24
- 25
- 26
- 27
- 28
- 29
- 30
- 31
- 32
- 33
- 34
- 35
- 36
- 37
- 38
- 39
- 40
- 41
- 42
- 43
- 44
- 45
- 46
- 47
- 48
- 49
- 50
- 51
- 52
- 53
- 54
- 55
- 56
- 57
- 58
- 59
- 60
- 61
- 62
- 63
- 64
- 65
- 66
- 67
- 68
- 69
- 70
- 71
- 72
- 73
测试,可以让调用者自定义选择策略
@Slf4j(topic = "c.InitTest") public class InitTest { public static void main(String[] args) { ThreadPool threadPool = new ThreadPool(2, 1000, TimeUnit.MILLISECONDS, 10, (queue, task) -> { // 1. 死等 // queue.put(task); // 2. 超时等待 // queue.offer(task, 100, TimeUnit.MILLISECONDS); // 3. 让调用者放弃任务执行 // log.debug("放弃任务...{}", task); // 4. 让调用者抛出异常 // throw new RuntimeException("任务执行失败..." + task); // 5. 让调用者自己执行任务 task.run(); }); for (int i = 0; i < 15; i++) { int idx = i; threadPool.execute(() -> { try { TimeUnit.SECONDS.sleep(1); } catch (InterruptedException e) { e.printStackTrace(); } log.debug("{}", idx); }); } } }- 1
- 2
- 3
- 4
- 5
- 6
- 7
- 8
- 9
- 10
- 11
- 12
- 13
- 14
- 15
- 16
- 17
- 18
- 19
- 20
- 21
- 22
- 23
- 24
- 25
- 26
- 27
- 28
10. 线程池 ThreadPoolExecutor

10.1 线程池状态
private static final int COUNT_BITS = Integer.SIZE - 3; private static final int COUNT_MASK = (1 << COUNT_BITS) - 1; // runState is stored in the high-order bits private static final int RUNNING = -1 << COUNT_BITS; private static final int SHUTDOWN = 0 << COUNT_BITS; private static final int STOP = 1 << COUNT_BITS; private static final int TIDYING = 2 << COUNT_BITS; private static final int TERMINATED = 3 << COUNT_BITS;- 1
- 2
- 3
- 4
- 5
- 6
- 7
- 8

- RUNNING:接受新任务并处理排队的任务
- SHUTDOWN:不接受新任务,但处理排队的任务
- STOP:不接受新任务,不处理排队的任务,并中断正在进行的任务
- TIDYING:所有任务都已终止,
workerCount为 0,转换到状态整理的线程将运行terminated()钩子方法 - TERMINATED:
terminated()已完成这些值之间的数字顺序,以允许有序比较
为什么用 3 个高位表示线程池状态,29 个低位表示线程数量?
这些信息保存在一个
AtomicInteger类型的原子变量ctl中,目的是为了将线程池状态和线程个数合二为一,这样一次 CAS 原子操作即可完成赋值。ctl.compareAndSet(c, ctlOf(targetState, workerCountOf(c)))); // rs 表示 runState,wc 表示 wokerCount,位或运算可以直接合并两者 private static int ctlOf(int rs, int wc) { return rs | wc; };- 1
- 2
- 3
- 4
状态变化

10.2 构造方法
public ThreadPoolExecutor(int corePoolSize, // 核心线程数目(最多保留的线程数) int maximumPoolSize, // 最大线程数目 long keepAliveTime, // 生存时间 - 针对救急线程 TimeUnit unit, // 时间单位 BlockingQueue<Runnable> workQueue, // 阻塞队列 ThreadFactory threadFactory, // 线程工厂 - 可以给线程起个名字 RejectedExecutionHandler handler) // 拒绝策略 { if (corePoolSize < 0 || maximumPoolSize <= 0 || maximumPoolSize < corePoolSize || keepAliveTime < 0) throw new IllegalArgumentException(); if (workQueue == null || threadFactory == null || handler == null) throw new NullPointerException(); this.corePoolSize = corePoolSize; this.maximumPoolSize = maximumPoolSize; this.workQueue = workQueue; this.keepAliveTime = unit.toNanos(keepAliveTime); this.threadFactory = threadFactory; this.handler = handler; }- 1
- 2
- 3
- 4
- 5
- 6
- 7
- 8
- 9
- 10
- 11
- 12
- 13
- 14
- 15
- 16
- 17
- 18
- 19
- 20
- 21
- 22
工作方式:
corePoolSize设置核心线程数,maximumPoolSize设置核心线程数 + 救急线程数(都是懒惰创建):

当阻塞队列放不下就用到了救急线程去执行,当救急线程也满了,才会执行拒绝策略。Note:
救急线程和核心线程的区别:- 核心线程一旦创建就一直存在,救急线程创建后执行完任务后具有生存时间
keepAliveTime和unit就是控制救急线程的执行时间的。
工作流程
- 初始状态下线程池为空,当一个任务提交给线程池后,线程池会创建一个新的线程来执行任务
- 线程数达到
corePoolSize,这时再加入任务会被加入workQueue中排队 - 若队列选择限定容量的队列,那么任务数超过队列大小时,会最多创建
maximumPoolSize - corePoolSize数目的线程来救急 - 若总线程达到了
maximumPoolSize,仍然有新任务这时候会执行拒绝策略,拒绝策略 JDK 提供了 4 种实现,其他著名框架也提供了实现:-
AbortPolicy(默认):让调用者抛出 RejectedExecutionException -
CallerRunsPolicy:让调用者自己执行任务 -
DiscardPolicy:放弃本次任务 -
DiscardOldestPolicy:放弃队列中最早的任务,将本任务取而代之

-
Dubbo的实现:抛出 RejectedExecutionException 之前记录日志,并 dump 线程栈信息,方便定位问题 -
Netty的实现:创建一个新线程来执行任务 -
ActiveMQ的实现:带超时等待(60s)尝试放入队列,类似之前的自定义拒绝策略 -
PinPoint的实现:使用拒绝策略链,会逐个尝试策略链中每种拒绝策略
-
- 当高峰过去后,超过
corePoolSize的救急线程若一段时间没有事情做,需要结束节省资源,该事件由keepAliveTime和unit控制。
根据这个构造方法,JDK
Executors类中提供了众多的工厂方法来创建各种用途的线程池。10.3 创建线程池
10.3.1 固定大小的线程池
newFixedThreadPool()public static ExecutorService newFixedThreadPool(int nThreads) { return new ThreadPoolExecutor(nThreads, nThreads, 0L, TimeUnit.MILLISECONDS, new LinkedBlockingQueue<Runnable>()); } public static ExecutorService newFixedThreadPool(int nThreads, ThreadFactory threadFactory) { return new ThreadPoolExecutor(nThreads, nThreads, 0L, TimeUnit.MILLISECONDS, new LinkedBlockingQueue<Runnable>(), threadFactory); }- 1
- 2
- 3
- 4
- 5
- 6
- 7
- 8
- 9
- 10
- 11
- 12
特点
核心线程数 == 最大线程数,没有救急线程,无需等待时间- 因为是
LinkedBlockingQueue,因此阻塞队列可以放任意数量的任务
适用范围
- 任务量已知,相对耗时的任务
测试
@Slf4j(topic = "c.InitTest") public class InitTest { public static void main(String[] args) { ExecutorService pool = Executors.newFixedThreadPool(2); pool.execute(() -> { log.debug("1"); }); pool.execute(() -> { log.debug("2"); }); pool.execute(() -> { log.debug("3"); }); } }- 1
- 2
- 3
- 4
- 5
- 6
- 7
- 8
- 9
- 10
- 11
- 12
- 13
- 14
- 15

可以看到程序没有停止,线程 1 执行完第一个任务,又从队列中拿出第三个任务进行执行。
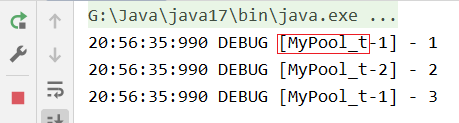
自定义线程工厂:
@Slf4j(topic = "c.InitTest") public class InitTest { public static void main(String[] args) { ExecutorService pool = Executors.newFixedThreadPool(2, new ThreadFactory() { private AtomicInteger t = new AtomicInteger(1); @Override public Thread newThread(Runnable r) { return new Thread(r, "MyPool_t-"+t.getAndIncrement()); } }); pool.execute(() -> { log.debug("1"); }); pool.execute(() -> { log.debug("2"); }); pool.execute(() -> { log.debug("3"); }); } }- 1
- 2
- 3
- 4
- 5
- 6
- 7
- 8
- 9
- 10
- 11
- 12
- 13
- 14
- 15
- 16
- 17
- 18
- 19
- 20
- 21
10.3.2 带缓冲的线程池
newCachedThreadPool()public static ExecutorService newCachedThreadPool() { return new ThreadPoolExecutor(0, Integer.MAX_VALUE, 60L, TimeUnit.SECONDS, new SynchronousQueue<Runnable>()); } /*传递线程工厂的方法略*/- 1
- 2
- 3
- 4
- 5
- 6
特点
- 核心线程数为
0,最大线程数为Integer.MAX_VALUE,救急线程的空闲生存时间为 60s,意味着- 创建的全部都是救急线程(执行完后空闲 60s 可回收)
- 救急线程可以无限创建
SynchronousQueue队列的特点是没有容量,没有线程来取执行结束的线程,那么下一个线程也放不进去
适用范围
- 整个线程池任务会根据任务量的不断增长,没有上限,当任务执行完毕,空闲线程 60s 后会释放线程
- 适合任务数比较密集,但是每个任务执行时间较短的情况
10.3.3 单线程线程池
newSingleThreadExecutor()public static ExecutorService newSingleThreadExecutor() { return new FinalizableDelegatedExecutorService (new ThreadPoolExecutor(1, 1, 0L, TimeUnit.MILLISECONDS, new LinkedBlockingQueue<Runnable>())); }- 1
- 2
- 3
- 4
- 5
- 6
特点
- 线程数固定为 1,任务数多余 1 时,放进无容量限制的阻塞队列排队。
- 任务执行完毕,这唯一的线程也不会被释放。
和自己创建线程有什么区别:
- 自己创建一个单线程串行执行任务,若任务执行失败而终止那么没有任何补救措施,而线程池还会创建新的线程,保证池的正常工作
和固定线程数为 1 的线程池的区别:
Executors.newSingleThreadExecutor()线程个数始终为 1,不能修改- 只对外暴露
ExecutorService接口的方法,因此不能调用ThreadPoolExecutor中特有的方法
- 只对外暴露
Executors.newFixedThreadPool(1)初始线程数为 1,之后还可以修改- 可以通过
setCorePoolSize等方法修改,前提是不能超过初始设置的最大线程数
- 可以通过
@Slf4j(topic = "c.InitTest") public class InitTest { public static void main(String[] args) { ThreadPoolExecutor pool = (ThreadPoolExecutor) Executors.newFixedThreadPool(2, new ThreadFactory() { private final AtomicInteger t = new AtomicInteger(1); @Override public Thread newThread(Runnable r) { return new Thread(r, "MyPool_t-" + t.getAndIncrement()); } }); // 修改核心线程数 pool.setCorePoolSize(0); pool.execute(() -> { log.debug("1"); }); pool.execute(() -> { log.debug("2"); }); pool.execute(() -> { log.debug("3"); }); } }- 1
- 2
- 3
- 4
- 5
- 6
- 7
- 8
- 9
- 10
- 11
- 12
- 13
- 14
- 15
- 16
- 17
- 18
- 19
- 20
- 21
- 22
- 23
- 24
- 25
适用范围
- 希望多个任务排队执行
10.3.4 任务调度线程池
newScheduledThreadPool()public static ScheduledExecutorService newScheduledThreadPool(int corePoolSize) { return new ScheduledThreadPoolExecutor(corePoolSize); }- 1
- 2
- 3
10.3.4.1 引例:Timer 的解决方案:
@Slf4j(topic = "c.InitTest") public class InitTest { public static void main(String[] args) { Timer timer = new Timer(); timer.schedule(new TimerTask() { @SneakyThrows @Override public void run() { log.debug("task 1"); TimeUnit.SECONDS.sleep(2); } }, 1000); timer.schedule(new TimerTask() { @Override public void run() { log.debug("task 2"); } }, 1000); } }- 1
- 2
- 3
- 4
- 5
- 6
- 7
- 8
- 9
- 10
- 11
- 12
- 13
- 14
- 15
- 16
- 17
- 18
- 19
- 20
- 21

Timer优点是简单易用,但是所有任务都是由一个线程来调度,因此所有任务是串行执行的,同一个时间只能有一个任务在执行,前一个任务的延迟或者异常都将影响到之后的任务。10.3.4.2 延时任务
一个任务的执行不会影响下一个任务的执行
@Slf4j(topic = "c.InitTest") public class InitTest { public static void main(String[] args) { ScheduledExecutorService pool = Executors.newScheduledThreadPool(2); pool.schedule(() -> { log.debug("task 1"); try { TimeUnit.SECONDS.sleep(2); } catch (InterruptedException e) { e.printStackTrace(); } }, 1, TimeUnit.SECONDS); pool.schedule(() -> { log.debug("task 2"); }, 1, TimeUnit.SECONDS); } }- 1
- 2
- 3
- 4
- 5
- 6
- 7
- 8
- 9
- 10
- 11
- 12
- 13
- 14
- 15
- 16
- 17
- 18

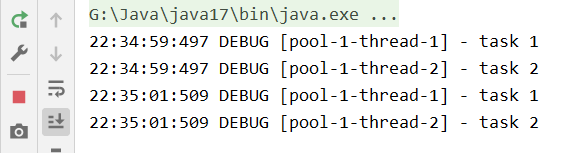
10.3.4.3 周期定时执行
scheduleAtFixedRate()除任务外的三个参数分别是起始时间,间隔时间,时间单位scheduleAtFixedRate()任务执行时间也算在间隔时间之中,当上一次任务开始执行时开始计算间隔时间,若任务执行时间大于间隔时间,则按照上一次任务结束时间开始执行- 而
scheduleWithFixedDelay()不同,任务执行时间不算入间隔时间,一次任务必须等上一次任务结束之后再等一段间隔时间才能执行
@Slf4j(topic = "c.InitTest") public class InitTest { public static void main(String[] args) { ScheduledExecutorService pool = Executors.newScheduledThreadPool(2); pool.scheduleAtFixedRate(() -> { log.debug("task 1"); }, 0, 2,TimeUnit.SECONDS); pool.scheduleAtFixedRate(() -> { log.debug("task 2"); }, 0, 2,TimeUnit.SECONDS); } }- 1
- 2
- 3
- 4
- 5
- 6
- 7
- 8
- 9
- 10
- 11
- 12
- 13
- 14
10.3.4.4 异常处理
①主动获取异常,将可能发生异常的代码用
try {} catch {}括起来:@Slf4j(topic = "c.InitTest") public class InitTest { public static void main(String[] args) { ScheduledExecutorService pool = Executors.newScheduledThreadPool(2); pool.schedule(() -> { log.debug("task 1"); try { int i = 1 / 0; TimeUnit.SECONDS.sleep(3); } catch (Exception e) { log.error("error", e); } }, 1, TimeUnit.SECONDS); } }- 1
- 2
- 3
- 4
- 5
- 6
- 7
- 8
- 9
- 10
- 11
- 12
- 13
- 14
- 15
- 16

②使用
Callable类型的任务,并且用get获取返回值,不用get是接受不到异常信息的:@Slf4j(topic = "c.InitTest") public class InitTest { public static void main(String[] args) throws ExecutionException, InterruptedException { ScheduledExecutorService pool = Executors.newScheduledThreadPool(2); Future<Boolean> future = pool.schedule(() -> { log.debug("task 1"); int i = 1 / 0; return true; }, 1, TimeUnit.SECONDS); log.debug("result: {}", future.get()); } }- 1
- 2
- 3
- 4
- 5
- 6
- 7
- 8
- 9
- 10
- 11
- 12
- 13
- 14

10.4 提交任务
10.4.1 执行任务(无返回值)
public void execute(Runnable command)- 1
10.4.2 提交任务,用返回值 Future 获得任务执行结果(带返回值)
public <T> Future<T> submit(Callable<T> task)- 1
测试:
@Slf4j(topic = "c.InitTest") public class InitTest { public static void main(String[] args) throws ExecutionException, InterruptedException { ExecutorService pool = Executors.newFixedThreadPool(2); Future<String> submit = pool.submit(() -> { log.debug("1"); return "1 success!"; }); Future<String> submit2 = pool.submit(() -> { log.debug("2"); return "2 success!"; }); Future<String> submit3 = pool.submit(() -> { log.debug("3"); return "3 success!"; }); log.debug("{} {} {}", submit.get(), submit2.get(), submit3.get()); } }- 1
- 2
- 3
- 4
- 5
- 6
- 7
- 8
- 9
- 10
- 11
- 12
- 13
- 14
- 15
- 16
- 17
- 18
- 19

10.4.3 提交集合中的所有任务(带返回值)
public <T> List<Future<T>> invokeAll(Collection<? extends Callable<T>> tasks)- 1
测试:
@Slf4j(topic = "c.InitTest") public class InitTest { public static void main(String[] args) throws ExecutionException, InterruptedException { ExecutorService pool = Executors.newFixedThreadPool(2); List<Future<Object>> futures = pool.invokeAll(Arrays.asList( () -> { log.debug("1"); return "1 success!"; }, () -> { log.debug("2"); return "2 success!"; }, () -> { log.debug("3"); return "3 success!"; } )); futures.forEach(t -> { try { log.debug("{}", t.get()); } catch (InterruptedException | ExecutionException e) { throw new RuntimeException(e); } }); } }- 1
- 2
- 3
- 4
- 5
- 6
- 7
- 8
- 9
- 10
- 11
- 12
- 13
- 14
- 15
- 16
- 17
- 18
- 19
- 20
- 21
- 22
- 23
- 24
- 25
- 26
- 27

10.4.4 提交集合中所有任务,哪个任务先执行完成,其他任务取消(带返回值)
public <T> T invokeAny(Collection<? extends Callable<T>> tasks)- 1
测试:
@Slf4j(topic = "c.InitTest") public class InitTest { public static void main(String[] args) throws ExecutionException, InterruptedException { ExecutorService pool = Executors.newFixedThreadPool(2); String result = pool.invokeAny(Arrays.asList( () -> { log.debug("1"); TimeUnit.MILLISECONDS.sleep(1000); log.debug("1 end"); return "1 success!"; }, () -> { log.debug("2"); TimeUnit.MILLISECONDS.sleep(500); log.debug("2 end"); return "2 success!"; }, () -> { log.debug("3"); TimeUnit.MILLISECONDS.sleep(2000); log.debug("3 end"); return "3 success!"; } )); log.debug(result); } }- 1
- 2
- 3
- 4
- 5
- 6
- 7
- 8
- 9
- 10
- 11
- 12
- 13
- 14
- 15
- 16
- 17
- 18
- 19
- 20
- 21
- 22
- 23
- 24
- 25
- 26
- 27

Note:
若固定线程数为 1,则每次只会执行队列中第一个任务并返回,其他任务不执行10.4.5 提交集合中所有任务,哪个任务先执行完成,其他任务取消且带超时时间(带返回值)
public <T> T invokeAny(Collection<? extends Callable<T>> tasks, long timeout, TimeUnit unit)- 1
- 2
10.5 关闭线程池
10.5.1 shutdown
public void shutdown()- 1
- 线程池状态变为
SHUTDOWN - 不会接受新的任务
- 已提交的任务会执行完
- 该方法不会阻塞调用线程的执行
测试:
@Slf4j(topic = "c.InitTest") public class InitTest { public static void main(String[] args) throws ExecutionException, InterruptedException { ExecutorService pool = Executors.newFixedThreadPool(2); List<Future<Object>> futures = pool.invokeAll(Arrays.asList( () -> { log.debug("1"); TimeUnit.MILLISECONDS.sleep(1000); log.debug("1 end"); return "1 success!"; }, () -> { log.debug("2"); TimeUnit.MILLISECONDS.sleep(500); log.debug("2 end"); return "2 success!"; }, () -> { log.debug("3"); TimeUnit.MILLISECONDS.sleep(2000); log.debug("3 end"); return "3 success!"; } )); log.debug("shutdown"); pool.shutdown(); pool.execute(() -> { log.debug("4"); try { TimeUnit.MILLISECONDS.sleep(1000); } catch (InterruptedException e) { e.printStackTrace(); } log.debug("4 end"); }); } }- 1
- 2
- 3
- 4
- 5
- 6
- 7
- 8
- 9
- 10
- 11
- 12
- 13
- 14
- 15
- 16
- 17
- 18
- 19
- 20
- 21
- 22
- 23
- 24
- 25
- 26
- 27
- 28
- 29
- 30
- 31
- 32
- 33
- 34
- 35
- 36
- 37
- 38
- 39

执行完 shutdown 就不能再执行其他任务了,再来新任务会直接走拒绝策略10.5.2 shutdownNow
public List<Runnable> shutdownNow()- 1
- 线程池状态变为
STOP - 不会接收新任务
- 会将队列中的任务返回
- 并用 interrupt 的方式中断正在执行的任务
测试:
@Slf4j(topic = "c.InitTest") public class InitTest { public static void main(String[] args) throws ExecutionException, InterruptedException { ExecutorService pool = Executors.newFixedThreadPool(2); Future<String> submit = pool.submit(() -> { log.debug("1"); TimeUnit.MILLISECONDS.sleep(1000); log.debug("1 end"); return "1 success!"; }); Future<String> submit2 = pool.submit(() -> { log.debug("2"); TimeUnit.MILLISECONDS.sleep(500); log.debug("2 end"); return "2 success!"; }); Future<String> submit3 = pool.submit(() -> { log.debug("3"); TimeUnit.MILLISECONDS.sleep(2000); log.debug("3 end"); return "3 success!"; }); List<Runnable> tasks = pool.shutdownNow(); tasks.forEach(task -> log.debug("{}", task)); } }- 1
- 2
- 3
- 4
- 5
- 6
- 7
- 8
- 9
- 10
- 11
- 12
- 13
- 14
- 15
- 16
- 17
- 18
- 19
- 20
- 21
- 22
- 23
- 24
- 25
- 26
- 27

可以看到正在执行的任务也被打断了。10.5.3 isShutdown
不是 RUNNING 状态的线程池返回 true
10.5.4 isTerminated
线程池状态是否是 TERMINATED
10.5.5 awaitTermination
调用 shutdown() 后,由于调用线程不会等待所有任务运行结束,因此如果它想在线程池 TERMINATED 后做些事情,可以利用此方法等待。
10.6 异步模式之工作线程(Worker Thread)
10.6.1 定义
让有限的工作线程(Worker Thread)来轮流异步处理无限多的任务。也可以归类为分工模式,典型实现就是线程池,同时也体现了享元模式。
- 举个例子:海底捞的服务员(线程),轮流处理每位客人的点餐(任务),如果为每位客人都配一名专属的服务员,那么成本就太高了。
不同的任务类型应该使用不同的线程池,这样才能避免饥饿,提高效率。
- 举个例子:若一个餐馆的工人既要招呼客人(任务类型 A),又要到厨房做菜(任务类型 B),显然效率不高,分成服务员职业(线程池 A)和厨师职业(线程池 B)更为合理。
10.6.2 饥饿
固定大小线程池会有饥饿现象:
- 若两个工人是同一个线程池中的两个线程(即两个工人是全能的,都会点餐和做饭)
-
- 工人 A 负责一桌客人点餐,点完餐等菜做好,等待工人 B 做菜,等 B 做完菜然后 A 给客人上菜(没问题)
-
- 若同时来了两桌客人,工人 A 和工人 B 都去负责客人点餐,那么就没有人去做菜,由线程数不足导致饥饿
@Slf4j(topic = "c.InitTest") public class InitTest { public static void main(String[] args) { ExecutorService pool = Executors.newFixedThreadPool(2); pool.execute(() -> { log.debug("处理点单..."); Future<String> f = pool.submit(() -> { log.debug("做菜"); return "麻辣鸡丝"; }); try { log.debug("上菜: {}", f.get()); } catch (InterruptedException | ExecutionException e) { e.printStackTrace(); } }); pool.execute(() -> { log.debug("处理点单..."); Future<String> f = pool.submit(() -> { log.debug("做菜"); return "北京烤鸭"; }); try { log.debug("上菜: {}", f.get()); } catch (InterruptedException | ExecutionException e) { e.printStackTrace(); } }); } }- 1
- 2
- 3
- 4
- 5
- 6
- 7
- 8
- 9
- 10
- 11
- 12
- 13
- 14
- 15
- 16
- 17
- 18
- 19
- 20
- 21
- 22
- 23
- 24
- 25
- 26
- 27
- 28
- 29
- 30
- 31

10.6.3 解决饥饿
- 多加线程
- 使用不同的线程池(推荐)
@Slf4j(topic = "c.InitTest") public class InitTest { public static void main(String[] args) { ExecutorService waiterPool = Executors.newFixedThreadPool(1); ExecutorService cookPool = Executors.newFixedThreadPool(1); waiterPool.execute(() -> { log.debug("处理点单..."); Future<String> f = cookPool.submit(() -> { log.debug("做菜"); return "麻辣鸡丝"; }); try { log.debug("上菜: {}", f.get()); } catch (InterruptedException | ExecutionException e) { e.printStackTrace(); } }); waiterPool.execute(() -> { log.debug("处理点单..."); Future<String> f = cookPool.submit(() -> { log.debug("做菜"); return "北京烤鸭"; }); try { log.debug("上菜: {}", f.get()); } catch (InterruptedException | ExecutionException e) { e.printStackTrace(); } }); } }- 1
- 2
- 3
- 4
- 5
- 6
- 7
- 8
- 9
- 10
- 11
- 12
- 13
- 14
- 15
- 16
- 17
- 18
- 19
- 20
- 21
- 22
- 23
- 24
- 25
- 26
- 27
- 28
- 29
- 30
- 31
- 32

10.6.4 创建多少容量地线程池合适
- 过小导致程序不能充分地利用系统资源,容易导致饥饿
- 过大会导致更多地线程上下文切换,占用更多内存
CPU 密集型运算
通常采用
CPU 核数 + 1,能实现最优地 CPU 利用率Note:
+1 是为了保证当线程由于页缺失或其他原因导致暂停时,额外的一个线程就能顶上去,保证 CPU 时钟周期不被浪费I/O 密集型运算
CPU 不总是处于繁忙状态,例如当你执行业务计算时,这时候会使用 CPU 资源,当执行 IO 操作时,远程 RPC 调用时,包括数据库操作时,CPU 就闲下来了,可以利用多线程提高它的利用率。
经验公式:
线程数 = 核心数 ∗ 期望 C P U 利用率 ∗ 总时间 ( 即 C P U 计算时间 + 等待时间 ) C P U 计算时间 线程数 = \frac{核心数 * 期望 CPU 利用率 * 总时间(即 CPU计算时间 + 等待时间)}{CPU 计算时间} 线程数=CPU计算时间核心数∗期望CPU利用率∗总时间(即CPU计算时间+等待时间)10.7 线程池应用-定时任务
需求:每周四 18:00:00 定时执行一项任务
LocalDateTime是线程安全的类
@Slf4j(topic = "c.InitTest") public class InitTest { public static void main(String[] args) { // 获取当前时间 LocalDateTime now = LocalDateTime.now(); // 获得周四时间, 如果是周一, 那么可以直接设置到周四; 若当前是周五, 那么应该设置到下一个周四 LocalDateTime time = now.withHour(18).withMinute(0).withSecond(0).withNano(0).with(DayOfWeek.THURSDAY); if (now.compareTo(time) > 0) { time = time.plusWeeks(1); } // 代表当前时间和周四时间的时间差 long initialDelay = Duration.between(now, time).toMillis(); // 一周的间隔时间 long period = 1000 * 60 * 60 * 24 * 7; ScheduledExecutorService pool = Executors.newScheduledThreadPool(1); pool.scheduleAtFixedRate(() -> { log.debug("Running..."); }, initialDelay, period, TimeUnit.MICROSECONDS); } }- 1
- 2
- 3
- 4
- 5
- 6
- 7
- 8
- 9
- 10
- 11
- 12
- 13
- 14
- 15
- 16
- 17
- 18
- 19
- 20
- 21
- 22
- 23
10.8 Tomcat 线程池

LimitLatch用来限流,可以控制最大连接个数,类似 JUC 中的SemaphoreAcceptor只负责接受新的Socket连接Poller只负责监听 Socket channnel 是否有可读的 I/O 事件- 一旦可读,封装一个任务对象(
SocketProcessor),提交给Executor线程池处理 Executor线程池中的工作线程最终负责处理请求
Tomcat 线程池扩展了
ThreadPoolExecutor,行为稍有不同:- 如果线程池达到了
maximumPoolSize- 这时候不会立刻抛出
RejectedExecutionException异常 - 而是再次尝试将任务放入队列,如果还失败,才抛出
RejectedExecutionException异常
- 这时候不会立刻抛出
处理任务流程:

11. Fork/Join
11.1 概念
Fork/Join 是 JDK 1.7 加入的新的线程池的实现,体现一种分治思想,适用于能够进行任务拆分的 CPU 密集型运算。
Fork/Join 在分治的基础上加入了多线程,可以把每一个任务的分解和合并交给不同的线程来做,进一步提升了运算效率。
Fork/Join 默认会创建与 CPU 核心数大小相同的线程池。
11.2 使用
可以自定义类继承
RecursiveAction(无返回值)或者继承RecursiveTask(有返回值)。计算 1~n 之间整数的和:
@Slf4j(topic = "c.InitTest") public class InitTest { public static void main(String[] args) { // 使用4个线程的线程池 ForkJoinPool pool = new ForkJoinPool(4); Integer result = pool.invoke(new MyTask(1, 10)); log.debug("result: {}", result); } } /** * 计算 1~n 之间整数的和 */ class MyTask extends RecursiveTask<Integer> { private final int begin; private final int end; public MyTask(int begin, int end) { this.begin = begin; this.end = end; } @Override protected Integer compute() { // 终止条件 if (begin == end) { return begin; } if (begin + 1 == end) { return begin + end; } int mid = (begin + end) >> 1; MyTask t1 = new MyTask(begin, mid); MyTask t2 = new MyTask(mid + 1, end); t1.fork(); t2.fork(); return t1.join() + t2.join(); } }- 1
- 2
- 3
- 4
- 5
- 6
- 7
- 8
- 9
- 10
- 11
- 12
- 13
- 14
- 15
- 16
- 17
- 18
- 19
- 20
- 21
- 22
- 23
- 24
- 25
- 26
- 27
- 28
- 29
- 30
- 31
- 32
- 33
- 34
- 35
- 36
- 37
- 38
- 39
- 40
- 41

-
相关阅读:
docker问题解决记录
break,continue
IK分词器
旅游网站(携程旅行网页学习 vue3+element)
GPT润色指令
Jenkins修改端口和工作目录
基于JavaSwing开发模拟电梯系统+分析报告 课程设计 大作业源码
6. vector
图应用详解
多线程学习
- 原文地址:https://blog.csdn.net/qq_39906884/article/details/127610198
