-
consul部署
docker consul的容器服务更新与发现
服务注册与发现是微服务架构中不可或缺的重要组件。起初服务都是单节点的,不保证高可用性,也不考虑服务的压力承载,服务之间调用单纯的通过接口访问。直到后来出现了多个节点的分布式架构,起初的解决手段是在服务前端负载均衡,这样前端必须要知道所有后端服务的网络位置,并配置在配置文件中。这里就会有几个问题:
- 如果调用后端服务A~N,就需要配置N个服务的网络位置,配置很麻烦
- 后端服务的网络位置变化,都需要改变每个调用者的配置
服务注册与发现可以解决这些问题的。后端服务AN可以把当前自己的网络位置注册到服务发现模块,服务发现就以KN的方式记录下来,K一般是服务名,V是ip加端口。服务发现模块定时的进行健康检查,轮询查看这些后端服务能不能访问的了。前端在调用后端服务A~N的时候,就跑去服务发现模块问下他们的网络位置,然后再调用他们的服务。以这样的方式解决上面的问题,前端完全不需要记录这些后端服务的网络位置,前端和后端完全解耦
(2):什么是consul
consul是google开源的一个使用go语言开发的服务管理软件。支持朵数据中心,分布式高可用的,服务发现和配置共享。采用Raft算法,用来保证服务的高可用。内置了服务注册与发现框架、分布一致性协议实现,健康检查、Key/Value存储,多数据中心方案,不再需要依赖其他工具(比如zookeeper)。服务部署简单,只有一个可运行的二进制文件包
consul部署
服务器类型 系统 IP地址 需要组件 consul服务器 centos:7 192.168.64.250 运行consul服务、nginx服务、consul-template守护进程 registrator服务器 centos:7 192.168.64.15 运行registrator容器、nginx服务 关闭防火墙和核心防护
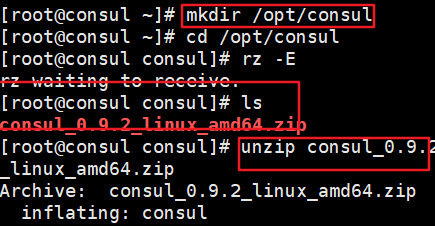
systemctl stop firewalld setenforce 0 (192.168.64.250) 建立 consul服务 [root@consul ~]# mkdir /opt/consul [root@consul ~]# cd /opt/consul [root@consul consul]# rz -E rz waiting to receive. [root@consul consul]# ls consul_0.9.2_linux_amd64.zip [root@consul consul]# unzip consul_0.9.2_linux_amd64.zip Archive: consul_0.9.2_linux_amd64.zip inflating: consul [root@consul consul]# mv consul /usr/local/bin [root@consul consul]#- 1
- 2
- 3
- 4
- 5
- 6
- 7
- 8
- 9
- 10
- 11
- 12
- 13
- 14
- 15
- 16
- 17
- 18

设置代理,后台启动consul服务器
[root@consul consul]# consul agent \ > -server \ > -bootstrap \ > -ui \ > -data-dir=/var/lib/consul-data \ > -bind=192.168.64.250 \ > -client=0.0.0.0 \ > -node=consul-server01 &> /var/log/consul.log & -server: 以server身份启动。默认是client。 -bootstrap :用来控制一个server是否在bootstrap模式,在一个数据中心中只能有一个server处于bootstrap模式,当一个server处于 bootstrap模式时,可以自己选举为 server-leader。 -bootstrap-expect=2 :集群要求的最少server数量,当低于这个数量,集群即失效。 -ui :指定开启 UI 界面,这样可以通过 http://localhost:8500/ui 这样的地址访问 consul 自带的 web UI 界面。 -data-dir :指定数据存储目录。 -bind :指定用来在集群内部的通讯地址,集群内的所有节点到此地址都必须是可达的,默认是0.0.0.0。 -client :指定 consul 绑定在哪个 client 地址上,这个地址提供 HTTP、DNS、RPC 等服务,默认是 127.0.0.1。 -node :节点在集群中的名称,在一个集群中必须是唯一的,默认是该节点的主机名。 -datacenter :指定数据中心名称,默认是dc1- 1
- 2
- 3
- 4
- 5
- 6
- 7
- 8
- 9
- 10
- 11
- 12
- 13
- 14
- 15
- 16
- 17
- 18
- 19

查看端口
netstat -natp | grep consul- 1

查看谁是leader
consul info | grep leader- 1

查看集群状态
consul operator raft list-peers- 1

通过 http api 获取集群信息 curl 127.0.0.1:8500/v1/status/peers #查看集群server成员 curl 127.0.0.1:8500/v1/status/leader #集群 server-leader curl 127.0.0.1:8500/v1/catalog/services #注册的所有服务 curl 127.0.0.1:8500/v1/catalog/nginx #查看 nginx 服务信息 curl 127.0.0.1:8500/v1/catalog/nodes #集群节点详细信息- 1
- 2
- 3
- 4
- 5
- 6
(192.168.64.15)
registrator部署
容器服务自动加入nginx集群
Gliderlabs/Registrator可检查容器运行状态自动注册,还可以注销docker容器的服务到服务配置中心
目前支持consul/Etcd和SkyDNS2
安装Gliderlabs/Registrator docker run -d \ --name=registrator \ --net=host \ -v /var/run/docker.sock:/tmp/docker.sock \ --restart=always \ gliderlabs/registrator:latest \ -ip=192.168.64.15 \ consul://192.168.64.250:8500 –net=host:把运行的docker容器设定为host网络模式-v /var/run/docker.sock:/tmp/docker.sock:把宿主机的Docker守护进程(Docker daemon)默认监听的Unix域套接字挂载到容器中 –restart=always:设置在容器退出时总是重启容器 -ip:刚才把network指定了host模式,所以我们指定ip为宿主机的ip consul:指定consul服务器的IP和端口- 1
- 2
- 3
- 4
- 5
- 6
- 7
- 8
- 9
- 10
- 11
- 12
- 13
- 14
- 15
- 16

查看是否安装成功 docker ps -a- 1
- 2
安装nginx、httpd测试镜像
docker run -itd -p:30:80 --name test-01 -h test1 nginx docker run -itd -p:31:80 --name test-02 -h test2 nginx docker run -itd -p:32:80 --name test-03 -h test3 httpd docker run -itd -p:33:80 --name test-04 -h test4 httpd- 1
- 2
- 3
- 4

在consul服务器中查看镜像是否注册(192.168.64.250)
curl 127.0.0.1:8500/v1/catalog/services- 1

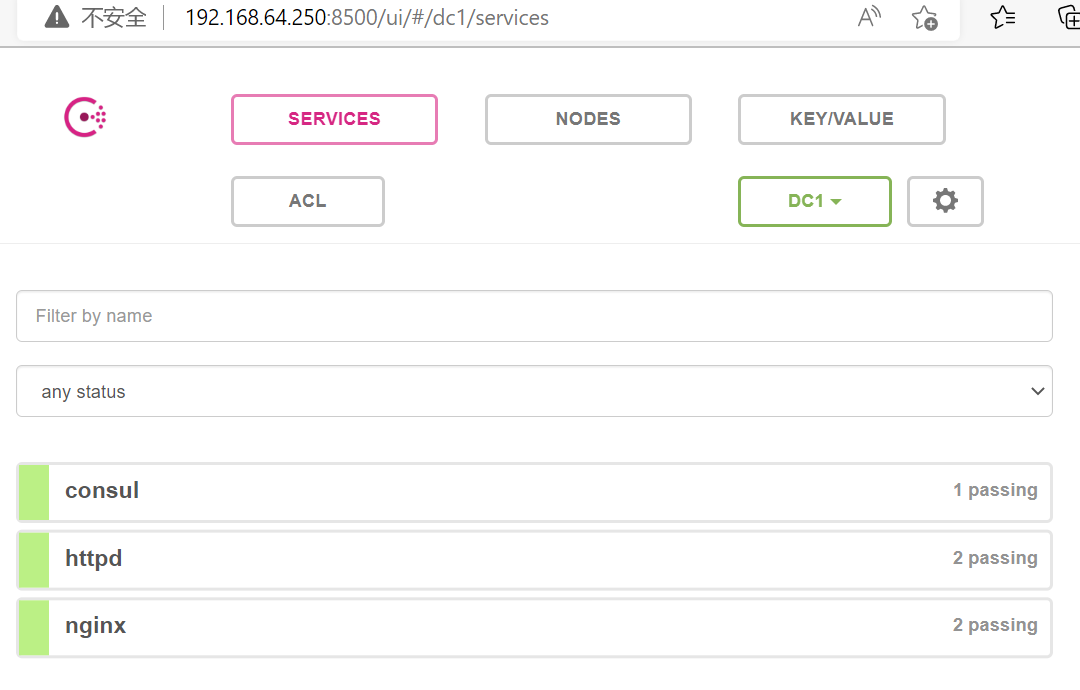
网页查看注册中心是否发现了这些服务

配置template模板自动更新
-
Consul-Template是基于Consul的自动替换配置文件的应用。Consul -Template是一个守护进程, 用于实时查询Consul集群信息,并更新文件系统上任意数量的指定模板,生成配置文件。更新完成以后,可以选择运行shell 命令执行更新操作,重新加载Nginx
-
Consul-Template可以查询Consul中的服务目录、Key、Key-values 等。这种强大的抽象功能和查询语言模板可以使Consul -Template特别适合动态的创建配置文件。例如:创建Apache/Nginx Proxy BalancersHaproxy Backends等
1:准备template nginx模板文件
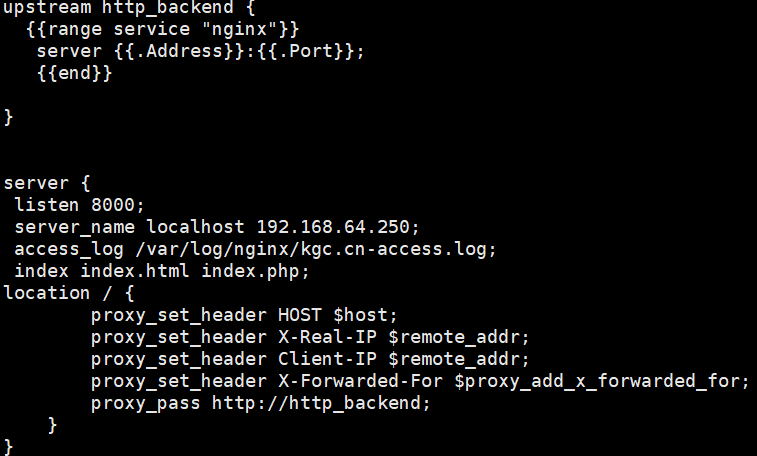
(192.168.64.250) 在consul服务器上进行操作 cd /opt/consul vim nginx.ctml 定义nginx upstream一个简单模板 upstream http_backend { {{range service "nginx"}} server {{.Address}}:{{.Port}}; {{end}}; } 定义一个server,监听8000端口,反向代理到upstream server { listen 8000; server_name localhost 192.168.64.250; access_log /var/log/nginx/kgc.cn-access.log; index index.html index.php; location / { proxy_set_header HOST $host; proxy_set_header X-Real-IP $remote_addr; proxy_set_header Client-IP $remote_addr; proxy_set_header X-Forwarded-For $proxy_add_x_forwarded_for; proxy_pass http://http_backend; } } ~- 1
- 2
- 3
- 4
- 5
- 6
- 7
- 8
- 9
- 10
- 11
- 12
- 13
- 14
- 15
- 16
- 17
- 18
- 19
- 20
- 21
- 22
- 23
- 24
- 25
- 26
- 27
- 28
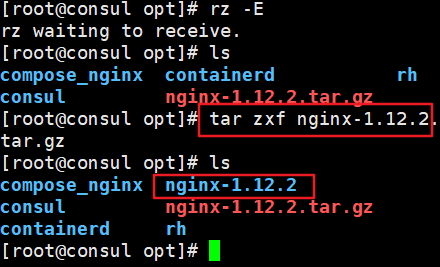
上传nginx安装包
cd /opt tar zxvf nginx-1.12.2.tar.gz- 1
- 2
创建nginx用户并安装依赖包
[root@consul opt]# useradd -M -s /sbin/nologin nginx [root@consul opt]# yum -y install gcc pcre-devel zlib-devel gcc-c++ make- 1
- 2

编译
[root@consul opt]# cd nginx-1.12.2/ [root@consul nginx-1.12.2]# ./configure --prefix=/usr/local/nginx --user=nginx --group=nginx && make && make install- 1
- 2
- 3

创建软连接,将nginx加到系统变量中
ln -s /usr/local/nginx/sbin/nginx /usr/local/sbin/- 1

修改配置文件
cd /usr/local/nginx/conf/ vim /nginx.conf 19行插入 include vhost/*.conf;- 1
- 2
- 3
- 4
- 5
- 6

创建nginx服务的vhost和日志目录
cd /usr/local/nginx/conf mkdir vhost mkdir /var/log/nginx nginx netstat -natp | grep nginx- 1
- 2
- 3
- 4
- 5

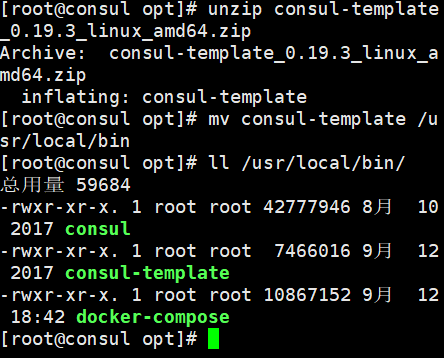
传入consul压缩包并解压 cd /opt unzip consul-template_0.19.3_linux_amd64.zip- 1
- 2
- 3
- 4

启动consul-template(前台后台都行,这里是前台)
consul-template --consul-addr 192.168.64.250:8500 \ --template "/opt/consul/nginx.ctmpl:/usr/local/nginx/conf/vhost/bxh.conf:/usr/local/nginx/sbin/nginx -s reload" \ --log-level=info- 1
- 2
- 3
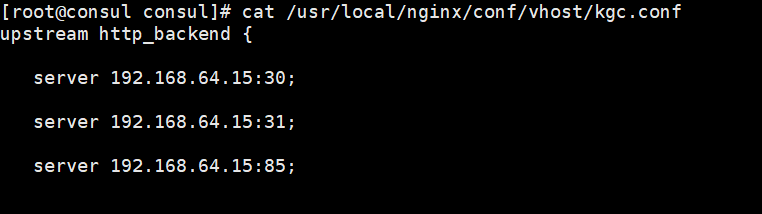
新开一个终端,查看配置文件是否生成
cd /usr/local/nginx/conf/vhost/ cat bxh.conf- 1
- 2
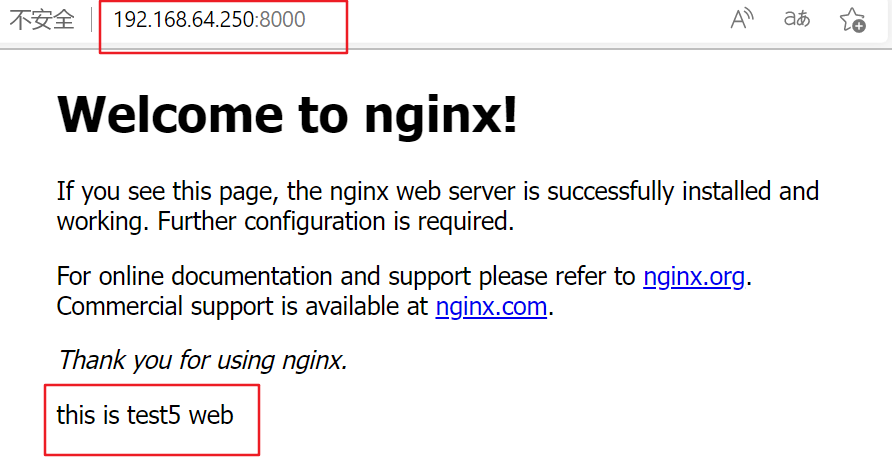
在registrator服务器上添加端口为85 的nginx容器(192.168.64.15)
docker run -itd -p:85:80 --name test-05 -h test5 nginx- 1
#13.修改容器nginx站点目录中默认的html.index文件(192.168.64.15) #分别登陆容器添加默认web页面显示 [root@registrator ~]# docker exec -it test-01 bash root@test1:/# echo "this is test1 web" >> /usr/share/nginx/html/index.html root@test1:/# exit [root@registrator ~]# docker exec -it test-02 bash root@test2:/# echo "this is test2 web" >> /usr/share/nginx/html/index.html root@test2:/# exit [root@registrator ~]# docker exec -it test-05 bash root@test5:/# echo "this is test5 web" >> /usr/share/nginx/html/index.html root@test5:/# exit- 1
- 2
- 3
- 4
- 5
- 6
- 7
- 8
- 9
- 10
- 11
- 12
- 13
浏览器访问


-
相关阅读:
远程运维用什么软件?可以保障更安全?
【LoRa-温湿度光照数据无线传输(点对多通讯)】
2022.11.16 英语背诵
bit、bin 、mcs文件区别
OpenAcc的使用
WEB日志框架综述
【计算机网络】网络层——IP协议
云原生Kubernetes:pod基础与配置
【数据结构】万字链表详解
SSH连接服务器经常被断开解决方法
- 原文地址:https://blog.csdn.net/H_YANG__/article/details/126924233
