-
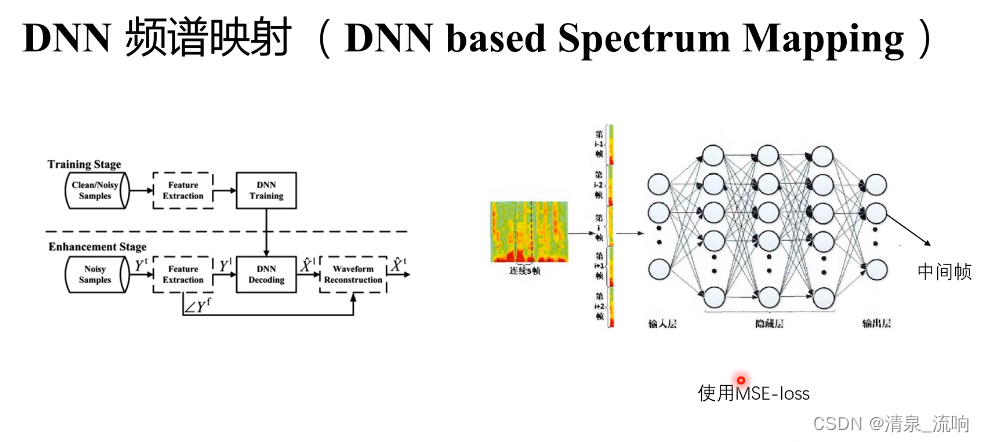
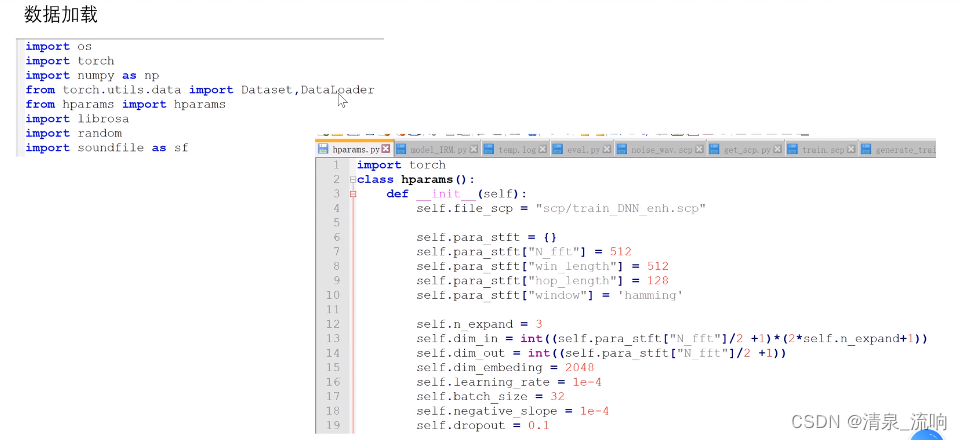
语音增强——DNN(深度神经网络)频谱映射
输出层得到的是干净语音的频谱
 M开头的是男性说话人,F开头的是女性说话人
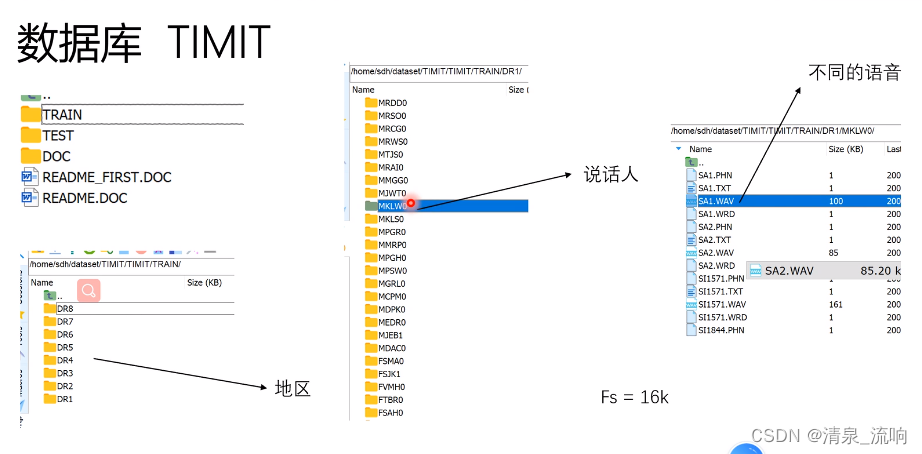
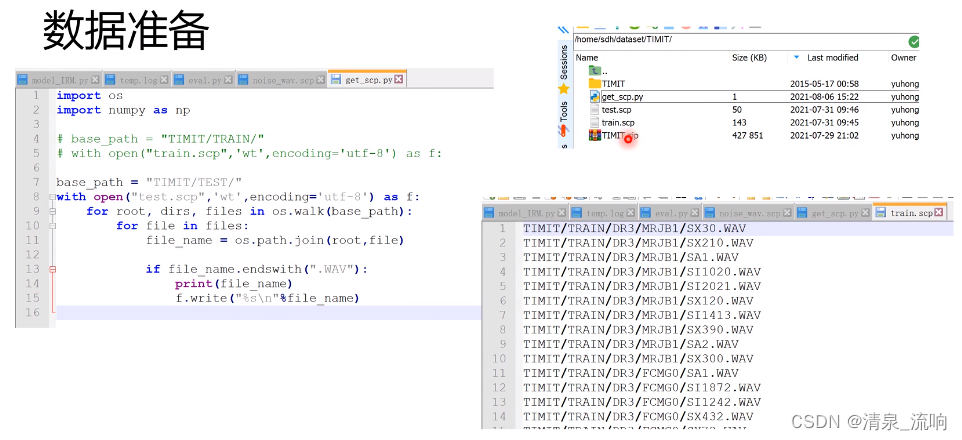
get_scp.py程序如下:
- import os
- import numpy as np
- base_path="TIMIT/TEST/"
- with open("test.scp","wt",encoding='utf-8') as f:
- # base_path="TIMIT/TRAIN/"
- # with open("train.scp","wt",encoding='utf-8') as f:
- for root,dirs,files in os.walk(base_path):
- for file in files:
- file_name = os.path.join(root,file)
- if file_name.endswith(".WAV"):
- print(file_name)
- f.write("%s\n"%file_name)
Psignal和Pnoise是能量,Asignal和Anoise是幅值


librosa读取数据会把语音归一化到[-1,1]之间,因此我们不用librosa,我们使用soundfile,直接读取原始数据
程序如下:
- import os
- import numpy as np
- import random
- import scipy.io.wavfile as wav
- import librosa
- import soundfile as sf
- from numpy.linalg import norm
- def signal_by_db(speech,noise,snr):
- speech = speech.astype(np.int16)
- noise = noise.astype(np.int16)
- len_speech = speech.shape[0] # 得到语音的长度
- len_noise = noise.shape[0] # 得到噪声的长度,噪声的长度要远大于语音的长度
- start = random.randint(0,len_noise-len_speech) # 返回0~len_noise-len_speech之间的任意整数
- end = start+len_speech
- add_noise = noise[start:end] # 从噪声信号截取一段与语言信号长度一样的噪声段出来
- add_noise = add_noise / norm(add_noise) * norm(speech) / (10.0 ** (0.05 * snr))
- mix = speech + add_noise
- return mix
- if __name__=="__main__":
- noise_path = "D:\\深度学习数据集\\NOISEX"
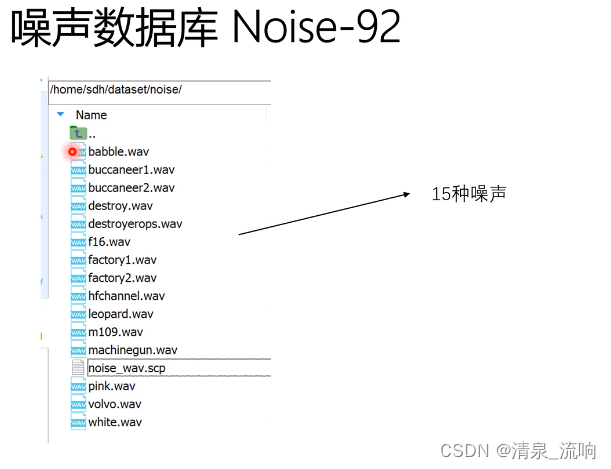
- noises = ['babble', 'buccaneer1', 'destroyerengine', 'factory2', 'volvo', 'white']
- clean_wavs = np.loadtxt('scp/train.scp', dtype='str').tolist()
- clean_path = "D:\\TIMIT"
- path_noisy = "D:\\深度学习数据集\\DNN-Mapping\\nosiy"
- snrs = [-5, 0, 5, 10, 15, 20]
- with open('scp/train_DNN_enh.scp', 'wt') as f:
- for noise in noises:
- print(noise)
- noise_file = os.path.join(noise_path, noise + '.wav')
- noise_data, fs = sf.read(noise_file, dtype='int16')
- for clean_wav in clean_wavs:
- clean_file = os.path.join(clean_path, clean_wav)
- clean_data, fs = sf.read(clean_file, dtype='int16')
- for snr in snrs:
- noisy_file = os.path.join(path_noisy, noise, str(snr), clean_wav)
- noisy_path, _ = os.path.split(noisy_file)
- os.makedirs(noisy_path, exist_ok=True) # 文件路径不存在则创建路径
- mix = signal_by_db(clean_data, noise_data, snr)
- noisy_data = np.asarray(mix, dtype=np.int16)
- sf.write(noisy_file, noisy_data, fs) # 把噪声数据写入该路径(noisy_file)下
- f.write('%s %s \n' %(noisy_file, clean_file))

 拼帧操作:
拼帧操作:假设语音信号有14帧,用5帧预测一帧(中间帧),最终因此只能预测10帧【2~11】
expend=左边扩展帧=右边扩展帧=3,因此本程序用3+3+1=7帧预测一帧
tensor.unfold的dimension表示,沿着哪一个维度进行取帧的,本程序令dimension=0,表示沿着时间的维度取帧,size表示取几帧,step表示移动步长


为什么不直接把结果进行MSE,而要进行 BatchNorm1d后在MSE?
原因如下:若不进行BatchNorm1d,数值取值范围很大,用神经网络映射一个取值范围很大的数时,收敛很慢,所以为了提高收敛速度,必须加入BatchNorm1d

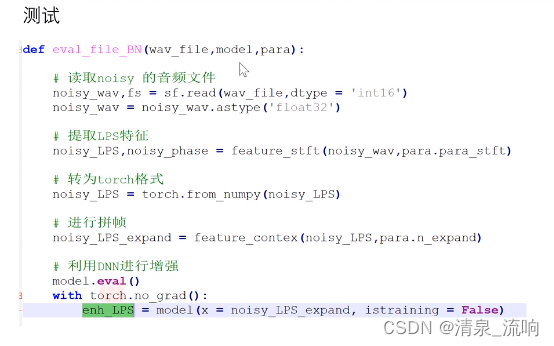
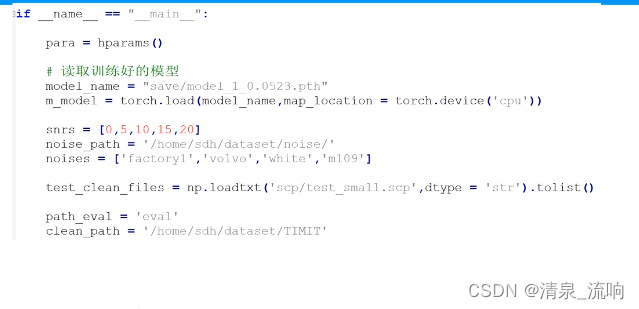
测试阶段:


-
相关阅读:
人工神经网络的算法原理,人工神经网络算法优点
Spring的创建和使用
(十三)Java算法:基数排序(详细图解)
Linux系统编程—socket网络编程
Spring源码分析(十五)循环依赖2:源码分析
python打开.npy文件的常见报错及解决
orb-slam2 从单目开始的简单学习(8):LocalMapping
Halcon一维码识别实例
JavaSE学习----(八)常用类之String类
虚拟数字人直播软件实现带货功能,成为新一代直播风口!
- 原文地址:https://blog.csdn.net/qq_42233059/article/details/126780515
