-
Nginx目录结构与配置文件详解
目录
default_type application/octet-stream;
error_page 500 502 503 504 /50x.html;
Nginx的目录结构:
- [root@van ~]# tree /usr/local/nginx/
- /usr/local/nginx/
- ├── client_body_temp
- ├── conf
- │ ├── fastcgi.conf
- │ ├── fastcgi.conf.default
- │ ├── fastcgi_params
- │ ├── fastcgi_params.default
- │ ├── koi-utf
- │ ├── koi-win
- │ ├── mime.types
- │ ├── mime.types.default
- │ ├── nginx.conf
- │ ├── nginx.conf.default
- │ ├── scgi_params
- │ ├── scgi_params.default
- │ ├── uwsgi_params
- │ ├── uwsgi_params.default
- │ └── win-utf
- ├── fastcgi_temp
- ├── html
- │ ├── 50x.html
- │ ├── index.html
- │ └── index.php
- ├── logs
- │ ├── access.log
- │ ├── error.log
- │ └── nginx.pid
- ├── proxy_temp
- ├── sbin
- │ └── nginx
- ├── scgi_temp
- └── uwsgi_temp
这里方便直观讲解,所以直接在Xftp中进行演示。
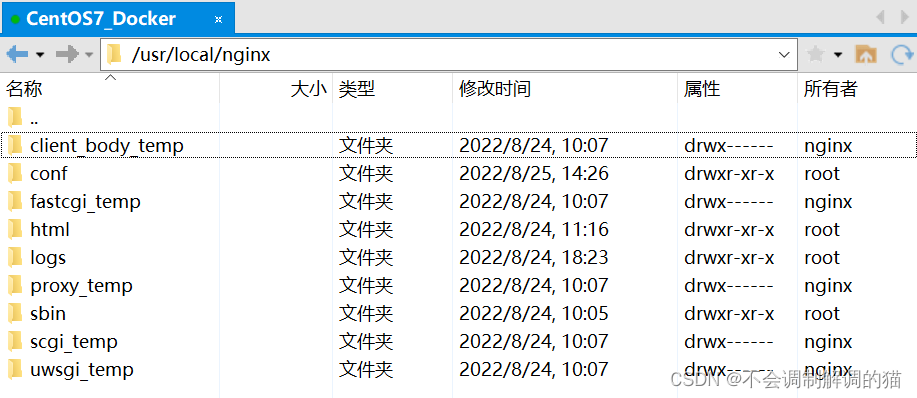
目录如下,可能不同 以自己的安装路径为准:
/usr/local/nginx这里可以看到有5个以 _temp 结尾的目录,这些都是临时形成的,所以就不介绍了。
conf
顾名思义,这里是用来存放配置文件的目录,这里最为主要的是 nginx.conf 这个文件,这个是Nginx的主配置文件。若以后需要手动添加其它的配置文件,还请一并放在此目录下。

nginx.conf
主要来看一下这个 nginx.conf 文件(这里直接在Xftp里右键查看了,方便):

内容大致如下(因为我的有做过一定修改,可能会与你们的有出入,不碍事):
- #user nobody;
- worker_processes 1;
- #error_log logs/error.log;
- #error_log logs/error.log notice;
- #error_log logs/error.log info;
- #pid logs/nginx.pid;
- events {
- worker_connections 1024;
- }
- http {
- include mime.types;
- default_type application/octet-stream;
- #log_format main '$remote_addr - $remote_user [$time_local] "$request" '
- # '$status $body_bytes_sent "$http_referer" '
- # '"$http_user_agent" "$http_x_forwarded_for"';
- #access_log logs/access.log main;
- sendfile on;
- #tcp_nopush on;
- #keepalive_timeout 0;
- keepalive_timeout 65;
- #gzip on;
- server {
- listen 80;
- server_name localhost;
- #charset koi8-r;
- #access_log logs/host.access.log main;
- location / {
- root html;
- index index.html index.htm index.php index.java;
- }
- #error_page 404 /404.html;
- # redirect server error pages to the static page /50x.html
- #
- error_page 500 502 503 504 /50x.html;
- location = /50x.html {
- root html;
- }
- # proxy the PHP scripts to Apache listening on 127.0.0.1:80
- #
- #location ~ \.php$ {
- # proxy_pass http://127.0.0.1;
- #}
- # pass the PHP scripts to FastCGI server listening on 127.0.0.1:9000
- #
- #location ~ \.php$ {
- # root html;
- # fastcgi_pass 127.0.0.1:9000;
- # fastcgi_index index.php;
- # fastcgi_param SCRIPT_FILENAME /usr/local/nginx/html$fastcgi_script_name;
- # include fastcgi_params;
- #}
- # deny access to .htaccess files, if Apache's document root
- # concurs with nginx's one
- #
- #location ~ /\.ht {
- # deny all;
- #}
- }
- # another virtual host using mix of IP-, name-, and port-based configuration
- #
- #server {
- # listen 8000;
- # listen somename:8080;
- # server_name somename alias another.alias;
- # location / {
- # root html;
- # index index.html index.htm;
- # }
- #}
- # HTTPS server
- #
- #server {
- # listen 443 ssl;
- # server_name localhost;
- # ssl_certificate cert.pem;
- # ssl_certificate_key cert.key;
- # ssl_session_cache shared:SSL:1m;
- # ssl_session_timeout 5m;
- # ssl_ciphers HIGH:!aNULL:!MD5;
- # ssl_prefer_server_ciphers on;
- # location / {
- # root html;
- # index index.html index.htm;
- # }
- #}
- }
能看出来格式很想JSON串。
worker_processes
默认为1,表示开启一个业务进程。当然你也可以把他改成10,但需要注意的是这个东西跟cpu的内核数量是有挂钩的。如果说咱们的cpu只有2核,那在这里写个3那可能就没啥意义了。如果把一个cpu内核绑定到多个进程上的话,按照时间片轮转机制来说,这样只会降低cpu的利用率。打个比方:我让A帮我去买份饭回来,但是紧接着B和C也想让A帮他们带饭,这样就延长的A帮我带饭回来的时间,那对于 我 来说A的工作效率其实是降低了的。
worker_connections
单个进程可接受连接数,默认为1024。
include mime.types;
引入http mime类型
这里的 include 命令会把另外一个配置文件引用到我们的当前的这个配置文件当中。 这里的 mime.types 配置文件是用来申明所返回或发送文件的类型。咱们的浏览器其实不能根据文件的后缀名来判断文件的格式/类型,它必须由服务器发送的http头里所标注的信息来展示文件的类型。咱们可以去这个 mime.types 里面看一下:

- types {
- text/html html htm shtml;
- text/css css;
- text/xml xml;
- application/javascript js;
- text/plain txt;
- image/png png;
- application/java-archive jar war ear;
- application/json json;
- application/msword doc;
- application/pdf pdf;
- application/zip zip;
- application/octet-stream bin exe dll;
- application/octet-stream deb;
- application/octet-stream dmg;
- application/octet-stream iso img;
- application/octet-stream msi msp msm;
- audio/midi mid midi kar;
- audio/mpeg mp3;
- audio/ogg ogg;
- audio/x-m4a m4a;
- audio/x-realaudio ra;
- video/mp2t ts;
- video/mp4 mp4;
- video/x-flv flv;
- video/x-m4v m4v;
- video/x-mng mng;
- video/x-ms-asf asx asf;
- video/x-ms-wmv wmv;
- video/x-msvideo avi;
- }
复制了一部分过来,原文件的内容还是不少的。可以看到这里的格式有点像kv键值对。比如说这里18行的 exe 文件,他所得到的是一个叫做 application/octet-stream 的类型,意思是以数据流的方式让浏览器去加载,并询问用户是否要进行下载操作。那比如说咱们现在有个一个非常奇怪的格式,这个格式是平常根本见不到的格式,那我们就可以将其写在此文件中,让他按照你想要的格式去让浏览器解读。
default_type application/octet-stream;
如果mime类型没匹配上,默认使用二进制流的方式传输。
sendfile
使用linux的 sendfile(socket, file, len) 高效网络传输,也就是数据0拷贝。 未开启sendfile。再发个比方:咱们现在有两台电脑,我们需要从PC1拿点东西去PC2,那我们就得先拿U盘去PC1里面拷贝,然后再用U盘拷贝到PC2中,而如果开启了这个sendfile,那就相当于直接隔空传过去,省去了拷贝的过程。
sendfile off;
直接上图来讲:

咱们的Nginx是假设在CentOS操作系统上的,当服务过来的时候是通过CentOS的网络接口然后转发给Nginx。Nginx拿到信息后会根据其内容去硬盘(SSD)中找到那个目标文件,然后Nginx会把这个文件完整的读一遍,读到自己的内存中再交给应用程序,应用程序也把拿到的文件完整的读进自己的内存,再转发到CentOS的网络接口(当然这里面还有DMA [ Direct Memory Access直接访问内存 ] 的调度,网络接口的缓存和内核的缓存)网络接口再把其发送出去。这里的层层缓存就相当于上面所说的层层复制。
sendfile on;

这里通过Nginx会给内核发送一个信号,此时的应用程序不会再去把文件读取进自己的内存了,而是直接发送这个 sendfile() 信号(当然这其实是一个方法,里面会写明需要传出的文件和socket)给CentOS的网络接口,网络接口在收到信号后回去找到这个目标文件,然后发送出去。
keepalive_timeout 65;
连接的超时时间限制。
server {}
这里可以把一个server看成是一个主机,所以一个Nginx可以拥有多台这样的主机,它们通过不同的端口号 listen 来区分。当然端口号也可以相同,那样的话就需要通过 server_name 来分区了。开启多个主机的方式也叫作虚拟主机(vhost)。
location / {}
咱们这回先举例子。 http://abc.com/xxx/index.html 这个叫做url,没啥问题吧。而这其中的 /xxx/index.html 叫做uri。当这个uri被匹配上的时候,那么就会进入到这个 location / {} 中,去找里面的root目录。这里的 root html; 中的html其实是个相对路径,就是咱们下一小节提到的那个html目录。
error_page 500 502 503 504 /50x.html;
简单的来说,如果出现了这四个报错,那么就会进入到这个 50x.html 中,这个文件也会在下一小节中提到。
html
这里的 index.php 直接无视,这是我自己加进去的:

index.html
能看到这里放着两个html文件,其中的 index.html 为Nginx的默认页,可以看看里面是啥:
- html>
- <html>
- <head>
- <title>Welcome to nginx!title>
- <style>
- body {
- width: 35em;
- margin: 0 auto;
- font-family: Tahoma, Verdana, Arial, sans-serif;
- }
- style>
- head>
- <body>
- <h1>Welcome to Tomcat!h1>
- <p>If you see this page, the nginx web server is successfully installed and
- working. Further configuration is required.p>
- <p>For online documentation and support please refer to
- <a href="http://nginx.org/">nginx.orga>.<br/>
- Commercial support is available at
- <a href="http://nginx.com/">nginx.coma>.p>
- <p><em>Thank you for using nginx.em>p>
- body>
- html>
可以看到我把这里第13行的Nginx修改成了
Tomcat,咱们可以去测试看一下。
很简单的html语言,咱们继续看第二个文件 50x.html
50x.html
- html>
- <html>
- <head>
- <title>Errortitle>
- <style>
- body {
- width: 35em;
- margin: 0 auto;
- font-family: Tahoma, Verdana, Arial, sans-serif;
- }
- style>
- head>
- <body>
- <h1>An error occurred.h1>
- <p>Sorry, the page you are looking for is currently unavailable.<br/>
- Please try again later.p>
- <p>If you are the system administrator of this resource then you should check
- the error log for details.p>
- <p><em>Faithfully yours, nginx.em>p>
- body>
- html>
这里就是Nginx的一个默认的报错页面,也没啥好讲的。
logs

这里有两个log日志和一个pid文件。可以看到这个 access.log 真的是相当的大!足足有48KB(我这里才用了不到两天)
access.log
访问日志
- 192.168.150.11 - - [24/Aug/2022:11:06:06 +0800] "GET /img/%E8%A1%A5%E8%B4%B4.png HTTP/1.1" 304 0 "http://192.168.150.50/" "Mozilla/5.0 (Windows NT 10.0; Win64; x64) AppleWebKit/537.36 (KHTML, like Gecko) Chrome/104.0.0.0 Safari/537.36"
- 192.168.150.11 - - [24/Aug/2022:11:06:06 +0800] "GET /img/%E5%A4%87%E6%B3%A8.png HTTP/1.1" 304 0 "http://192.168.150.50/" "Mozilla/5.0 (Windows NT 10.0; Win64; x64) AppleWebKit/537.36 (KHTML, like Gecko) Chrome/104.0.0.0 Safari/537.36"
这里的内容实在是太多啦,所以只复制了两行过来。
其实也就是在用户访问咱们的时候,会把时间、地点、人物、人物所访问的文件、人物所带的参数等信息记录在此。所以这个文件通常都是非常的大(但是它并不会影响到Nginx的性能),为了防止数据写不进来而导致服务出现问题,所以在配置文件中会严格的把控 access.log 文件的大小,一旦它达到了那个指定的大小,那么系统就是重新新建一个文件用来继续写入访问信息日志。
error.log
随便复制几行过来看看:
- 2022/08/24 11:05:47 [notice] 53322#0: signal process started
- 2022/08/24 11:28:44 [notice] 54846#0: signal process started
- 2022/08/24 18:23:11 [notice] 14640#0: signal process started
- 2022/08/25 15:24:22 [error] 855#0: *1 open() "/usr/local/nginx/html/favicon.ico" failed (2: No such file or directory), client: 192.168.150.11, server: localhost, request: "GET /favicon.ico HTTP/1.1", host: "192.168.150.50", referrer: "http://192.168.150.50/"
这个日志就比上面的 access.log 要小很多了。说白了就是用户在访问服务时所遇到的错误,都会被记录在这个 error.log 里面。
nginx.pid
能看出来这个文件跟上面的不一样啊,后缀为pid而不是log。这个文件是用来记录咱们Nginx主进程的ID号的。
854内容也很简单,只有这一个数字。当然你们的ID跟我的不太可能会一致,咱们可以去系统里看看:
ps -ef | grep nginx
可以看到master主进程的ID与文件中内容一致。
sbin

Nginx
下面只有一个Nginx的主程序,也没啥好说的。
-
相关阅读:
PC摄像头设置 默认摄像头设置 win11 默认摄像头设置
Linux之Shell变量和引用
记一次 .NET 某传感器采集系统 线程爆高分析
springboot上传文件到后台指定文件夹
postgresql如何关闭自动提交设置
mybatis-plus进行数据字段加密解密入库
香港的Web3从业者们 出走新加坡还是选择留下?
Android 多桌面图标启动, 爬坑点击打开不同页面
保研笔记八——YOLOV5项目复习
开源纯粹主义:每一颗螺丝钉都是自由的
- 原文地址:https://blog.csdn.net/Trollz/article/details/126525238
