-
远程服务器的Docker环境遇到问题,无法调试
安装vscode 的插件
- 首先确保你的Vscode上安装了remote-ssh,Docker 和 remote-container插件
- 然后在你的远程服务器上也安装上remote-container,Docker插件
- 现在假设你已经安装好了插件
使用vscode进入容器调试
- 点击容器的图标
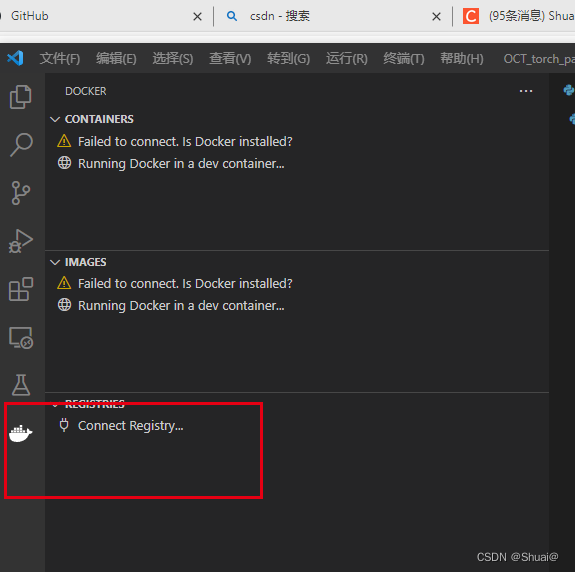
- 选择IMAGES
有两种方式run和run interactive

3. 使用VScode进入Vscode内部
使用Run interactive之后在容器部分可以看到容器建立了
这个时候对着建立的容器右键选择Attach Visual Studio Code这样就是进入容器内调试Vscode了

- 容器内部需要vscode插件的安装
安装pylance,python的基本插件,这样才可以确保调试程序
- Attach Visual Studio Code进入容器
点击Attach Visual Studio Code进入容器可以看到,需要先向容器安装一些Vscode的插件,确保能连接容器。

下面可以看到连接成功了到容器内部了,左下角可以看到是容器
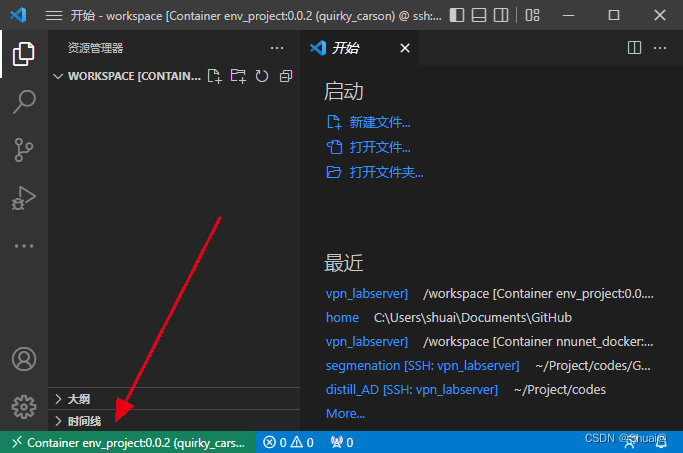
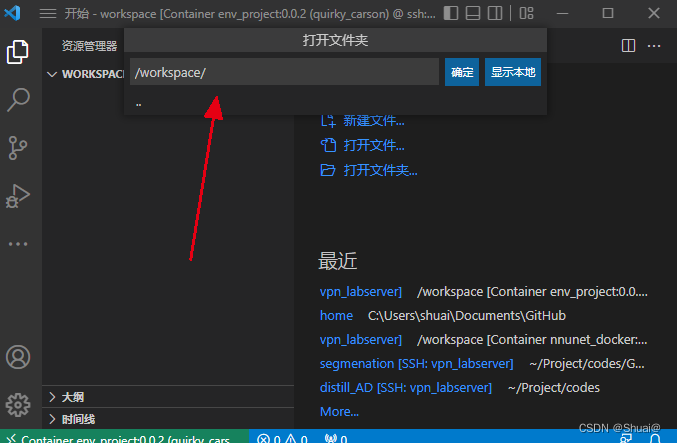
打开文件夹选择容器目录
创建了测试的python文件,如果发现没有办法调试的话
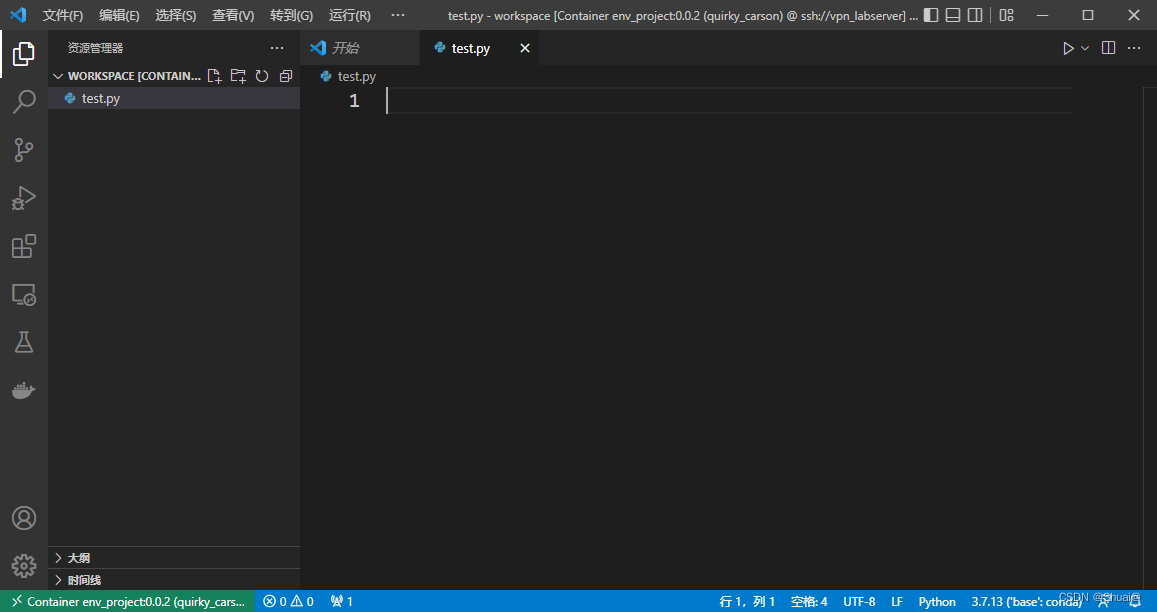
在插件部分,安装容器内的python插件,点击下图中的下载按钮就可以了
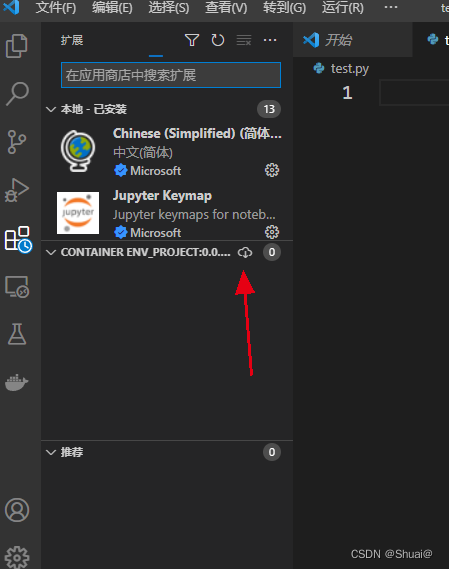
从下面可以看到是容器内的python环境

debug模式成功
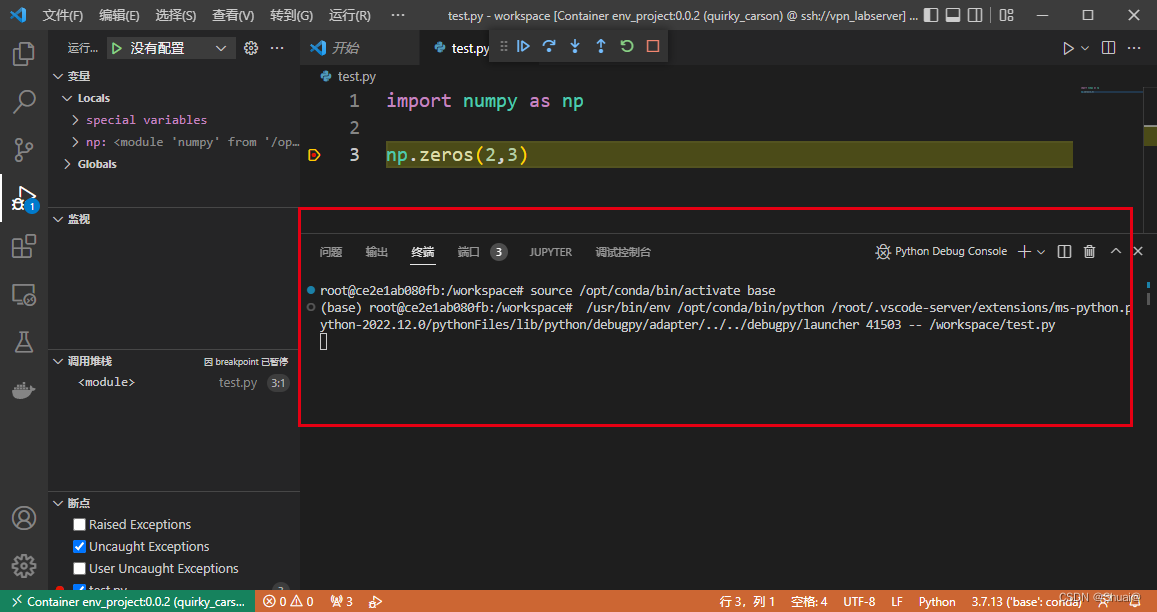
!!!一般不能调试运行的情况是使用服务器的python环境是调试失败的。
想使用GPU的方式在VScode 运行Docker
参考链接
Please change your code to your devcontainer.json
修改devcontainer.json{ "name": "Anaconda (Python 3)", "build": { "context": "..", "dockerfile": "Dockerfile", "args": { "NODE_VERSION": "none" } }, "settings": { "python.defaultInterpreterPath": "/opt/conda/bin/python", "python.linting.enabled": true, "python.linting.pylintEnabled": true, "python.formatting.autopep8Path": "/opt/conda/bin/autopep8", "python.formatting.yapfPath": "/opt/conda/bin/yapf", "python.linting.flake8Path": "/opt/conda/bin/flake8", "python.linting.pycodestylePath": "/opt/conda/bin/pycodestyle", "python.linting.pydocstylePath": "/opt/conda/bin/pydocstyle", "python.linting.pylintPath": "/opt/conda/bin/pylint" }, "extensions": [ "ms-python.python", "ms-python.vscode-pylance" ], "runArgs": ["--gpus","all" ], "remoteUser": "vscode", }- 1
- 2
- 3
- 4
- 5
- 6
- 7
- 8
- 9
- 10
- 11
- 12
- 13
- 14
- 15
- 16
- 17
- 18
- 19
- 20
- 21
- 22
- 23
- 24
- 25
- 26
- 27
- 28
- 29
- 30
- 31
- 32
-
相关阅读:
C# 通讯 HslCommunication
【算法】滑动窗口题单——4.不定长滑动窗口(求子数组个数)
JavaScript常用事件详解
使用JMeter创建数据库测试
Python类和对象怎么使用
大数据开发之Sqoop详细介绍
虚幻引擎:如何实现骨骼重定向
从实体经济和数字经济融合展开,思考商业模式的变化
0066 线程基础
进程与线程的区别
- 原文地址:https://blog.csdn.net/weixin_37707670/article/details/126343566
