-
CentOS 7 安装 MySQL 5.7
前言
本文隶属于专栏《大数据安装部署》,该专栏为笔者原创,引用请注明来源,不足和错误之处请在评论区帮忙指出,谢谢!
正文
在 CentOS 7 中默认安装有 MariaDB ,这个是 MySQL 的分支,但为了需要,还是要在系统中安装 MySQL ,而且安装完成之后可以直接覆盖掉 MariaDB。
1. 安装 wget 工具
使用 wget 工具下载 mysql 安装包和 yum 源文件。
[root@node02 ~]# wget -i -c http://dev.mysql.com/get/mysql57-community-release-el7-10.noarch.rpm -bash: wget: command not found You have new mail in /var/spool/mail/root [root@node02 ~]# yum install -y wget Loaded plugins: fastestmirror Loading mirror speeds from cached hostfile * base: mirror.jdcloud.com * extras: mirror.jdcloud.com * updates: mirrors.tuna.tsinghua.edu.cn Resolving Dependencies --> Running transaction check ---> Package wget.x86_64 0:1.14-18.el7_6.1 will be installed --> Finished Dependency Resolution Dependencies Resolved =================================================================================================== Package Arch Version Repository Size =================================================================================================== Installing: wget x86_64 1.14-18.el7_6.1 base 547 k Transaction Summary =================================================================================================== Install 1 Package Total download size: 547 k Installed size: 2.0 M Downloading packages: wget-1.14-18.el7_6.1.x86_64.rpm | 547 kB 00:00:08 Running transaction check Running transaction test Transaction test succeeded Running transaction Installing : wget-1.14-18.el7_6.1.x86_64 1/1 Verifying : wget-1.14-18.el7_6.1.x86_64 1/1 Installed: wget.x86_64 0:1.14-18.el7_6.1 Complete! [root@node02 ~]#- 1
- 2
- 3
- 4
- 5
- 6
- 7
- 8
- 9
- 10
- 11
- 12
- 13
- 14
- 15
- 16
- 17
- 18
- 19
- 20
- 21
- 22
- 23
- 24
- 25
- 26
- 27
- 28
- 29
- 30
- 31
- 32
- 33
- 34
- 35
- 36
- 37
- 38
- 39
- 40
- 41
- 42
2. 下载并安装MySQL官方的 Yum Repository
[root@node02 ~]# wget -i -c http://dev.mysql.com/get/mysql57-community-release-el7-10.noarch.rpm --2019-10-11 14:31:09-- http://dev.mysql.com/get/mysql57-community-release-el7-10.noarch.rpm Resolving dev.mysql.com (dev.mysql.com)... 137.254.60.11 Connecting to dev.mysql.com (dev.mysql.com)|137.254.60.11|:80... connected. HTTP request sent, awaiting response... 301 Moved Permanently Location: https://dev.mysql.com/get/mysql57-community-release-el7-10.noarch.rpm [following] --2019-10-11 14:31:11-- https://dev.mysql.com/get/mysql57-community-release-el7-10.noarch.rpm Connecting to dev.mysql.com (dev.mysql.com)|137.254.60.11|:443... connected. HTTP request sent, awaiting response... 302 Found Location: https://repo.mysql.com//mysql57-community-release-el7-10.noarch.rpm [following] --2019-10-11 14:31:14-- https://repo.mysql.com//mysql57-community-release-el7-10.noarch.rpm Resolving repo.mysql.com (repo.mysql.com)... 104.93.1.42 Connecting to repo.mysql.com (repo.mysql.com)|104.93.1.42|:443... connected. HTTP request sent, awaiting response... 200 OK Length: 25548 (25K) [application/x-redhat-package-manager] Saving to: ‘mysql57-community-release-el7-10.noarch.rpm’ 100%[=========================================================>] 25,548 --.-K/s in 0.001s 2019-10-11 14:31:15 (31.3 MB/s) - ‘mysql57-community-release-el7-10.noarch.rpm’ saved [25548/25548] -c: No such file or directory No URLs found in -c. FINISHED --2019-10-11 14:31:15-- Total wall clock time: 5.9s Downloaded: 1 files, 25K in 0.001s (31.3 MB/s) You have new mail in /var/spool/mail/root [root@node02 ~]#- 1
- 2
- 3
- 4
- 5
- 6
- 7
- 8
- 9
- 10
- 11
- 12
- 13
- 14
- 15
- 16
- 17
- 18
- 19
- 20
- 21
- 22
- 23
- 24
- 25
- 26
- 27
- 28
使用上面的命令就直接下载了安装用的 Yum Repository,大概 25KB 的样子,然后就可以直接 yum 安装了。
[root@node02 ~]# yum -y install mysql57-community-release-el7-10.noarch.rpm Loaded plugins: fastestmirror Examining mysql57-community-release-el7-10.noarch.rpm: mysql57-community-release-el7-10.noarch Marking mysql57-community-release-el7-10.noarch.rpm to be installed Resolving Dependencies --> Running transaction check ---> Package mysql57-community-release.noarch 0:el7-10 will be installed --> Finished Dependency Resolution Dependencies Resolved =================================================================================================== Package Arch Version Repository Size =================================================================================================== Installing: mysql57-community-release noarch el7-10 /mysql57-community-release-el7-10.noarch 30 k Transaction Summary =================================================================================================== Install 1 Package Total size: 30 k Installed size: 30 k Downloading packages: Running transaction check Running transaction test Transaction test succeeded Running transaction Installing : mysql57-community-release-el7-10.noarch 1/1 Verifying : mysql57-community-release-el7-10.noarch 1/1 Installed: mysql57-community-release.noarch 0:el7-10 Complete! You have new mail in /var/spool/mail/root [root@node02 ~]#- 1
- 2
- 3
- 4
- 5
- 6
- 7
- 8
- 9
- 10
- 11
- 12
- 13
- 14
- 15
- 16
- 17
- 18
- 19
- 20
- 21
- 22
- 23
- 24
- 25
- 26
- 27
- 28
- 29
- 30
- 31
- 32
- 33
- 34
- 35
- 36
- 37
下面就是使用 yum 安装 MySQL 了,这步可能会花些时间,安装完成后就会覆盖掉之前的 mariadb。
[root@node02 ~]# yum -y install mysql-community-server Loaded plugins: fastestmirror Loading mirror speeds from cached hostfile * base: mirror.jdcloud.com * extras: mirror.jdcloud.com * updates: mirrors.tuna.tsinghua.edu.cn mysql-connectors-community | 2.5 kB 00:00:00 mysql-tools-community | 2.5 kB 00:00:00 mysql57-community | 2.5 kB 00:00:00 (1/3): mysql57-community/x86_64/primary_db | 184 kB 00:00:01 (2/3): mysql-tools-community/x86_64/primary_db | 61 kB 00:00:02 (3/3): mysql-connectors-community/x86_64/primary_db | 44 kB 00:00:03 Resolving Dependencies --> Running transaction check ---> Package mysql-community-server.x86_64 0:5.7.27-1.el7 will be installed --> Processing Dependency: mysql-community-common(x86-64) = 5.7.27-1.el7 for package: mysql-community-server-5.7.27-1.el7.x86_64 --> Processing Dependency: mysql-community-client(x86-64) >= 5.7.9 for package: mysql-community-server-5.7.27-1.el7.x86_64 --> Running transaction check ---> Package mysql-community-client.x86_64 0:5.7.27-1.el7 will be installed --> Processing Dependency: mysql-community-libs(x86-64) >= 5.7.9 for package: mysql-community-client-5.7.27-1.el7.x86_64 ---> Package mysql-community-common.x86_64 0:5.7.27-1.el7 will be installed --> Running transaction check ---> Package mariadb-libs.x86_64 1:5.5.60-1.el7_5 will be obsoleted --> Processing Dependency: libmysqlclient.so.18()(64bit) for package: 2:postfix-2.10.1-7.el7.x86_64 --> Processing Dependency: libmysqlclient.so.18(libmysqlclient_18)(64bit) for package: 2:postfix-2.10.1-7.el7.x86_64 ---> Package mysql-community-libs.x86_64 0:5.7.27-1.el7 will be obsoleting --> Running transaction check ---> Package mysql-community-libs-compat.x86_64 0:5.7.27-1.el7 will be obsoleting --> Finished Dependency Resolution Dependencies Resolved =================================================================================================== Package Arch Version Repository Size =================================================================================================== Installing: mysql-community-libs x86_64 5.7.27-1.el7 mysql57-community 2.2 M replacing mariadb-libs.x86_64 1:5.5.60-1.el7_5 mysql-community-libs-compat x86_64 5.7.27-1.el7 mysql57-community 2.0 M replacing mariadb-libs.x86_64 1:5.5.60-1.el7_5 mysql-community-server x86_64 5.7.27-1.el7 mysql57-community 165 M Installing for dependencies: mysql-community-client x86_64 5.7.27-1.el7 mysql57-community 24 M mysql-community-common x86_64 5.7.27-1.el7 mysql57-community 275 k Transaction Summary =================================================================================================== Install 3 Packages (+2 Dependent packages) Total download size: 194 M Downloading packages: warning: /var/cache/yum/x86_64/7/mysql57-community/packages/mysql-community-common-5.7.27-1.el7.x86_64.rpm: Header V3 DSA/SHA1 Signature, key ID 5072e1f5: NOKEY Public key for mysql-community-common-5.7.27-1.el7.x86_64.rpm is not installed (1/5): mysql-community-common-5.7.27-1.el7.x86_64.rpm | 275 kB 00:00:01 (2/5): mysql-community-libs-5.7.27-1.el7.x86_64.rpm | 2.2 MB 00:00:04 (3/5): mysql-community-libs-compat-5.7.27-1.el7.x86_64.rpm | 2.0 MB 00:00:06 mysql-community-client-5.7.27- FAILED 18 MB 170:42:08 ETA http://repo.mysql.com/yum/mysql-5.7-community/el/7/x86_64/mysql-community-client-5.7.27-1.el7.x86_64.rpm: [Errno 12] Timeout on http://repo.mysql.com/yum/mysql-5.7-community/el/7/x86_64/mysql-community-client-5.7.27-1.el7.x86_64.rpm: (28, 'Operation too slow. Less than 1000 bytes/sec transferred the last 30 seconds') Trying other mirror. mysql-community-server-5.7.27- FAILED 16 MB --:--:-- ETA http://repo.mysql.com/yum/mysql-5.7-community/el/7/x86_64/mysql-community-server-5.7.27-1.el7.x86_64.rpm: [Errno 12] Timeout on http://repo.mysql.com/yum/mysql-5.7-community/el/7/x86_64/mysql-community-server-5.7.27-1.el7.x86_64.rpm: (28, 'Operation too slow. Less than 1000 bytes/sec transferred the last 30 seconds') Trying other mirror. (4/5): mysql-community-client-5.7.27-1.el7.x86_64.rpm | 24 MB 00:11:58 mysql-community-server-5.7.27- FAILED 4 MB 2600:47:50 ETA http://repo.mysql.com/yum/mysql-5.7-community/el/7/x86_64/mysql-community-server-5.7.27-1.el7.x86_64.rpm: [Errno 12] Timeout on http://repo.mysql.com/yum/mysql-5.7-community/el/7/x86_64/mysql-community-server-5.7.27-1.el7.x86_64.rpm: (28, 'Operation too slow. Less than 1000 bytes/sec transferred the last 30 seconds') Trying other mirror. (5/5): mysql-community-server-5.7.27-1.el7.x86_64.rpm | 165 MB 00:07:44 --------------------------------------------------------------------------------------------------- Total 148 kB/s | 194 MB 00:22:20 Retrieving key from file:///etc/pki/rpm-gpg/RPM-GPG-KEY-mysql Importing GPG key 0x5072E1F5: Userid : "MySQL Release Engineering- 1
- 2
- 3
- 4
- 5
- 6
- 7
- 8
- 9
- 10
- 11
- 12
- 13
- 14
- 15
- 16
- 17
- 18
- 19
- 20
- 21
- 22
- 23
- 24
- 25
- 26
- 27
- 28
- 29
- 30
- 31
- 32
- 33
- 34
- 35
- 36
- 37
- 38
- 39
- 40
- 41
- 42
- 43
- 44
- 45
- 46
- 47
- 48
- 49
- 50
- 51
- 52
- 53
- 54
- 55
- 56
- 57
- 58
- 59
- 60
- 61
- 62
- 63
- 64
- 65
- 66
- 67
- 68
- 69
- 70
- 71
- 72
- 73
- 74
- 75
- 76
- 77
- 78
- 79
- 80
- 81
- 82
- 83
- 84
- 85
- 86
- 87
- 88
- 89
- 90
- 91
- 92
- 93
- 94
- 95
- 96
- 97
- 98
- 99
- 100
- 101
- 102
- 103
- 104
- 105
- 106
- 107
- 108
- 109
3. MySQL数据库设置
首先启动 MySQL
#启动mysql服务 [root@node02 ~]# systemctl start mysqld.service #查看mysql运行状态 [root@node02 ~]# systemctl status mysqld.service ● mysqld.service - MySQL Server Loaded: loaded (/usr/lib/systemd/system/mysqld.service; enabled; vendor preset: disabled) #表示已经启动(linux) Active: active (running) since Fri 2019-10-11 15:14:57 CST; 6s ago Docs: man:mysqld(8) http://dev.mysql.com/doc/refman/en/using-systemd.html Process: 22525 ExecStart=/usr/sbin/mysqld --daemonize --pid-file=/var/run/mysqld/mysqld.pid $MYSQLD_OPTS (code=exited, status=0/SUCCESS) Process: 22449 ExecStartPre=/usr/bin/mysqld_pre_systemd (code=exited, status=0/SUCCESS) Main PID: 22528 (mysqld) CGroup: /system.slice/mysqld.service └─22528 /usr/sbin/mysqld --daemonize --pid-file=/var/run/mysqld/mysqld.pid Oct 11 15:14:54 node02.kaikeba.com systemd[1]: Starting MySQL Server... Oct 11 15:14:57 node02.kaikeba.com systemd[1]: Started MySQL Server. [root@node02 ~]#- 1
- 2
- 3
- 4
- 5
- 6
- 7
- 8
- 9
- 10
- 11
- 12
- 13
- 14
- 15
- 16
- 17
- 18
- 19
此时 MySQL 已经开始正常运行,不过要想进入 MySQL 还得先找出此时 root 用户的密码,通过如下命令可以在日志文件中找出密码:
#查找到root用户登录mysql数据库的密码:7UOv>SVzygyB [root@node02 ~]# grep "password" /var/log/mysqld.log 2019-10-11T07:14:54.482816Z 1 [Note] A temporary password is generated for root@localhost: 7UOv>SVzygyB You have new mail in /var/spool/mail/root [root@node02 ~]#- 1
- 2
- 3
- 4
- 5
命令进入数据库:
[root@node02 ~]# mysql -u root -p Enter password: Welcome to the MySQL monitor. Commands end with ; or \g. Your MySQL connection id is 3 Server version: 5.7.27 Copyright (c) 2000, 2019, Oracle and/or its affiliates. All rights reserved. Oracle is a registered trademark of Oracle Corporation and/or its affiliates. Other names may be trademarks of their respective owners. Type 'help;' or '\h' for help. Type '\c' to clear the current input statement. mysql> show databases; #提示修改初始密码 ERROR 1820 (HY000): You must reset your password using ALTER USER statement before executing this statement. mysql> show databases; ERROR 1820 (HY000): You must reset your password using ALTER USER statement before executing this statement. #注意密码设置不能过于简单,mysql有密码设置规范(特殊字符、字母大小写,数字三者的组合) mysql> ALTER USER 'root'@'localhost' IDENTIFIED BY '!Qaz123456'; #添加scm用户对scm库的访问权限 mysql> grant all on scm.* to scm@'%' identified by '!Qaz123456'; Query OK, 0 rows affected, 1 warning (0.01 sec) mysql> select user,host from user; +---------------+-----------+ | user | host | +---------------+-----------+ | scm | % | | mysql.session | localhost | | mysql.sys | localhost | | root | localhost | +---------------+-----------+ 4 rows in set (0.01 sec) #刷新访问权限的设置,这一步非常重要,如果没有操作,scm远程访问mysql数据库就失败. mysql> flush privileges; Query OK, 0 rows affected (0.01 sec) #添加root用户远程访问数据库 mysql>grant all on *.* to root@'%' identified by '!Qaz123456'; mysql> flush privileges; mysql> select user,host from user; +---------------+-----------+ | user | host | +---------------+-----------+ | root | % | | scm | % | | mysql.session | localhost | | mysql.sys | localhost | | root | localhost | +---------------+-----------+ 5 rows in set (0.00 sec) mysql> delete from user where user='root' and host='localhost'; Query OK, 1 row affected (0.02 sec) mysql> select user,host from user; +---------------+-----------+ | user | host | +---------------+-----------+ | root | % | | scm | % | | mysql.session | localhost | | mysql.sys | localhost | +---------------+-----------+ 4 rows in set (0.00 sec) mysql> flush privileges; #创建scm数据库 mysql> create database scm; Query OK, 1 row affected (0.01 sec) mysql> show databases; +--------------------+ | Database | +--------------------+ | information_schema | | mysql | | performance_schema | | scm | | sys | +--------------------+ 5 rows in set (0.00 sec) mysql> update mysql.user set Grant_priv='Y',Super_priv='Y' where user = 'root' and host = '%'; Query OK, 1 row affected (0.00 sec) Rows matched: 1 Changed: 1 Warnings: 0 mysql> flush privileges; Query OK, 0 rows affected (0.00 sec) mysql> quit Bye You have new mail in /var/spool/mail/root #从起mysql服务 [root@node02 ~]# systemctl restart mysqld.service [root@node02 ~]#- 1
- 2
- 3
- 4
- 5
- 6
- 7
- 8
- 9
- 10
- 11
- 12
- 13
- 14
- 15
- 16
- 17
- 18
- 19
- 20
- 21
- 22
- 23
- 24
- 25
- 26
- 27
- 28
- 29
- 30
- 31
- 32
- 33
- 34
- 35
- 36
- 37
- 38
- 39
- 40
- 41
- 42
- 43
- 44
- 45
- 46
- 47
- 48
- 49
- 50
- 51
- 52
- 53
- 54
- 55
- 56
- 57
- 58
- 59
- 60
- 61
- 62
- 63
- 64
- 65
- 66
- 67
- 68
- 69
- 70
- 71
- 72
- 73
- 74
- 75
- 76
- 77
- 78
- 79
- 80
- 81
- 82
- 83
- 84
- 85
- 86
- 87
- 88
- 89
- 90
- 91
- 92
- 93
- 94
- 95
- 96
- 97
- 98
- 99
- 100
- 101
- 102
- 103
4. 开启 mysql 的 binlog
Mysql 的 binlog 日志作⽤用是⽤用来记录 mysql 内部增删等对 mysql 数据库有更更新的内容的记录(对数据库的改动),对数据库的查询 select 或 show 等不不会被 binlog 日志记录;主要⽤用于数据库的主从复制以及增量恢复。
mysql 的 binlog 日志必须打开 log-bin 功能才能生成 binlog 日志。
-rw-rw---- 1 mysql mysql 449229328 Sep 2 19:21 mysql-bin.000001 -rw-rw---- 1 mysql mysql 860032004 Sep 4 15:08 mysql-bin.000002 -rw-rw---- 1 mysql mysql 613773 Sep 4 15:17 mysql-bin.000003 -rw-rw---- 1 mysql mysql 125 Sep 4 15:18 mysql-bin.000004 -rw-rw---- 1 mysql mysql 645768398 Sep 24 00:40 mysql-bin.000005 -rw-rw---- 1 mysql mysql 81087585 Oct 25 14:33 mysql-bin.000006 -rw-rw---- 1 mysql mysql 192 Oct 9 18:25 mysql-bin.index- 1
- 2
- 3
- 4
- 5
- 6
- 7
4.1 修改 /etc/my.cnf
[mysqld] log-bin=/var/lib/mysql/mysql-bin 【binlog⽇日志存放路路径】 binlog-format=ROW 【⽇日志中会记录成每⼀一⾏行行数据被修改的形式】 server_id=1 【指定当前机器器的服务ID(如果是集群,不不能重复)】- 1
- 2
- 3
- 4
4.2 重启 mysql,并验证
输入命令查看:
mysql> show variables like '%log_bin%';- 1

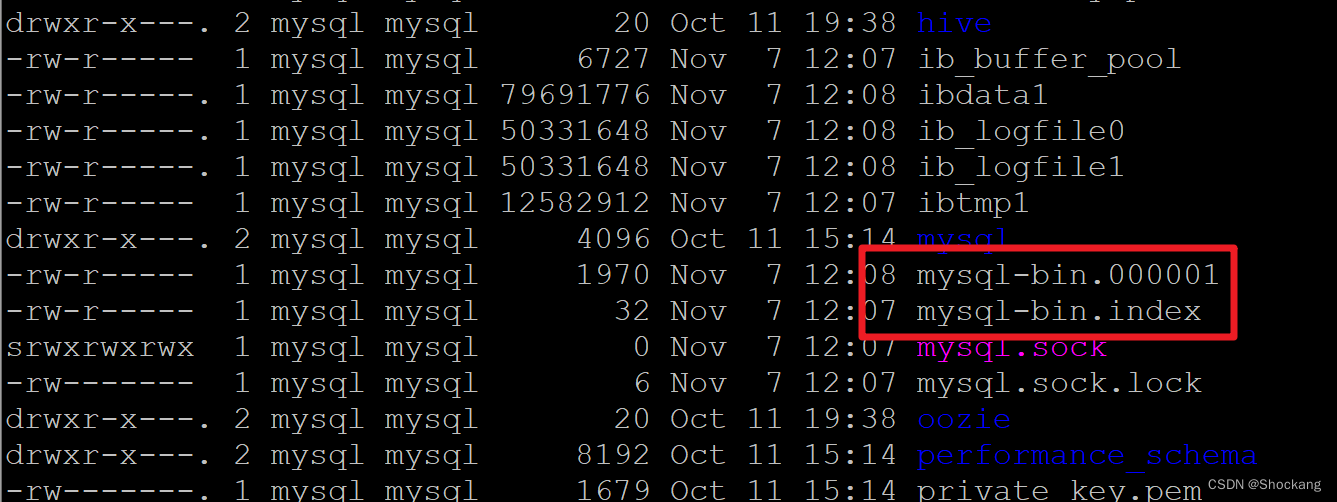
进入指定的 binlog 路径查看是否生产 binlog
cd /var/lib/mysql/- 1
5. 安装 maxwell
5.1 下载 maxwell
关于 Maxwell 请参考我的博客——Maxwell 是什么?
5.2 解压 maxwell-1.21.1.tar.gz
tar -zxvf maxwell-1.21.1.tar.gz -C /opt- 1
5.3 Maxwell 解析 binlog 到Kafka
在 maxwell 的目录下创建 driver.properties 配置文件并编辑填入如下内容,主要用来指定解析业务库的 binlog 和发送数据到 kafka
[root@node02 maxwell-1.22.1]# touch driver.properties You have new mail in /var/spool/mail/root [root@node02 maxwell-1.22.1]# vi driver.properties binlog ############### log_level=INFO producer=kafka host = 10.20.3.155 user = maxwell password = 123456 producer_ack_timeout = 600000 ######### binlog ############### ######### output format stuff ############### output_binlog_position=ture output_server_id=true output_thread_id=ture output_nulls=true output_xoffset=true output_schema_id=true ######### output format stuff ############### ############ kafka stuff ############# kafka.bootstrap.servers=node01:9092,node02:9092,node03:9092 kafka_topic=veche kafka_partition_hash=murmur3 kafka_key_format=hash kafka.compression.type=snappy kafka.retries=5 kafka.acks=all producer_partition_by=primary_key ############ kafka stuff ############# ############## misc stuff ########### bootstrapper=async ############## misc stuff ########## ############## filter ############### filter=exclude:*.*, include: test.order_info_201904,include: test.order_info_201905,include: test.o rder_info_201906,include: test.order_info_201907,include: test.order_info_201908,include: test.orde r_info_201906,include: test.order_info_201910,include: test.order_info_201911,include: test.order_i nfo_201912,include: test.renter_info,include: test.driver_info ,include: test.opt_alliance_business ############## filter ############### "driver.properties" 36L, 1343C written [root@node02 maxwell-1.22.1]#- 1
- 2
- 3
- 4
- 5
- 6
- 7
- 8
- 9
- 10
- 11
- 12
- 13
- 14
- 15
- 16
- 17
- 18
- 19
- 20
- 21
- 22
- 23
- 24
- 25
- 26
- 27
- 28
- 29
- 30
- 31
- 32
- 33
- 34
- 35
- 36
- 37
- 38
- 39
- 40
- 41
以上参数解释:http://maxwells-daemon.io/config/
######### binlog ############### 用于指定解析目标机器的binlog(业务库所在机器地址) ######### output format stuff ############### 配置输出格式 ############ kafka stuff ############# 指定kafka地址 ############## misc stuff ########### 在处理bootstrap时,是否会阻塞正常的binlog解析 async不会阻塞 ############## filter ############### 用于指定需要监控哪些库、哪些表- 1
- 2
- 3
- 4
- 5
- 6
- 7
- 8
- 9
- 10
- 11
- 12
- 13
- 14
- 15
5.4 给 maxwell 添加权限
创建 Maxwell 用户,并赋予 maxwell 库的一些权限
CREATE USER 'maxwell'@'%' IDENTIFIED BY '!Qaz123456'; GRANT ALL ON maxwell.* TO 'maxwell'@'%' IDENTIFIED BY '!Qaz123456'; GRANT SELECT, REPLICATION CLIENT, REPLICATION SLAVE on *.* to 'maxwell'@'%'; FLUSH PRIVILEGES;- 1
- 2
- 3
- 4
5.5 启动maxwell
bin/maxwell --user='maxwell' --password='!Qaz123456' --host='127.0.0.1' --producer=kafka --kafka.bootstrap.servers=node01:9092 --kafka_topic=maxwell- 1
启动之后,通过 jps -m 查看进程

测试:
cd /opt/cloudera/parcels/KAFKA-3.1.0-1.3.1.0.p0.35/lib/kafka/bin/- 1
-
相关阅读:
九、Echart图表 之 grid组件用法 直角坐标系内绘图网格
PCN、ECN
基于JavaSSH框架的网上商城设计与实现
随手记录: 扩展M.2硬盘,从1T换到2T 硬盘clone ubuntu设置等注意事项
【附源码】Python计算机毕业设计汽车租赁管理系统
搭建云原生环境
Python自动化测试:web自动化测试——Selenium框架
第2章 矩阵
nvcc编译器之编译选项(chapter 4)
【牛客】SQL125 得分不小于平均分的最低分
- 原文地址:https://blog.csdn.net/Shockang/article/details/126335849
