-
CSS 基础
CSS 基础
引言
CSS:Cascading Style Sheets ( 层叠样式表 )
CSS 的作用
CSS 能够对网页中元素位置的排版进行像素级的精确控制,实现美化页面的效果,且能够做到页面的样式和结构分离。使用了CSS,就相当于女生化妆之后。
CSS 基础格式
选择器 { 属性:值; }- 1
- 2
- 3
- 4
- 5
一、CSS 引入方式
1. 内部样式表
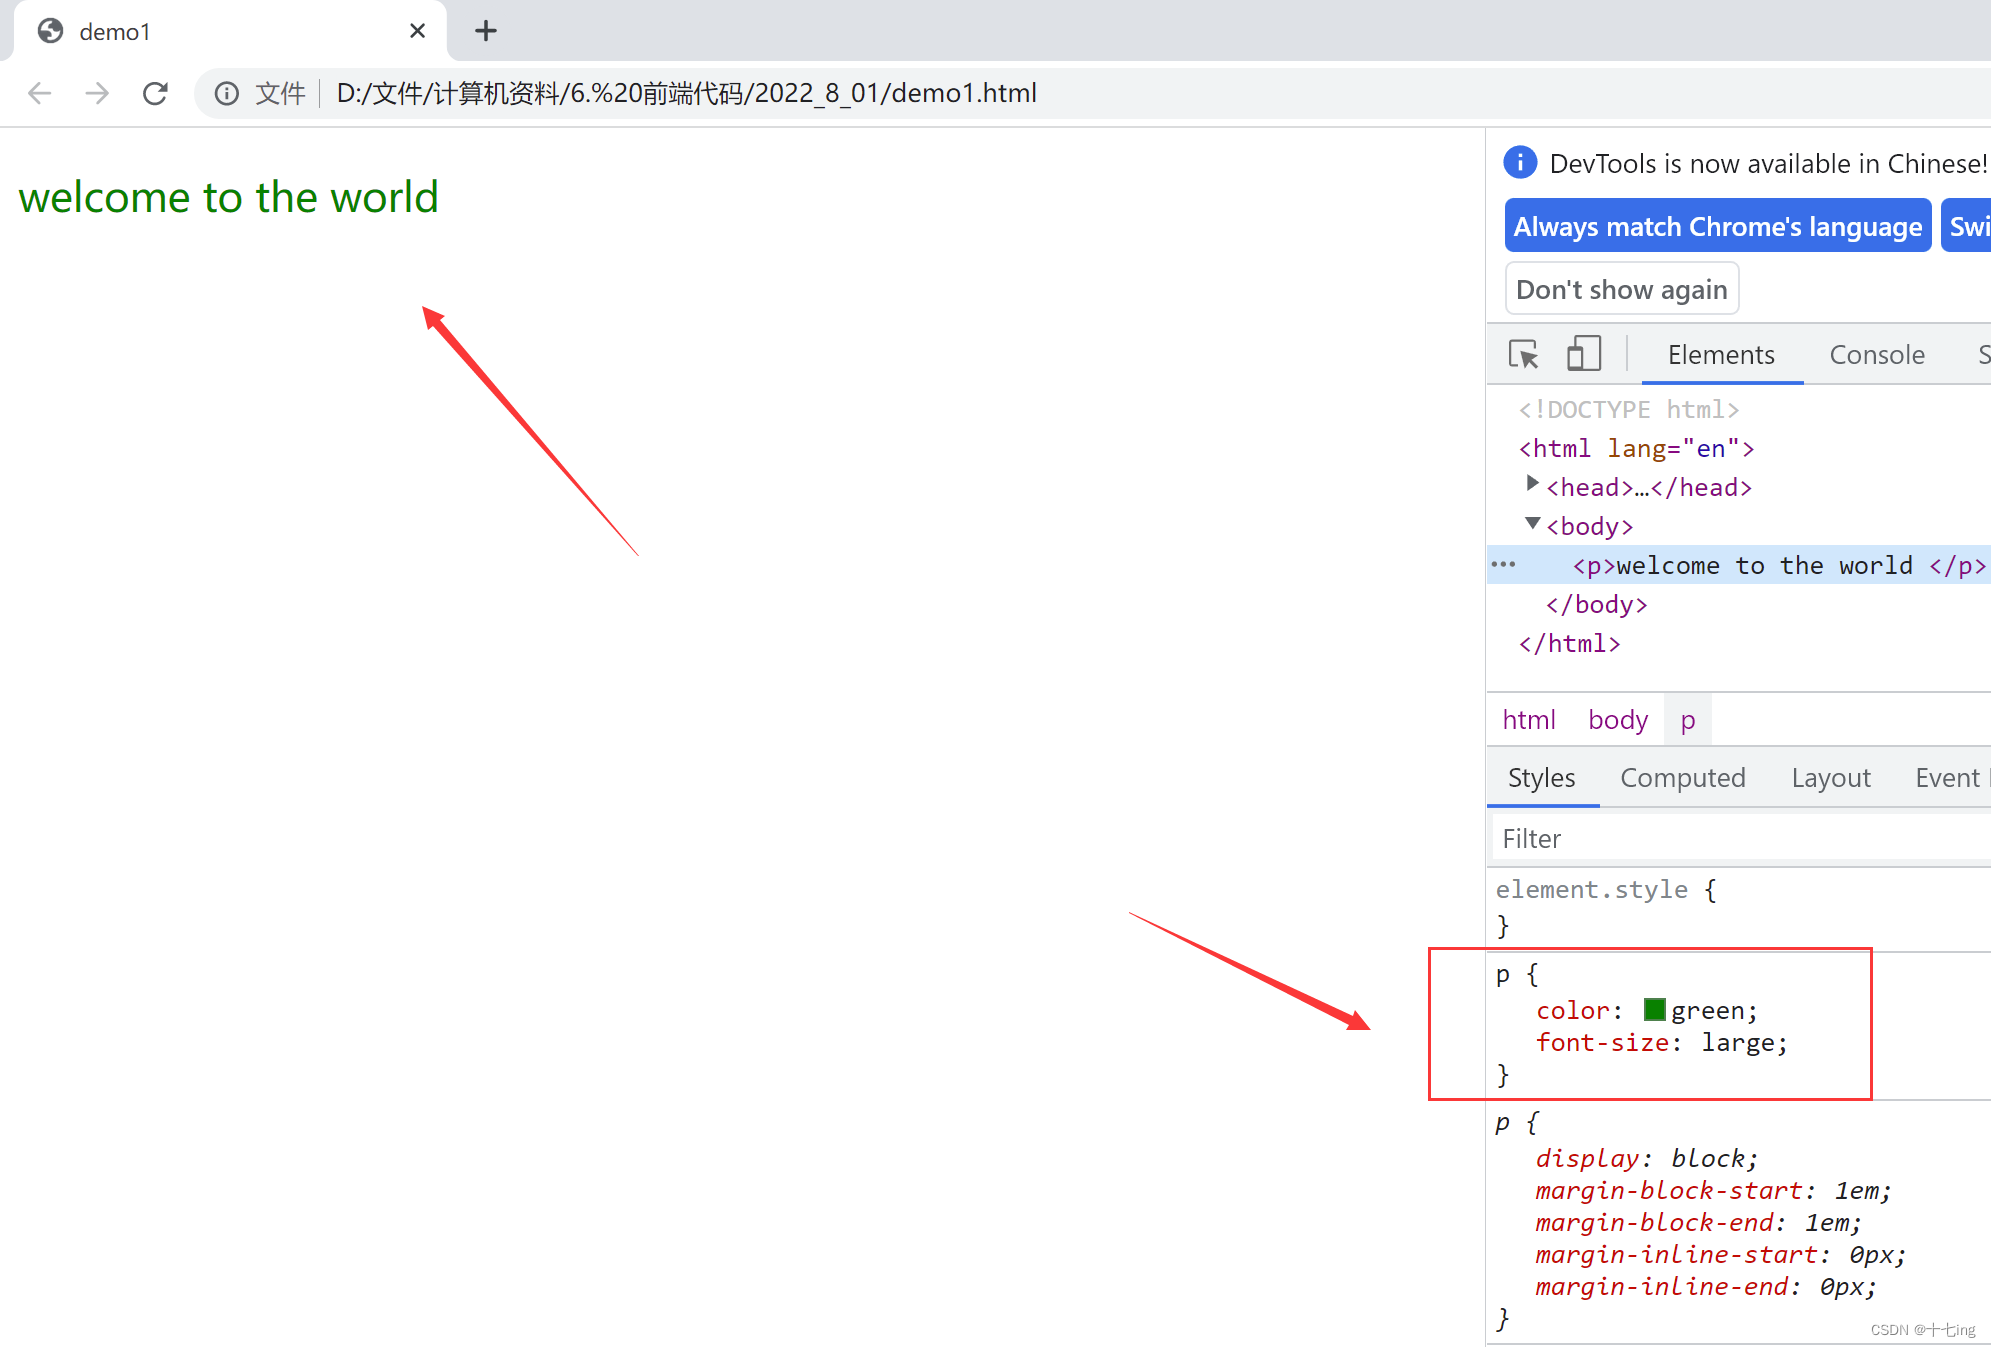
内部样式表是写在当前编辑的 html 中的 style 标签内,理论上来说 style 标签可以放到 html 的任意位置,但我们一般都是习惯放到 head 标签中。其中 p { } 表示选择器。
DOCTYPE html> <html lang="en"> <head> <meta charset="UTF-8"> <meta http-equiv="X-UA-Compatible" content="IE=edge"> <meta name="viewport" content="width=device-width, initial-scale=1.0"> <title>demo1title> <style> p { /* 颜色为绿色 */ color: green; /* 字体大小 */ font-size: large; } style> head> <body> <p>welcome to the world p> body> html>- 1
- 2
- 3
- 4
- 5
- 6
- 7
- 8
- 9
- 10
- 11
- 12
- 13
- 14
- 15
- 16
- 17
- 18
- 19
- 20
- 21
- 22
- 23
注意注释的写法:
正确写法:/* */ 错误写法:// 另外,在 VS Code 中,可以使用 Ctrl + / 进行快速注释和快速反注释- 1
- 2
- 3
- 4
展示结果:
2. 行内样式表
行内样式表是通过 style 属性,来直接指定某个标签的样式。
<body> <p style="color: red; font-size: larger;">welcome to the world p> body>- 1
- 2
- 3
展示结果:
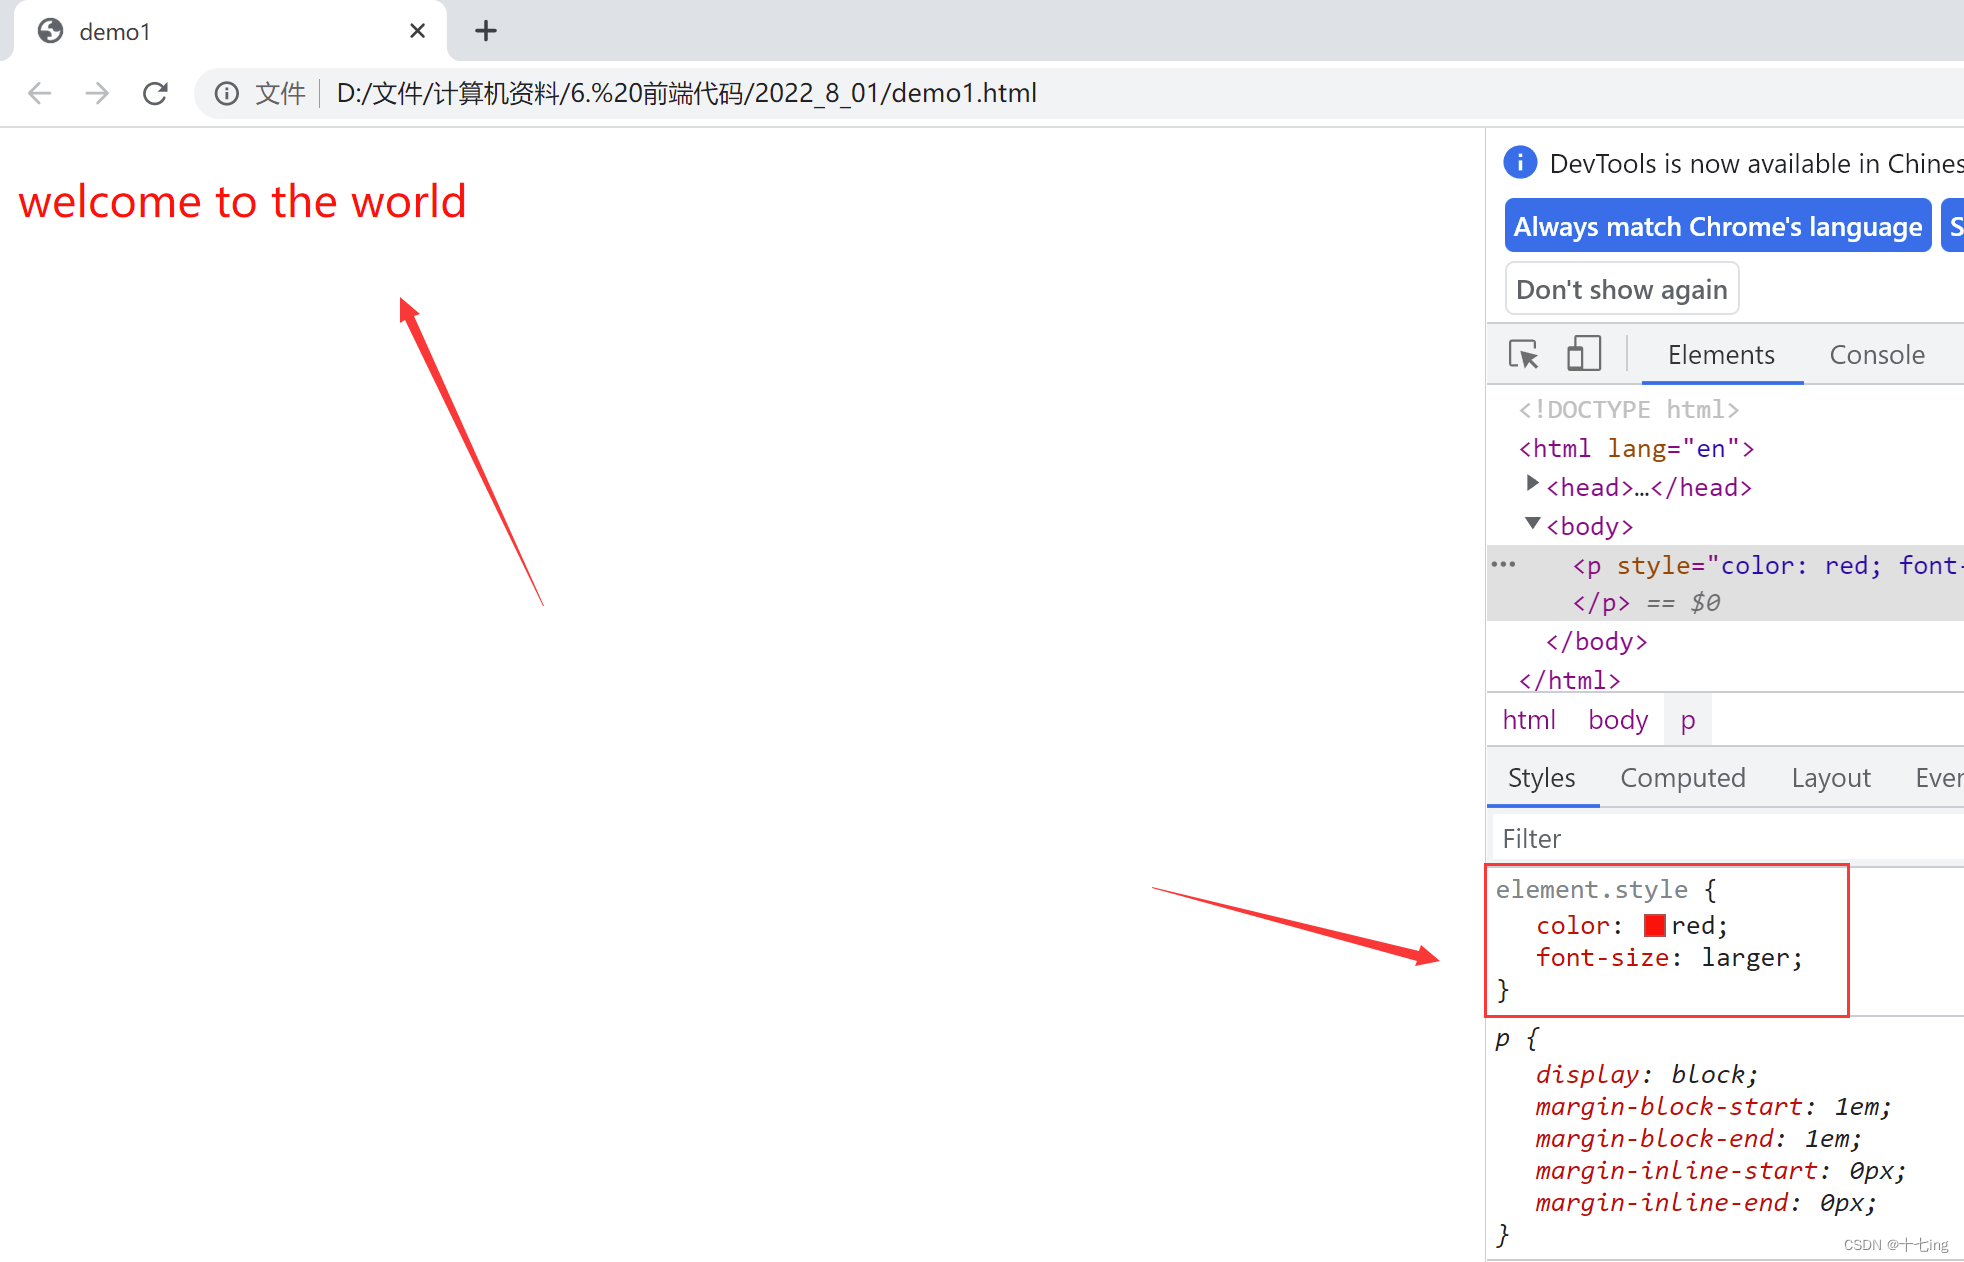
注意:行内样式表的优先级更高
DOCTYPE html> <html lang="en"> <head> <meta charset="UTF-8"> <meta http-equiv="X-UA-Compatible" content="IE=edge"> <meta name="viewport" content="width=device-width, initial-scale=1.0"> <title>demo1title> <style> p { /* 颜色为绿色 */ color: green; /* 字体大小 */ font-size: large; } style> head> <body> <p style="color: red; font-size: larger;">welcome to the world p> body> html>- 1
- 2
- 3
- 4
- 5
- 6
- 7
- 8
- 9
- 10
- 11
- 12
- 13
- 14
- 15
- 16
- 17
- 18
- 19
- 20
- 21
- 22
- 23
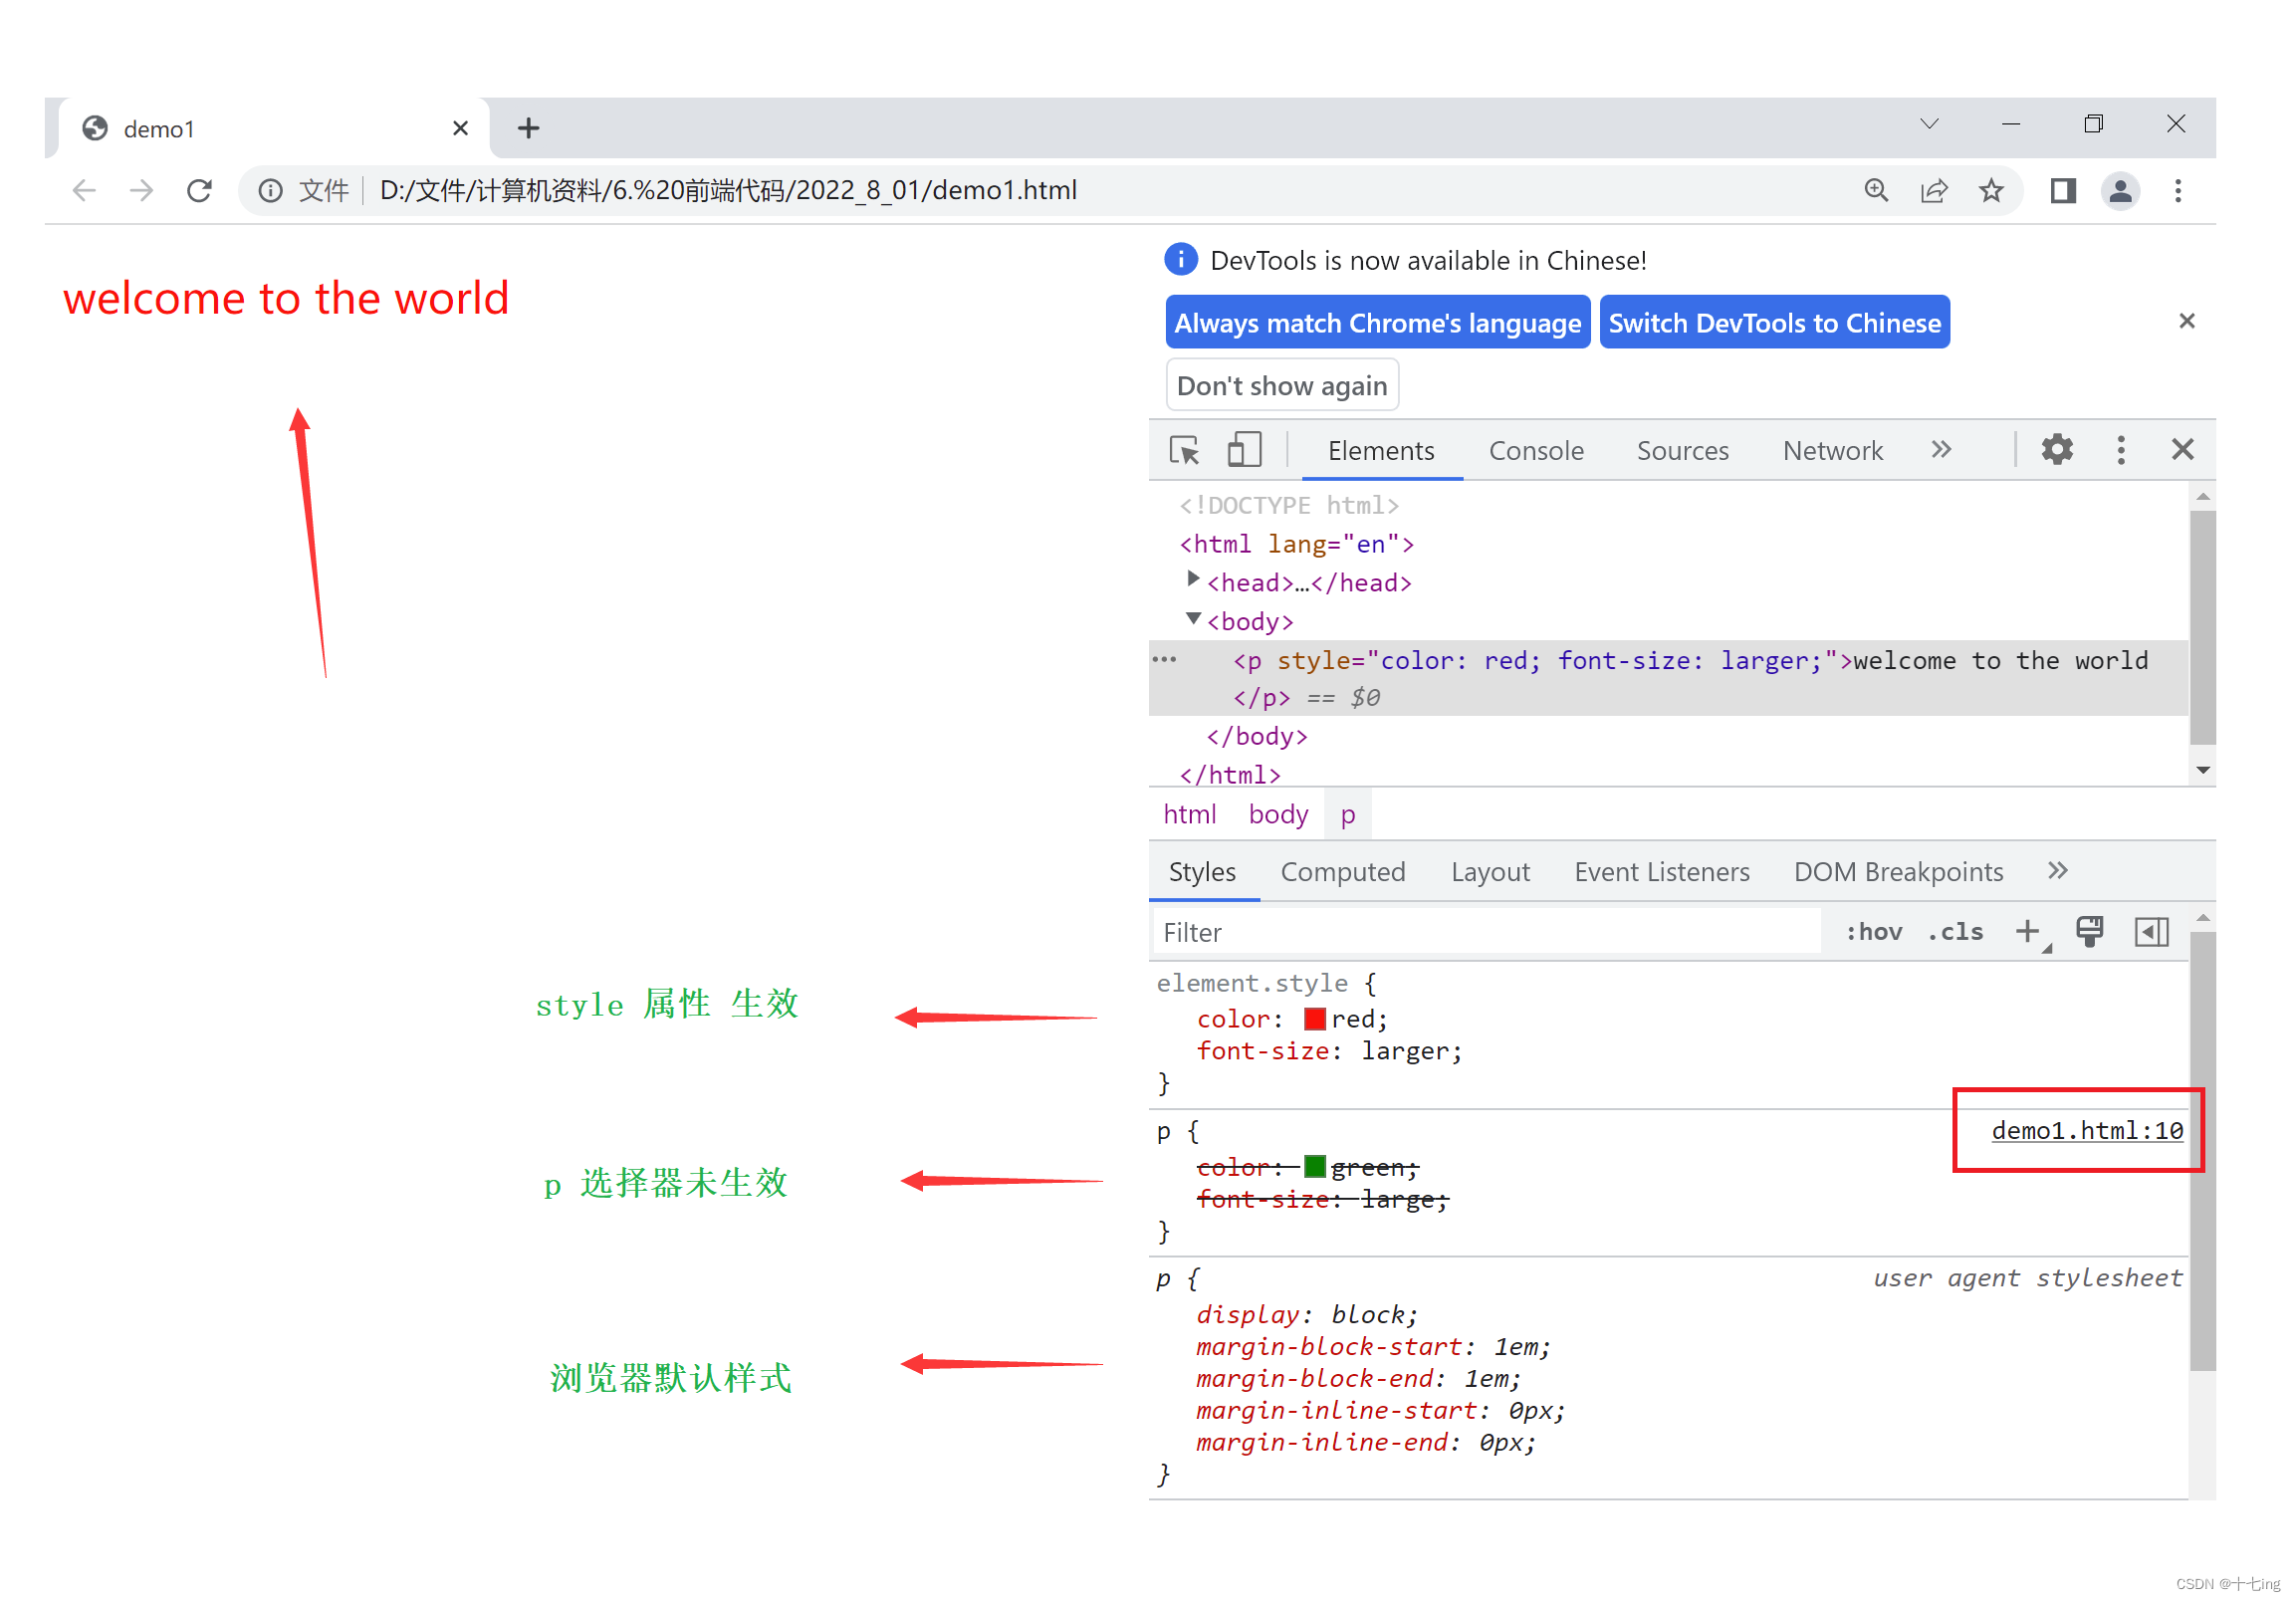
注意:
由于行内样式表的优先级高于内部样式表,所以 style 属性会覆盖 p 选择器中的一些设置。
在我们使用 CSS 的时候,一个元素最终的样式,其实可以是 " 多方叠加 " 的效果,也就是说,一个元素的样式可以由很多地方同时设置,最终是一个叠加效果,但在这个过程中,有些设置的样式能够生效,有些可能不会生效,这取决与语法实现。
展示结果:
3. 外部样式
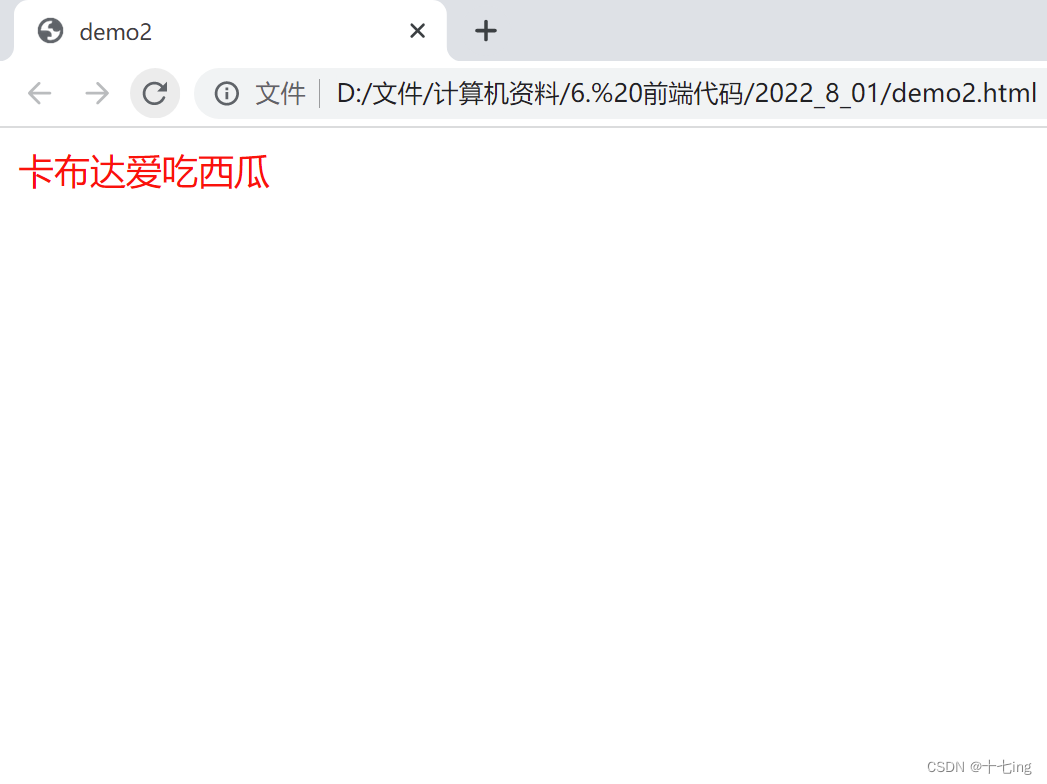
(1) 创建一个 css 文件,在 css 文件中,编辑样式。
(2) 在 html 文件中,使用 link 标签,并通过路径引入 css 文件。css 文件
div { color: red; }- 1
- 2
- 3
html 文件
DOCTYPE html> <html lang="en"> <head> <meta charset="UTF-8"> <meta http-equiv="X-UA-Compatible" content="IE=edge"> <meta name="viewport" content="width=device-width, initial-scale=1.0"> <title>demo2title> <link rel="stylesheet" href="demo2.css"> head> <body> <div>卡布达爱吃西瓜div> body> html>- 1
- 2
- 3
- 4
- 5
- 6
- 7
- 8
- 9
- 10
- 11
- 12
- 13
- 14
- 15
- 16
展示结果:
注意
使用外部样式的时候,可能在修改内容后,不会生效。造成这种情况的原因:受到浏览器缓存的影响。
关于缓存:
这是计算机中一种常见的提升性能的技术手段,网页依赖的资源 ( 图片/CSS/JS等 ) 通常是从服务器上获取的,而如果用户频繁访问该网站,那么这些外部资源就没必要反复从服务器获取。所以计算机就将缓存先存起来 ( 就是存在本地磁盘上了 ),从而提高访问效率。在使用浏览器的时候,如果真的遇到修改内容不生效的这种情况,就可以通过 Ctrl + F5 强制刷新页面,即强制浏览器重新获取 css 文件。
二、CSS 代码风格
1. 展开
p { color: red; font-size: 30px; }- 1
- 2
- 3
- 4
开发阶段,一般建议写成展开风格,使得代码可读性更高。
2. 紧凑
p { color: red; font-size: 30px;}- 1
部署阶段,一般建议使用紧凑风格。
因为 CSS 的作用是对页面进行美化,此外,在编写 css 代码的时候,和 html 一样,空格、换行在代码中是不生效的。而当我们将所编写的 css 代码全部确认后,就可以写在一起,这样就能减少不必要的空格、缩进、换行等,从而达到节省带宽的效果。我们在前面提到,CSS 是从服务器下载到浏览器中的,CSS 代码越长,要下载的内容就越多,所以就会消耗带宽。
而由于 CSS 和 JS 都是从服务器下载到浏览器的本地的,所以对应的 css 文件 和 js 文件中的代码一般都会使用专业的工具进行压缩。
压缩效果就如下图所示:
3. 注意代码的写法
在 CSS中,对于更复杂的代码,一般都是使用 " 脊柱命名法 "
编程语言常见的命名风格:
① 驼峰命名法:形如 【fontSize】 ( Java / JS / C++)
② 蛇形命名法:形如 【font_size】( C / C++ )
③ 脊柱命名法:形如 【font-size】( CSS ),比较少见。
④ 匈牙利命名法:类似于驼峰,但会先加上一个前缀,表示类型。
形如 【ifrontSize】( 整型变量 )
形如 【sfrontSize】( 字符串类型变量 )
( 比较少见,当下时代基本不这么写了,Windows API 中很多都是这么搞的 )三、CSS 基础选择器 ( 重要 )
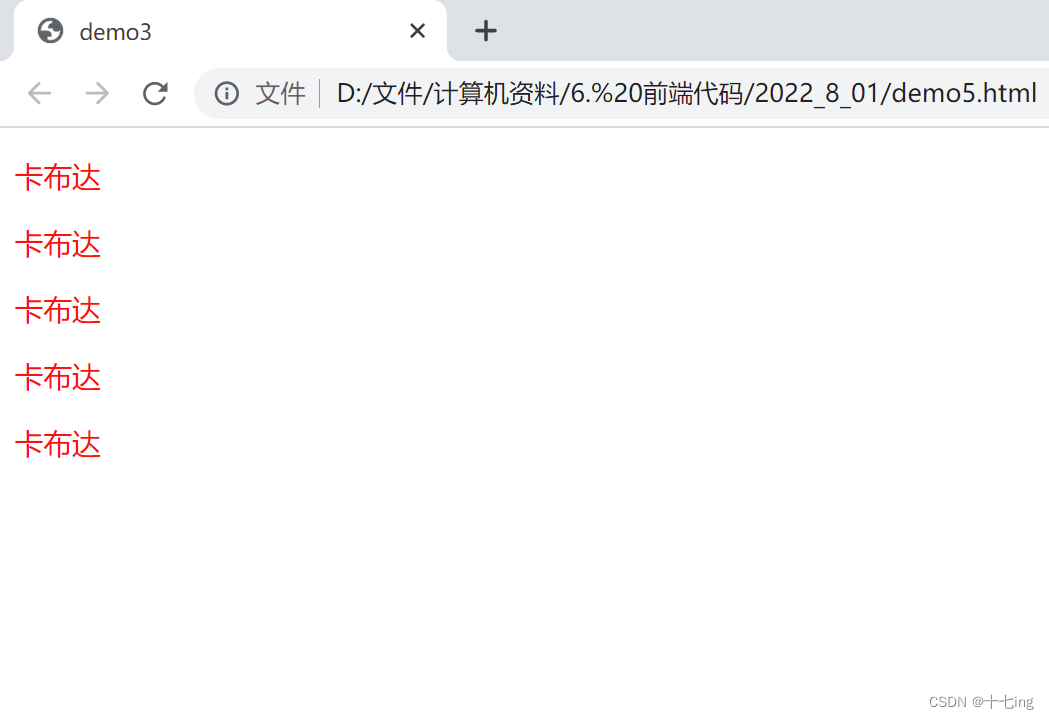
1. 标签选择器 ( 标签 )
标签选择器可以为所有同一类型的标签设置样式。
DOCTYPE html> <html lang="en"> <head> <meta charset="UTF-8"> <meta http-equiv="X-UA-Compatible" content="IE=edge"> <meta name="viewport" content="width=device-width, initial-scale=1.0"> <title>demo3title> <style> p { color: red; } style> head> <body> <p>卡布达p> <p>卡布达p> <p>卡布达p> <p>卡布达p> <p>卡布达p> body> html>- 1
- 2
- 3
- 4
- 5
- 6
- 7
- 8
- 9
- 10
- 11
- 12
- 13
- 14
- 15
- 16
- 17
- 18
- 19
- 20
- 21
- 22
- 23
- 24
展示结果:
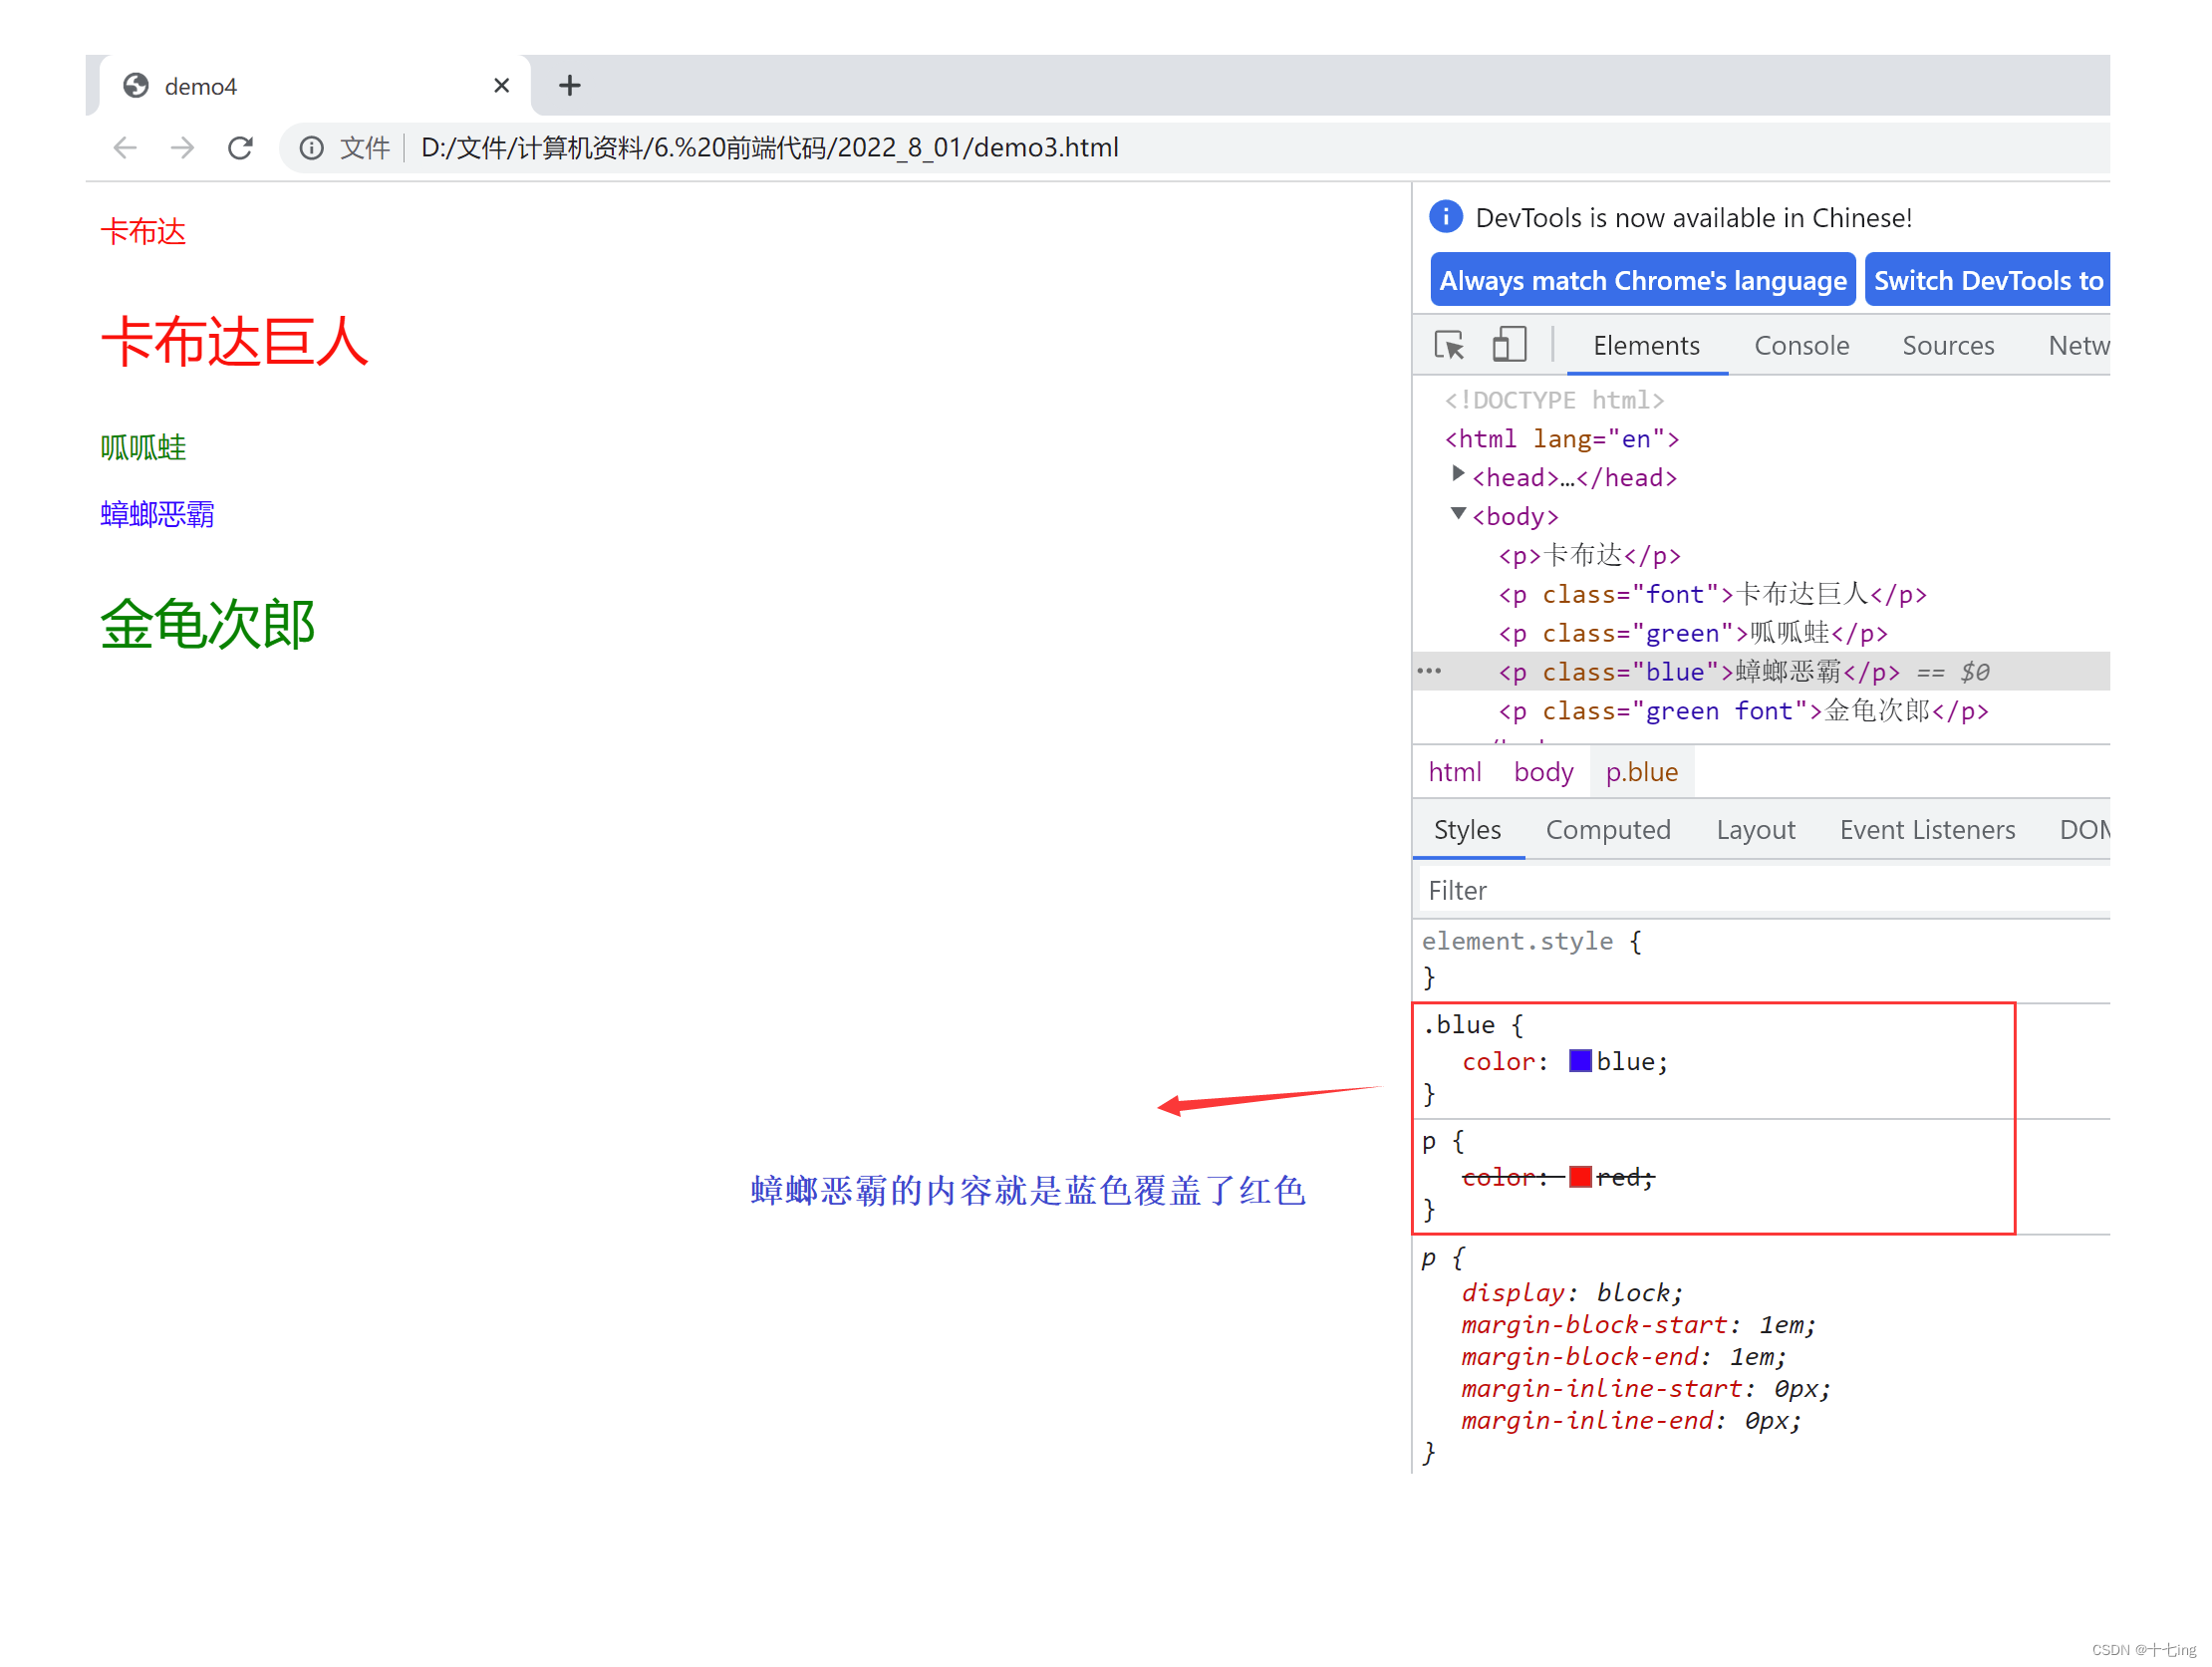
2. 类选择器 ( . )
类选择器可以让属于同一 class 的属性拥有同样的样式。
DOCTYPE html> <html lang="en"> <head> <meta charset="UTF-8"> <meta http-equiv="X-UA-Compatible" content="IE=edge"> <meta name="viewport" content="width=device-width, initial-scale=1.0"> <title>demo4title> <style> p { color: red; } .green { color: green; } .blue { color: blue; } .font { font-size: 30px; } style> head> <body> <p>卡布达p> <p class="font" >卡布达巨人p> <p class="green">呱呱蛙p> <p class="blue">蟑螂恶霸p> <p class="green font">金龟次郎p> body> html>- 1
- 2
- 3
- 4
- 5
- 6
- 7
- 8
- 9
- 10
- 11
- 12
- 13
- 14
- 15
- 16
- 17
- 18
- 19
- 20
- 21
- 22
- 23
- 24
- 25
- 26
- 27
- 28
- 29
- 30
- 31
- 32
- 33
- 34
- 35
- 36
- 37
- 38
- 39
我们必须明确,标签选择器为每个相同标签的内容设置了样式,但当类选择器也存在的时候,那么标签中的内容就会以类选择器设置的样式为优先。上面代码中的【呱呱蛙、蟑螂恶霸、金龟次郎】就是这么回事。
展示结果:
注意
CSS 中的类与 Java 中的类不同,CSS 中的类只是将一类的归在一起,起到了一个分类的作用。而 Java 中的类,无疑代表了面向对象的的一些特性,比如:继承、封装、多态…
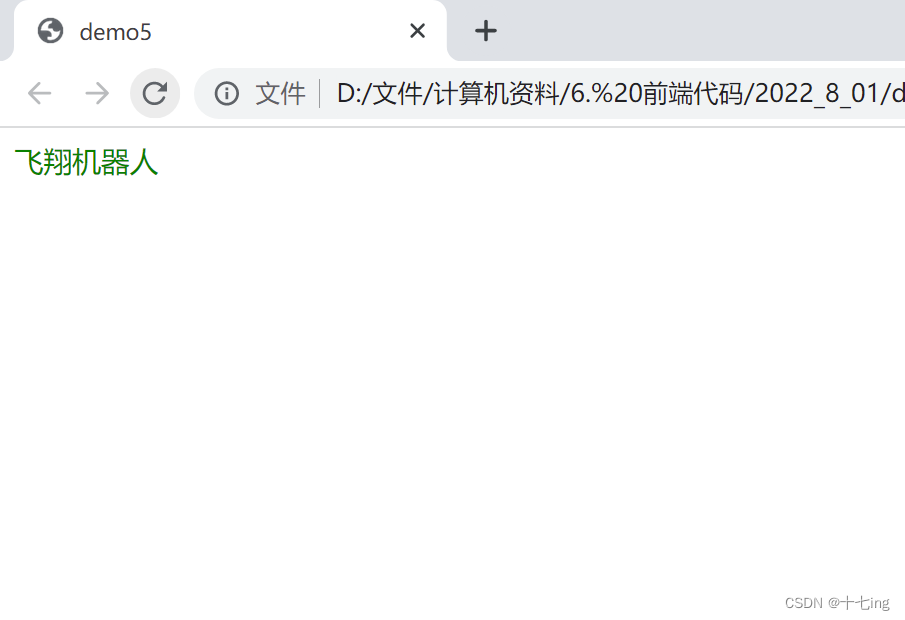
3. id 选择器 ( # )
每个 html 中的元素都有一个 id 属性,要求这个属性是整个页面中唯一的值,也可以通过这个值来找到对应的元素。
DOCTYPE html> <html lang="en"> <head> <meta charset="UTF-8"> <meta http-equiv="X-UA-Compatible" content="IE=edge"> <meta name="viewport" content="width=device-width, initial-scale=1.0"> <title>demo5title> head> <style> div { color: red; } #flag { color: green; } style> <body> <div id="flag">飞翔机器人div> body> html>- 1
- 2
- 3
- 4
- 5
- 6
- 7
- 8
- 9
- 10
- 11
- 12
- 13
- 14
- 15
- 16
- 17
- 18
- 19
- 20
同样地,标签选择器与 id 选择器在一起的时候,也是以 id 选择器设置的样式为先。
展示结果:
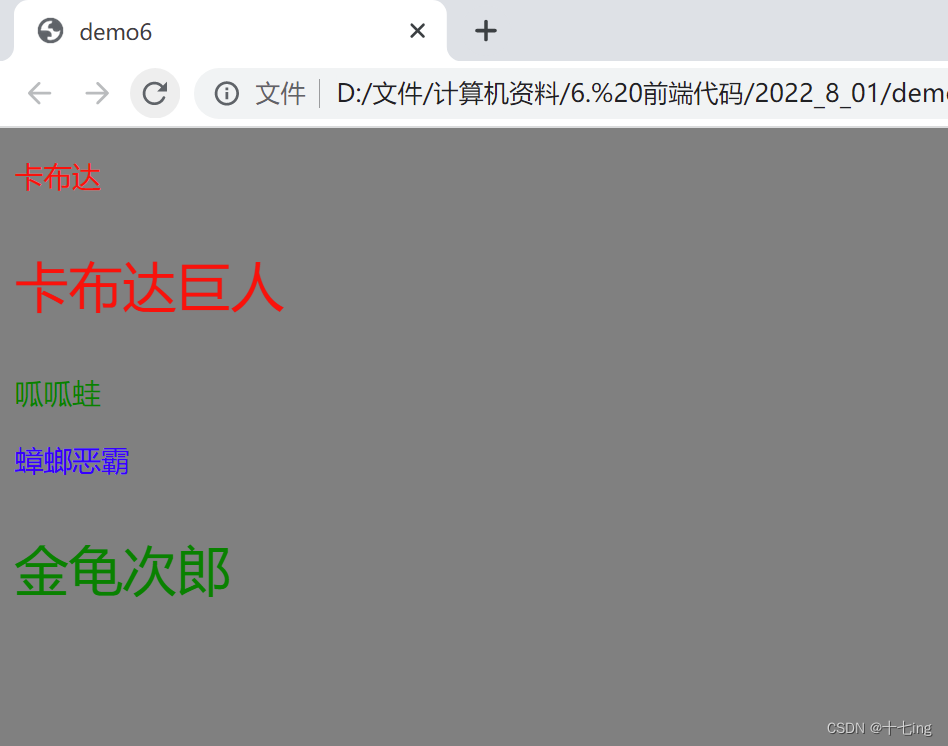
4. 通配符选择器 ( * )
通配符选择器用来统一所有的标签,它存在的意义往往是能够消除浏览器的默认样式,一般用来清空内外边距。
DOCTYPE html> <html lang="en"> <head> <meta charset="UTF-8"> <meta http-equiv="X-UA-Compatible" content="IE=edge"> <meta name="viewport" content="width=device-width, initial-scale=1.0"> <title>demo6title> <style> * { background-color: gray; } p { color: red; } .green { color: green; } .blue { color: blue; } .font { font-size: 30px; } style> head> <body> <p>卡布达p> <p class="font" >卡布达巨人p> <p class="green">呱呱蛙p> <p class="blue">蟑螂恶霸p> <p class="green font">金龟次郎p> body>- 1
- 2
- 3
- 4
- 5
- 6
- 7
- 8
- 9
- 10
- 11
- 12
- 13
- 14
- 15
- 16
- 17
- 18
- 19
- 20
- 21
- 22
- 23
- 24
- 25
- 26
- 27
- 28
- 29
- 30
- 31
- 32
- 33
- 34
- 35
- 36
- 37
- 38
- 39
- 40
展示结果:
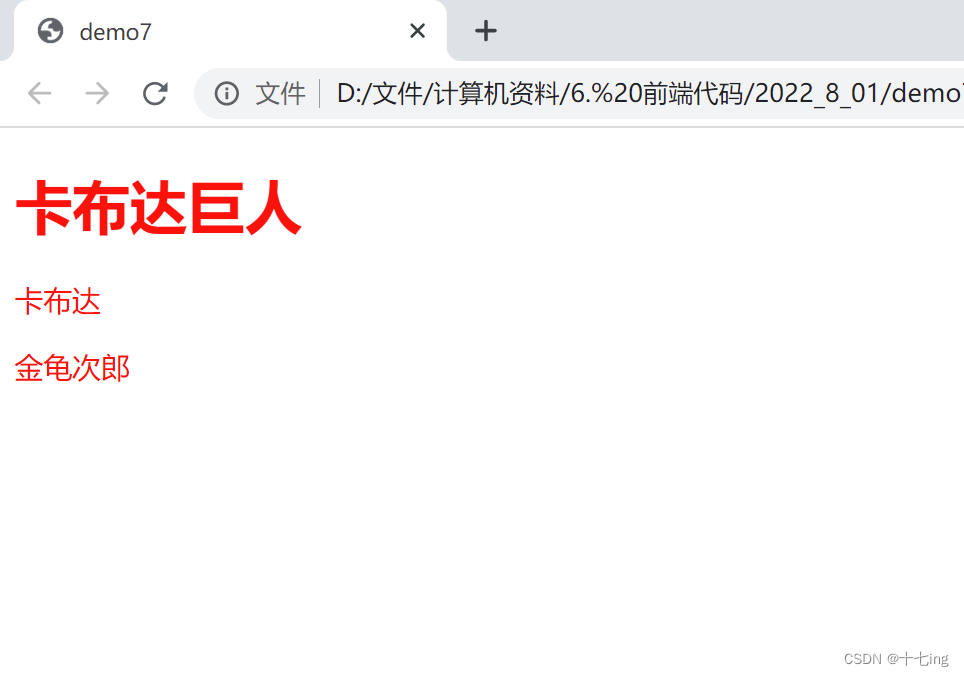
DOCTYPE html> <html lang="en"> <head> <meta charset="UTF-8"> <meta http-equiv="X-UA-Compatible" content="IE=edge"> <meta name="viewport" content="width=device-width, initial-scale=1.0"> <title>demo7title> <style> * { color: red; } style> head> <body> <h1>卡布达巨人h1> <p>卡布达p> <div>金龟次郎div> body> html>- 1
- 2
- 3
- 4
- 5
- 6
- 7
- 8
- 9
- 10
- 11
- 12
- 13
- 14
- 15
- 16
- 17
- 18
- 19
展示结果:
四、复合选择器 ( 重要 )
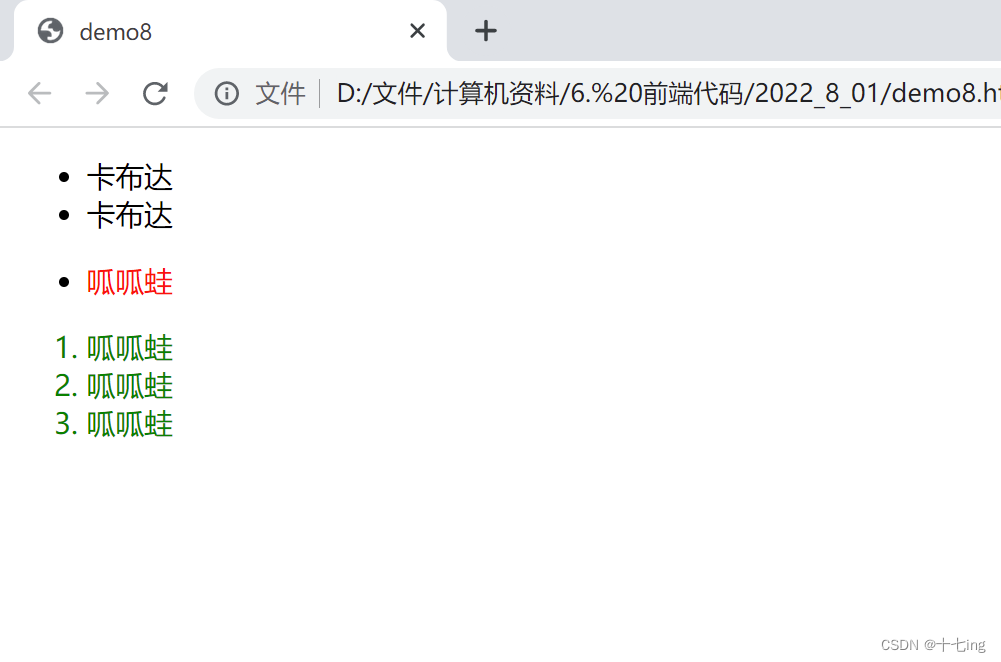
1. 后代选择器
元素1 元素2 { 设置样式 }- 1
- 2
- 3
- 4
- 5
注意:
① 只对元素2 进行设置样式,不影响元素1
② 元素1 是父级,元素2 可以是子级,或孙子级,或重孙子级…
③ 元素1 和 元素2 可以是标签选择器、类选择器、id 选择器…展示1
DOCTYPE html> <html lang="en"> <head> <meta charset="UTF-8"> <meta http-equiv="X-UA-Compatible" content="IE=edge"> <meta name="viewport" content="width=device-width, initial-scale=1.0"> <title>demo8title> <style> ul p{ color: red; } .aaa li { color: green; } style> head> <body> <ul> <li>卡布达li> <li>卡布达li> <li> <p>呱呱蛙p> li> ul> <ol class="aaa"> <li>呱呱蛙li> <li>呱呱蛙li> <li>呱呱蛙li> ol> body> html>- 1
- 2
- 3
- 4
- 5
- 6
- 7
- 8
- 9
- 10
- 11
- 12
- 13
- 14
- 15
- 16
- 17
- 18
- 19
- 20
- 21
- 22
- 23
- 24
- 25
- 26
- 27
- 28
- 29
- 30
- 31
- 32
- 33
- 34
- 35
- 36
- 37
展示结果:
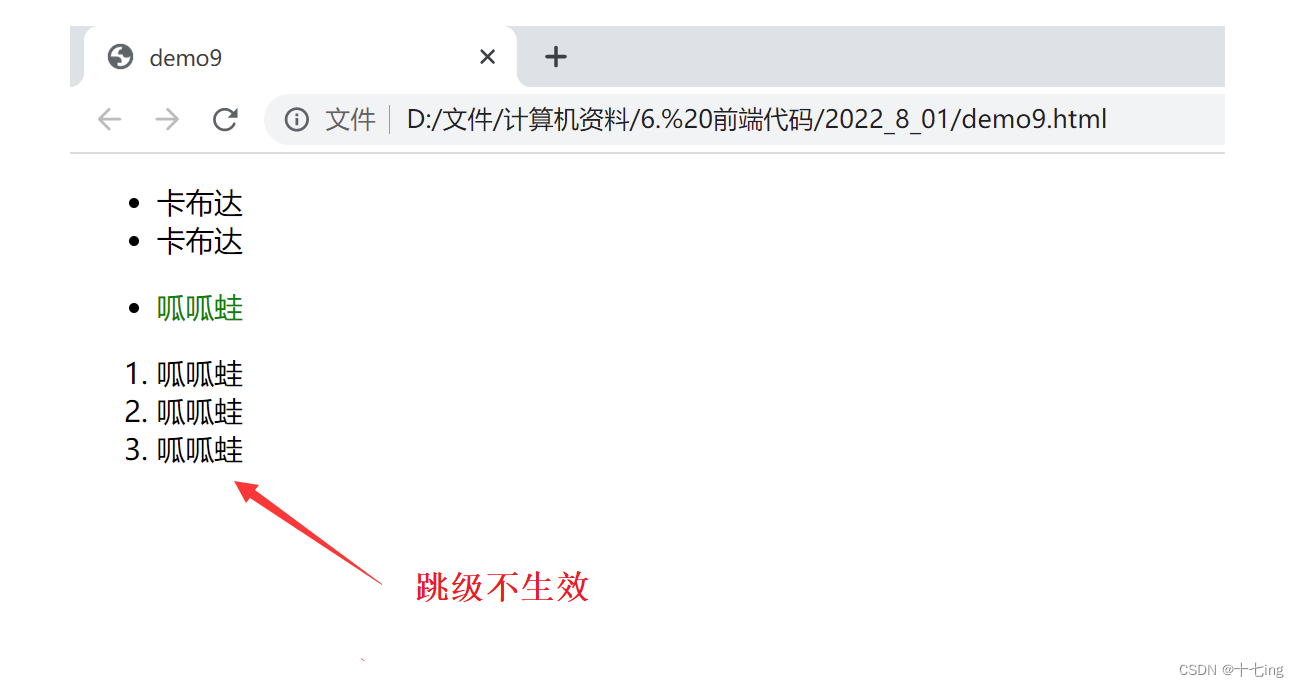
2. 子选择器
元素1>元素2 { 设置样式 }- 1
- 2
- 3
- 4
- 5
注意:
① 元素2 只能是 元素1 的子级,不能是元素1 的孙子级…也就是说,两者只能选择并列的一级关系,不能跳级。
② 其他的语法和后代选择器相似。
展示1
DOCTYPE html> <html lang="en"> <head> <meta charset="UTF-8"> <meta http-equiv="X-UA-Compatible" content="IE=edge"> <meta name="viewport" content="width=device-width, initial-scale=1.0"> <title>demo9title> <style> ul>li>p { color: green; } ol>div { color: green; } style> head> <body> <ul class="bbb"> <li>卡布达li> <li>卡布达li> <li> <p>呱呱蛙p> li> ul> <ol class="aaa"> <li>呱呱蛙li> <li>呱呱蛙li> <li> <div>呱呱蛙div> li> ol> body> html>- 1
- 2
- 3
- 4
- 5
- 6
- 7
- 8
- 9
- 10
- 11
- 12
- 13
- 14
- 15
- 16
- 17
- 18
- 19
- 20
- 21
- 22
- 23
- 24
- 25
- 26
- 27
- 28
- 29
- 30
- 31
- 32
- 33
- 34
- 35
- 36
- 37
展示结果:
展示2
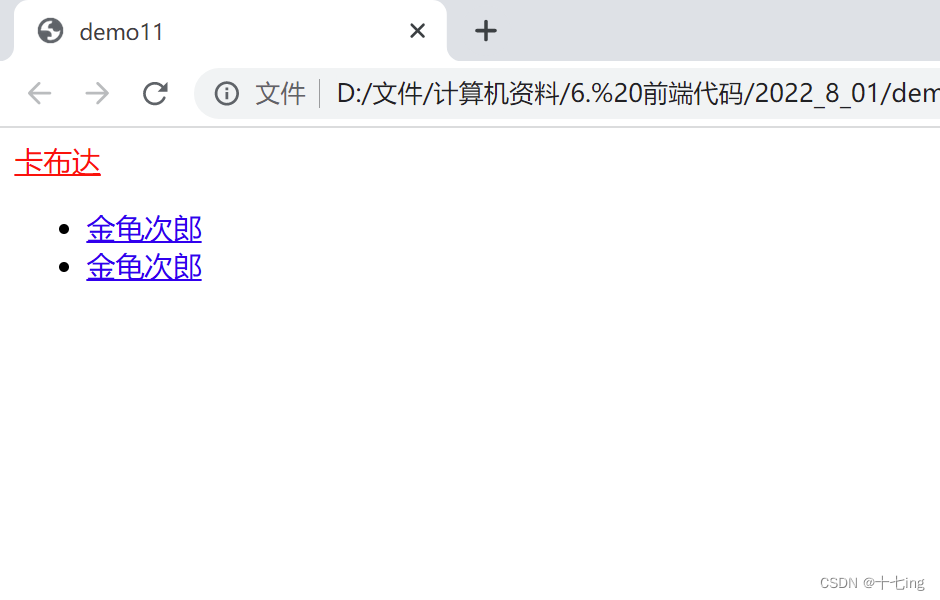
将卡布达改成红色
DOCTYPE html> <html lang="en"> <head> <meta charset="UTF-8"> <meta http-equiv="X-UA-Compatible" content="IE=edge"> <meta name="viewport" content="width=device-width, initial-scale=1.0"> <title>demo11title> <style> .bbb>a { color: red; } style> head> <body> <div class="bbb"> <a href="#">卡布达a> <ul> <li><a href="#">金龟次郎a>li> <li><a href="#">金龟次郎a>li> ul> div> body> html>- 1
- 2
- 3
- 4
- 5
- 6
- 7
- 8
- 9
- 10
- 11
- 12
- 13
- 14
- 15
- 16
- 17
- 18
- 19
- 20
- 21
- 22
- 23
展示结果:
注意
不管是使用后代选择器还是子选择器,最好通过逐级的方式来设置样式,因为这样更加清楚。如果跳级,在代码量少的情况下当然也可以做到,但在代码量多的情况下容易混淆。
3. 并集选择器
元素1, 元素2 { 设置样式 }- 1
- 2
- 3
- 4
- 5
元素1 和 元素2 可以是基础选择器,亦可以是复合选择器。
展示1
DOCTYPE html> <html lang="en"> <head> <meta charset="UTF-8"> <meta http-equiv="X-UA-Compatible" content="IE=edge"> <meta name="viewport" content="width=device-width, initial-scale=1.0"> <title>demo12title> <style> p,div,ol>li>div { color: red; } style> head> <body> <p>卡布达p> <div>呱呱蛙div> <ol> <li>车轮滚滚li> <li>车轮滚滚li> <li> <div>车轮滚滚div> li> ol> body> html>- 1
- 2
- 3
- 4
- 5
- 6
- 7
- 8
- 9
- 10
- 11
- 12
- 13
- 14
- 15
- 16
- 17
- 18
- 19
- 20
- 21
- 22
- 23
- 24
- 25
- 26
展示效果:

5. 伪类选择器
(1) 链接伪类选择器
a:link 未被访问过的链接 a:visited 已经被访问过的链接 a:hover 鼠标指针悬停上的链接 a:active 活动链接(鼠标长按链接了但是未弹起)- 1
- 2
- 3
- 4
展示
DOCTYPE html> <html lang="en"> <head> <meta charset="UTF-8"> <meta http-equiv="X-UA-Compatible" content="IE=edge"> <meta name="viewport" content="width=device-width, initial-scale=1.0"> <title>demo13title> <style> a { font-size: 30px; } a:link { color: black; } a:visited { color: green; } a:hover { color: red; } a:active { color: gray; } style> head> <body> <a href="https://www.sogou.com/" target="_blank">点击访问搜狗a> body> html>- 1
- 2
- 3
- 4
- 5
- 6
- 7
- 8
- 9
- 10
- 11
- 12
- 13
- 14
- 15
- 16
- 17
- 18
- 19
- 20
- 21
- 22
- 23
- 24
- 25
- 26
- 27
- 28
- 29
- 30
- 31
- 32
- 33
- 34
- 35
展示结果:

(2) 焦点伪类选择器
input:focus { 设置样式 }- 1
- 2
- 3
- 4
- 5
展示
DOCTYPE html> <html lang="en"> <head> <meta charset="UTF-8"> <meta http-equiv="X-UA-Compatible" content="IE=edge"> <meta name="viewport" content="width=device-width, initial-scale=1.0"> <title>demo14title> <style> div>input { font-size: 30px; } input:focus { color: red; } style> head> <body> <div> <input type="text"> <input type="text"> <input type="text"> div> body> html>- 1
- 2
- 3
- 4
- 5
- 6
- 7
- 8
- 9
- 10
- 11
- 12
- 13
- 14
- 15
- 16
- 17
- 18
- 19
- 20
- 21
- 22
- 23
- 24
- 25
- 26
只有在某个文本框输入的时候,当前才会具有红色并放大的效果。
展示结果:

五、字体属性
展示1 字体样式
font-family: '宋体'; font-family: '微软雅黑'; ... ...- 1
- 2
- 3
- 4
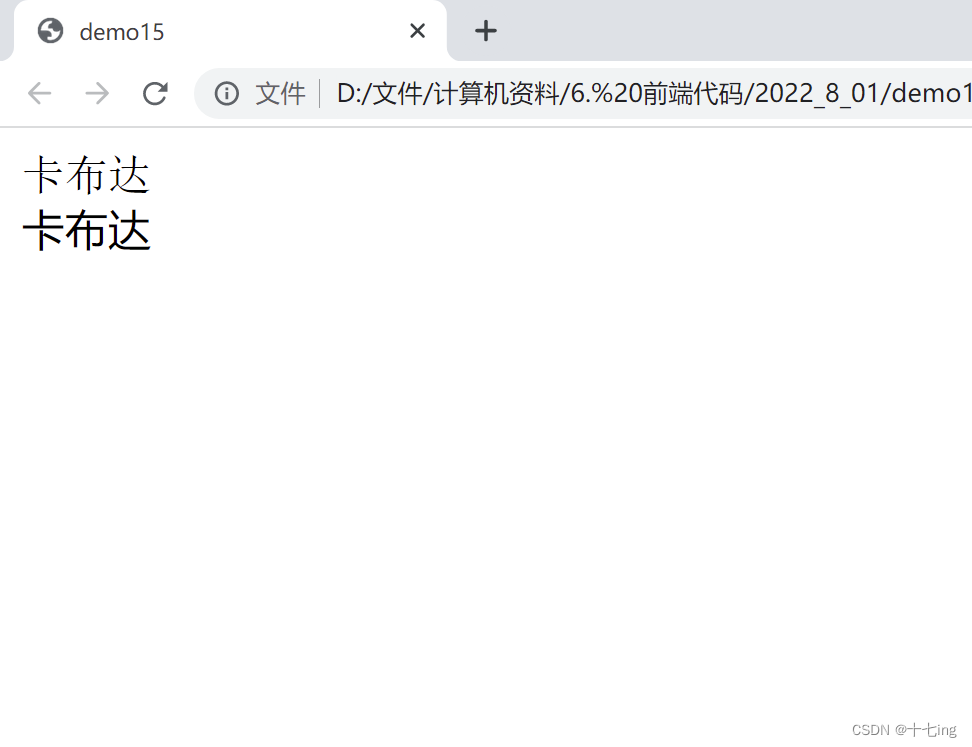
字体样式建议使用大众用户常见的字体,这样就会更加兼容。
DOCTYPE html> <html lang="en"> <head> <meta charset="UTF-8"> <meta http-equiv="X-UA-Compatible" content="IE=edge"> <meta name="viewport" content="width=device-width, initial-scale=1.0"> <title>demo15title> <style> body>.aaa{ font-family: '宋体'; } body>.bbb{ font-family: '微软雅黑'; } style> head> <body> <div class="aaa">卡布达div> <div class="bbb">卡布达div> body> html>- 1
- 2
- 3
- 4
- 5
- 6
- 7
- 8
- 9
- 10
- 11
- 12
- 13
- 14
- 15
- 16
- 17
- 18
- 19
- 20
- 21
- 22
- 23
- 24
展示结果:
展示2 字体大小
字体大小在前面的代码中有提到,这里不再赘述,使用 font-size.
展示3 字体粗细
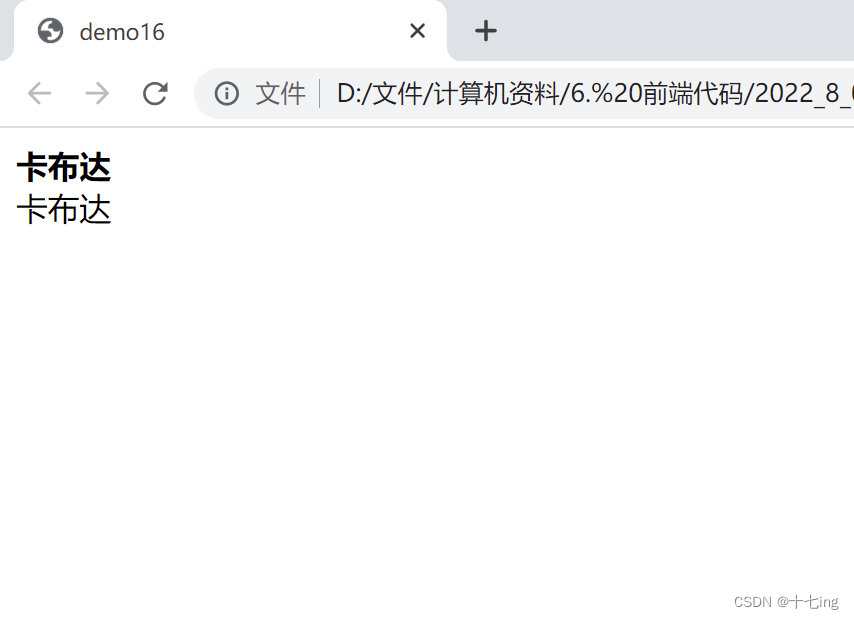
font-weight: bold / normal (常用)- 1
- 2
和字体大小一样,字体粗细可以使用数值表示,也可以使用英文字母代替值。
常用的是DOCTYPE html> <html lang="en"> <head> <meta charset="UTF-8"> <meta http-equiv="X-UA-Compatible" content="IE=edge"> <meta name="viewport" content="width=device-width, initial-scale=1.0"> <title>demo16title> <style> .aaa { font-weight: bold; } .bbb { font-weight: normal; } style> head> <body> <div class="aaa">卡布达div> <div class="bbb">卡布达div> body> html>- 1
- 2
- 3
- 4
- 5
- 6
- 7
- 8
- 9
- 10
- 11
- 12
- 13
- 14
- 15
- 16
- 17
- 18
- 19
- 20
- 21
- 22
- 23
- 24
- 25
展示结果:
展示4 字体倾斜
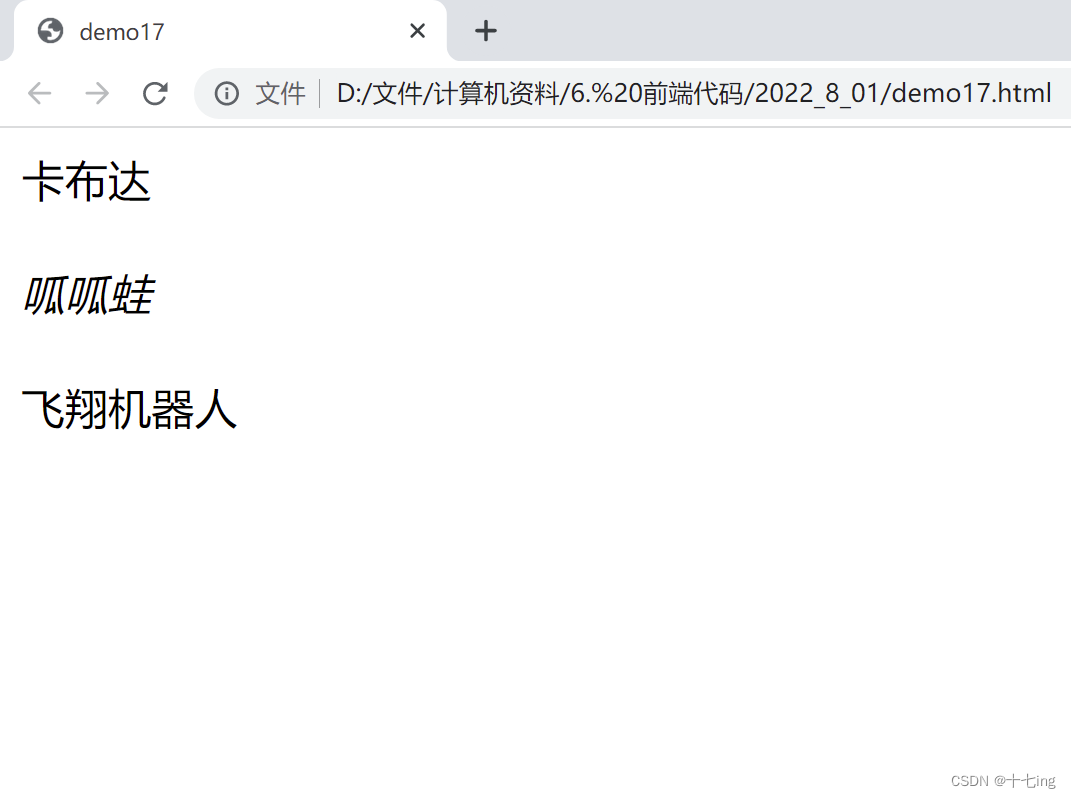
font-style: normal / italic- 1
- 2
DOCTYPE html> <html lang="en"> <head> <meta charset="UTF-8"> <meta http-equiv="X-UA-Compatible" content="IE=edge"> <meta name="viewport" content="width=device-width, initial-scale=1.0"> <title>demo17title> <style> .aaa { font-style: normal; } .bbb { font-style: italic; } .ccc>em { font-style: normal; } style> head> <body> <div class="aaa">卡布达div><br/> <div class="bbb">呱呱蛙div><br/> <div class="ccc"> <em>飞翔机器人em> div> body> html>- 1
- 2
- 3
- 4
- 5
- 6
- 7
- 8
- 9
- 10
- 11
- 12
- 13
- 14
- 15
- 16
- 17
- 18
- 19
- 20
- 21
- 22
- 23
- 24
- 25
- 26
- 27
- 28
- 29
- 30
- 31
- 32
- 33
- 34
- 35
- 36
将 font-style 设置成 normal,这可以将 html 中的 em 标签消除倾斜效果 ( 因为在 html 的语法中,em 标签就是表示倾斜的意思 )
展示结果:
六、文本颜色
认识 RGB
在 CSS 中,理解 RGB 十分关键。
RGB:Red, Green, Blue. 光学三原色(RGB):红、绿、蓝- 1
- 2
- 3
颜料三原色(CMYK):红、黄、蓝
① 毋庸置疑,CSS 采用的是光学三原色,而不是颜料三原色。
② CSS 中,针对 R, G, B 三个分量,各使用一个字节表示 (8个比特位,表示的范围是 0 - 255,十六进制表示为 00 - FF)
③ 数值越大,表示该分量的颜色就越浓。( 255, 255, 255 ) 表示白色,( 0, 0, 0 ) 表示黑色。
展示1
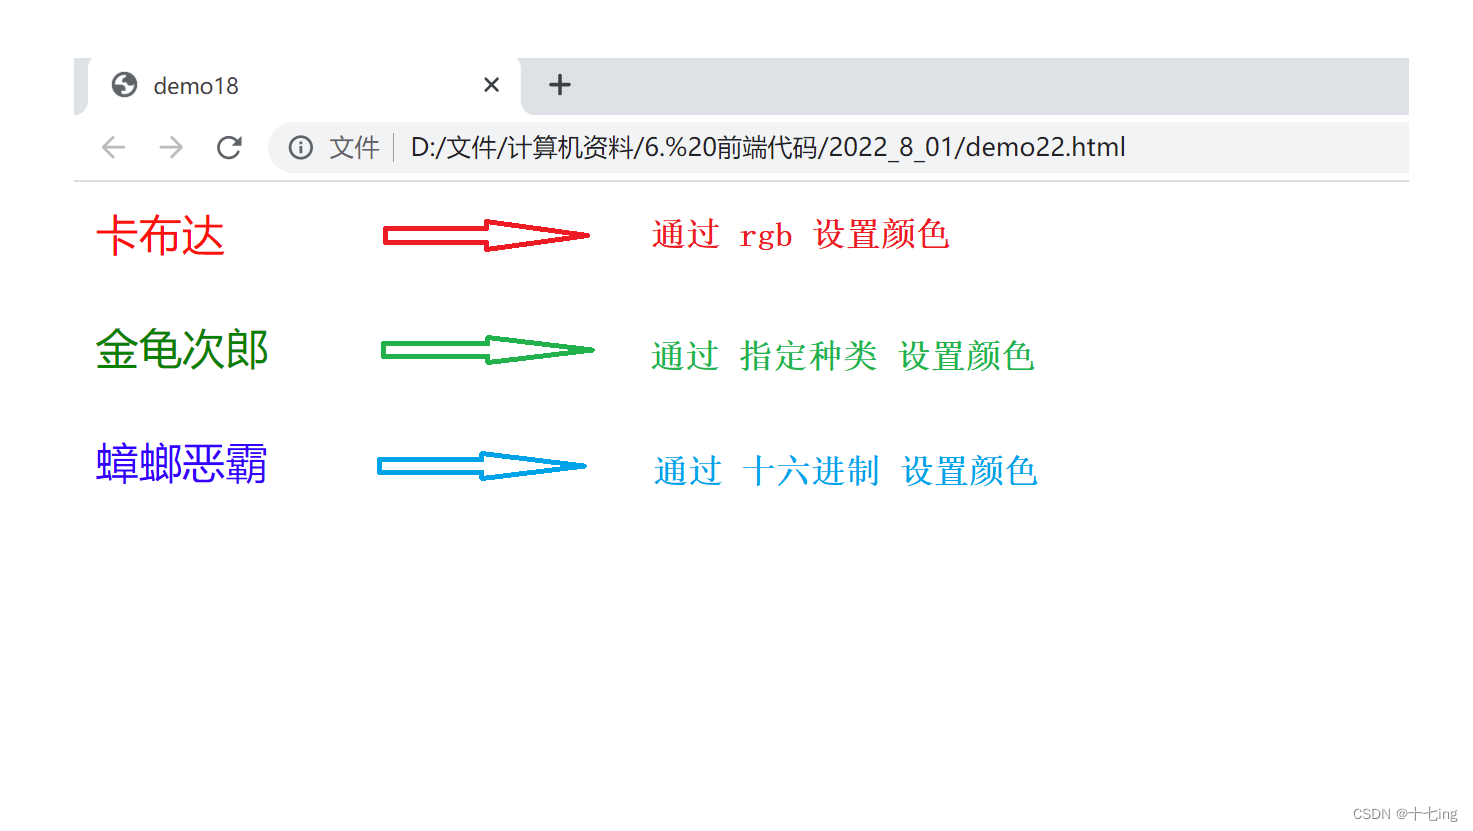
针对 color 这个属性,我们可以使用以下几种设置颜色的方法:
① 通过 rgb 设置颜色
② 通过 指定英文 设置颜色
③ 通过 调色板 设置颜色
④ 通过 十六进制 设置颜色在上面的四种用法中,rgb 的用法是较为广泛的。因为我们使用 CSS 的最终目的是为了让页面好看,可能大多时候,需要美工事先设计好,我们再根据 rgb 的三个要素往里填。
而关于 rgb 的三个要素,小伙伴可以自己使用 VS Code 或 IDEA 这样的编译器试一试调配的结果,还是很有意思的。在日常使用的 QQ截图 中,当我们使用鼠标在扫描的过程中,就精准地出现了 rgb 这三个要素值。
DOCTYPE html> <html lang="en"> <head> <meta charset="UTF-8"> <meta http-equiv="X-UA-Compatible" content="IE=edge"> <meta name="viewport" content="width=device-width, initial-scale=1.0"> <title>demo18title> <style> .aaa { color: rgb(255, 0, 0); } .bbb { color: green; } .ccc { color: #0000ff; } style> head> <body> <div class="aaa">卡布达div> <br/> <div class="bbb">金龟次郎div> <br/> <div class="ccc">蟑螂恶霸div> body> html>- 1
- 2
- 3
- 4
- 5
- 6
- 7
- 8
- 9
- 10
- 11
- 12
- 13
- 14
- 15
- 16
- 17
- 18
- 19
- 20
- 21
- 22
- 23
- 24
- 25
- 26
- 27
- 28
- 29
- 30
展示结果:
展示2
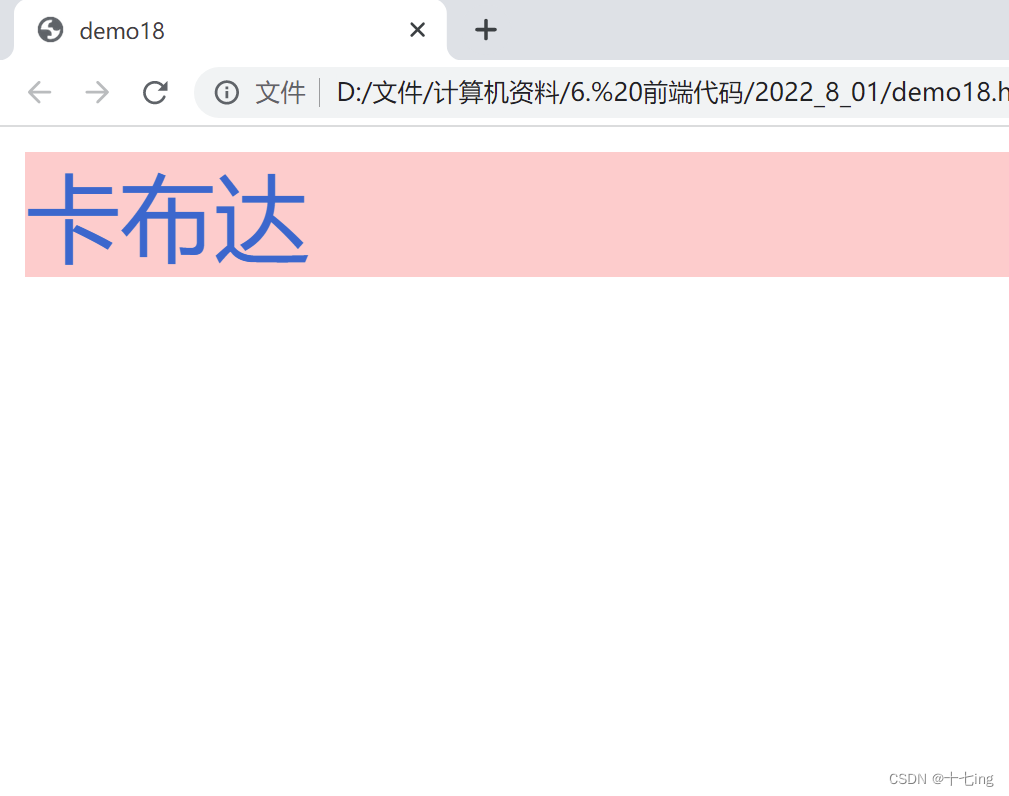
DOCTYPE html> <html lang="en"> <head> <meta charset="UTF-8"> <meta http-equiv="X-UA-Compatible" content="IE=edge"> <meta name="viewport" content="width=device-width, initial-scale=1.0"> <title>demo18title> <style> .bbb { font-size: 30px; color: rgb(42, 107, 205); background-color: rgba(255, 0, 0, 0.2); } style> head> <body> <div class="bbb">卡布达div> body> html>- 1
- 2
- 3
- 4
- 5
- 6
- 7
- 8
- 9
- 10
- 11
- 12
- 13
- 14
- 15
- 16
- 17
- 18
- 19
- 20
- 21
- 22
① rgba 中的 a:alpha,第四位,即透明度的意思,范围为:0 - 1.
② 0 为全透明;1 为不透明。
③ rgb 和 rgba 的用法相似,支持设置的方法有很多。
展示结果:
七、文本属性
1. 文本水平对齐
text-align: left / center / right- 1
- 2
DOCTYPE html> <html lang="en"> <head> <meta charset="UTF-8"> <meta http-equiv="X-UA-Compatible" content="IE=edge"> <meta name="viewport" content="width=device-width, initial-scale=1.0"> <title>demo19title> <style> .aaa { text-align: center; } .bbb { text-align: left; } .ccc { text-align: right; } style> head> <body> <div class="aaa">卡布达div> <div class="bbb">呱呱蛙div> <div class="ccc">车轮滚滚div> body> html>- 1
- 2
- 3
- 4
- 5
- 6
- 7
- 8
- 9
- 10
- 11
- 12
- 13
- 14
- 15
- 16
- 17
- 18
- 19
- 20
- 21
- 22
- 23
- 24
- 25
- 26
- 27
- 28
- 29
- 30
- 31
展示结果:

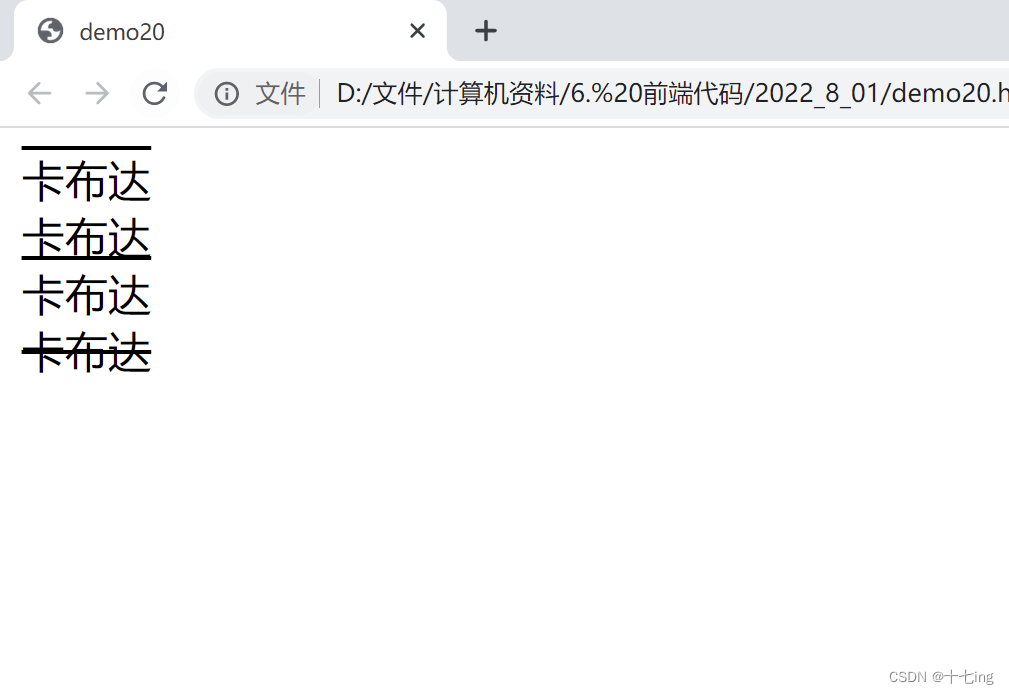
2. 文本装饰
text-decoration: none / overline / underline / line-through- 1
- 2
展示1
DOCTYPE html> <html lang="en"> <head> <meta charset="UTF-8"> <meta http-equiv="X-UA-Compatible" content="IE=edge"> <meta name="viewport" content="width=device-width, initial-scale=1.0"> <title>demo20title> <style> .aaa { text-decoration: overline; } .bbb { text-decoration: underline; } .ccc { text-decoration: none; } .ddd { text-decoration: line-through; } style> head> <body> <div class="aaa">卡布达div> <div class="bbb">卡布达div> <div class="ccc">卡布达div> <div class="ddd">卡布达div> body> html>- 1
- 2
- 3
- 4
- 5
- 6
- 7
- 8
- 9
- 10
- 11
- 12
- 13
- 14
- 15
- 16
- 17
- 18
- 19
- 20
- 21
- 22
- 23
- 24
- 25
- 26
- 27
- 28
- 29
- 30
- 31
- 32
- 33
- 34
- 35
- 36
- 37
展示结果:
展示2
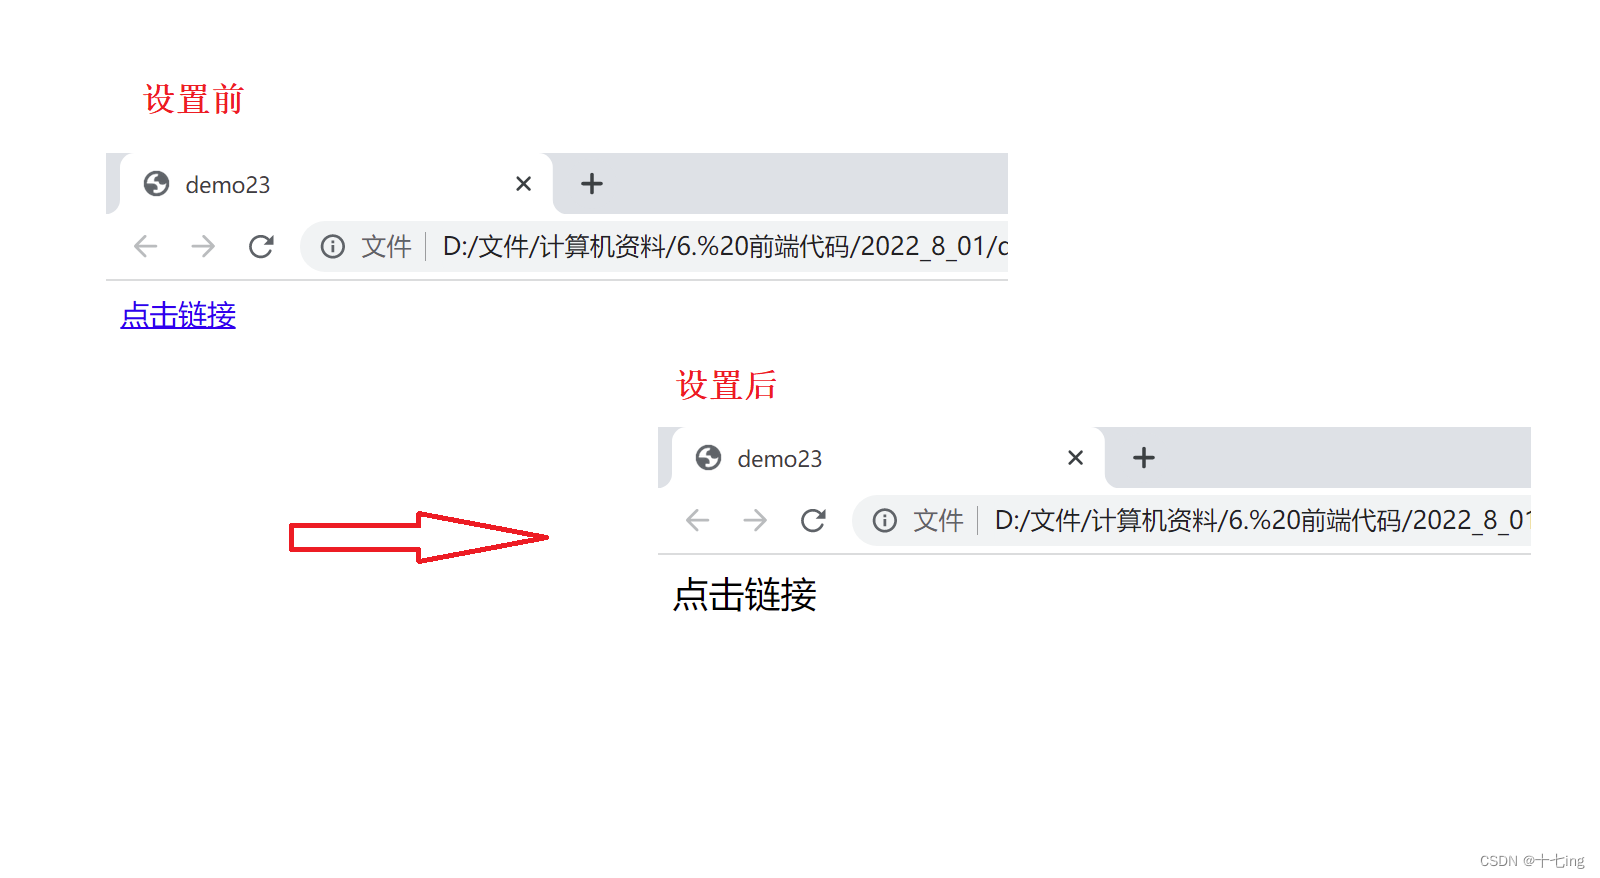
在上一篇博客中,我提到关于 a 标签的一些用法。而当 a 标签写出来并展示之后,我们可以看到,它是刻板的形式 ( 带下划线,和固定颜色 ),这其实是由于 html 的语法和 不同浏览器显示所造成的结果。而我们就可以通过将 text-decoration 置成 none,并设置一些其他属性即可。
将下划线删除,在当今的网页设计很常见,例如一些带标签跳转的视频主页,就是这么做的。因为既然你避免不了使用链接,又要为了美观,这就是一个办法。
DOCTYPE html> <html lang="en"> <head> <meta charset="UTF-8"> <meta http-equiv="X-UA-Compatible" content="IE=edge"> <meta name="viewport" content="width=device-width, initial-scale=1.0"> <title>demo23title> <style> a { text-decoration: none; font-size: 20px; color: black; } style> head> <body> <a href="#">点击链接a> body> html>- 1
- 2
- 3
- 4
- 5
- 6
- 7
- 8
- 9
- 10
- 11
- 12
- 13
- 14
- 15
- 16
- 17
- 18
- 19
- 20
- 21
展示结果:
3. 文本缩进
text-indent:- 1
① 缩进可以根据单位需求设置,单位可以使用 px 或 em.
② 1个 em 代表当前文字的尺寸大小,2个em 就是当前文字尺寸的两倍。
③ 缩进可以是负的,但会导致文字就冒出左边页面。DOCTYPE html> <html lang="en"> <head> <meta charset="UTF-8"> <meta http-equiv="X-UA-Compatible" content="IE=edge"> <meta name="viewport" content="width=device-width, initial-scale=1.0"> <title>demo21title> head> <style> div { text-indent: 2em; } style> <body> <div> 其实当时在互联网界已经有过一些统一样式表语言的建议了, 但CSS是第一个含有“层叠”丰意的样式表语言。在CSS中, 一个文件的样式可以从其他的样式表中继承。 读者在有些地方可以使用他自己更喜欢的样式, 在其他地方则继承或“层叠”作者的样式。 这种层叠的方式使作者和读者都可以灵活地加入自己的设计, 混合每个人的爱好。 div> body> html>- 1
- 2
- 3
- 4
- 5
- 6
- 7
- 8
- 9
- 10
- 11
- 12
- 13
- 14
- 15
- 16
- 17
- 18
- 19
- 20
- 21
- 22
- 23
- 24
- 25
- 26
- 27
- 28
展示结果:
我故意通过滚轮将字体放大了,就是为了展示清楚缩进 2个字符。
( 下面的第一句话来自于百度 )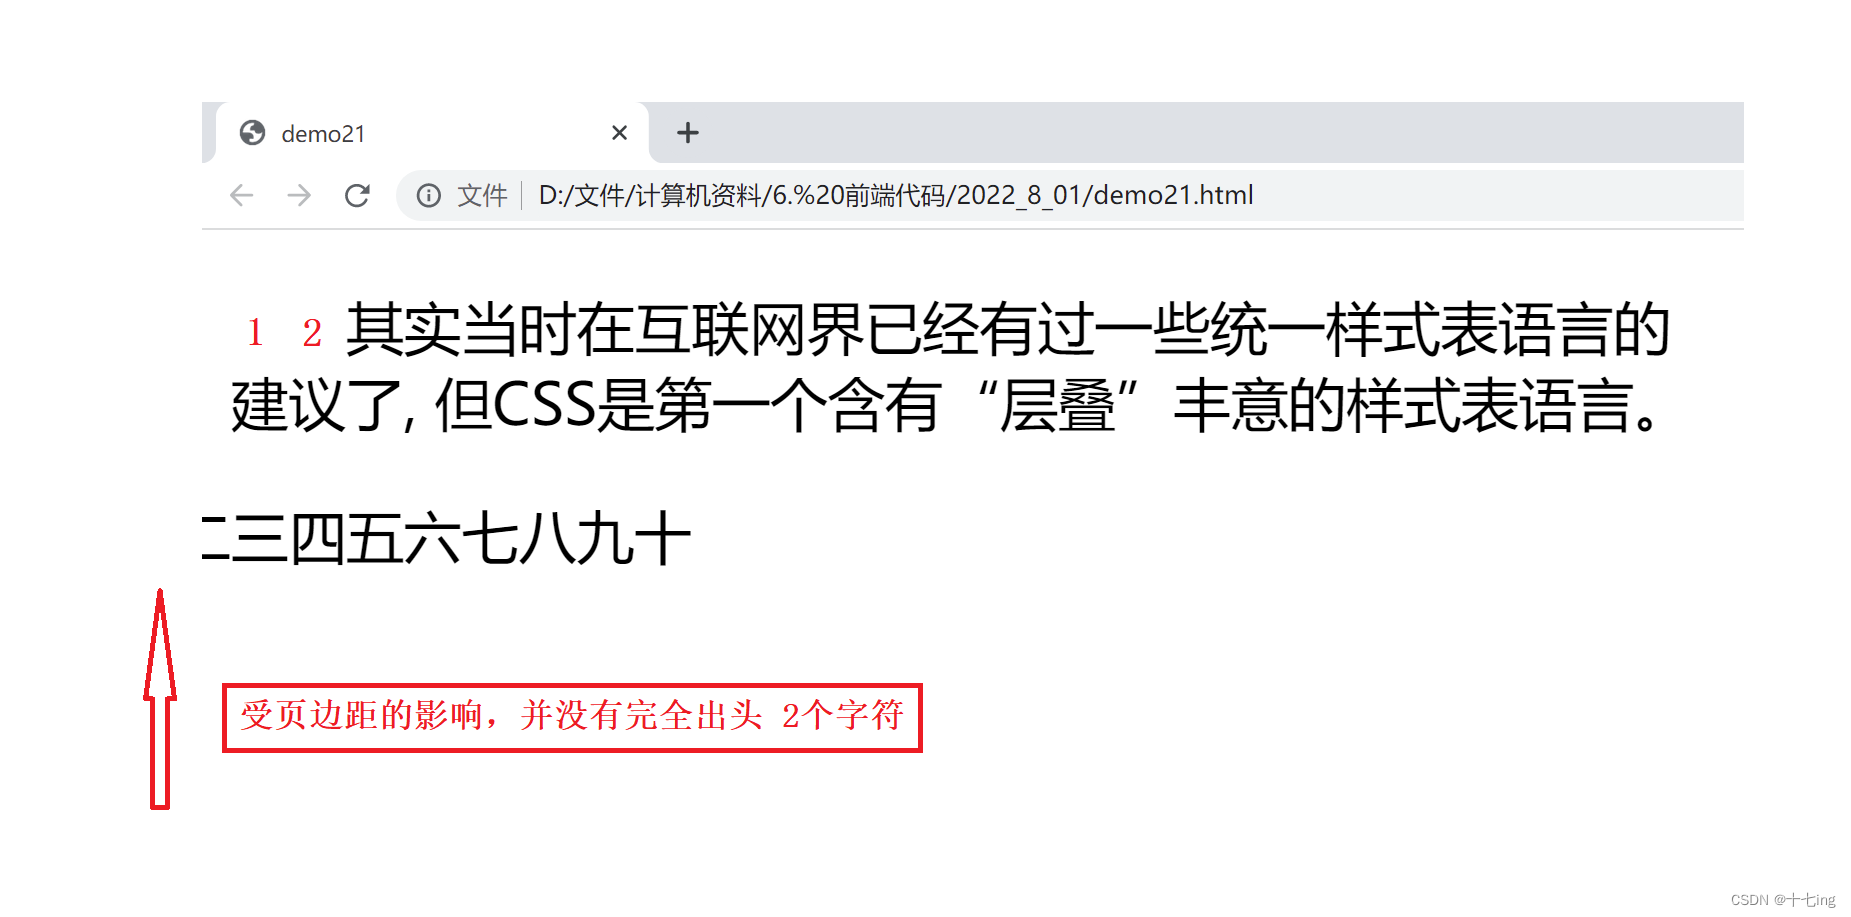
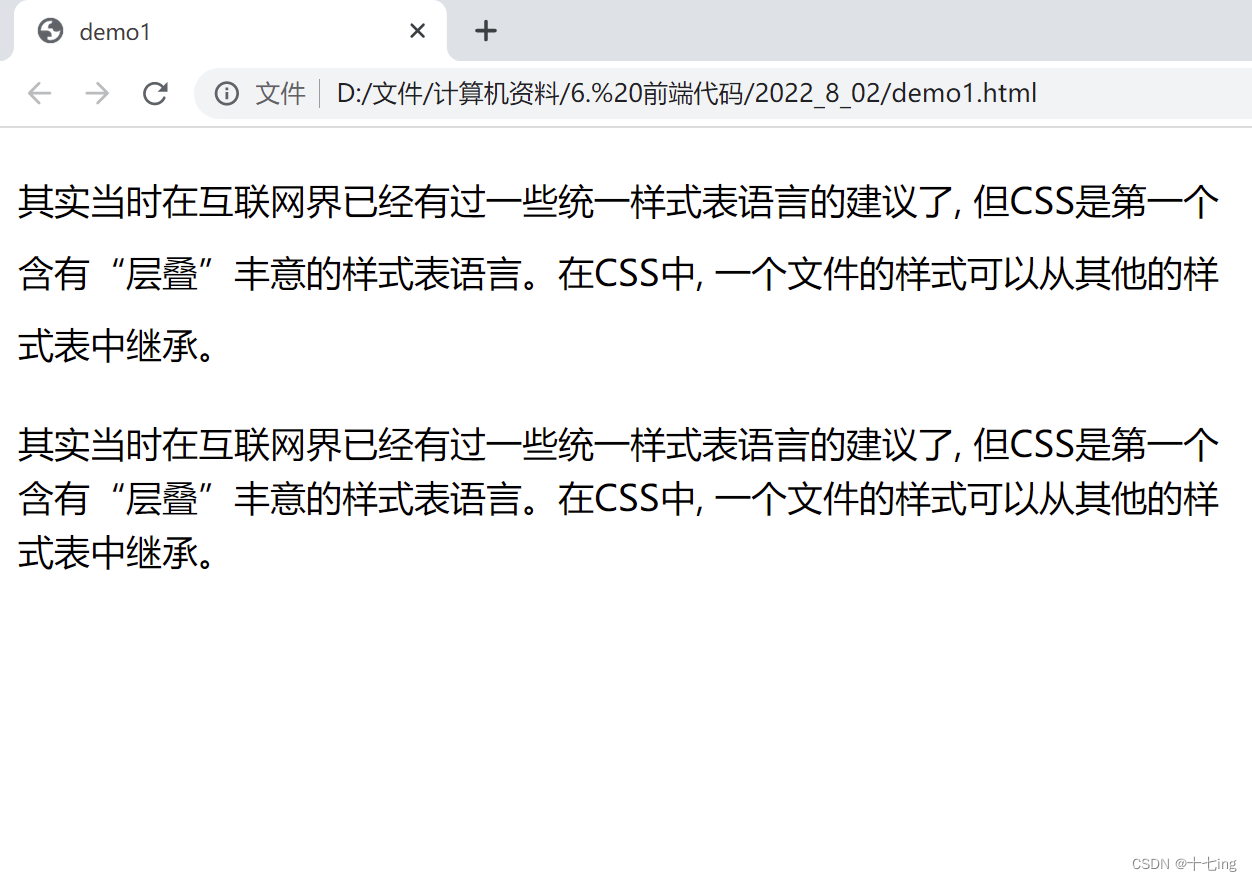
4. 文本行高
line-height:- 1
设置文本行高其实和我们平时使用的 word 中的设置行间距的意思是一样的,在 CSS 中,我们可以使用百分比、像素值、数值…来设置行间距。
展示1
DOCTYPE html> <html lang="en"> <head> <meta charset="UTF-8"> <meta http-equiv="X-UA-Compatible" content="IE=edge"> <meta name="viewport" content="width=device-width, initial-scale=1.0"> <title>demo1title> <style> .aaa { line-height: 2; } .bbb { line-height: 150%; } style> head> <body> <p class="aaa"> 其实当时在互联网界已经有过一些统一样式表语言的建议了, 但CSS是第一个含有“层叠”丰意的样式表语言。在CSS中, 一个文件的样式可以从其他的样式表中继承。 p> <p class="bbb"> 其实当时在互联网界已经有过一些统一样式表语言的建议了, 但CSS是第一个含有“层叠”丰意的样式表语言。在CSS中, 一个文件的样式可以从其他的样式表中继承。 p> body> html>- 1
- 2
- 3
- 4
- 5
- 6
- 7
- 8
- 9
- 10
- 11
- 12
- 13
- 14
- 15
- 16
- 17
- 18
- 19
- 20
- 21
- 22
- 23
- 24
- 25
- 26
- 27
- 28
- 29
- 30
- 31
- 32
- 33
- 34
展示结果:
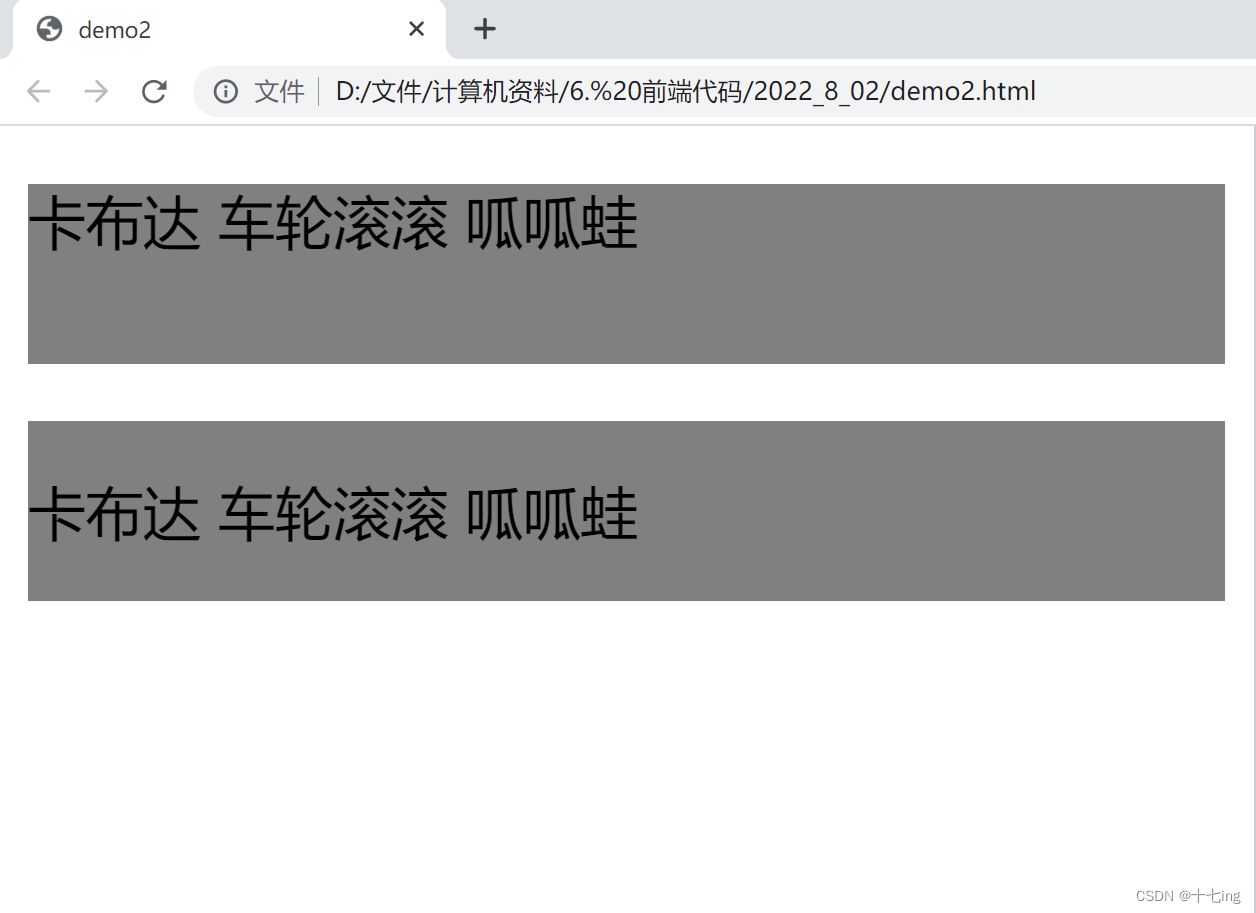
展示2
将行高与当前元素的高度设置相等,可以使得文字垂直对齐。
下面的展示结果中,第二行文本就已垂直对齐。DOCTYPE html> <html lang="en"> <head> <meta charset="UTF-8"> <meta http-equiv="X-UA-Compatible" content="IE=edge"> <meta name="viewport" content="width=device-width, initial-scale=1.0"> <title>demo2title> <style> .aaa { background-color: gray; height: 50px; line-height: 20px; } .bbb { background-color: gray; height: 50px; line-height: 50px; } style> head> <body> <p class="aaa">卡布达 车轮滚滚 呱呱蛙p> <p class="bbb">卡布达 车轮滚滚 呱呱蛙p> body> html>- 1
- 2
- 3
- 4
- 5
- 6
- 7
- 8
- 9
- 10
- 11
- 12
- 13
- 14
- 15
- 16
- 17
- 18
- 19
- 20
- 21
- 22
- 23
- 24
- 25
- 26
- 27
- 28
- 29
展示结果:
八、背景属性
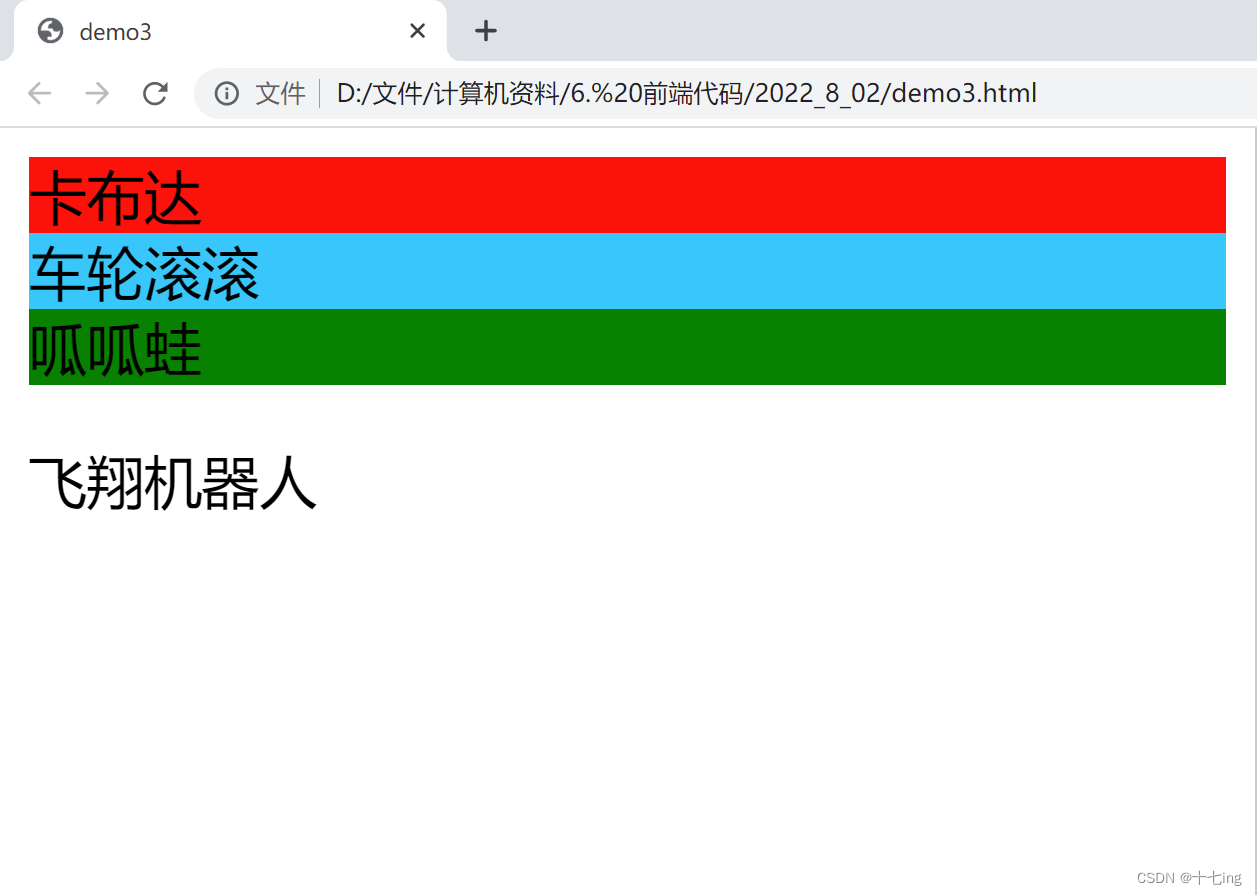
1. 背景颜色
background-color:- 1
background-color 所能设置的值,和前文中提到的 color 是一样的,所以我就不再赘述此属性的用法了,下面展示常见的写法:
DOCTYPE html> <html lang="en"> <head> <meta charset="UTF-8"> <meta http-equiv="X-UA-Compatible" content="IE=edge"> <meta name="viewport" content="width=device-width, initial-scale=1.0"> <title>demo3title> <style> div { background-color: green; } .aaa { background-color: red; } .bbb { background-color: rgb(0, 200, 250); } .ccc { background-color: transparent; } p { background-color: transparent; } style> head> <body> <div> <div class="aaa">卡布达div> <div class="bbb">车轮滚滚div> <div class="ccc">呱呱蛙div> div> <p>飞翔机器人p> body> html>- 1
- 2
- 3
- 4
- 5
- 6
- 7
- 8
- 9
- 10
- 11
- 12
- 13
- 14
- 15
- 16
- 17
- 18
- 19
- 20
- 21
- 22
- 23
- 24
- 25
- 26
- 27
- 28
- 29
- 30
- 31
- 32
- 33
- 34
- 35
- 36
- 37
- 38
- 39
- 40
- 41
- 42
值得注意的是:我们将 background-color 设置为 transparent,即表示透明的意思。但当【ccc】属性的父类 div 已经被设置成绿色的时候,就会让【ccc】属性也变成绿色了。
当然,如果【ccc】属性的父类没有被实现背景颜色,就还会变成透明。展示结果:
2. 背景图片
background-image: url();- 1
上面的 url 中,需要填写路径。
DOCTYPE html> <html lang="en"> <head> <meta charset="UTF-8"> <meta http-equiv="X-UA-Compatible" content="IE=edge"> <meta name="viewport" content="width=device-width, initial-scale=1.0"> <title>demo4title> <style> p { color: red; font-size: 300px; background-image: url(123.png); height: 1500px; } style> head> <body> <p>卡布达p> body> html>- 1
- 2
- 3
- 4
- 5
- 6
- 7
- 8
- 9
- 10
- 11
- 12
- 13
- 14
- 15
- 16
- 17
- 18
- 19
- 20
- 21
- 22
注意
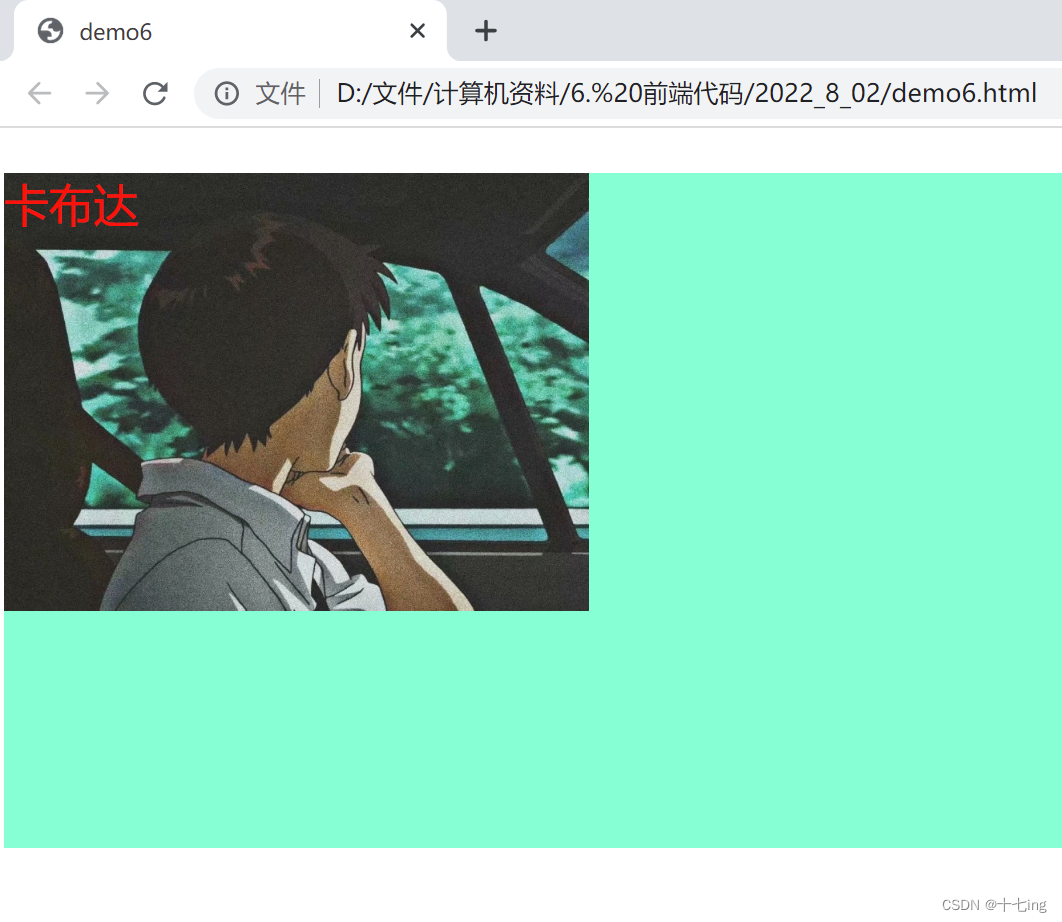
因为我们是对标签p 进行修饰的,所以如果我们想要文字和图片在一起的效果,就需要在 p 选择器设置样式的时候,加点设置,比方说:整个高度需设置更大一些。然而最终我们看到,展示的背景图片却是多张图片组合在一起的,这其实是因为默认平铺的效果,因为当前浏览器可能觉得,需要将整个 p 标签填满,在后面我们会提到如何取消平铺。
展示结果:

3. 背景图片平铺
background-repeat: no-repeat (不平铺) repeat (平铺) repeat-x (水平平铺) repeat-y (垂直平铺)- 1
- 2
- 3
- 4
- 5
- 6
DOCTYPE html> <html lang="en"> <head> <meta charset="UTF-8"> <meta http-equiv="X-UA-Compatible" content="IE=edge"> <meta name="viewport" content="width=device-width, initial-scale=1.0"> <title>demo5title> <style> p { color: red; font-size: 300px; height: 1500px; background-image: url(123.png); background-repeat: no-repeat; background-color: aquamarine; } style> head> <body> <p>卡布达p> body> html>- 1
- 2
- 3
- 4
- 5
- 6
- 7
- 8
- 9
- 10
- 11
- 12
- 13
- 14
- 15
- 16
- 17
- 18
- 19
- 20
- 21
- 22
- 23
- 24
- 25
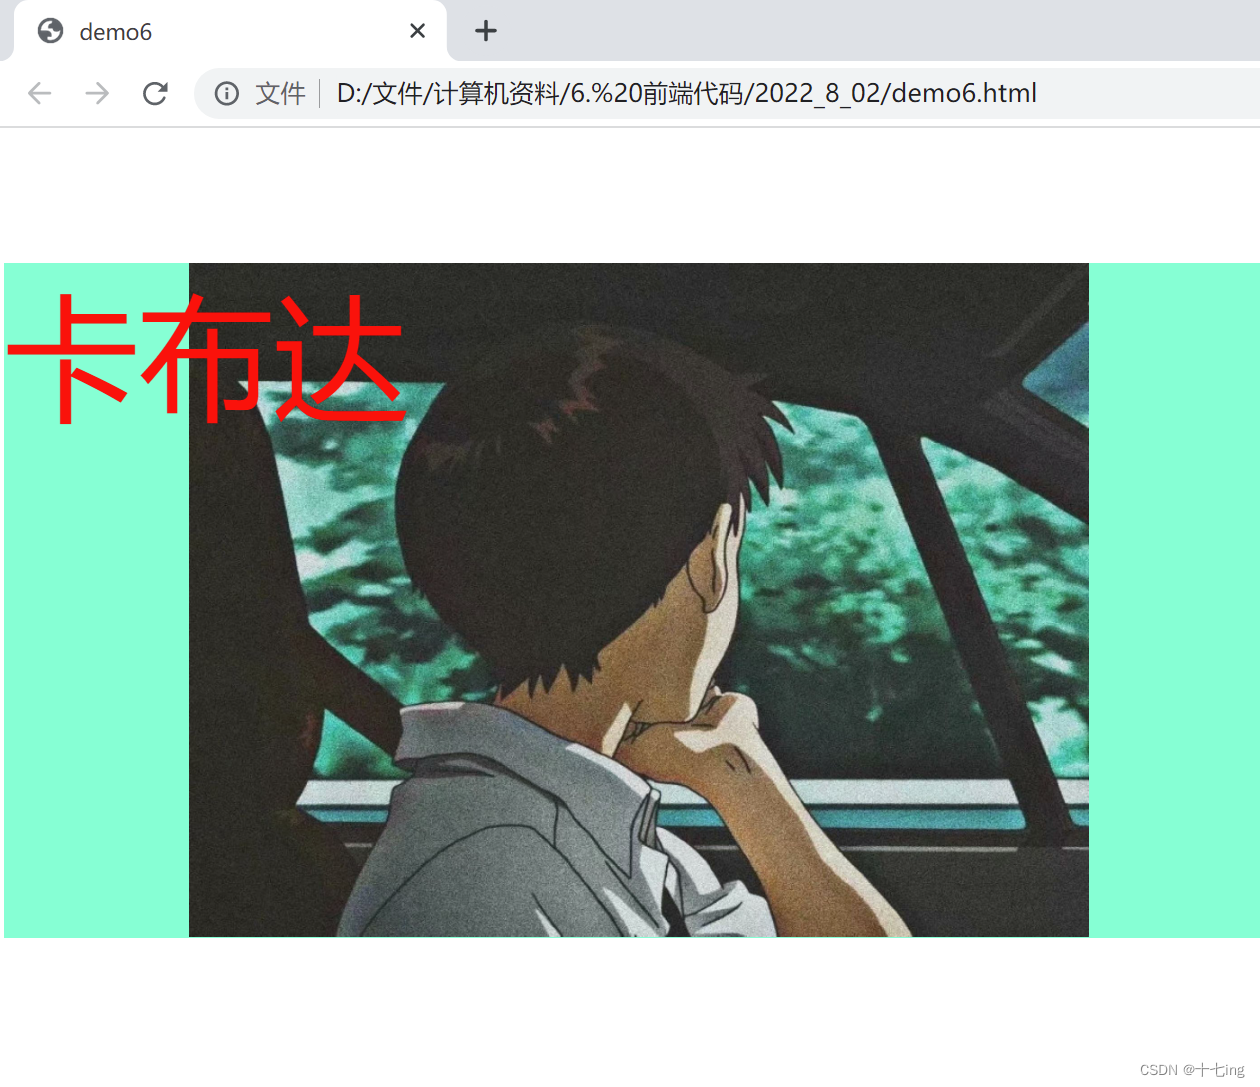
下图展示了背景图片不平铺的效果;此外,如果背景图片与背景颜色共存的情况下,背景图片会将背景颜色进行覆盖。
展示结果:

4. 背景图片尺寸
background-size:- 1
background-size 属性可以设置的值有很多,如:像素值、百分比、cover、contain…
展示1
DOCTYPE html> <html lang="en"> <head> <meta charset="UTF-8"> <meta http-equiv="X-UA-Compatible" content="IE=edge"> <meta name="viewport" content="width=device-width, initial-scale=1.0"> <title>demo6title> <style> p { color: red; font-size: 100px; height: 1500px; background-image: url(123.png); background-repeat: no-repeat; background-color: aquamarine; background-size: 1300px, 1300px; } style> head> <body> <p>卡布达p> body> html>- 1
- 2
- 3
- 4
- 5
- 6
- 7
- 8
- 9
- 10
- 11
- 12
- 13
- 14
- 15
- 16
- 17
- 18
- 19
- 20
- 21
- 22
- 23
- 24
- 25
通过像素值可以直接对背景图片进行设置,但我们必须明确,背景图片是用来修饰 p 标签的,所以我们必须以当前的 p标签高度为基准。
展示结果:
展示2
但我们将 background-size 属性分别设置为 cover 和 contain 的时候
background-size: cover; background-size: contain;- 1
- 2
展示结果:

5. 背景图片位置
background-position: x, y;- 1
x 和 y 都可以填写以下的三种参数:
① 方位名词:( top, left, right, bottom )
② 精确单位:坐标或百分比 ( 以左上角为原点 )
③ 混合单位:同时包含方位名词和精确单位注意:上面的 x 和 y 是以 x轴往右为正方向,y轴往下为正方向的。
而不是像高等数学中的 y轴往上为正方向。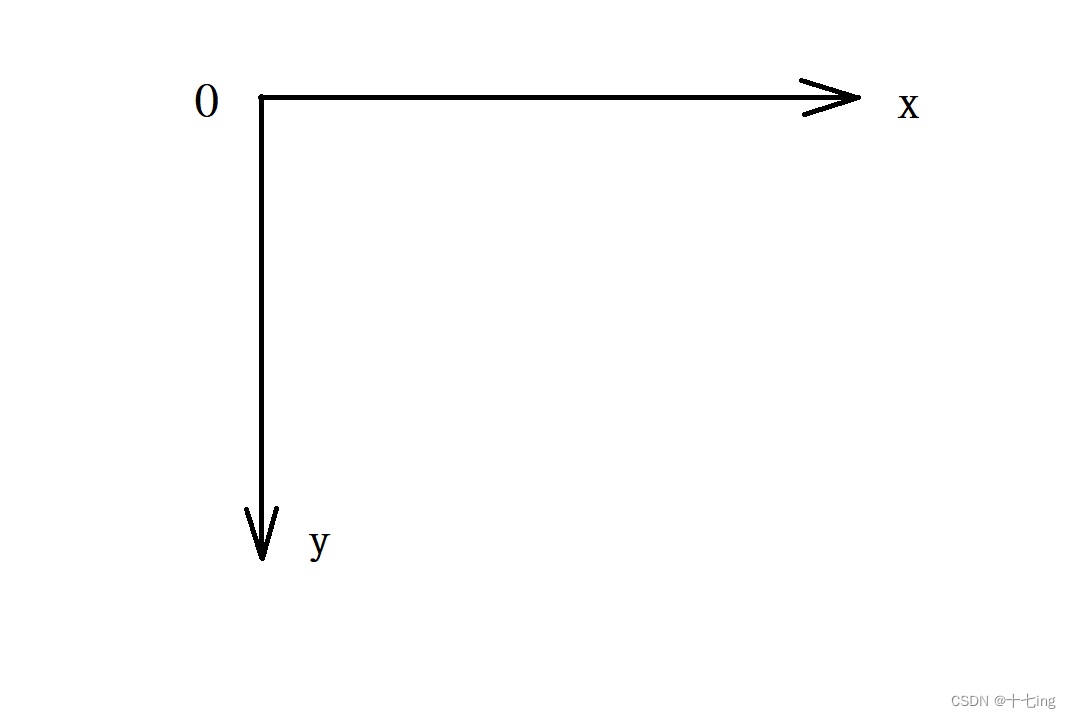
展示
DOCTYPE html> <html lang="en"> <head> <meta charset="UTF-8"> <meta http-equiv="X-UA-Compatible" content="IE=edge"> <meta name="viewport" content="width=device-width, initial-scale=1.0"> <title>demo6title> <style> p { color: red; font-size: 300px; height: 1500px; background-image: url(123.png); background-repeat: no-repeat; background-color: aquamarine; background-position: center,center; } style> head> <body> <p>卡布达p> body> html>- 1
- 2
- 3
- 4
- 5
- 6
- 7
- 8
- 9
- 10
- 11
- 12
- 13
- 14
- 15
- 16
- 17
- 18
- 19
- 20
- 21
- 22
- 23
- 24
- 25
- 26
这里就不为大家演示了,这里的图片放置方法较为多变,小伙伴可以自己试一下。
展示结果:
九、圆角矩形
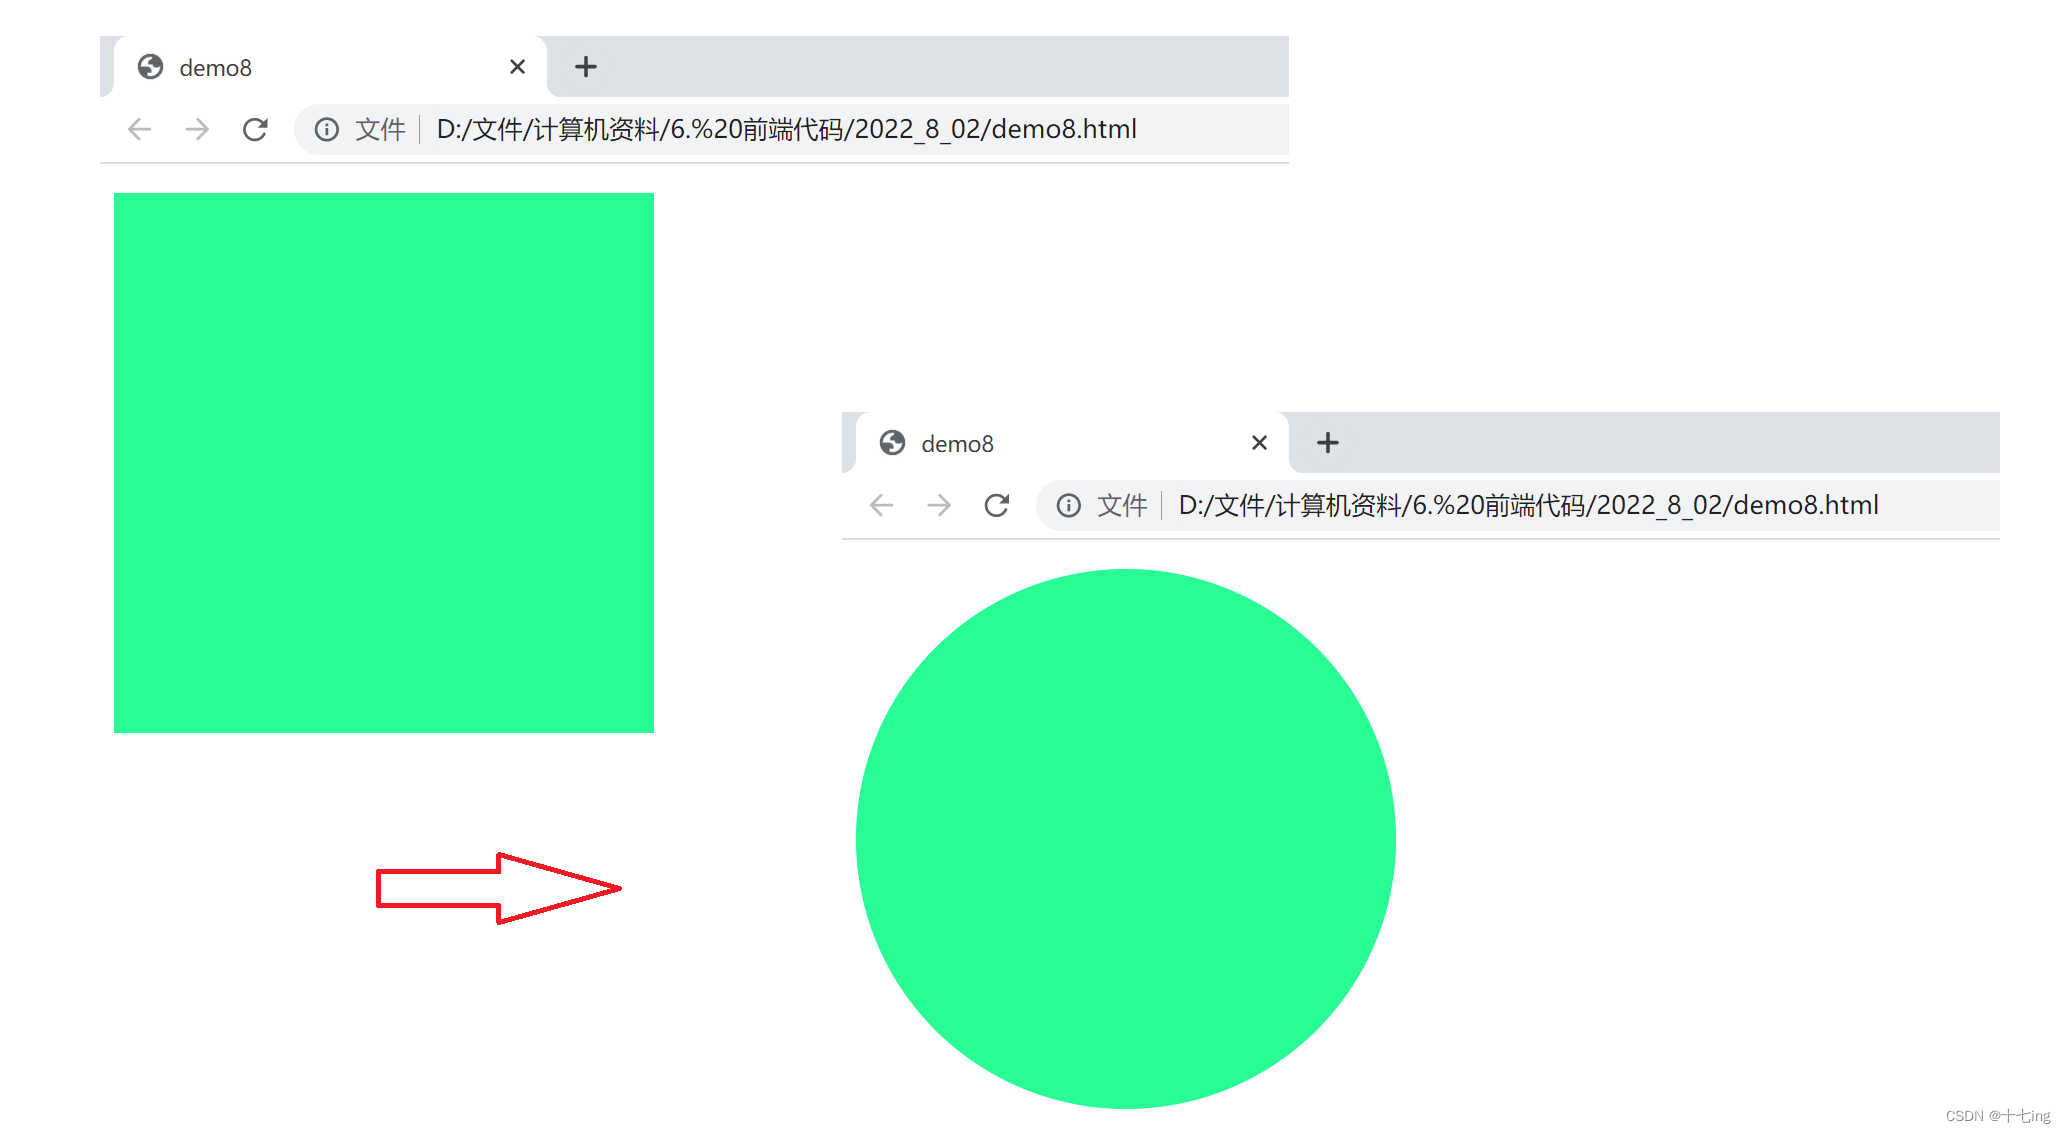
border-radius: length;- 1
其中,length 是内切圆的半径,其数值越大,弧线越弯曲。
展示1
DOCTYPE html> <html lang="en"> <head> <meta charset="UTF-8"> <meta http-equiv="X-UA-Compatible" content="IE=edge"> <meta name="viewport" content="width=device-width, initial-scale=1.0"> <title>demo8title> <style> p { background-color: rgb(0, 250, 150); height: 300px; width: 300px; border-radius: 250px; } style> head> <body> <p>p> body> html>- 1
- 2
- 3
- 4
- 5
- 6
- 7
- 8
- 9
- 10
- 11
- 12
- 13
- 14
- 15
- 16
- 17
- 18
- 19
- 20
- 21
- 22
- 23
我们将正方形的背景转换成圆形的背景,只需要将 border-radius 设置为宽度的一半即可。
展示结果:
展示2
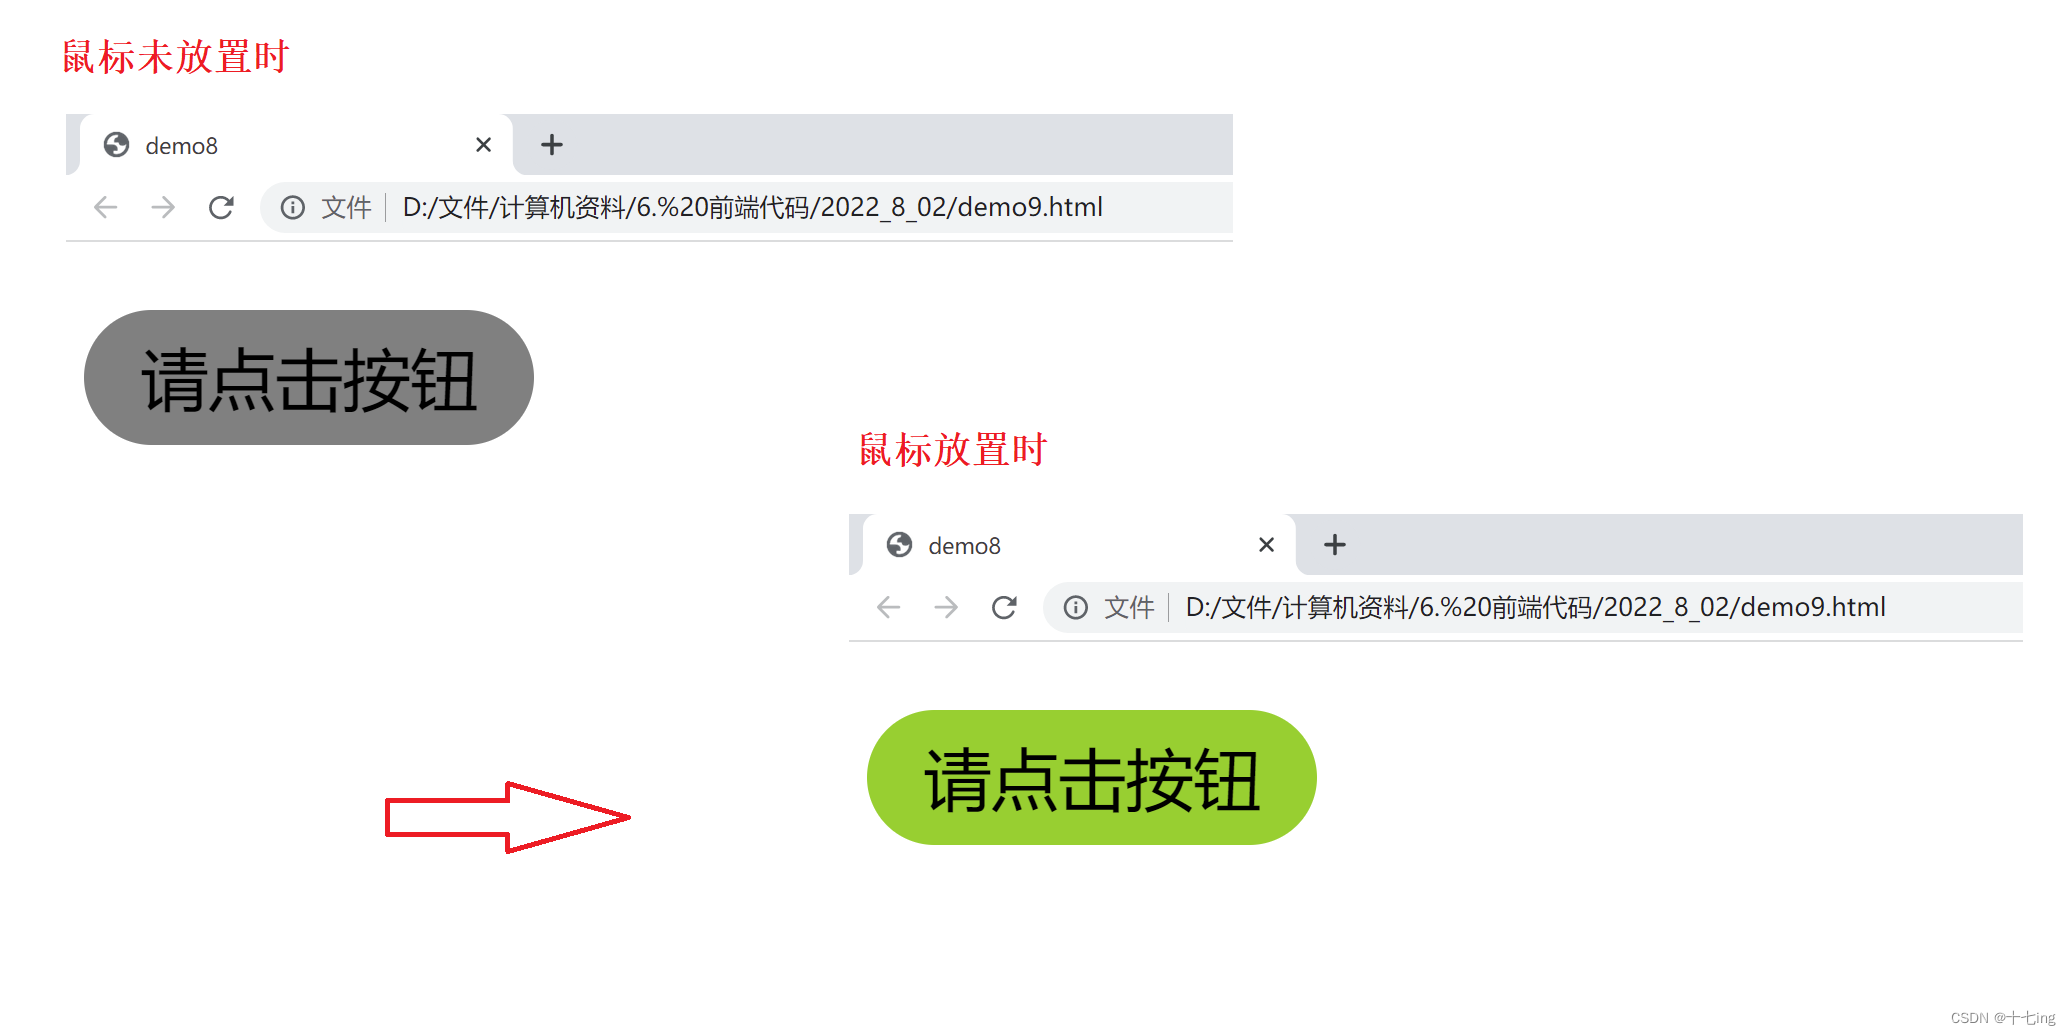
设计一个点击按钮
DOCTYPE html> <html lang="en"> <head> <meta charset="UTF-8"> <meta http-equiv="X-UA-Compatible" content="IE=edge"> <meta name="viewport" content="width=device-width, initial-scale=1.0"> <title>demo8title> <style> p { background-color: gray; font-size: 30px; height: 60px; width: 200px; border-radius: 30px; text-align: center; line-height: 60px; } p:hover { background-color: yellowgreen; } style> head> <body> <p>请点击按钮p> body> html>- 1
- 2
- 3
- 4
- 5
- 6
- 7
- 8
- 9
- 10
- 11
- 12
- 13
- 14
- 15
- 16
- 17
- 18
- 19
- 20
- 21
- 22
- 23
- 24
- 25
- 26
- 27
- 28
- 29
- 30
解析代码
① 通过 height 和 width 属性设置了当前 p标签 的最大高度和宽度。
② 通过 border-radius 属性设置了高度一半的圆角。
③ 通过 text-align 属性设置了水平对齐,line-height 属性设置了垂直对齐。
④ 通过 p:hover 这个伪类选择器设置了鼠标放置时换色。
展示结果:
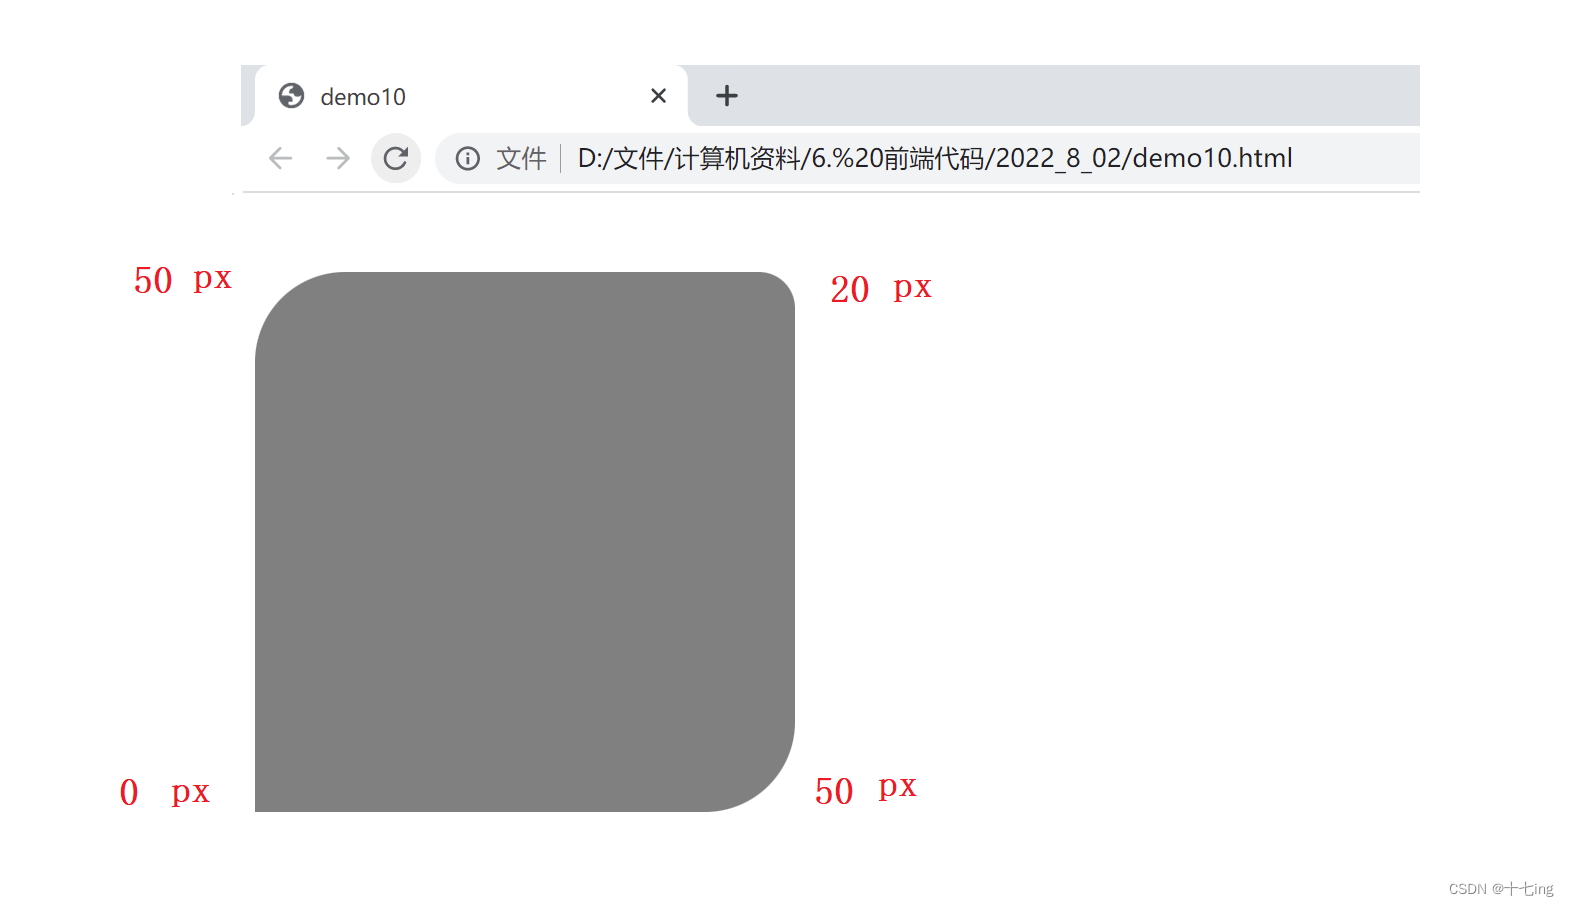
展示3
border-radius: 50px 20px 50px 0px;- 1
上面是按照顺时针划分圆角的,所以与下面四行是等价的。
border-top-left-radius:50px; border-top-right-radius:20px; border-bottom-right-radius:50px; border-bottom-left-radius:0px;- 1
- 2
- 3
- 4
展示结果:
-
相关阅读:
TRC心血管研究之艾美捷TRC缺血研究领域
算法学习笔记-LeetCode215-数组中的第K个最大元素
零基础入门多媒体音频(7)-AAOS audio
ROS机械臂 Movelt 学习笔记2 | Move Group 接口 C++
正点原子嵌入式linux驱动开发——Linux SPI驱动
MySQL 按年月日统计,创建视图
winform Application.Exit()不起作用的解决方法。
C++ atomic 和 memory ordering
接口 vs 抽象类:如何在Java中做出正确的选择
java调用jni全流程,简洁易懂!
- 原文地址:https://blog.csdn.net/lfm1010123/article/details/126098524