-
YOLOv3目标检测全过程记录
前提:
软硬件环境:
python 3.6.5
Ubuntu18.04 LTS
PyTorch 1.1.0
CUDA 10.0
cudnn 7.5.0
GPU: NVIDIA TITAN XP一 准备数据集
1. 准备图片
这个可以需要自己拍摄,一般识别一件物体准备500张图片即可
2. 进行数据标定
这需要使用labelImg来进行数据的标定工作
labelImg的安装方式如下所示:
- sudo apt-get install pyqt5-dev-tools
- sudo pip3 install -r requirements/requirements-linux-python3.txt
- make qt5py3
- python3 labelImg.py
在运行第二行命令时可能会出现缺少pip3之类的提示,可以通过运行以下命令解决:
sudo apt-get install python3-pip
关于 labelImg的具体使用可以参考网上的具体教程
二 下载并安装darknet
1. 官方代码下载地址:https://github.com/pjreddie/darknet
当然,你也可以采用以下命令进行下载
git clone https://github.com/pjreddie/darknet2. 现在开始编译
- cd darknet
- sudo gedit Makefile
打开后,根据自己的需求修改文件夹,因为我用GPU,所以修改为GPU=1,CUDNN=1,OPENCV我设为0,因为我不使用摄像头。
make接着用make命令进行编译,出现以下界面,编译成功:

三 实验数据集整理与准备
1. 将上一步解压的darknet文件夹放到home根目录下,然后再建立一个文件夹,命名为VOCdekit,再在VOCdekit文件夹下建立一个VOC2022,然后再在VOC2022下面创建三个文件夹,分别为Annotations,JPEGImages和ImageSets. 将标注的数据集放在 Annotations 下,即.xml格式的文件, 将所有用到的图片放到JPEGImages下,再在ImageSets下建立一个Main文件夹。
2. 刚才建立这么多文件夹,解释一下它们要做的事:VOC2022建立,因为要制作VOC2022格式的数据集,源码中的路径命名都是按照这样的格式来的。那么在VOC2022中的Annotations又有什么用?它是为存放xml格式的标签文件的,也就是你刚才用Labelmg制作的标签文件,里面保存了每张图片的尺寸、物体类别、boundingbox等等信息,每一张xml文件都对应了JPEGImages中的一张图片。JPEGImages自然而然就是存放数据集图片的文件夹,也就是你自己收集的训练和测试图片。ImageSets里面本来时包含了三个文件夹的,但是我们只强调存放图像数据的Main文件,这个Main文件存着训练、测试和验证集的图片名称,也就是起到分割三个集的作用。
3. 在VOC2022下建立一个test.py文件,将以下代码拷进去- import os
- import random
- trainval_percent = 0.1
- train_percent = 0.9
- xmlfilepath = 'Annotations'
- txtsavepath = 'ImageSets\Main'
- total_xml = os.listdir(xmlfilepath)
- num = len(total_xml)
- list = range(num)
- tv = int(num * trainval_percent)
- tr = int(tv * train_percent)
- trainval = random.sample(list, tv)
- train = random.sample(trainval, tr)
- ftrainval = open('ImageSets/Main/trainval.txt', 'w')
- ftest = open('ImageSets/Main/test.txt', 'w')
- ftrain = open('ImageSets/Main/train.txt', 'w')
- fval = open('ImageSets/Main/val.txt', 'w')
- for i in list:
- name = total_xml[i][:-4] + '\n'
- if i in trainval:
- ftrainval.write(name)
- if i in train:
- ftest.write(name)
- else:
- fval.write(name)
- else:
- ftrain.write(name)
- ftrainval.close()
- ftrain.close()
- fval.close()
- ftest.close()
4. 在VOC2022下打开终端,运行上述的python文件
python test.py运行成功后会看到Main文件下多了四个txt文件

四 加入自己的数据集
1. 在darknet文件夹下打开终端(注意是在darknet文件下打开终端),然后输入如下命令
wget https://pjreddie.com/media/files/voc_label.py如果不能下载的话也可以直接复制网址自己去下载, 下载完后将voc_label.py放到darknet文件夹下
2. 进行voc_label.py文件的修改:
(1)首先删除包含2007的所有项
(2)将剩余的2012全部改为2022(注意:这里的2022即为上述我们所建立的VOC2022,如果是VOC2033则改为2033)
(3)classes保存自己要检测的类别即可
3. 再darknet文件夹下打开终端,输入如下命令:
- python voc_label.py
- cat 2022_train.txt 2022_val.txt > train.txt
注意:这里的2022_train.txt和后面的2022_val.txt要和自己上面所建立的VOC2022保持一致
结束后,应该会发现,出现三个txt文件2022_train.txt,2022_val.txt,2022_test.txt,这是真正有用的三个文件。
五 修改配置
1. 在darknet文件下的cfg文件夹下面创建一个zp_test.data文件夹,.data文件夹的创建方式可以直接复制cfg文件夹下面已有的.data文件,然后做相应的修改即可
具体的修改方式如下所示:
- classes=<你需要检测的类别数量>
- train = <2007_train.txt 文件所在的位置>
- valid = <2007_test.txt/2007_valid.txt 文件所在位置,这不太重要>
- names = <names文件所在位置>
- backup = <backup文件夹所在位置,没有就自己建一个>---这个即为最后数据训练完成后权重文件所存放的位置
比如我的data文件的内容如下所示:
- classes=11
- train=/home/robot/darknet/2022_train.txt
- valid=/home/robot/darknet/2022_test.txt
- names=/home/robot/darknet/data/cell.names
- backup=backup/zp_test
2. 在darknet文件下的data文件夹下面创建一个zp_test.names文件夹,.names文件夹的创建方式可以直接复制data文件夹下面已有的.names文件,然后做相应的修改即可
具体的修改方式如下所示:即按照从上到下的顺序依次填写自己训练物品的名称

3. 网络配置在cfg中,此次采用yolov3.cfg,这里需要修改cfg文件。每个[yolo]及其前的卷积层都要修改,主要修改卷积层中的filters的数量,数量计算公式是 filters= 3*(5+类别数),比如我这里有11个类别,filters=48. 还要修改[yolo]中的classes数,几个类别写几,我是11个类别,就写11。
(注意:如果正常的话,应该只有三处需要修改的地方!!! 可以直接Ctrl+F搜索[yolo]进行查找,只有三次需要修改的地方!!!)
一下是我的修改后的文件
- [net]
- # Testing
- # batch=1
- # subdivisions=1
- # Training
- batch=64
- subdivisions=16
- width=608
- height=608
- channels=3
- momentum=0.9
- decay=0.0005
- angle=0
- saturation = 1.5
- exposure = 1.5
- hue=.1
- learning_rate=0.001
- burn_in=1000
- max_batches = 500200
- policy=steps
- steps=400000,450000
- scales=.1,.1
- [convolutional]
- batch_normalize=1
- filters=32
- size=3
- stride=1
- pad=1
- activation=leaky
- # Downsample
- [convolutional]
- batch_normalize=1
- filters=64
- size=3
- stride=2
- pad=1
- activation=leaky
- [convolutional]
- batch_normalize=1
- filters=32
- size=1
- stride=1
- pad=1
- activation=leaky
- [convolutional]
- batch_normalize=1
- filters=64
- size=3
- stride=1
- pad=1
- activation=leaky
- [shortcut]
- from=-3
- activation=linear
- # Downsample
- [convolutional]
- batch_normalize=1
- filters=128
- size=3
- stride=2
- pad=1
- activation=leaky
- [convolutional]
- batch_normalize=1
- filters=64
- size=1
- stride=1
- pad=1
- activation=leaky
- [convolutional]
- batch_normalize=1
- filters=128
- size=3
- stride=1
- pad=1
- activation=leaky
- [shortcut]
- from=-3
- activation=linear
- [convolutional]
- batch_normalize=1
- filters=64
- size=1
- stride=1
- pad=1
- activation=leaky
- [convolutional]
- batch_normalize=1
- filters=128
- size=3
- stride=1
- pad=1
- activation=leaky
- [shortcut]
- from=-3
- activation=linear
- # Downsample
- [convolutional]
- batch_normalize=1
- filters=256
- size=3
- stride=2
- pad=1
- activation=leaky
- [convolutional]
- batch_normalize=1
- filters=128
- size=1
- stride=1
- pad=1
- activation=leaky
- [convolutional]
- batch_normalize=1
- filters=256
- size=3
- stride=1
- pad=1
- activation=leaky
- [shortcut]
- from=-3
- activation=linear
- [convolutional]
- batch_normalize=1
- filters=128
- size=1
- stride=1
- pad=1
- activation=leaky
- [convolutional]
- batch_normalize=1
- filters=256
- size=3
- stride=1
- pad=1
- activation=leaky
- [shortcut]
- from=-3
- activation=linear
- [convolutional]
- batch_normalize=1
- filters=128
- size=1
- stride=1
- pad=1
- activation=leaky
- [convolutional]
- batch_normalize=1
- filters=256
- size=3
- stride=1
- pad=1
- activation=leaky
- [shortcut]
- from=-3
- activation=linear
- [convolutional]
- batch_normalize=1
- filters=128
- size=1
- stride=1
- pad=1
- activation=leaky
- [convolutional]
- batch_normalize=1
- filters=256
- size=3
- stride=1
- pad=1
- activation=leaky
- [shortcut]
- from=-3
- activation=linear
- [convolutional]
- batch_normalize=1
- filters=128
- size=1
- stride=1
- pad=1
- activation=leaky
- [convolutional]
- batch_normalize=1
- filters=256
- size=3
- stride=1
- pad=1
- activation=leaky
- [shortcut]
- from=-3
- activation=linear
- [convolutional]
- batch_normalize=1
- filters=128
- size=1
- stride=1
- pad=1
- activation=leaky
- [convolutional]
- batch_normalize=1
- filters=256
- size=3
- stride=1
- pad=1
- activation=leaky
- [shortcut]
- from=-3
- activation=linear
- [convolutional]
- batch_normalize=1
- filters=128
- size=1
- stride=1
- pad=1
- activation=leaky
- [convolutional]
- batch_normalize=1
- filters=256
- size=3
- stride=1
- pad=1
- activation=leaky
- [shortcut]
- from=-3
- activation=linear
- [convolutional]
- batch_normalize=1
- filters=128
- size=1
- stride=1
- pad=1
- activation=leaky
- [convolutional]
- batch_normalize=1
- filters=256
- size=3
- stride=1
- pad=1
- activation=leaky
- [shortcut]
- from=-3
- activation=linear
- # Downsample
- [convolutional]
- batch_normalize=1
- filters=512
- size=3
- stride=2
- pad=1
- activation=leaky
- [convolutional]
- batch_normalize=1
- filters=256
- size=1
- stride=1
- pad=1
- activation=leaky
- [convolutional]
- batch_normalize=1
- filters=512
- size=3
- stride=1
- pad=1
- activation=leaky
- [shortcut]
- from=-3
- activation=linear
- [convolutional]
- batch_normalize=1
- filters=256
- size=1
- stride=1
- pad=1
- activation=leaky
- [convolutional]
- batch_normalize=1
- filters=512
- size=3
- stride=1
- pad=1
- activation=leaky
- [shortcut]
- from=-3
- activation=linear
- [convolutional]
- batch_normalize=1
- filters=256
- size=1
- stride=1
- pad=1
- activation=leaky
- [convolutional]
- batch_normalize=1
- filters=512
- size=3
- stride=1
- pad=1
- activation=leaky
- [shortcut]
- from=-3
- activation=linear
- [convolutional]
- batch_normalize=1
- filters=256
- size=1
- stride=1
- pad=1
- activation=leaky
- [convolutional]
- batch_normalize=1
- filters=512
- size=3
- stride=1
- pad=1
- activation=leaky
- [shortcut]
- from=-3
- activation=linear
- [convolutional]
- batch_normalize=1
- filters=256
- size=1
- stride=1
- pad=1
- activation=leaky
- [convolutional]
- batch_normalize=1
- filters=512
- size=3
- stride=1
- pad=1
- activation=leaky
- [shortcut]
- from=-3
- activation=linear
- [convolutional]
- batch_normalize=1
- filters=256
- size=1
- stride=1
- pad=1
- activation=leaky
- [convolutional]
- batch_normalize=1
- filters=512
- size=3
- stride=1
- pad=1
- activation=leaky
- [shortcut]
- from=-3
- activation=linear
- [convolutional]
- batch_normalize=1
- filters=256
- size=1
- stride=1
- pad=1
- activation=leaky
- [convolutional]
- batch_normalize=1
- filters=512
- size=3
- stride=1
- pad=1
- activation=leaky
- [shortcut]
- from=-3
- activation=linear
- [convolutional]
- batch_normalize=1
- filters=256
- size=1
- stride=1
- pad=1
- activation=leaky
- [convolutional]
- batch_normalize=1
- filters=512
- size=3
- stride=1
- pad=1
- activation=leaky
- [shortcut]
- from=-3
- activation=linear
- # Downsample
- [convolutional]
- batch_normalize=1
- filters=1024
- size=3
- stride=2
- pad=1
- activation=leaky
- [convolutional]
- batch_normalize=1
- filters=512
- size=1
- stride=1
- pad=1
- activation=leaky
- [convolutional]
- batch_normalize=1
- filters=1024
- size=3
- stride=1
- pad=1
- activation=leaky
- [shortcut]
- from=-3
- activation=linear
- [convolutional]
- batch_normalize=1
- filters=512
- size=1
- stride=1
- pad=1
- activation=leaky
- [convolutional]
- batch_normalize=1
- filters=1024
- size=3
- stride=1
- pad=1
- activation=leaky
- [shortcut]
- from=-3
- activation=linear
- [convolutional]
- batch_normalize=1
- filters=512
- size=1
- stride=1
- pad=1
- activation=leaky
- [convolutional]
- batch_normalize=1
- filters=1024
- size=3
- stride=1
- pad=1
- activation=leaky
- [shortcut]
- from=-3
- activation=linear
- [convolutional]
- batch_normalize=1
- filters=512
- size=1
- stride=1
- pad=1
- activation=leaky
- [convolutional]
- batch_normalize=1
- filters=1024
- size=3
- stride=1
- pad=1
- activation=leaky
- [shortcut]
- from=-3
- activation=linear
- ######################
- [convolutional]
- batch_normalize=1
- filters=512
- size=1
- stride=1
- pad=1
- activation=leaky
- [convolutional]
- batch_normalize=1
- size=3
- stride=1
- pad=1
- filters=1024
- activation=leaky
- [convolutional]
- batch_normalize=1
- filters=512
- size=1
- stride=1
- pad=1
- activation=leaky
- [convolutional]
- batch_normalize=1
- size=3
- stride=1
- pad=1
- filters=1024
- activation=leaky
- [convolutional]
- batch_normalize=1
- filters=512
- size=1
- stride=1
- pad=1
- activation=leaky
- [convolutional]
- batch_normalize=1
- size=3
- stride=1
- pad=1
- filters=1024
- activation=leaky
- [convolutional]
- size=1
- stride=1
- pad=1
- filters=48
- activation=linear
- [yolo]
- mask = 6,7,8
- anchors = 10,13, 16,30, 33,23, 30,61, 62,45, 59,119, 116,90, 156,198, 373,326
- classes=11
- num=9
- jitter=.3
- ignore_thresh = .7
- truth_thresh = 1
- random=1
- [route]
- layers = -4
- [convolutional]
- batch_normalize=1
- filters=256
- size=1
- stride=1
- pad=1
- activation=leaky
- [upsample]
- stride=2
- [route]
- layers = -1, 61
- [convolutional]
- batch_normalize=1
- filters=256
- size=1
- stride=1
- pad=1
- activation=leaky
- [convolutional]
- batch_normalize=1
- size=3
- stride=1
- pad=1
- filters=512
- activation=leaky
- [convolutional]
- batch_normalize=1
- filters=256
- size=1
- stride=1
- pad=1
- activation=leaky
- [convolutional]
- batch_normalize=1
- size=3
- stride=1
- pad=1
- filters=512
- activation=leaky
- [convolutional]
- batch_normalize=1
- filters=256
- size=1
- stride=1
- pad=1
- activation=leaky
- [convolutional]
- batch_normalize=1
- size=3
- stride=1
- pad=1
- filters=512
- activation=leaky
- [convolutional]
- size=1
- stride=1
- pad=1
- filters=48
- activation=linear
- [yolo]
- mask = 3,4,5
- anchors = 10,13, 16,30, 33,23, 30,61, 62,45, 59,119, 116,90, 156,198, 373,326
- classes=11
- num=9
- jitter=.3
- ignore_thresh = .7
- truth_thresh = 1
- random=1
- [route]
- layers = -4
- [convolutional]
- batch_normalize=1
- filters=128
- size=1
- stride=1
- pad=1
- activation=leaky
- [upsample]
- stride=2
- [route]
- layers = -1, 36
- [convolutional]
- batch_normalize=1
- filters=128
- size=1
- stride=1
- pad=1
- activation=leaky
- [convolutional]
- batch_normalize=1
- size=3
- stride=1
- pad=1
- filters=256
- activation=leaky
- [convolutional]
- batch_normalize=1
- filters=128
- size=1
- stride=1
- pad=1
- activation=leaky
- [convolutional]
- batch_normalize=1
- size=3
- stride=1
- pad=1
- filters=256
- activation=leaky
- [convolutional]
- batch_normalize=1
- filters=128
- size=1
- stride=1
- pad=1
- activation=leaky
- [convolutional]
- batch_normalize=1
- size=3
- stride=1
- pad=1
- filters=256
- activation=leaky
- [convolutional]
- size=1
- stride=1
- pad=1
- filters=48
- activation=linear
- [yolo]
- mask = 0,1,2
- anchors = 10,13, 16,30, 33,23, 30,61, 62,45, 59,119, 116,90, 156,198, 373,326
- classes=11
- num=9
- jitter=.3
- ignore_thresh = .7
- truth_thresh = 1
- random=1
4. 下载yolov3的初始权重,还要下载一下darknet53.conv.74的模型参数
wget https://pjreddie.com/media/files/darknet53.conv.74如果无法下载的话,也可以直接复制网址自己进行下载,下载完后将darknet53.conv.74放在darknet文件夹下.
六 进行数据训练
在darknet中打开终端,输入如下命令进行训练:
./darknet detector train cfg/zp_test.data cfg/yolov3.cfg darknet53.conv.74这里再提醒一下,上面那句代码,zp_test.data换为你自己刚才建立的data文件,yolov3.cfg是因为我使用的是yolov3模型,如果用其他模型,就输入其他模型比如yolov3-tiny.cfg之类的,那么就要在第5步下载相对应的权重。
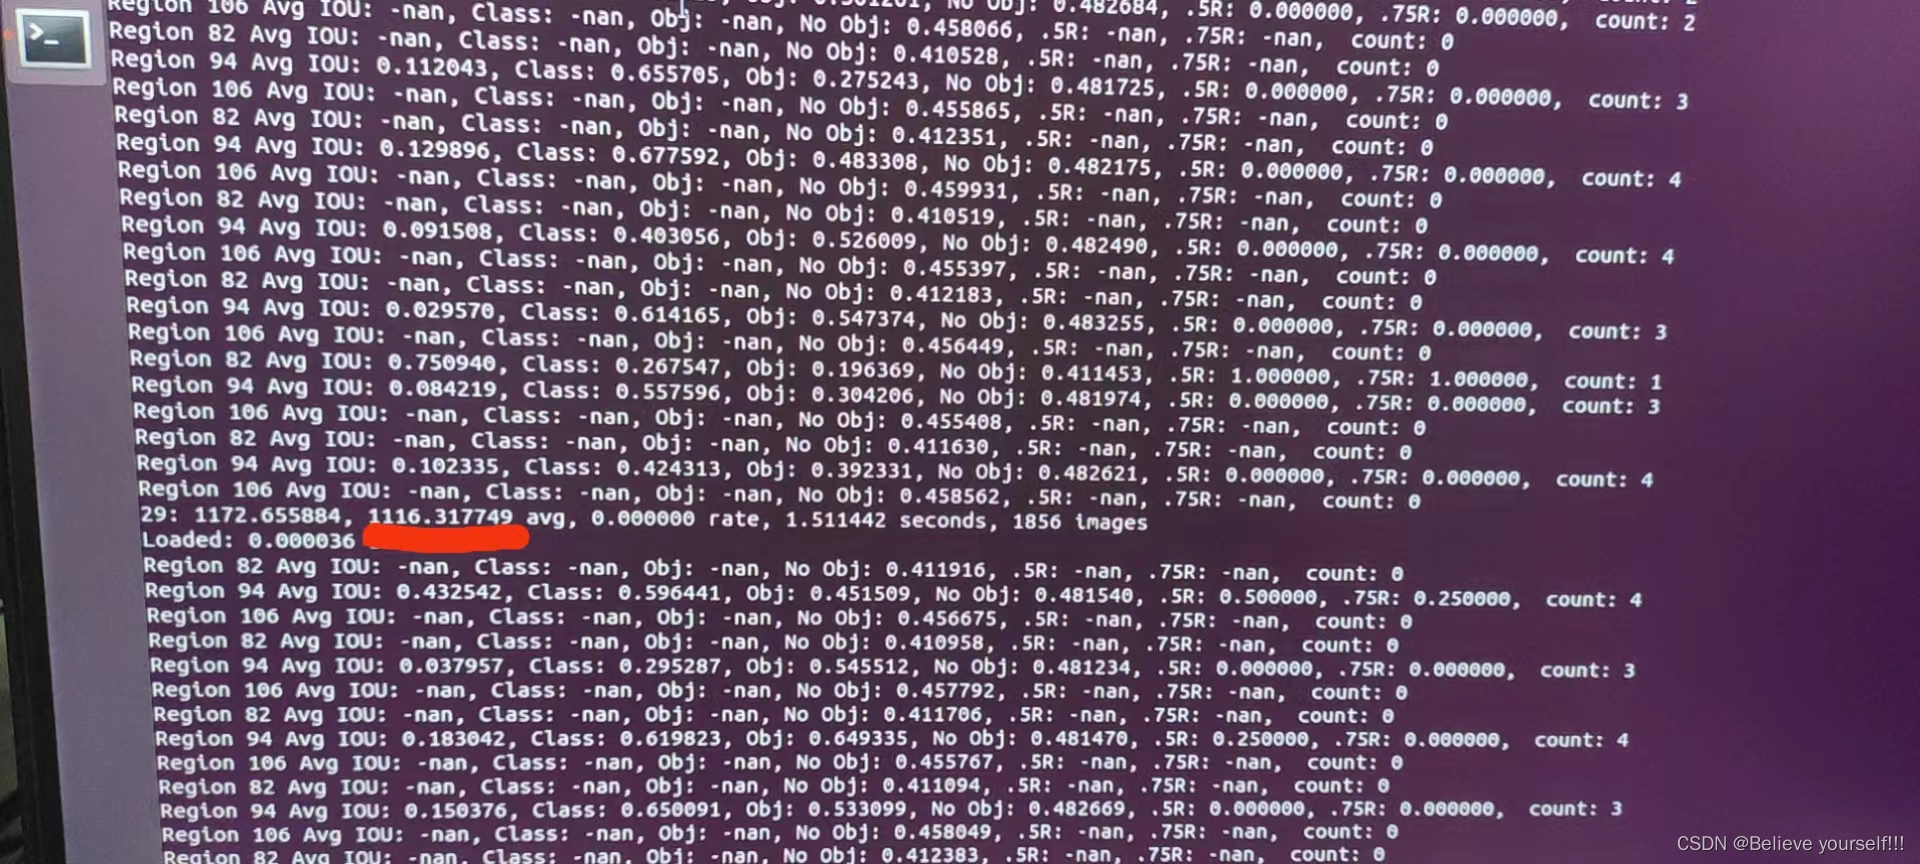
当这个数字下降到0.0x的时候说明已经训练可以. 最前面的29表示训练的轮数
七 开始进行识别
1. 将之前训练好的bakeup里面的权重文件.weights文件放到 /catkin_ws/src/darknet_ros/darknet_ros/yolo_network_config/weights里面

2. 将之前改好的 .cfg 文件放到 /catkin_ws/src/darknet_ros/darknet_ros/yolo_network_config/cfg
这个.cfg文件即为上面的yolov3.cfg文件,这里建议粘贴复制一份,即将yolov3.cfg拷贝一份命名比如为yolov3-voc-zp.cfg,然后将yolov3-voc-zp.cfg放到/catkin_ws/src/darknet_ros/darknet_ros/yolo_network_config/cfg下面. 这样可以避免命名重复

3. 将这个/catkin_ws/src/darknet_ros/darknet_ros/config/yolov3-voc.yaml文件拷贝一份(位置也在当前文件夹,比如命名为yolov3-zp.yaml),然后将中的config_file,weight_file和names根据实际情况修改,其实就是之前添加进来的两个文件


注意:这里的权重文件有许多,选择最后那个,因为训练的时候每一轮都会产生一个权重文件,然后将前面的权重文件进行覆盖,所以这里只写最后那个生成的权重文件即可
4. 修改ros.yaml文件
找到/home/robot/catkin_ws/src/darknet_ros/darknet_ros/config目录下的ros.yaml文件,进行摄像头的配置工作.根据自己的需要选择不同的摄像头的topic

5. 创建相关的启动launch文件
在该目录下:/home/robot/catkin_ws/src/darknet_ros/darknet_ros/launch, 创建一个launch文件,模板可以复制之前的,然后进行相应的修改即可,比如我创建了一个yolo_v3_zp.launch

然后对里面的内容进行相应的修改,主要就修改下图中标注的地方即可,后面的yaml文件即为/catkin_ws/src/darknet_ros/darknet_ros/config目录下刚刚自己所创建的那个yaml文件

6. 开始进行识别
我使用的是realsense摄像头进行识别
首先运行刚刚创建的那个launch文件,下面命令根据自己所创建的launch文件进行修改即可
roslaunch darknet_ros yolo_v3_zp.launch然后摄像头的启动项,我使用的是realsense摄像头,具体代码配置自行编写
rosrun realsense_test realsense_recognition下面是我的代码
- //realsense
- #include <librealsense2/rs.hpp>
- //ros
- # include "ros/ros.h"
- //C++
- # include <bits/stdc++.h>
- //Opencv
- # include "opencv2/opencv.hpp"
- # include <cv_bridge/cv_bridge.h>
- # include <image_transport/image_transport.h>
- //darknet
- # include "realsense_test/BoundingBoxes.h"
- # include "realsense_test/BoundingBox.h"
- using namespace cv;
- using namespace std;
- //物体识别
- struct Objects
- {
- int xmin, ymin, xmax, ymax; //一个物品的左上角和右下角坐标
- Objects(int a, int b, int c, int d) : xmin(a), ymin(b), xmax(c), ymax(d) {}
- };
- struct target_object
- {
- int xmid, ymid, distance; //物体中间坐标和距离
- };
- multimap<string, Objects> all_objects; //存储所有的物品信息,因为一张图片中可能会出现多种一样的东西,所以用multimap
- void ObjectCallback(const realsense_test::BoundingBoxes::ConstPtr &msg)
- {
- for (int i = 0; i < msg->bounding_boxes.size(); ++i)
- {
- realsense_test::BoundingBox temp = msg->bounding_boxes[i];
- if (temp.probability > 0.6)
- { //大于0.6,我们就认为可信
- all_objects.insert(make_pair(temp.Class, Objects(temp.xmin, temp.ymin, temp.xmax, temp.ymax)));
- }
- }
- }
- //测量物体位置(返回物体中心点坐标和物体的距离)
- target_object ObjectMark(Mat &color, Mat &depth, int xmin, int ymin, int xmax, int ymax)
- {
- //计算图像中间30*30个像素点深度的众数
- int xmid = (int)(xmin + xmax) * 0.5;
- int ymid = (int)(ymin + ymax) * 0.5;
- map<int, int> depthmap; //用于计算众数
- for(int i = ymid - 10; i <= ymid + 10; i ++)
- {
- const uint16_t *pD = depth.ptr<uint16_t>(i);
- for(int j = xmid - 10; j <= xmid + 10; j ++)
- {
- int distance;
- distance = *(pD + j);
- depthmap[distance] ++;
- }
- }
- int max = -1;
- int temp_distance = -1;
- for(auto value : depthmap)
- {
- if(value.second > max)
- {
- max = value.second;
- temp_distance = value.first;
- }
- }
- depthmap.clear();
- int final_distance = temp_distance;
- if(final_distance < 0) final_distance = 0;
- //int final_distance = depth.at<uint16_t>(xmid, ymid);
- putText(color, to_string(final_distance), Point(xmid, ymid), FONT_HERSHEY_SIMPLEX, 1, (0, 0, 255), 2, 8, false);
- rectangle(color, Point(xmin, ymin), Point(xmax, ymax), Scalar(0, 255, 0), 3);
- target_object tobj;
- tobj.distance = final_distance;
- tobj.xmid = xmid;
- tobj.ymid = ymid;
- //imshow("color", color);
- return tobj;
- }
- int main(int argc, char *argv[])
- {
- //=================ros初始化==============
- ros::init(argc, argv, "move_test");
- ros::NodeHandle n;
- //realsense RGB图像发布者
- image_transport::ImageTransport it(n);
- image_transport::Publisher rgb_pub = it.advertise("realsense/RGBImage", 1);
- cout<<"11111"<<endl;
- ros::Subscriber sub = n.subscribe("/darknet_ros/bounding_boxes", 2, ObjectCallback);
- cout<<"222222"<<endl;
- //开启realsense
- //创建数据管道
- rs2::pipeline p;
- rs2::config pipe_config;
- pipe_config.enable_stream(RS2_STREAM_DEPTH,1280,720,RS2_FORMAT_Z16,30);
- pipe_config.enable_stream(RS2_STREAM_COLOR,1280,720,RS2_FORMAT_RGB8,30);
- //start()函数返回数据管道的profile
- rs2::pipeline_profile profile = p.start(pipe_config);
- Mat color, depth;
- while(waitKey(30) != 27)
- {
- //捕获RGB和深度图像
- rs2::frameset frames = p.wait_for_frames();
- rs2::video_frame rs_color = frames.get_color_frame();
- rs2::depth_frame rs_depth = frames.get_depth_frame();
- //将RBG图像转为opencv类型
- const int wc = rs_color.as<rs2::video_frame>().get_width();
- const int hc = rs_color.as<rs2::video_frame>().get_height();
- Mat color1(Size(wc, hc), CV_8UC3, (void*)rs_color.get_data(), Mat::AUTO_STEP);
- cvtColor(color1, color, cv::COLOR_RGB2BGR);
- //将深度图像转为opencv类型
- const int wd = rs_depth.as<rs2::depth_frame>().get_width();
- const int hd = rs_depth.as<rs2::depth_frame>().get_height();
- Mat depth(Size(wd, hd), CV_16U, (void*)rs_depth.get_data(), Mat::AUTO_STEP);
- //发布RGB图像
- sensor_msgs::ImagePtr msg = cv_bridge::CvImage(std_msgs::Header(), "bgr8", color).toImageMsg();
- ros::Rate loop_rate(30);
- loop_rate.sleep();
- ros::spinOnce();
- rgb_pub.publish(msg);
- target_object tobj; //目标物体
- //imshow("zp",color);
- for(auto value : all_objects)
- {
- tobj = ObjectMark(color, depth, value.second.xmin,
- value.second.ymin, value.second.xmax, value.second.ymax);
- ros::Rate loop_rate(100);
- loop_rate.sleep();
- }
- all_objects.clear();
- }
- return 0;
- }
-
相关阅读:
TypeScript精华精讲(接口与泛函)
教你注册chrome开发者账号,并发布chrome浏览器插件。
含文档+PPT+源码等]精品基于Uniapp实现的移动端的医生寻访平台的设计与实现[包运行成功]
苏州大学:从PostgreSQL到TDengine
01 SpringMVC 入门
【giszz笔记】产品设计标准流程【4】
Redis五大数据类型的底层设计
第一届龙信杯取证比赛部分题目复现
文心大模型写TodoList项目需求
Leetcode1704:判断字符串的两半是否相似
- 原文地址:https://blog.csdn.net/qq_58011370/article/details/125541838
