-
Nginx优化与防盗链
一.Nginx服务优化
1.配置Nginx隐藏版本号

(一) 修改配置文件方式


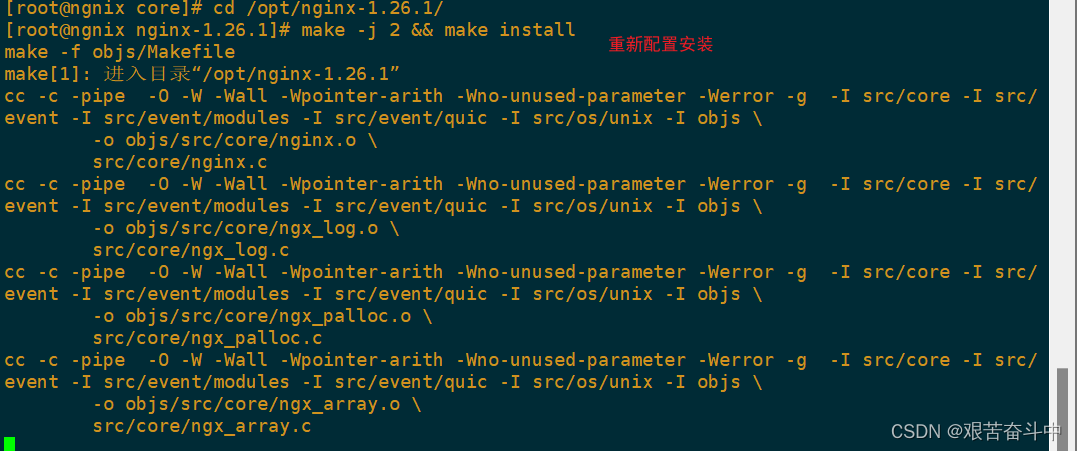
修改源码文件,重新编译安装
- [root@ngnix nginx-1.26.1]# cd /usr/local/nginx/conf
- [root@ngnix conf]# ls
- fastcgi.conf koi-utf nginx.conf uwsgi_params
- fastcgi.conf.default koi-win nginx.conf.default uwsgi_params.default
- fastcgi_params mime.types scgi_params win-utf
- fastcgi_params.default mime.types.default scgi_params.default
- [root@ngnix conf]# vim nginx.conf
- server_tokens on; #打开显示版本号
- [root@ngnix conf]# systemctl restart nginx
- [root@ngnix conf]# curl -I http://192.168.80.30
- HTTP/1.1 200 OK
- Server: apache/2.48.0
- Date: Sun, 02 Jun 2024 05:13:40 GMT
- Content-Type: text/html; charset=utf-8


 2.更改程序运行用户与组
修改Nginx用户与组


(1)编译安装时指定用户与组
./configure --prefix=/usr/local/nginx --user=nginx --group=nginx --with-http_stub_status_module && make && make install # --user指定用户, --group指定组
(2)修改配置文件法指定
- [root@ngnix conf]# vim nginx.conf
- [root@ngnix conf]# systemctl restart nginx.service
- [root@ngnix conf]# ps aux | grep nginx
- root 5518 0.0 0.0 46008 1164 ? Ss 13:34 0:00 nginx: master process /usr/local/nginx/sbin/nginx
- nginx 5520 0.0 0.0 48484 2000 ? S 13:34 0:00 nginx: worker process
- root 5524 0.0 0.0 112824 988 pts/0 R+ 13:34 0:00 grep --color=auto nginx

3.配置网页缓存时间


-
http段:实现对所有虚拟主机站点网页进行缓存;
-
server段:实现对某一个虚拟主机的一个站点中所有网页进行缓存;
-
location段:实现对某一个虚拟主机的某个指定访问路径进行缓存;
- [root@ngnix conf]# vim nginx.conf
- [root@ngnix conf]# nginx -t
- nginx: the configuration file /usr/local/nginx/conf/nginx.conf syntax is ok
- nginx: configuration file /usr/local/nginx/conf/nginx.conf test is successful
- [root@ngnix conf]# systemctl reload nginx
- [root@ngnix conf]# cd /usr/local/nginx/html/
- http {
- ......
- server {
- ......
- location / {
- root html;
- index index.html index.htm;
- }
- location ~ \.(gif|jpg|jepg|png|bmp|ico)$ { #加入新的 location,以图片作为缓存对象
- root html;
- expires 1d; #指定缓存时间,1天
- }
- ......
- }
- }
- http://www.xy101.com/dingzhen.html


4. 日志分割


- #!/bin/bash
- #this is used for cutting nginx log files
- YESTERDAY=$(DATE -D "-1 day" "+%Y%m%d")
- LOGPATH=/var/log/nginx
- NGINX_HOME=/usr/local/nginx
- PIDPATH=$NGINX_HOME/logs/nginx.conf
- #使用test -d判断专门保存日志的目录是否存在,如果不存在则创建目录
- test -d $LOGPATH || mkdir -p $LOGPATH
- #使用mv命令进行日志分制,移动日志文件到专门保存日志的目录里,并在文件名后缀添加时间标记
- mv $NGINX_HOME/logs/access.log $LOGPATH/access.log_$YESTERDAY
- mv $NGINX_HOME/logs/access.log $LOGPATH/ERROR.log_$YESTERDAY
- #使用kill -USR1 使nginx生成新的日志文件,用于后续的日志记录
- kill -USR1 $(cat $PIDPATH)
- #使用find -mtime 选项查找出超过N天以前的旧日志文件并删除,用来释放磁盘空间
- find $LOGPATH -mtime +90 -delete


5.设置连接超时

HTTP有一个KeepAlive模式,它告诉web服务器在处理完一个请求后保持这个TCP连接的打开状态。若接收到来自同一客户端的其它请求,服务端会利用这个未被关闭的连接,而不需要再建立一个连接。
KeepAlive 在一段时间内保持打开状态,它们会在这段时间内占用资源。占用过多就会影响性能。
keepalive_timeout
指定KeepAlive的超时时间(timeout)。指定一个长连接最多可以保持多长时间,服务器将会在这个时间后关闭连接。 Nginx的默认值是65秒,有些浏览器最多只保持 60 秒,所以可以设定为 60 秒。若将它设置为0,就禁止了keepalive 连接。
第二个参数(可选的)指定了在响应头Keep-Alive:timeout=time中的time值。这个头能够让一些浏览器主动关闭连接,这样服务器就不必去关闭连接了。没有这个参数,Nginx 不会发送 Keep-Alive 响应头。client_header_timeout
客户端向服务端发送一个完整的 request header 的超时时间。如果客户端在指定时间内没有发送一个完整的 request header,Nginx 返回 HTTP 408(Request Timed Out)。client_body_timeout
指定客户端与服务端建立连接后发送 request body 的超时时间。如果客户端在指定时间内没有发送任何内容,Nginx 返回 HTTP 408(Request Timed Out)。
- vim /usr/local/nginx/conf/nginx.conf
- http {
- ......
- keepalive_timeout 65 55;第一个65代表服务器端主动断开连接保持时间,第二个55代表客户端主动断开连接保持时间
- keepalive_requests 100;
- client_header_timeout 80;
- client_body_timeout 80;
- ......
- }
- systemctl restart nginx


6.更改进程数


- vim /usr/local/nginx/conf/nginx.conf
- [root@ngnix conf]# vim nginx.conf
- ngixnworker_processes auto;
- worker_cpu_affinity 01 10; #为进程绑定两个cpu
- [root@ngnix conf]# systemctl restart nginx.service
- [root@ngnix conf]# ps aux | grep ngixn
- root 6903 0.0 0.0 112824 988 pts/0 S+ 15:38 0:00 grep --color=auto
7.配置网页压缩与防盗链

- [root@ngnix usr]# cd /opt/nginx-1.26.1/
- [root@ngnix nginx-1.26.1]# ls
- auto CHANGES.ru configure html Makefile objs src
- CHANGES conf contrib LICENSE man README
- [root@ngnix nginx-1.26.1]# cd auto/
- [root@ngnix auto]# ls
- cc feature headers install module options stubs types
- define have include lib modules os summary unix
- endianness have_headers init make nohave sources threads
- [root@ngnix auto]# cat options | grep YES
- HTTP=YES
- HTTP_CACHE=YES
- HTTP_CHARSET=YES
- HTTP_GZIP=YES
- HTTP_SSI=YES
- HTTP_ACCESS=YES


- [root@ngnix nginx-1.26.1]# cd /usr/local/nginx/conf
- [root@ngnix conf]# pwd
- /usr/local/nginx/conf
- [root@ngnix conf]# vim nginx.conf
- gzip on; #取消注释,开启gzip压缩功能
- gzip_min_length 1k; #最小压缩文件大小
- gzip_buffers 4 64k; #压缩缓冲区,大小为4个64k缓冲区
- gzip_http_version 1.1; #压缩版本(默认1.1,前端如果是squid2.5请使用1.0)
- gzip_comp_level 6; #压缩比率
- gzip_vary on; #支持前端缓存服务器存储压缩页面
- gzip_types text/plain text/javascript application/x-javascript text/css text/xml application/xml application/xml+rss image/jpg image/jpeg image/png image/gif application/x-httpd-php application/javascript application/json image/jpg image/png test/html; #压缩类型,表示哪些网页文档启用压缩功能
- [root@ngnix conf]# nginx -t
- [root@ngnix conf]# cd /usr/local/nginx/html/
- [root@ngnix html]# ll -h
- 总用量 1.4M
- -rw-r--r-- 1 root root 497 5月 30 11:36 50x.html
- -rw-r--r-- 1 root root 52 6月 2 14:12 chunren.html
- -rw-r--r-- 1 root root 98K 5月 30 15:40 chunren.jpg
- -rw-r--r-- 1 root root 54 6月 2 14:14 dingzhen.html
- -rw-r--r-- 1 root root 1.3M 6月 2 14:14 dingzhen.jpg
- -rw-r--r-- 1 root root 615 5月 30 11:36 index.html
- -rw-r--r-- 1 root root 150 5月 30 20:48 test.php
- [root@ngnix html]# vim dingzhen.html

实现网页图片的大小压缩
- [root@ngnix html]# cd /etc/yum.repos.d/
- [root@ngnix yum.repos.d]# ls
- local.repo repo.bak
- [root@ngnix yum.repos.d]# mv repo.bak/* ./
- mv:是否覆盖"./local.repo"? yes
- [root@ngnix yum.repos.d]# mv local.repo repo.bak/
- [root@ngnix yum.repos.d]# yum install -y gd-devel
- cd /opt/nginx-1.12.0/
- ./configure --prefix=/usr/local/nginx --user=nginx --group=nginx --with-http_stub_status_module --with-http_image_filter_module
- make && make install
- vim /usr/local/nginx/conf/nginx.conf
- http {
- ....
- gzip on;
- gzip_types text/plain .... image/jpeg image/gif image/png; #将图片类型文件压缩加入gzip
- ....
- server {
- ....
- location ~* \.(jpg|gif|png)$ {
- image_filter resize 200 200; #按等比例缩小图像的宽或高至指定大小。如果只想设置一个维度,另一维可以指定为:“-”
- expires ld;
- } #(如果长>宽就以长为标准,宽为比例;如果长<宽就以宽为标准,长为比例)
- }
- }
- cd /usr/local/nginx/html
- 先将game.jpg文件传到/usr/local/nginx/html目录下
- vim index.html
- ......
- <img src="game.jpg"/> #网页中插入图片
- </body>
- </html>
- systemctl restart nginx
防盗链
 盗链主机
盗链主机- [root@localhost yum.repos.d]# cd /usr/local/nginx/html
- [root@localhost html]# vim dz.html #创建盗链html
- <h1>this is test web</h1>
- <img src="http://www.xy101.com/dingzhen.jpg" />

- [root@localhost html]#vim /etc/httpd/conf/httpd.conf
- ServerName www.dz.com:80


此时此刻发现盗链主机成功盗链源网站


在源主机机型设置防盗链
- [root@ngnix html]# cd /usr/local/nginx/html
- [root@ngnix conf]# vim nginx.conf
- location ~ \.(gif|jpg|jpeg|swf)$ { 这段正则表达式表示匹配不区分大小写,以.jpg 或.gif 或.swf 结尾的文件;
- root html;
- expires 1d;
- valid_referers none blocked xy101.com *.xy101.com; 设置信任的网站
- if ( $invalid_referer ) {
- rewrite ^/ http://www.xy101.com/error.png;
- }
- }


-
相关阅读:
Unity的IFilterBuildAssemblies:深入解析与实用案例
springboot+VUE+elementui医院设备仪器维修保养管理系统
Element登录+注册
油封的正常使用寿命是多长?
vue3 + vite 性能优化 ( 从5s -> 0.5s )
荐书丨《哥德尔、艾舍尔、巴赫书:集异璧之大成》:机器人与音乐的次元壁破了
Abbkine AbFluor 488 细胞凋亡检测试剂盒特点及实验建议
Pycharm 的使用
VMWare16的安装及VMware配置Ubuntu虚拟机
基于单目相机的2D测量(工件尺寸和物体尺寸)
- 原文地址:https://blog.csdn.net/m0_61187759/article/details/139389700