-
uniapp——项目day03
商品列表
分支创建

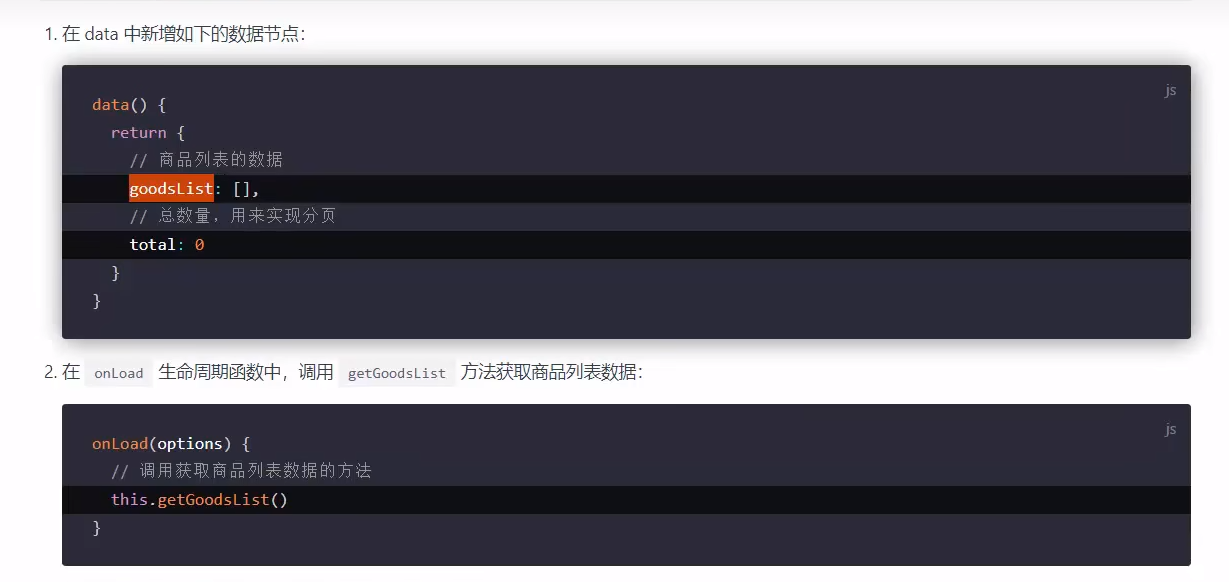
定义请求参数对象


获取商品列表数据
 渲染商品列表结构
1. 在页面中,通过 v-for 指令,循环渲染出商品的 UI 结构:
- <template>
- <view>
- <view class="goods-list">
- <block v-for="(goods, i) in goodsList" :key="i">
- <view class="goods-item">
- <view class="goods-item-left">
- <image :src="goods.goods_small_logo || defaultPic" class="goods-pic">image>
- view>
- <view class="goods-item-right">
- <view class="goods-name">{{goods.goods_name}}view>
- <view class="goods-info-box">
- <view class="goods-price">¥{{goods.goods_price}}view>
- view>
- view>
- view>
- block>
- view>
- view>
- template>
2. 为了防止某些商品的图片不存在,需要在 data 中定义一个默认的图片:
- // 默认的空图片
- defaultPic: 'https://img3.doubanio.com/f/movie/8dd0c794499fe925ae2ae89ee30cd225750457b4/pics/movie/celebrity-default-medium.png'

3. 美化商品列表的 UI 结构:
- .goods-item {
- display: flex;
- padding: 10px 5px;
- border-bottom: 1px solid #f0f0f0;
- .goods-item-left {
- margin-right: 5px;
- .goods-pic {
- width: 100px;
- height: 100px;
- display: block;
- }
- }
- .goods-item-right {
- display: flex;
- flex-direction: column;
- justify-content: space-between;
- .goods-name {
- font-size: 13px;
- }
- .goods-price {
- font-size: 16px;
- color: #c00000;
- }
- }
- }
把商品 item 项封装为自定义组件
1. 在 components 目录上鼠标右键,选择 新建组件 :
2. 将 goods_list 页面中,关于商品 item 项相关的 UI 结构、样式、data 数据,封装到 my-goods 组件中:
- <template>
- <view class="goods-item">
- <view class="goods-item-left">
- <image :src="goods.goods_small_logo || defaultPic" class="goodspic">image>
- view>
- <view class="goods-item-right">
- <view class="goods-name">{{goods.goods_name}}view>
- <view class="goods-info-box">
- <view class="goods-price">¥{{goods.goods_price}}view>
- view>
- view>
- view>
- template>
- <script>
- export default {
- name: "my-goods",
- // 定义 props 属性,用来接收外界传递到当前组件的数据
- props: {
- // 商品的信息对象
- goods: {
- type: Object,
- defaul: {},
- },
- },
- data() {
- return {
- // 默认的空图片
- defaultPic: 'https://img3.doubanio.com/f/movie/8dd0c794499fe925ae2ae89ee30cd225750457b4/pics/movie/celebrity-default-medium.png',
- };
- }
- }
- script>
- <style lang="scss">
- .goods-item {
- display: flex;
- padding: 10px 5px;
- border-bottom: 1px solid #f0f0f0;
- .goods-item-left {
- margin-right: 5px;
- .goods-pic {
- width: 100px;<template>
- <view class="goods-item">
- <view class="goods-item-left">
- <image :src="goods.goods_small_logo || defaultPic" class="goodspic">image>
- view>
- <view class="goods-item-right">
- <view class="goods-name">{{goods.goods_name}}view>
- <view class="goods-info-box">
- <view class="goods-price">¥{{goods.goods_price}}view>
- view>
- view>
- view>
- template>
- <script>
- export default {
- name: "my-goods",
- // 定义 props 属性,用来接收外界传递到当前组件的数据
- props: {
- // 商品的信息对象
- goods: {
- type: Object,
- defaul: {},
- },
- },
- data() {
- return {
- // 默认的空图片
- defaultPic: 'https://img3.doubanio.com/f/movie/8dd0c794499fe925ae2ae89ee30cd225750457b4/pics/movie/celebrity-default-medium.png',
- };
- }
- }
- script>
- <style lang="scss">
- .goods-item {
- display: flex;
- padding: 10px 5px;
- border-bottom: 1px solid #f0f0f0;
- .goods-item-left {
- margin-right: 5px;
- .goods-pic {
- width: 100px;
- height: 100px;
- display: block;
- }
- }
- .goods-item-right {
- display: flex;
- flex-direction: column;
- justify-content: space-between;
- .goods-name {
- font-size: 13px;
- }
- .goods-price {
- font-size: 16px;
- color: #c00000;
- }
- }
- }
- style>
- height: 100px;
- display: block;
- }
- }
- .goods-item-right {
- display: flex;
- flex-direction: column;
- justify-content: space-between;
- .goods-name {
- font-size: 13px;
- }
- .goods-price {
- font-size: 16px;
- color: #c00000;
- }
- }
- }
- style>

使用过滤器处理商品价格
1. 在 my-goods 组件中,和 data 节点平级,声明 filters 过滤器节点如下:
- filters: {
- // 把数字处理为带两位小数点的数字
- tofixed(num) {
- return Number(num).toFixed(2)
- }
- }
2. 在渲染商品价格的时候,通过管道符 | 调用过滤器:
- <view class="goods-price">¥{{goods.goods_price | tofixed}}view>
上拉加载更多
初步实现上拉加载更多
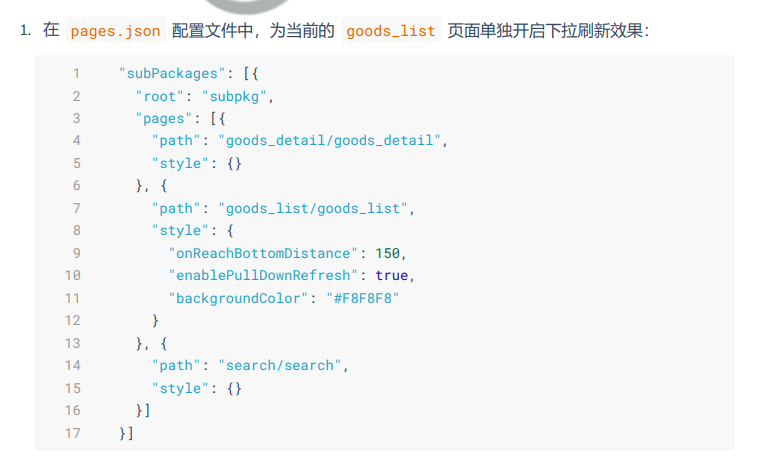
1. 打开项目根目录中的 pages.json 配置文件,为 subPackages 分包中的 goods_list 页面 配置上拉触底的距离:
在style中配置如下属性
"onReachBottomDistance": 1502. 在 goods_list 页面中,和 methods 节点平级,声明 onReachBottom 事件处理函数,用 来监听页面的上拉触底行为:
- onReachBottom() {
- // 让页码值自增 +1
- this.queryObj.pagenum += 1
- // 重新获取列表数据
- this.getGoodsList()
- }
3. 改造 methods 中的 getGoodsList 函数,当列表数据请求成功之后,进行新旧数据的拼接处 理:
- async getGoodsList() {
- // 发起请求
- const {
- data: res
- } = await
- uni.$http.get('/api/public/v1/goods/search', this.queryObj)
- if (res.meta.status !== 200) return uni.$showMsg()
- // 为数据赋值:通过展开运算符的形式,进行新旧数据的拼接
- this.goodsList = [...this.goodsList, ...res.message.goods]
- this.total = res.message.total
- }
通过节流阀防止发起额外的请求
1. 在 data 中定义 isloading 节流阀如下:
- // 是否正在请求数据
- isloading: false
判断数据是否加载完毕

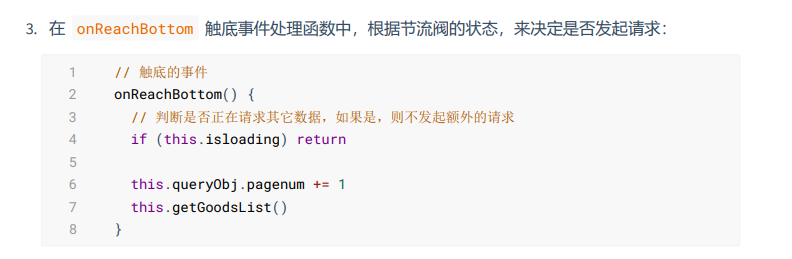
2. 修改 onReachBottom 事件处理函数如下:
- onReachBottom() {
- // 判断是否还有下一页数据
- if (this.queryObj.pagenum * this.queryObj.pagesize >= this.total)
- return uni.$showMsg('数据加载完毕!')
- // 判断是否正在请求其它数据,如果是,则不发起额外的请求
- if (this.isloading) return
- this.queryObj.pagenum += 1
- this.getGoodsList()
- }
下拉刷新

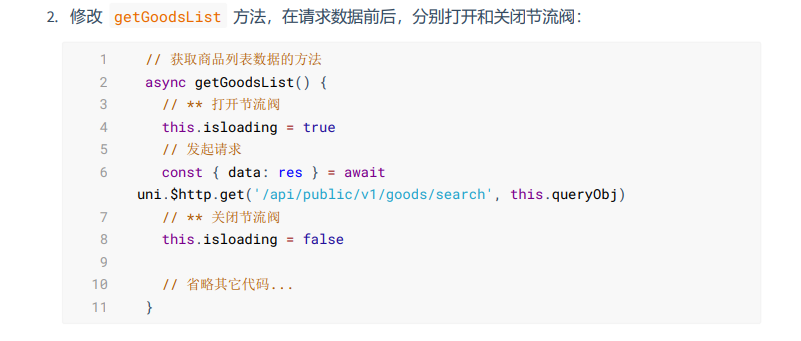
3. 修改 getGoodsList 函数,接收 cb 回调函数并按需进行调用:
- async getGoodsList(cb) {
- // ** 打开节流阀
- this.isloading = true
- // 发起请求
- const {
- data: res
- } = await
- uni.$http.get('/api/public/v1/goods/search', this.queryObj)
- this.isloading = false
- // 只要数据请求完毕,就立即按需调用 cb 回调函数
- cb && cb()
- if (res.meta.status !== 200) return uni.$showMsg()
- // 为数据赋值:通过展开运算符的形式,进行新旧数据的拼接
- this.goodsList = [...this.goodsList, ...res.message.goods]
- this.total = res.message.total
- }
点击商品 item 项跳转到详情页面
1. 将循环时的 block 组件修改为 view 组件,并绑定 click 点击事件处理函数:
- <view class="goods-list">
- <view v-for="(item, i) in goodsList" :key="i" @click="gotoDetail(item)">
- <my-goods :goods="item">my-goods>
- view>
- view>

分支的合并与提交

商品详情
创建分支
git checkout -b goodsdetail获取商品详情数据


渲染商品详情页的 UI 结构
渲染轮播图区域

实现轮播图预览效果
1. 为轮播图中的 image 图片绑定 click 事件处理函数:
- <image :src="item.pics_big" @click="preview(i)">image>
2. 在 methods 中定义 preview 事件处理函数:
- // 实现轮播图的预览效果
- preview(i) {
- // 调用 uni.previewImage() 方法预览图片
- uni.previewImage({
- // 预览时,默认显示图片的索引
- current: i,
- // 所有图片 url 地址的数组
- urls: this.goods_info.pics.map(x => x.pics_big)
- })
- }
渲染商品信息区域
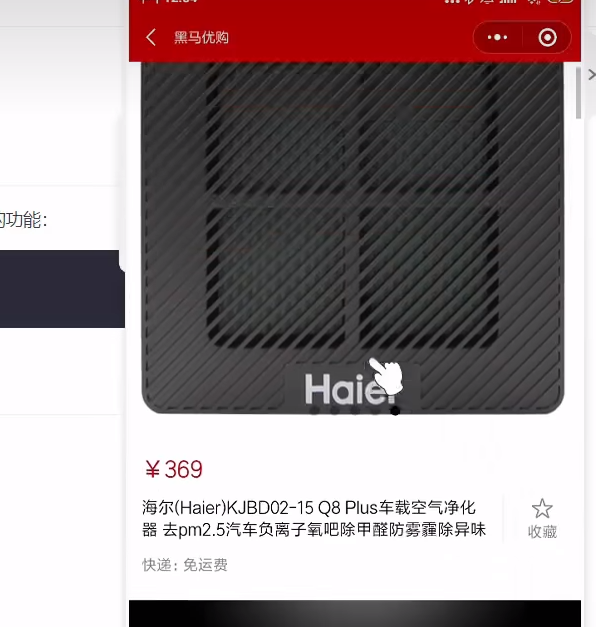
1. 定义商品信息区域的 UI 结构如下:
- <view class="goods-info-box">
- <view class="price">¥{{goods_info.goods_price}}view>
- <view class="goods-info-body">
- <view class="goods-name">{{goods_info.goods_name}}view>
- <view class="favi">
- <uni-icons type="star" size="18" color="gray">uni-icons>
- <text>收藏text>
- view>
- view>
- <view class="yf">快递:免运费view>
- view>
2. 美化商品信息区域的样式:
- // 商品信息区域的样式
- .goods-info-box {
- padding: 10px;
- padding-right: 0;
- .price {
- color: #c00000;
- font-size: 18px;
- margin: 10px 0;
- }
- .goods-info-body {
- display: flex;
- justify-content: space-between;
- .goods-name {
- font-size: 13px;
- padding-right: 10px;
- }
- // 收藏区域
- .favi {
- width: 120px;
- font-size: 12px;
- display: flex;
- flex-direction: column;
- justify-content: center;
- align-items: center;
- border-left: 1px solid #efefef;
- color: gray;
- }
- }
- // 运费
- .yf {
- margin: 10px 0;
- font-size: 12px;
- color: gray;
- }
- }
渲染商品详情信息

 3. 解决 .webp 格式图片在 ios 设备上无法正常显示的问题:
- // 定义请求商品详情数据的方法
- async getGoodsDetail(goods_id) {
- const {
- data: res
- } = await uni.$http.get('/api/public/v1/goods/detail', {
- goods_id
- })
- if (res.meta.status !== 200) return uni.$showMsg()
- // 使用字符串的 replace() 方法,将 webp 的后缀名替换为 jpg 的后缀名
- res.message.goods_introduce = res.message.goods_introduce.replace(/
, '
)
- .replace(/webp/g, 'jpg')
- this.goods_info = res.message
- }
解决商品价格闪烁的问题
1. 导致问题的原因:在商品详情数据请求回来之前,data 中 goods_info 的值为 {} ,因此初次 渲染页面时,会导致 商品价格、商品名称 等闪烁的问题。
2. 解决方案:判断 goods_info.goods_name 属性的值是否存在,从而使用 v-if 指令控制页面 的显示与隐藏:

渲染详情页底部的商品导航区域
渲染商品导航区域的 UI 结构
基于 uni-ui 提供的 GoodsNav 组件来实现商品导航区域的效果
1. 在 data 中,通过 options 和 buttonGroup 两个数组,来声明商品导航组件的按钮配置对 象:
- // 左侧按钮组的配置对象
- options: [{
- icon: 'shop',
- text: '店铺'
- }, {
- icon: 'cart',
- text: '购物车',
- info: 2
- }],
- // 右侧按钮组的配置对象
- buttonGroup: [{
- text: '加入购物车',
- backgroundColor: '#ff0000',
- color: '#fff'
- },
- {
- text: '立即购买',
- backgroundColor: '#ffa200',
- color: '#fff'
- }
- ]
2. 在页面中使用 uni-goods-nav 商品导航组件:
- <view class="goods_nav">
- <uni-goods-nav :fill="true" :options="options" :buttonGroup="buttonGroup" @click="onClick"
- @buttonClick="buttonClick" />
- view>
3. 美化商品导航组件,使之固定在页面最底部:
- .goods-detail-container {
- // 给页面外层的容器,添加 50px 的内padding,
- // 防止页面内容被底部的商品导航组件遮盖
- padding-bottom: 50px;
- }
- .goods_nav {
- // 为商品导航组件添加固定定位
- position: fixed;
- bottom: 0;
- left: 0;
- width: 100%;
- }
点击跳转到购物车页面

2. 根据 e.content.text 的值,来决定进一步的操作:
- // 左侧按钮的点击事件处理函数
- onClick(e) {
- if (e.content.text === '购物车') {
- // 切换到购物车页面
- uni.switchTab({
- url: '/pages/cart/cart'
- })
- }
- }
分支的合并与提交

加入购物车
分支创建
git checkout -b cart配置vuex
1.在项目根目录中创建store文件夹,专门存放vuex相关的模块.
2.在store目录上鼠标右键,选择新建js文件,新建store.js文件.
3. 在 store.js 中按照如下 4 个步骤初始化 Store 的实例对象:
这里是vue2的初始化方法
- // 1. 导入 Vue 和 Vuex
- import Vue from 'vue'
- import Vuex from 'vuex'
- // 2. 将 Vuex 安装为 Vue 的插件
- Vue.use(Vuex)
- // 3. 创建 Store 的实例对象
- const store = new Vuex.Store({
- // TODO:挂载 store 模块
- modules: {},
- })
- // 4. 向外共享 Store 的实例对象
- export default store
这里是vue3的初始化方法, byd,这里不同的初始化方法是真的麻烦,差点就重新创建项目了
- // 1. 导入 Vue 和 Vuex
- import { createStore } from 'vuex'
- import moduleCart from './cart.js'
- // 2. 创建 Store 的实例对象
- const store = createStore({
- modules: {
- m_cart: moduleCart,
- },
- })
- // 3. 向外共享 Store 的实例对象
- export default store
4. 在 main.js 中导入 store 实例对象并挂载到 Vue 的实例上:
下面是uniapp中提供的两种初始化,,所以我也加上了在vue3中的挂载方式。
- // #ifndef VUE3
- import store from './store/store.js'
- import Vue from 'vue'
- import App from './App'
- Vue.config.productionTip = false
- App.mpType = 'app'
- const app = new Vue({
- store
- ...App,
- })
- app.$mount()
- // #endif
- //_______________________________________________
- // #ifdef VUE3
- import {
- createSSRApp
- } from 'vue'
- import App from './App.vue'
- import store from './store/store.js'
- export function createApp() {
- const app = createSSRApp(App)
- app.use(store)
- return {
- app,
- }
- }
- // #endif
创建购物车的store模块
1. 在 store 目录上鼠标右键,选择 新建 -> js文件 ,创建购物车的 store 模块,命名为 cart.js :
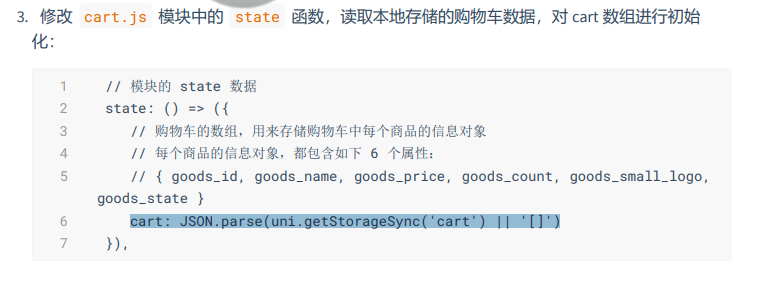
2. 在 cart.js 中,初始化如下的 vuex 模块:
- export default {
- // 为当前模块开启命名空间
- namespaced: true,
- // 模块的 state 数据
- state: () => ({
- // 购物车的数组,用来存储购物车中每个商品的信息对象
- // 每个商品的信息对象,都包含如下 6 个属性:
- // { goods_id, goods_name, goods_price, goods_count,
- goods_small_logo,
- goods_state
- }
- cart: [],
- }),
- // 模块的 mutations 方法
- mutations: {},
- // 模块的 getters 属性
- getters: {},
- }
3. 在 store/store.js 模块中,导入并挂载购物车的 vuex 模块,示例代码如下:
- import Vue from 'vue'
- import Vuex from 'vuex'
- // 1. 导入购物车的 vuex 模块
- import moduleCart from './cart.js'
- Vue.use(Vuex)
- const store = new Vuex.Store({
- // TODO:挂载 store 模块
- modules: {
- // 2. 挂载购物车的 vuex 模块,模块内成员的访问路径被调整为 m_cart,例如:
- // 购物车模块中 cart 数组的访问路径是 m_cart/cart
- m_cart: moduleCart,
- },
- })
- export default store
在商品详情页中使用 Store 中的数据
1. 在 goods_detail.vue 页面中,修改 标签中的代码如下:
- // 从 vuex 中按需导出 mapState 辅助方法
- import {
- mapState
- } from 'vuex'
- export default {
- computed: {
- // 调用 mapState 方法,把 m_cart 模块中的 cart 数组映射到当前页面中,作为计算
- 属性来使用
- // ...mapState('模块的名称', ['要映射的数据名称1', '要映射的数据名称2'])
- ...mapState('m_cart', ['cart']),
- },
- // 省略其它代码...
- }

实现加入购物车的功能
1. 在 store 目录下的 cart.js 模块中,封装一个将商品信息加入购物车的 mutations 方法,命名 为 addToCart 。示例代码如下:
- export default {
- // 为当前模块开启命名空间
- namespaced: true,
- // 模块的 state 数据
- state: () => ({
- // 购物车的数组,用来存储购物车中每个商品的信息对象
- // 每个商品的信息对象,都包含如下 6 个属性:
- // { goods_id, goods_name, goods_price, goods_count,
- goods_small_logo,
- goods_state
- }
- cart: [],
- }),
- // 模块的 mutations 方法
- mutations: {
- addToCart(state, goods) {
- // 根据提交的商品的Id,查询购物车中是否存在这件商品
- // 如果不存在,则 findResult 为 undefined;否则,为查找到的商品信息对象
- const findResult = state.cart.find((x) => x.goods_id ===
- goods.goods_id)
- if (!findResult) {
- // 如果购物车中没有这件商品,则直接 push
- state.cart.push(goods)
- } else {
- // 如果购物车中有这件商品,则只更新数量即可
- findResult.goods_count++
- }
- },
- },
- // 模块的 getters 属性
- getters: {},
- }
2. 在商品详情页面中,通过 mapMutations 这个辅助方法,把 vuex 中 m_cart 模块下的 addToCart 方法映射到当前页面:
- // 按需导入 mapMutations 这个辅助方法
- import {
- mapMutations
- } from 'vuex'
- export default {
- methods: {
- // 把 m_cart 模块中的 addToCart 方法映射到当前页面使用
- ...mapMutations('m_cart', ['addToCart']),
- },
- }
3. 为商品导航组件 uni-goods-nav 绑定 @buttonClick="buttonClick" 事件处理函数:
- // 右侧按钮的点击事件处理函数
- buttonClick(e) {
- // 1. 判断是否点击了 加入购物车 按钮
- if (e.content.text === '加入购物车') { // 2. 组织一个商品的信息对象
- const goods = {
- goods_id: this.goods_info.goods_id, // 商品的Id
- goods_name: this.goods_info.goods_name, // 商品的名称
- goods_price: this.goods_info.goods_price, // 商品的价格
- goods_count: 1, // 商品的数量
- goods_small_logo: this.goods_info.goods_small_logo, // 商品的图片
- goods_state: true // 商品的勾选状态
- }
- console.log(goods)
- // 3. 通过 this 调用映射过来的 addToCart 方法,把商品信息对象存储到购物车中
- this.addToCart(goods)
- }
- },
动态统计购物车中商品的总数量
1. 在 cart.js 模块中,在 getters 节点下定义一个 total 方法,用来统计购物车中商品的 总数量:
- // 模块的 getters 属性
- getters: {
- // 统计购物车中商品的总数量
- total(state) {
- let c = 0
- // 循环统计商品的数量,累加到变量 c 中
- state.cart.forEach(goods => c += goods.goods_count)
- return c
- }
- },
2. 在商品详情页面的 script 标签中,按需导入 mapGetters 方法并进行使用:
- // 按需导入 mapGetters 这个辅助方法
- import {
- mapGetters
- } from 'vuex'
- export default {
- computed: {
- // 把 m_cart 模块中名称为 total 的 getter 映射到当前页面中使用
- ...mapGetters('m_cart', ['total']),
- },
- }
3. 通过 watch 侦听器,监听计算属性 total 值的变化,从而动态为购物车按钮的徽标赋值:
- watch: {
- // 1. 监听 total 值的变化,通过第一个形参得到变化后的新值
- total(newVal) {
- // 2. 通过数组的 find() 方法,找到购物车按钮的配置对象
- const findResult = this.options.find((x) => x.text === '购物车')
- if (findResult) {
- // 3. 动态为购物车按钮的 info 属性赋值
- findResult.info = newVal
- }
- },
- },
持久化存储购物车中的商品
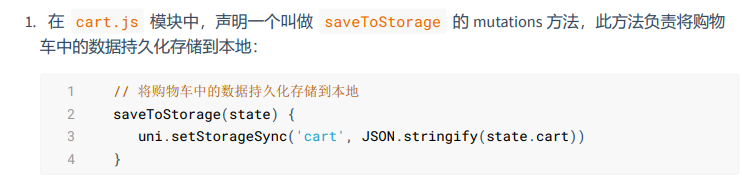
2. 修改 mutations 节点中的 addToCart 方法,在处理完商品信息后,调用步骤 1 中定义的 saveToStorage 方法:
- addToCart(state, goods) {
- // 根据提交的商品的Id,查询购物车中是否存在这件商品
- // 如果不存在,则 findResult 为 undefined;否则,为查找到的商品信息对象
- const findResult = state.cart.find((x) => x.goods_id ===
- goods.goods_id)
- if (!findResult) {
- // 如果购物车中没有这件商品,则直接 push
- state.cart.push(goods)
- console.log(state.cart)
- } else {
- // 如果购物车中有这件商品,则只更新数量即可
- findResult.goods_count++
- }
- // 通过 commit 方法,调用 m_cart 命名空间下的 saveToStorage 方法
- this.commit('m_cart/saveToStorage')
- },
优化商品详情页的 total 侦听器
1. 使用普通函数的形式定义的 watch 侦听器,在页面首次加载后不会被调用。因此导致了商品详情 页在首次加载完毕之后,不会将商品的总数量显示到商品导航区域:
2. 为了防止这个上述问题,可以使用对象的形式来定义 watch 侦听器(详细文档请参考 Vue 官方的 watch 侦听器教程),示例代码如下:
- watch: {
- // 定义 total 侦听器,指向一个配置对象
- total: {
- // handler 属性用来定义侦听器的 function 处理函数
- handler(newVal) {
- const findResult = this.options.find(x => x.text === '购物车')
- if (findResult) {
- findResult.info = newVal
- }
- },
- // immediate 属性用来声明此侦听器,是否在页面初次加载完毕后立即调用
- immediate: true
- }
- },
动态为 tabBar 页面设置数字徽标
需求描述:从商品详情页面导航到购物车页面之后,需要为 tabBar 中的购物车动态设置数字徽 标。

将设置 tabBar 徽标的代码抽离为 mixins
注意:除了要在 cart.vue 页面中设置购物车的数字徽标,还需要在其它 3 个 tabBar 页面中,为购 物车设置数字徽标。
此时可以使用 Vue 提供的 mixins 特性,提高代码的可维护性。
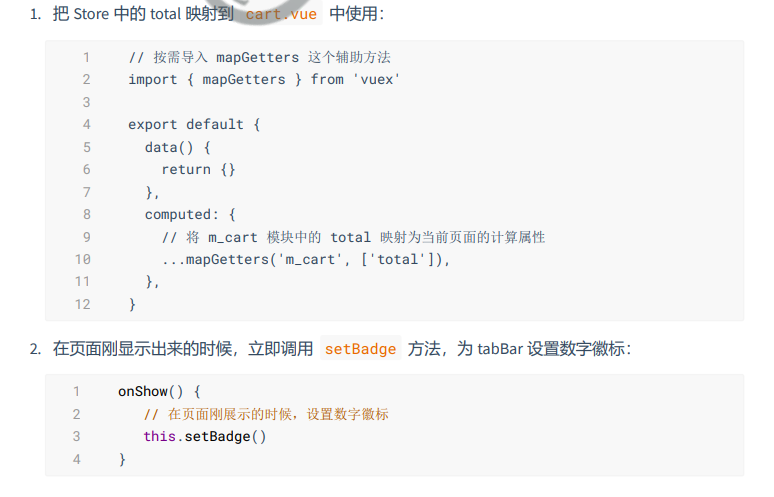
1. 在项目根目录中新建 mixins 文件夹,并在 mixins 文件夹之下新建 tabbar-badge.js 文 件,用来把设置 tabBar 徽标的代码封装为一个 mixin 文件:
- import {
- mapGetters
- } from 'vuex'
- // 导出一个 mixin 对象
- export default {
- computed: {
- ...mapGetters('m_cart', ['total']),
- },
- onShow() {
- // 在页面刚展示的时候,设置数字徽标
- this.setBadge()
- },
- methods: {
- setBadge() {
- // 调用 uni.setTabBarBadge() 方法,为购物车设置右上角的徽标
- uni.setTabBarBadge({
- index: 2,
- text: this.total + '', // 注意:text 的值必须是字符串,不能是数字
- })
- },
- },
- }
2. 修改 home.vue , cate.vue , cart.vue , my.vue 这 4 个 tabBar 页面的源代码,分别导 入 @/mixins/tabbar-badge.js 模块并进行使用:
-
相关阅读:
【软件】Ubuntu16.04安装repo全纪录,构建自己的repo仓库,最详细的步骤大全,以及踩坑大全
06、SpringBoot+微信支付 -->商户定时查订单状态、用户取消订单(关闭订单API)、查询订单API--到微信支付平台查询订单
【无标题】
【BrowserRouter与HashRouter的区别】
FM5889协议系列-识别加限流IC 多口USB超级充电器
【每日3题(3)】符串中不同整数的数目
糯米粉可以做什么好吃的 糯米粉做法大全
3.2 Keepalived安装部署
java-php-net-python-税务局征收管理系统计算机毕业设计程序
[附源码]Python计算机毕业设计Django农产品销售网站
- 原文地址:https://blog.csdn.net/m0_62327332/article/details/134357431
