-
Spring Cloud 之 GateWay简介及简单DEMO的搭建
(1)Filter(过滤器):
和Zuul的过滤器在概念上类似,可以使用它拦截和修改请求,并且对上游的响应,进行二次处理。过滤器为org.springframework.cloud.gateway.filter.GatewayFilter类的实例。
(2)Route(路由):
网关配置的基本组成模块,和Zuul的路由配置模块类似。一个Route模块由一个 ID,一个目标 URI,一组断言和一组过滤器定义。如果断言为真,则路由匹配,目标URI会被访问。(3)Predicate(断言):
这是一个 Java 8 的 Predicate,可以使用它来匹配来自 HTTP 请求的任何内容,例如 headers 或参数。断言的输入类型是一个 ServerWebExchange。
案例内容:
gateway基本目录:

bootstrap.ymlserver: port: 8081 spring: profiles: active: dev application: name: tt-sc-gateway cloud: nacos: username: nacos password: nacos config: server-addr: 192.168.xx.xxx:8848 file-extension: yml #开启nacos作为配置中心,默认值:true # enabled: true # # 配置文件读取的nacos命名空间ID,默认值:public # namespace: 7c6ef0e3-5384-499a-9357-25fa3b9c0a1e # # 配置文件在nacos命名空间中的分组,默认值:DEFAULT_GROUP # group: DEFAULT_GROUP # # 配置文件的文件前缀(配置文件名称),默认值:${spring.application.name}-${spring.profiles.active} # prefix: ${spring.application.name}-${spring.profiles.active} # # 配置文件的文件后缀(文件类型),默认值:properties # file-extension: yaml # # 配置内容的编码方式,默认值:UTF-8 # encode: UTF-8 # # 获取配置的超时时间,单位:ms,默认值:3000 # timeout: 3000 # # 开启监听和自动刷新,动态感知配置变化,默认值:true # refresh-enabled: true ############################################### # 引入扩展配置(同一分组或不同分组) # extension-configs: # 配置支持共享的 Data Id # - data-id: global.yaml # 配置 Data Id 所在分组,缺省默认 DEFAULT_GROUP # group: DEFAULT_GROUP # 配置Data Id 在配置变更时,是否动态刷新,缺省默认 false # refresh: true discovery: server-addr: 192.168.xx.xxx:8848- 1
- 2
- 3
- 4
- 5
- 6
- 7
- 8
- 9
- 10
- 11
- 12
- 13
- 14
- 15
- 16
- 17
- 18
- 19
- 20
- 21
- 22
- 23
- 24
- 25
- 26
- 27
- 28
- 29
- 30
- 31
- 32
- 33
- 34
- 35
- 36
- 37
- 38
- 39
- 40
- 41
- 42
application-dev.yml
spring: cloud: gateway: discovery: locator: # 是否与服务发现组件进行结合,通过 serviceId 转发到具体的服务实例。默认为false enabled: true lower-case-service-id: true #使用小写service-id routes: # 网关路由配置 - id: feignconsumer # 路由id,自定义,只要唯一即可 # 目标服务地址(uri:地址,请求转发后的地址) # uri: http://127.0.0.1:8081 路由的目标地址http 就是固定地址,uri的协议为lb,表示启用Gateway的负载均衡功能。 uri: lb://tt-sc-feign-consumer # 路由的目标地址lb就是负载均衡,后面跟服务名称 predicates: # 路由断言,也就是判断请求是否符合路由规则的条件;转发地址格式uri/archive - Path=/user/** # 这个是按照路径匹配,只要以 /user/ 开头就符合要求 fitters: - RewritePath=/user/?(?<segment>.*),/$\{segment} - id: feignprovide uri: lb://tt-sc-feign-provide predicates: - Path=/provide/** # 在这个时间之后的请求才会被转发 #- After=2031-04-13T15:14:47.433+08:00[Asia/Shanghai] globalcors: # 全局的跨域处理 add-to-simple-url-handLer-mapping: true # 解决options 请求被拦截问题 corsConfigurations: '[/**]': # 指定 拦截哪些请求 allowed0rigins: # 允许哪些网站的跨域请求 - "http:xxx.xxxx" - "http://www.you.com" allowedMethods: # 允许的跨域 ajax 的请求方式 - "GET" - "POST" - "DELETE" - "PUT" - "OPTIONS" allowedHeaders: "*" # 允许在请求中携带的头信息 allowCredentials: true # 是否允许携带cookie maxAge: 360000 # 这次跨域检测的有效- 1
- 2
- 3
- 4
- 5
- 6
- 7
- 8
- 9
- 10
- 11
- 12
- 13
- 14
- 15
- 16
- 17
- 18
- 19
- 20
- 21
- 22
- 23
- 24
- 25
- 26
- 27
- 28
- 29
- 30
- 31
- 32
- 33
- 34
- 35
- 36
- 37
- 38
- 39
- 40
- 41
GatewayApplication.java
package com.tt.gateway; import org.springframework.boot.SpringApplication; import org.springframework.boot.autoconfigure.SpringBootApplication; import org.springframework.cloud.client.SpringCloudApplication; import org.springframework.cloud.client.discovery.EnableDiscoveryClient; import org.springframework.context.annotation.ComponentScan; @SpringBootApplication public class GatewayApplication { public static void main(String[] args) { SpringApplication.run(GatewayApplication.class, args); } }- 1
- 2
- 3
- 4
- 5
- 6
- 7
- 8
- 9
- 10
- 11
- 12
- 13
- 14
- 15
pom.xml
<?xml version="1.0" encoding="UTF-8"?> <project xmlns="http://maven.apache.org/POM/4.0.0" xmlns:xsi="http://www.w3.org/2001/XMLSchema-instance" xsi:schemaLocation="http://maven.apache.org/POM/4.0.0 http://maven.apache.org/xsd/maven-4.0.0.xsd"> <parent> <artifactId>manage</artifactId> <groupId>com.example</groupId> <version>0.0.1-SNAPSHOT</version> </parent> <modelVersion>4.0.0</modelVersion> <artifactId>tt-sc-gateway</artifactId> <dependencies> <!-- nacos 客户端 作为 注册与发现--> <dependency> <groupId>com.alibaba.cloud</groupId> <artifactId>spring-cloud-starter-alibaba-nacos-discovery</artifactId> </dependency> <!-- nacos 配置中心 --> <dependency> <groupId>com.alibaba.cloud</groupId> <artifactId>spring-cloud-starter-alibaba-nacos-config</artifactId> </dependency> <dependency> <groupId>org.springframework.cloud</groupId> <artifactId>spring-cloud-starter-gateway</artifactId> <exclusions> <!-- 排除web依赖--> <exclusion> <groupId>org.springframework.boot</groupId> <artifactId>spring-boot-starter-web</artifactId> </exclusion> </exclusions> </dependency> </dependencies> </project>- 1
- 2
- 3
- 4
- 5
- 6
- 7
- 8
- 9
- 10
- 11
- 12
- 13
- 14
- 15
- 16
- 17
- 18
- 19
- 20
- 21
- 22
- 23
- 24
- 25
- 26
- 27
- 28
- 29
- 30
- 31
- 32
- 33
- 34
- 35
- 36
- 37
feignconsumer\feignprovide可参照Feign的demo
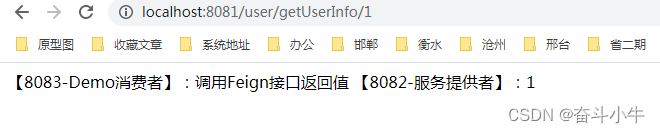
Spring Cloud 之 Feign 简介及简单DEMO的搭建测试结果:
-
相关阅读:
C# OpenCvSharp 矩阵计算-solveCubic、solvePoly、SVDecomp、max、min
NOIP2023模拟16联测37 D. 小猫吃火龙果
vue3+ts 实现移动端分页
ZROI Easy Sum(生成函数,分块,dp,组合,多项式)
达梦数据库-Win10安装
集成 mybatisplus-plus时,联合主键中带“id”字段报错问题
线程池——futuretask、CompletionService、CompletableFuture
如何评价微软发布的Phi-3,手机都可以运行的小模型
CANape使用记录(一):CANape新建工程及标定观测
Python武器库开发-flask篇之flask框架的安装(二十一)
- 原文地址:https://blog.csdn.net/FORLOVEHUAN/article/details/133927443
