-
Linux服务器实验总结以及回顾(全)
Linux
一、搭建简单的论坛
本实验取自:使用Linux搭建一个简单的论坛
本篇为回顾与总结,所以我们将不详细的讲其中的基础,详细内容请见上方原篇。1、准备工作
这里附上Discuz的源码包下载地址: https://www.dismall.com/thread-14660-1-1.html
 下载现在的版本最新的为3.5,这里我将也用3.5来完成搭建。
2、实现步骤
2.1 挂载光盘
获取
rpm软件包:rpmfind.net网站,官网,系统安装镜像文件(9个G左右的那个文件)
将iso文件浏览到虚拟机的光驱,然后挂载光盘读取光盘里面的文件[root@rhcsa ~]# mkdir /guangpan [root@rhcsa ~]# mount /dev/sr0 /guangpan/- 1
- 2
2.2 搭建yum安装环境
这里其实创建一个源便好,推荐使用网络源。
不过这里我两个都进行创建:
先配置仓库,仓库的文件名必须以.repo结尾,如果有多个以.repo结尾的文件,那么每一个文件都会被读取,rhel8和rhel9都需要至少两个仓库:AppStream和BaseOS2.2.1 网络源:
[root@rhcsa Packages]# cd /etc/yum.repos.d/ [root@rhcsa yum.repos.d]# touch net.repo [root@rhcsa yum.repos.d]# vim net.repo [root@rhcsa yum.repos.d]# cat net.repo [app] name=appstream baseurl=https://mirrors.aliyun.com/centos-stream/9-stream/AppStream/x86_64/os/ gpgcheck=0 [base] name=baseos baseurl=https://mirrors.aliyun.com/centos-stream/9-stream/BaseOS/x86_64/os/ gpgcheck=0- 1
- 2
- 3
- 4
- 5
- 6
- 7
- 8
- 9
- 10
- 11
- 12
- 13
2.2.2 本地源
先挂载光盘
[root@rhcsa yum.repos.d]# yum repolist- 1
配置本地源
[root@rhcsa yum.repos.d]# touch guangpan.repo [root@rhcsa yum.repos.d]# vim guangpan.repo [root@rhcsa yum.repos.d]# cat guangpan.repo [guangpan-app] name=gungpan-appstream baseurl=file:///guangpan/AppStream gpgcheck=1 gpgkey=file:///etc/pki/rpm-gpg/RPM-GPG-KEY-redhat-release [guangpan-base] name=guanpan-baseos baseurl=file:///guangpan/BaseOS gpgcheck=1 gpgkey=file:///etc/pki/rpm-gpg/RPM-GPG-KEY-redhat-release- 1
- 2
- 3
- 4
- 5
- 6
- 7
- 8
- 9
- 10
- 11
- 12
- 13
- 14
2.3 安装http服务
[root@rhcsa yum.repos.d]# yum install httpd -y- 1
2.4 启动http服务并配置开机自启动
[root@rhcsa yum.repos.d]# systemctl start httpd [root@rhcsa yum.repos.d]# systemctl enable --now httpd- 1
- 2
2.5 安装软件包:mariadb-server,php,php-mysql[php*]
[root@rhcsa yum.repos.d]# yum install mariadb-server -y [root@rhcsa yum.repos.d]# yum install php -y- 1
- 2
2.6 下载并解压论坛源码包Discuz
[root@rhcsa yum.repos.d]# cd /var/www/html/ [root@rhcsa html]# mv /root/Discuz_X3.5_SC_UTF8_20230210.zip . [root@rhcsa html]# unzip Discuz_X3.5_SC_UTF8_20230210.zip- 1
- 2
- 3
[root@rhcsa upload]# systemctl enable --now httpd- 1
[root@rhcsa upload]# systemctl enable --now mariadb- 1
[root@rhcsa upload]# systemctl disable --now firewalld.service- 1
2.7 设置selinux为允许
[root@rhcsa upload]# getenforce Enforcing [root@rhcsa upload]# setenforce 0 [root@rhcsa upload]# getenforce Permissive- 1
- 2
- 3
- 4
- 5
2.8 重新启动httpd服务
[root@rhcsa upload]# systemctl restart httpd- 1
2.9 安装Discuz论坛
1、输入自己的IP地址比如我虚拟机IP地址为
192.168.13.129
2、则我这里访问的链接就为www.192.168.13.129/upload/
3、如果是下面这个界面还请刷新下界面。

正确的界面应为:

接着这里点击接收,我们将看到如下这个界面:


当然这里我们一步一步来,首先第一步自然是解决它不能写等权限,这里我们仔细看可以发现,这些文件都是config/,data/以及uc*目录下的。
那么这里我就最简单的解决方式便是将他们直接赋予最高权限777
实现代码:[root@rhcsa upload]# chmod -R 777 config/ data/ uc*
-R便是进行递归修改文件的执行权限。
接着我们配置结束权限之后可以看到如下界面:

这里显示的是请检查mysqli是否正确加载,也就是有服务还没有进行配置。2.10 安装数据库
[root@rhcsa upload]# yum list | grep php | grep mysql php-mysqlnd.x86_64 8.0.27-1.el9 app- 1
- 2
[root@rhcsa upload]# yum list php-mysqlnd [root@rhcsa upload]# yum search php-mysqlnd [root@rhcsa upload]# yum install php-mysqlnd -y- 1
- 2
- 3
2.11 添加luntan数据库
#设置数据库管理员root的密码 #这里设置账户密码:u是代表用户user的意思,p也就是密码:passwd [root@rhcsa upload]# mysqladmin -uroot password '123456' #添加luntan数据库 [root@rhcsa upload]# mysql -uroot -p123456- 1
- 2
- 3
- 4
- 5
#查看当前存在的数据库名 MariaDB [(none)]> show databases; +--------------------+ | Database | +--------------------+ | information_schema | | mysql | | performance_schema | +--------------------+ 3 rows in set (0.001 sec) #创建一个数据库名为luntan的数据库 MariaDB [(none)]> create database luntan; Query OK, 1 row affected (0.001 sec) #查看当前存在的数据库名 MariaDB [(none)]> show databases; +--------------------+ | Database | +--------------------+ | information_schema | | luntan | | mysql | | performance_schema | +--------------------+ 4 rows in set (0.001 sec) MariaDB [(none)]> show databases; +--------------------+ | Database | +--------------------+ | information_schema | | luntan | | mysql | | performance_schema | +--------------------+ 4 rows in set (0.001 sec) #退出 MariaDB [(none)]> quit; Bye- 1
- 2
- 3
- 4
- 5
- 6
- 7
- 8
- 9
- 10
- 11
- 12
- 13
- 14
- 15
- 16
- 17
- 18
- 19
- 20
- 21
- 22
- 23
- 24
- 25
- 26
- 27
- 28
- 29
- 30
- 31
- 32
- 33
- 34
- 35
- 36
- 37
- 38
这里我们接着去浏览器进行刚才的配置:
下面这张图为数据库刚安装成功后截的

这一步之后直接默认,然后到第三步也就是数据库的配置
这里我们将数据库的名称改为我们刚才进行创建的数据库的名称:luntan
然后我们再在下面输入刚才所设置的管理员用户名以及密码就可完成数据库的配置以及安装。


这个时候我们就可以访问虚拟机然后登陆论坛了

这个时候我可以进行添加一块网卡,由于这里我采用的是NAT网络连接模式:

这里我们可以看到右下角有许多小标,第一个硬盘,第二个DVD,第三个网络适配器
我们只需要鼠标右键点击那些小标,弹出设置点开:

这里我们选择桥接方式连接网络,如下图:

2.12 实现局域网中都可以访问
[root@rhcsa html]# nmcli device connect ens224- 1
#再次查看网卡对应的会话名 [root@rhcsa html]# nmcli connection- 1
- 2
#再次查看网卡名以及其IP地址 [root@rhcsa html]# ip a- 1
- 2
访问新增IP地址即可。
二、配置NTP时间服务器
本实验取自:时间服务器
要求: 配置ntp时间服务器,确保客户端主机能和服务主机同步时间
准备工作: 两台虚拟机,一台做客户端,一台做服务器,这里:
服务器IP地址: 192.168.13.134
客户端IP地址: 192.168.13.135
1、服务器思路以及配置- 1、chrony安装
[root ~]# yum install chrony -y 上次元数据过期检查:2:56:29 前,执行于 2023年08月20日 星期日 10时27分38秒。 软件包 chrony-4.3-1.el9.x86_64 已安装。 依赖关系解决。 无需任何处理。 完毕! [root ~]#- 1
- 2
- 3
- 4
- 5
- 6
- 7
- 2、修改配置文件,这里改用阿里的时间授权,并将客户端及192.168.13.135列入白名单
[root ~]# vim /etc/chrony.conf- 1
配置之后:


- 3、重启服务
[root ~]# systemctl restart chronyd- 1
- 4、进行同步测试

这里可以看到已经同步完毕。- 5、查看同步状态

2、客户端思路以及配置- 1、同样的。chrony安装

- 2、修改配置文件
[root ~]# vim /etc/chrony.conf- 1
修改之后:

- 3、重启服务
[root ~]# systemctl restart chronyd- 1
- 4、进行同步测试
[root ~]# chronyc sources -v .-- Source mode '^' = server, '=' = peer, '#' = local clock. / .- Source state '*' = current best, '+' = combined, '-' = not combin | / 'x' = may be in error, '~' = too variable, '?' = unusab || .- xxxx [ yyyy ] +/- || Reachability register (octal) -. | xxxx = adjusted o || Log2(Polling interval) --. | | yyyy = measured o || \ | | zzzz = estimated || | | \ MS Name/IP address Stratum Poll Reach LastRx Last sample ======================================================================= ^* 192.168.13.134 3 6 17 14 -41us[ -44us] +- 1
- 2
- 3
- 4
- 5
- 6
- 7
- 8
- 9
- 10
- 11
- 12
- 13

这里查看服务器的IP以及状态,可以看到同步完毕。- 5、查看同步状态

[root ~]# timedatectl status Local time: 日 2023-08-20 10:33:03 CST Universal time: 日 2023-08-20 02:33:03 UTC RTC time: 日 2023-08-20 02:33:03 Time zone: Asia/Shanghai (CST, +0800) System clock synchronized: yes NTP service: active- 1
- 2
- 3
- 4
- 5
- 6
- 7
三、远程连接服务器
本实验取自:远程连接服务器
1、配置SSH监听端口号
- 第一步:server端操作,编辑配置文件
[root@server ~]# vim /etc/ssh/sshd_config Port 2222 # 修改第21行参数,去掉#,改为2222- 1
- 2
- 第二步:server端操作,重启服务
[root@server ~]# systemctl restart sshd [root@server ~]# netstat -ntlp # 查看端口号是否改变- 1
- 2
- 第三步:node1端操作,ssh登录服务器
[root@node1 ~]# ssh root@192.168.48.130 # 默认登录会被拒绝 ssh: connect to host 192.168.48.130 port 22: Connection refused [root@node1 ~]# ssh -p 2222 root@192.168.48.130 # 指明以2222端口号登录 root@192.168.48.130's password: [root@server ~]# 注销 Connection to 192.168.48.130 closed. [root@node1 ~]#- 1
- 2
- 3
- 4
- 5
- 6
- 7
- 8
- 9
- 注意:修改ssh端口号时必须关闭selinux
# 定位server端,修改会原来的22端口 [root@server ~]# vim /etc/ssh/sshd_config Port 22 # 修改第21行参数,去掉#,改为22 [root@server ~]# systemctl restart sshd [root@server ~]# netstat -ntlp # 开启selinux [root@server ~]# vim /etc/selinux/config SELINUX=enforcing # 改为enforcing即开启 [root@server ~]# reboot # 重启生效,等待 [root@server ~]# vim /etc/ssh/sshd_config # 重新修改端口号为3333 Port 3333 # 重启服务后会报错,selinux会拦截端口号修改 [root@server ~]# systemctl restart sshd Job for sshd.service failed because the control process exited with error code. See "systemctl status sshd.service" and "journalctl -xeu sshd.service" for details. [root@server ~]# setenforce 0 # 临时关闭selinux [root@server ~]# getenforce # 查看selinux状态 Permissive # 临时关闭,不拦截但会记录行为 [root@server ~]# systemctl restart sshd # 临时关闭selinux后重启服务成功 # 注意:修改端口这类的系统参数,需要关闭selinux或配置selinux让其放行- 1
- 2
- 3
- 4
- 5
- 6
- 7
- 8
- 9
- 10
- 11
- 12
- 13
- 14
- 15
- 16
- 17
- 18
- 19
- 20
- 21
- 22
- 23
- 24
- 25
2、拒绝root账户被远程登陆
实验要求:拒绝root账户远程登录
- 方法:使用配置文件中的Permitrootlogin参数进行实现
- 参数值:
参数类别 是否允许ssh登录 登录方式 交互shell yes 允许 无限制 无限制 no 不允许 无 无 prohibit-password 允许 仅允许使用密码 无限制 forced-commands only 允许 仅允许密钥 授权的口令 - 注意:RHEL9系统在安装系统时设置了“允许使用root使用密码登录ssh”时,/etc/ssh/sshd_confg.d目录下会多一个文件01-permitrootlogin.conf,该文件会单独记录Permitrootlogin yes 参数,所以在设置不允许root 账户登录ssh时应在该文件中设置


- 第一步:定位server,编辑配置文件
[root@server ~]# vim /etc/ssh/sshd_config.d/01-permitrootlogin.conf PermitRootLogin no # yes修改为no,拒绝以root身份登录服务器- 1
- 2

[root@server ~]# systemctl restart sshd- 1
- 第二步:定位node1,测试远程登录
[root@node1 ~]# ssh root@192.168.48.130 # 以root身份登录被拒绝 root@192.168.48.130's password: Permission denied, please try again.- 1
- 2
- 3

3、免密连接登录
3.1 基础知识
- ssh-keygen:用于生成、管理密钥
- 格式
[root@node1 ~]# ssh-keygen -t rsa- 1
- 分析
- -t:指定加密类型
- rsa:rsa公钥加密算法,可以产生公钥和私钥
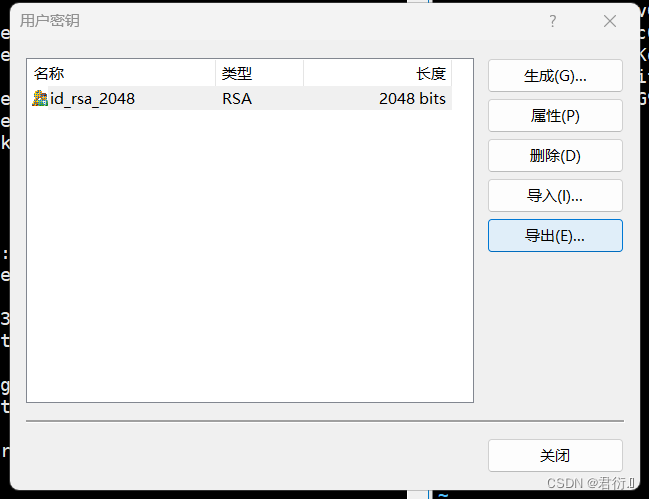
- 注意:执行后对应账户目录下的隐藏目录.ssh中有2个文件:
- /root/.ssh/id_rsa:本机私钥文件
- /root/.ssh/id_rsa.pub:本机公钥文件
3.2 虚拟机之间实现免密登录
- 第一步:定位node1,制作公私对
[root@node1 ~]# ssh-keygen -t rsa- 1

- 第二步:定位node1,将公钥上传
[root@node1 ~]# ssh-copy-id root@192.168.48.130 # 将node1公钥上传给130主机- 1

- 第三步:客户端测试
[root@node1 ~]# ssh root@192.168.48.130- 1

- 第四步:由于目标是双向免密,只需要在server’端制作公私钥对,将其上传给node1端即可
所以这里我就直接放截图了,在 SERVER上一配置便好。


当然,我们也可以在文件中看到互相发的公钥:


4、xshell实现免密登陆
之前xshell使用的是密码登录,现在通过密钥的配置,实现无密码登录
# 注意:以下步骤检查后若有authorized_keys文件则可忽略 # 先在服务器端检查/root/.ssh/authorized_keys是否存在,它时存储公钥的文件,若不存在需要新建 # 服务器端操作 [root@server ~]# cd /root [root@server ~]# ls -a [root@server ~]# mkdir .ssh [root@server ~]# cd .ssh [root@server .ssh]# vim authorized_keys # 有时需要注意.ssh目录的权限- 1
- 2
- 3
- 4
- 5
- 6
- 7
- 8
- 9
- 10
- 11
1、打开xshell开始操作,新建密钥:

2、下一步:

3、设置密钥文件名加密密码(可不设)

4、产生公钥,并另存为文件

将windows中保存的公钥文件以记事本的方式打开,复制内容,拷贝到Linux服务器端的/root/.ssh/authorized_keys文件中后保存退出,并重启服务:[root@server .ssh]# systemctl restart sshd- 1
5、xshell中新建会话:

6、点击用户身份验证,选择Public Key 方式验证登录,点击连接


7、设置以什么身份登录:
8、输入密钥密码

9、测试

免密配置成功。5、SSH免密+公钥验证连接
练习要求: 配置ssh免密登陆,能够实现客户端主机通过服务器端的redhat账户进行基于公钥验证方式的远程连接
实现步骤:- 1、添加redhat用户
[root ~]# useradd redhat [root ~]# passwd redhat 更改用户 redhat 的密码 。 新的密码: 无效的密码: 密码少于 8 个字符 重新输入新的密码: passwd:所有的身份验证令牌已经成功更新。- 1
- 2
- 3
- 4
- 5
- 6
- 7

- 2、生成密钥对
[root ~]# ssh-keygen -t rsa Generating public/private rsa key pair. Enter file in which to save the key (/root/.ssh/id_rsa): /root/.ssh/id_rsa already exists. Overwrite (y/n)? n [root ~]#- 1
- 2
- 3
- 4
- 5
- 6
- 3、上传
[root ~]# ssh-copy-id redhat.168.13.134 /usr/bin/ssh-copy-id: INFO: Source of key(s) to be installed: "/root/.ssh/id_rsa.pub" /usr/bin/ssh-copy-id: INFO: attempting to log in with the new key(s), to filter out any that are already installed /usr/bin/ssh-copy-id: INFO: 1 key(s) remain to be installed -- if you are prompted now it is to install the new keys redhat.168.13.134's password: Number of key(s) added: 1 Now try logging into the machine, with: "ssh 'redhat@192.168.13.134'" and check to make sure that only the key(s) you wanted were added. [root ~]#- 1
- 2
- 3
- 4
- 5
- 6
- 7
- 8
- 9
- 10
- 11
- 12
- 4、测试
[root ~]# ssh redhat.168.13.134 Register this system with Red Hat Insights: insights-client --register Create an account or view all your systems at https://red.ht/insights-dashboard [redhat ~]$ exit 注销 Connection to 192.168.13.134 closed. [root ~]#- 1
- 2
- 3
- 4
- 5
- 6
- 7

四、Web服务器
本实验取自:https://blog.csdn.net/weixin_63172698/article/details/132426298?spm=1001.2014.3001.5501
1、快速搭建网站
[root@server ~]# yum install httpd -y [root@server web1]# cd ~ [root@server ~]# echo "welcome to www.openlab.com" > /var/www/html/index.html [root@server ~]# ls /var/www/html/ index.html [root@server ~]# systemctl restart httpd- 1
- 2
- 3
- 4
- 5
- 6

查看SELinux以及防火墙状态,若开启,则临时关闭SELinux以及防火墙。

查看etc下的passwd文件即可查到apache。

这里我们可以进入主配置文件进行查看启动页面在哪个文件即可以看到:

所以,我们输入命令到此文件中,输出一个字符串:

- 查看:linux的火狐浏览器中输入127.0.0.1

使用主机去访问虚拟机的IP地址,这里我的IP地址为192.168.13.134

- 注意:
- 也可以在Windows端打开浏览器,输入linux服务器的IP地址
- 也可以通过curl命令访问网页,来验证网站是否搭建成功
[root@server ~]# curl 192.168.48.130- 1
2、更改网页启动目录
- 第一步:准备工作
[root@server ~]# setenforce 0 [root@server ~]# systemctl stop firewalld [root@server ~]# yum install httpd -y [root@server ~]# systemctl start httpd [root@server ~]# systemctl enable httpd- 1
- 2
- 3
- 4
- 5
- 第二步:新建网页存储目录/web1,使用xftp将网页数据上传到/web1

[root@server ~]# mkdir /web1 [root@server ~]# cd /web1 [root@server web1]# ls css dingban.mp4 img index.html js temp- 1
- 2
- 3
- 4

- 第三步:修改主配置文件
DocumentRoot "/web1" # 第124行修改为真实的网页存储目录 <Directory "/web1"> # 第129行修改网页存储目录的访问权限 AllowOverride None # Allow open access: Require all granted </Directory>- 1
- 2
- 3
- 4
- 5
- 6
- 7

- 第三步:重启服务器并测试
[root@server ~]# systemctl restart httpd # windows端打开浏览器输入服务器地址测试- 1
- 2
3、内网穿透
实验材料: 花生壳管理平台,Linux虚拟机以及xshell(要不要都行,远程连接工具),再就测试需要使用的浏览器(尽量不用IE浏览器),这里我使用的是谷歌浏览器
实验要求: 搭建网站使用花生壳进行内网穿透实现公网访问3.1 准备工作
[root@server ~]# setenforce 0 # 暂时关闭SELinux [root@server ~]# systemctl stop firewalld # 关闭防火墙 [root@server ~]# yum install httpd -y # 安装apache [root@server ~]# systemctl start httpd # 启动 [root@server ~]# systemctl enable httpd- 1
- 2
- 3
- 4
- 5
3.2 搭建网站
[root@server ~]# vim /etc/httpd/conf/httpd.conf # 修改124及129行数据 DocumentRoot "/zy" <Directory "/zy"> [root@server ~]# systemctl restart httpd # 重启服务- 1
- 2
- 3
- 4
3.3 测试:浏览器中输入ip进行测试
这里可以在主机上输入虚拟机IP进行测试,也可以在虚拟机使用浏览器进行访问自身环回:即127.0.0.1,即可访问成功。
3.4 使用花生壳进行内网穿透
3.4.1 注册并登陆


3.4.2 点击添加映射

这里https需要进行认证,点进去支付:

# 应用名称:自定 # 映射类型:https # 外网域名:系统指定,不能更改 # 外网端口:443,默认 # 内网主机:本机linux服务的IP地址 # 内网端口:本地linux端的http端口,默认80- 1
- 2
- 3
- 4
- 5
- 6

内主机这里查看自身虚拟机IP地址:


3.4.3 Linux安装花生壳客户端


点击Linux的立即下载

# 客户端下载: [root@server ~]# wget "https://dl.oray.com/hsk/linux/phddns_5.2.0_amd64.rpm" -O phddns_5.2.0_amd64.rpm # 客户端安装 [root@server ~]# rpm -ivh phddns_5.2.0_amd64.rpm # 启动 [root@server ~]# phddns start # 复制下图“右下角的网址” # 重新打开浏览器,输入http://b.oray.com,完成账户登录,激活- 1
- 2
- 3
- 4
- 5
- 6
- 7
- 8


# 登录激活- 1


右边即显示了登陆状态。# 点击绿色公网域名访问网站- 1

访问此域名即可。4、搭建具有身份验证功能网站
4.1 准备工作
[root@server ~]# setenforce 0 [root@server ~]# systemctl stop firewalld [root@server ~]# yum install httpd -y [root@server ~]# systemctl start httpd [root@server ~]# systemctl enable httpd- 1
- 2
- 3
- 4
- 5

4.2 编辑httpd目录中的用户主页配置文件(不是httpd.conf文件)
[root@server ~]# vim /etc/httpd/conf.d/userdir.conf #UserDir disabled # 插入#,注释掉,表示开启用户主页功能 UserDir public_html # 去掉#,启动网站存储数据的默认目录,路径:/home/账户名/public_html- 1
- 2
- 3
原文件:

更改后文件:

4.3 新建账户,设置权限
[root@server ~]# useradd andy [root@server ~]# passwd andy 更改用户 andy 的密码 。 新的密码: # 密码:123456 无效的密码: 密码少于 8 个字符 重新输入新的密码: passwd:所有的身份验证令牌已经成功更新。 [root@server ~]# useradd jenny [root@server ~]# passwd jenny 更改用户 jenny 的密码 。 新的密码: # 密码:654321 无效的密码: 密码少于 8 个字符 重新输入新的密码: passwd:所有的身份验证令牌已经成功更新。- 1
- 2
- 3
- 4
- 5
- 6
- 7
- 8
- 9
- 10
- 11
- 12
- 13
- 14

# 切换到andy账户,设置存储网页目录及权限 [root@server ~]# su andy [andy@server root]$ cd /home/andy [andy@server ~]$ mkdir public_html [andy@server ~]$ cd public_html/ [andy@server public_html]$ # 使用xftp将sxhkt网页数据上传到/home/andy/public_html目录中 [andy@server public_html]$ cd ~ [andy@server ~]$ chmod -Rf 755 /home/andy [andy@server ~]$ ll 总用量 0 drwxr-xr-x 7 andy andy 100 8月 22 11:25 public_html- 1
- 2
- 3
- 4
- 5
- 6
- 7
- 8
- 9
- 10
- 11
- 12

# 切换到jenny账户,设置存储网页目录及权限 [andy@server ~]$ su jenny 密码: [jenny@server andy]$ cd ~ [jenny@server ~]$ pwd /home/jenny [jenny@server ~]$ mkdir public_html [jenny@server ~]$ cd public_html/ [jenny@server public_html]$ cd ~ [jenny@server ~]$ chmod -Rf 755 /home/jenny [jenny@server ~]$ ll 总用量 0 drwxr-xr-x 6 jenny jenny 70 8月 22 11:29 public_html- 1
- 2
- 3
- 4
- 5
- 6
- 7
- 8
- 9
- 10
- 11
- 12
- 13

这时候并通过xftp将文件传到两个用户各自的页面文件中:


# 切换到root账户 [jenny@server ~]$ su root 密码: [root@server jenny]# cd ~ [root@server ~]# pwd /root- 1
- 2
- 3
- 4
- 5
- 6
4.4 重启服务并测试
[root@server ~]# systemctl restart httpd # 在Windows端浏览器地址栏中,输入: # 192.168.48.130/~andy # 192.168.48.130/~jenny- 1
- 2
- 3
- 4

4.5 增加密码访问控制
[root@server ~]# htpasswd -c /etc/httpd/passwd andy New password: # 密码:123456 Re-type new password: Adding password for user andy # 分析: # htpasswd:生成密码数据的命令 # -c:表示第一次生成,会创建存储密码加密密文的存储文件,第二次创建时不能增加-c参数,否则存储密码密文文件内容会被覆盖 # andy : 需要验证密码登录的账户 [root@server ~]# htpasswd /etc/httpd/passwd jenny New password: #v密码:654321 Re-type new password: Adding password for user andy- 1
- 2
- 3
- 4
- 5
- 6
- 7
- 8
- 9
- 10
- 11
- 12

这里密码文件位置是我们自身设定的:我们也可进行查看,使用的是密文:

4.6 编辑个人主页配置文件,设置访问控制策略
[root@server ~]# vim /etc/httpd/conf.d/userdir.conf # 定位最后一行输入以下内容: <directory "/home/andy/public_html"> # 设置andy账户目录的区域配置 authuserfile "/etc/httpd/passwd" # 设置验证密码的存储文件位置 authname "My privately" # 登录时的提示信息,可能不显示 authtype basic # 加密模式 require user andy # 需要验证密码的账户名 </directory> <directory "/home/jenny/public_html"> authuserfile "/etc/httpd/passwd" authname "My privately" authtype basic require user jenny </directory>- 1
- 2
- 3
- 4
- 5
- 6
- 7
- 8
- 9
- 10
- 11
- 12
- 13
- 14
- 15

4.7 启服务并测试
[root@server ~]# systemctl restart httpd # 在Windows端浏览器地址栏中,输入以下url时会验证密码 # 192.168.48.130/~andy # 192.168.48.130/~jenny- 1
- 2
- 3
- 4
- 5
这里访问的域名为虚拟机IP地址加~用户名。

当然,我们也可以不加用户名,这里在更改主配置文件时,将更改为以下内容即可:

这里创建的用户名为t1以及t2,剩余步骤同上面一致即可:

5、搭建2个基于域名的虚拟机主机网站
5.1 准备工作,即安装并启动
[root ~]# yum install httpd- 1

[root ~]# systemctl start httpd- 1
同时检查SELinux以及防火墙状态,开启的话将其关闭。
5.2 创建两个目录进行存放启动界面
[root ~]# mkdir -p /www/zy [root ~]# mkdir -p /www/sxhkt- 1
- 2
5.3 配置Linux的DNS hosts文件以及HTTP主配置文件
[root ~]# vim /etc/hosts [root ~]# vim /etc/httpd/conf/httpd.conf- 1
- 2
hosts文件:
原文件:

更改后:

主配置文件:
更改后:

5.4 重启服务并测试
[root ~]# systemctl restart httpd- 1
这里由于是基于Linux的DNS hosts文件进行更改的,所以,只能在Linux下进行访问其域名,这里即可访问成功。
6、搭建2个基于IP地址的虚拟机主机网站
6.1 准备工作,安装并启动
[root@server ~]# setenforce 0 [root@server ~]# systemctl stop firewalld [root@server ~]# yum install httpd -y [root@server ~]# systemctl start httpd [root@server ~]# systemctl enable httpd- 1
- 2
- 3
- 4
- 5

6.2 查看自身IP地址并添加IP地址

[root ~]# nmcli c mod ens160 +ipv4.addresses 192.168.13.137/24 [root ~]# nmcli c mod ens160 +ipv4.addresses 192.168.13.138/24 [root ~]# nmcli c up ens160 连接已成功激活(D-Bus 活动路径:/org/freedesktop/NetworkManager/ActiveConnection/3) [root ~]#- 1
- 2
- 3
- 4
- 5

这里即可看到新增了137以及138两个IP地址。6.3 创建两个IP的启动主页面,写入并查看
[root ~]# mkdir -p /www/ip137 [root ~]# mkdir -p /www/ip138 [root ~]# echo "ip137" > /www/ip137/index.html [root ~]# echo "ip138" > /www/ip138/index.html [root ~]# ls /www/ip137 index.html [root ~]# ls /www/ip138 index.html- 1
- 2
- 3
- 4
- 5
- 6
- 7
- 8

6.4 更改主配置文件
[root ~]# vim /etc/httpd/conf/httpd.conf- 1
原文件:

更改后:
6.5 重启服务并测试
[root@server ~]# systemctl restart httpd [root@server ~]curl 192.168.13.137 [root@server ~]curl 192.168.13.138- 1
- 2
- 3

即可访问成功。7、搭建2个基于端口号的虚拟机主机网站
7.1 准备工作,安装并启动
[root@server ~]# setenforce 0 [root@server ~]# systemctl stop firewalld [root@server ~]# yum install httpd -y [root@server ~]# systemctl start httpd [root@server ~]# systemctl enable httpd- 1
- 2
- 3
- 4
- 5

7.2 创建两个端口并将文件传入
[root ~]# mkdir -p /www/port{9527,9528} [root ~]# ls /www port9527 port9528 [root ~]# cd /www [root www]# ll 总用量 0 drwxr-xr-x 6 root root 70 8月 22 14:43 port9527 drwxr-xr-x 7 root root 100 8月 22 14:43 port9528 [root www]# ls /www/port9527 compat css img index.html js [root www]# ls /www/port9528 css dingban.mp4 img index.html js temp- 1
- 2
- 3
- 4
- 5
- 6
- 7
- 8
- 9
- 10
- 11
- 12
这里我们也可以查看使用端口的监听状况:


7.3 更改主配置文件
[root ~]# vim /etc/httpd/conf/httpd.conf- 1
原文件:

更改后文件:

7.4 重启服务,在浏览器中访问即可
[root@server ~]# systemctl restart httpd- 1
这里访问域名为自身IP地址加上端口号
比如,我的虚拟机IP地址为192.168.13.134
即访问:192.168.13.134:9527 192.168.13.134:9528- 1
- 2
即可访问成功。
8、给openlab搭建web网站(综合)
8.1 网站需求:
- 1、基于域名www.openlab.com可以访问网站内容为welcome to openlab!!!
- 2、给该公司创建三个子界面分别显示学生信息,教学资料和缴费网站,基于,www.openlab.com/data网站访问教学资料www.openlab.com/money网站访问缴费网站。
8.2 要求
- (1)学生信息网站只有t1和t2两人可以访问,其他
用户不能访问。 - (2)访问缴费网站实现数据加密基于https访问。
8.3 准备工作
# 安装所需软件 [root ~]# yum install httpd mod_ssl-y # 启动并自启动 [root ~]# systemctl start httpd [root ~]# systemctl enable httpd # hosts映射 [root ~]# vim /etc/hosts 192.168.13.134 www.openlab.com- 1
- 2
- 3
- 4
- 5
- 6
- 7
8.4 创建www.openlab.com网站
# 创建网页目录及网页 [root ~]# mkdir -p /www/openlab [root ~]# echo 'welcome to openlab!!!' > /www/openlab/index.html # 修改主配置文件 [root ~]# vim /etc/httpd/conf/httpd.conf- 1
- 2
- 3
- 4
- 5

<VirtualHost 192.168.13.134> DocumentRoot /www/openlab ServerName "www.openlab.com" <Directory /www/openlab> AllowOverride None require all granted </Directory> </VirtualHost>- 1
- 2
- 3
- 4
- 5
- 6
- 7
- 8
- 重启服务
[root ~]# systemctl restart httpd- 1

8.5 创建教学资料子网站data
# 创建网页界面 [root ~]# mkdir /www/openlab/data [root ~]# echo "data" > /www/openlab/data/index.html # 更改主配置文件 [root ~]# vim /etc/httpd/conf/httpd.conf <VirtualHost 192.168.13.134> DocumentRoot /www/openlab/data alias /data /www/openlab/data ServerName "www.openlab.com" <Directory /www/openlab/data> AllowOverride none require all granted </Directory> </VirtualHost> # 重启服务 [root ~]# systemctl restart httpd- 1
- 2
- 3
- 4
- 5
- 6
- 7
- 8
- 9
- 10
- 11
- 12
- 13
- 14
- 15
- 16

主配置文件更改后:

- 测试

8.6 创建学生信息子网站student
[root ~]# mkdir /www/openlab/student [root ~]# echo 'student' > /www/openlab/student/index.html [root ~]# useradd t1 [root ~]# passwa t1 [root ~]# useradd t2 [root ~]# passwd t2 [root ~]# htpasswd -c /etc/httpd/passwd t1 [root ~]# htpasswd /etc/httpd/passwd t2 # 更改主配置文件 [root ~]# vim /etc/httpd/conf/httpd.conf # 继续编写 <Directory /www/openlab/student> authuserfile /etc/httpd/passwd authname "student" authtype basic require user t1 t2 </Directory> # 重启服务 [root ~]# systemctl restart httpd- 1
- 2
- 3
- 4
- 5
- 6
- 7
- 8
- 9
- 10
- 11
- 12
- 13
- 14
- 15
- 16
- 17
- 18
- 19


- 测试


8.7 创建缴费子网站money
# 创建网站网页 [root ~]# mkdir /www/openlab/money [root ~]# echo 'money' > /www/openlab/money/index.html [root ~]# openssl genrsa -aes128 2048 > /etc/pki/tls/private/money.key Enter PEM pass phrase: Verifying - Enter PEM pass phrase: [root ~]# openssl req -utf8 -new -key /etc/pki/tls/private/money.key -x509 -days 365 -out /etc/pki/tls/certs/money.crt Enter pass phrase for /etc/pki/tls/private/money.key: You are about to be asked to enter information that will be incorporated into your certificate request. What you are about to enter is what is called a Distinguished Name or a DN. There are quite a few fields but you can leave some blank For some fields there will be a default value, If you enter '.', the field will be left blank. ----- Country Name (2 letter code) [XX]:86 State or Province Name (full name) []:shanxi Locality Name (eg, city) [Default City]:weinan Organization Name (eg, company) [Default Company Ltd]:openlab Organizational Unit Name (eg, section) []:RHCE Common Name (eg, your name or your server's hostname) []:server Email Address []:zy.com # 更改主配置文件 [root ~]# vim /etc/httpd/conf/httpd.conf # 重启服务 [root ~]# systemctl restart httpd- 1
- 2
- 3
- 4
- 5
- 6
- 7
- 8
- 9
- 10
- 11
- 12
- 13
- 14
- 15
- 16
- 17
- 18
- 19
- 20
- 21
- 22
- 23
- 24
- 25
- 26

更改后的主配置文件:

- 测试


五、基于https协议的静态网站
本实验取自:基于https协议的静态网站
1、https+ssl的加密认证web服务器
- 第一步:准备工作
# 恢复快照 [root@server ~]# setenforce 0 [root@server ~]# systemctl stop firewalld [root@server ~]# systemctl disable firewalld [root@server ~]# yum install httpd mod_ssl -y [root@server ~]# systemctl start httpd # 启动httpd [root@server ~]# systemctl enable httpd # 设置开机启动- 1
- 2
- 3
- 4
- 5
- 6
- 7

- 第二步:新建存储网站数据文件的目录
[root@server ~]# mkdir -p /www/zy # 私用xftp将windows的zy网站数据文件上传到/www/zy目录中- 1
- 2
- 第三步:在/etc/pki/tls/private目录中生成私钥文件
[root@server ~]# cd /etc/pki/tls/private # 进入私钥文件存储目录 [root@server private]# openssl genrsa -aes128 2048 > zy.key # 建立私钥文件 Enter PEM pass phrase: # 密码123456 Verifying - Enter PEM pass phrase: # 再输一遍密码123456- 1
- 2
- 3
- 4

- 第四步:在/etc/pki/tls/certs目录中生成证书
[root@server private]# cd /etc/pki/tls/certs [root@server certs]# openssl req -utf8 -new -key /etc/pki/tls/private/zy.key -x509 -days 365 -out zy.crt Enter pass phrase for /etc/pki/tls/private/zy.key: # 输入私钥加密密码123456 You are about to be asked to enter information that will be incorporated into your certificate request. What you are about to enter is what is called a Distinguished Name or a DN. There are quite a few fields but you can leave some blank For some fields there will be a default value, If you enter '.', the field will be left blank. ----- # 注意:下列证书信息项目,在面试时常问 Country Name (2 letter code) [XX]:86 # 国家代码 State or Province Name (full name) []:shanxi # 省份 Locality Name (eg, city) [Default City]:xi'an # 城市 Organization Name (eg, company) [Default Company Ltd]:openlab # 公司 Organizational Unit Name (eg, section) []:RHCE # 部门 Common Name (eg, your name or your server's hostname) []:server # 主机名 Email Address []:andy@qq.com # 邮箱 # 输入内容时,若输入错误,使用ctrl+退格 进行删除- 1
- 2
- 3
- 4
- 5
- 6
- 7
- 8
- 9
- 10
- 11
- 12
- 13
- 14
- 15
- 16
- 17
- 18
- 19
- 20

- 第五步:修改配置文件
[root@server certs]# cd ~ [root@server ~]# vim /etc/httpd/conf.d/ssl.conf # 定位第一行,输入以内内容 <virtualhost 192.168.13.134:443> sslengine on SSLCertificateFile /etc/pki/tls/certs/zy.crt SSLCertificateKeyFile /etc/pki/tls/private/zy.key servername 192.168.13.134 documentroot /www/zy </virtualhost> <directory /www/zy> allowoverride none require all granted </directory>- 1
- 2
- 3
- 4
- 5
- 6
- 7
- 8
- 9
- 10
- 11
- 12
- 13
- 14
- 15

- 第六步:重启服务
[root@server certs]# cd ~ [root@server ~]# vim /etc/httpd/conf.d/ssl.conf [root@server ~]# systemctl restart httpd 🔐 Enter TLS private key passphrase for 192.168.13.134:443 (RSA) : ****** # 需要输入私钥的密码123456- 1
- 2
- 3
- 4
- 第七步:测试
# 在windows端打开浏览器,输入https://192.168.13.134,点击高级->接受风险并继续- 1
2、组建含多子目录的网站
- 组建多个子目录网站www.openlab.com,该网站有2个子目录www.openlab.com/file和www.openlab.com/ftp,要求:
- file数据使用http读取
- ftp数据使用https读取
- 第一步:准备工作
# 恢复快照 [root@server ~]# setenforce 0 [root@server ~]# systemctl stop firewalld [root@server ~]# systemctl disable firewalld [root@server ~]# yum install httpd mod_ssl -y [root@server ~]# systemctl start httpd # 启动httpd [root@server ~]# systemctl enable httpd # 设置开机启动- 1
- 2
- 3
- 4
- 5
- 6
- 7
- 第二步:新建网页目录并建立网页
[root@server ~]# mkdir -p /www/file [root@server ~]# mkdir -p /www/ftp [root@server ~]# echo "file" > /www/file/index.html # 写入网站数据 [root@server ~]# echo "ftp" > /www/ftp/index.html- 1
- 2
- 3
- 4
- 第三步:建立本地hosts域名映射
[root@server ~]# vim /etc/hosts # 添加如下内容 192.168.48.130 www.openlab.com- 1
- 2
- 第四步:建立file网站
[root@server ~]# vim /etc/httpd/conf/httpd.conf <virtualhost 192.168.48.130> documentroot /www/file alias /file /www/file servername 'file' </virtualhost> <directory /www/file> allowoverride none require all granted </directory>- 1
- 2
- 3
- 4
- 5
- 6
- 7
- 8
- 9
- 10
- 11
- 第五步:建立https的ftp网站
[root@server ~]# openssl genrsa -aes128 2048 > /etc/pki/tls/private/ftp.key # 设置私钥文件 Enter PEM pass phrase: Verifying - Enter PEM pass phrase: [root@server ~]# openssl req -utf8 -new -key /etc/pki/tls/private/ftp.key -x509 -days 365 -out /etc/pki/tls/certs/ftp.crt # 设置证书 Enter pass phrase for /etc/pki/tls/private/ftp.key: # 输入私钥密码123456 You are about to be asked to enter information that will be incorporated into your certificate request. What you are about to enter is what is called a Distinguished Name or a DN. There are quite a few fields but you can leave some blank For some fields there will be a default value, If you enter '.', the field will be left blank. ----- Country Name (2 letter code) [XX]:86 State or Province Name (full name) []:shanxi Locality Name (eg, city) [Default City]:xi'an Organization Name (eg, company) [Default Company Ltd]:openlab Organizational Unit Name (eg, section) []:RHCE Common Name (eg, your name or your server's hostname) []:server Email Address []:andy@qq.com [root@server ~]# vim /etc/httpd/conf.d/ssl.conf # 定位第一行,输入以下内容: <virtualhost 192.168.48.130:443> sslengine on SSLCertificateFile /etc/pki/tls/certs/ftp.crt SSLCertificateKeyFile /etc/pki/tls/private/ftp.key servername 'ftp' documentroot /www/ftp alias /ftp /www/ftp # 设置别名访问二级目录 </virtualhost> <directory /www/ftp> allowoverride none require all granted </directory>- 1
- 2
- 3
- 4
- 5
- 6
- 7
- 8
- 9
- 10
- 11
- 12
- 13
- 14
- 15
- 16
- 17
- 18
- 19
- 20
- 21
- 22
- 23
- 24
- 25
- 26
- 27
- 28
- 29
- 30
- 31
- 32
- 33
- 34
- 35
- 第六步:重启服务
[root@server ~]# systemctl restart httpd 🔐 Enter TLS private key passphrase for ftp:443 (RSA) : ****** # 输入私钥的密码123456- 1
- 2
- 第七步:测试
# 虚拟机中打开火狐浏览器,输入www.openlab.com/file # 虚拟机中打开火狐浏览器,输入https://www.openlab.com/ftp,点击高级->接受风险并继续- 1
- 2
六、使用内网穿透搭建私有云存储
1、准备工作
关闭安全软件
[root@server ~]# setenforce 0 [root@server ~]# systemctl stop firewalld # 关闭防火墙- 1
- 2
搭建LAMP环境
[root@server ~]# yum install httpd mariadb-server php* -y- 1
2、上传软件
- 使用xftp将nextcloud-25.0.1.zip软件压缩包上传到Linux的根目录,并解压缩
[root@server ~]# cd / [root@server /]# unzip /nextcloud-25.0.1.zip- 1
- 2
设置nextcloud安装命令权限
[root@server /]# chmod -Rf 777 /nextcloud- 1
3、设置数据库
[root@server /]# systemctl start mariadb # 启动数据库 [root@server /]# mysql # 数据库设置 MariaDB [(none)]> create database nextcloud; # 创建数据库 MariaDB [(none)]> create user 'nextcloud'@'localhost' identified by '123456'; # 创建用户及密码 MariaDB [(none)]> grant all on nextcloud.* to 'nextcloud'@'localhost'; # 设置权限 MariaDB [(none)]> exit # 退出- 1
- 2
- 3
- 4
- 5
- 6
- 7
- 8

重启数据库[root@server /]# systemctl restart mariadb- 1
4、配置httpd
[root@server /]# vim /etc/httpd/conf/httpd.conf # 定位第124行修改如下: DocumentRoot "/nextcloud" <Directory "/nextcloud"> AllowOverride None # Allow open access: Require all granted </Directory>- 1
- 2
- 3
- 4
- 5
- 6
- 7
- 8
- 9

重启httpd服务[root@server /]# systemctl restart httpd- 1
5、私有云安装
- 打开浏览器后输入服务器IP地址,进入nextcloud安装向导
- 管理员的用户名即密码自定
- 存储与数据库:选择MySQL/MariaDB,设置数据库用户为nextcloud,密码:123456,数据库名:nextcloud,主机名:localhost


6、内网穿透配置
这里内网穿透详细见内网穿透石实验。


[root@server ~]# vim /nextcloud/config/config.php # 按照下面的内容对源文件进行修改 <?php $CONFIG = array ( 'instanceid' => 'ocif3g9giiwc', 'passwordsalt' => 'nzXf5wrB2QmOcw35btycuIbEGQ8DAq', 'secret' => 'D0EUghErW/BBmULBe/OwC1Ui+r9I+SsGLaRu8IpGNSpoEe1b', 'trusted_domains' => array ( 0 => '192.168.48.130', 1 => '40a09234i8.imdo.co', # 添加花生壳给的域名,不要https或www等前缀 ), 'datadirectory' => '/nextcloud/data', 'dbtype' => 'mysql', 'version' => '25.0.1.1', 'overwrite.cli.url' => 'https://40a09234i8.imdo.co:443', # 修改为花生壳给的域名,前面要有https,后面要有端口号 'dbname' => 'nextcloud', 'dbhost' => 'localhost', 'dbport' => '', 'dbtableprefix' => 'oc_', 'mysql.utf8mb4' => true, 'dbuser' => 'nextcloud', 'dbpassword' => '123456', 'installed' => true, 'overwritehost' => '40a09234i8.imdo.co:443', # 添加,域名更换为花生壳给的域名 'overwriteprotocol' => 'https', # 添加 );- 1
- 2
- 3
- 4
- 5
- 6
- 7
- 8
- 9
- 10
- 11
- 12
- 13
- 14
- 15
- 16
- 17
- 18
- 19
- 20
- 21
- 22
- 23
- 24
- 25
- 26
- 27
原config.php文件:

修改后文件:


-
相关阅读:
独享IP vs. 共享IP:哪种更适合你?
了解Ajax(第一天)
判断子序列 -- 二分查找
MySQL之索引
uboot引导vxworks--t4080调试记录
Mac系统每次更改vscode中的文件都提示权限不足
JVM常用参数解释说明
R语言数据探索与分析-碳排放分析预测
【GAMES-104现代游戏引擎】4、引擎渲染基础(渲染基础数据、全局光照、PBR、阴影)
懒人的百宝箱「GitHub 热点速览」
- 原文地址:https://blog.csdn.net/weixin_63172698/article/details/133842044