-
【若依框架RuoYi-Vue-Plus 图片回显不显示问题,OSS文件上传或者本地上传】
一、问题
1.设计表 product(商品表) 有 id (id) name(商品名)icon(图标)
2.使用若依代码生成功能,导入product表,代码生成。
3.将生成的代码导入到项目中得到如下列表和表单(插入数据),图片仅在提交、修改表单中回显,列表没有显示,如下图。

1.在若依框架中图片上传与回显引用了 components 组件组件中的 ImageUpload 与 ImagePreviewVue.component('ImageUpload', ImageUpload) Vue.component('ImagePreview', ImagePreview) // 图片上传组件 import ImageUpload from "@/components/ImageUpload" // 图片预览组件 import ImagePreview from "@/components/ImagePreview"- 1
- 2
- 3
- 4
- 5
- 6
2.引用ImageUpload组件上传图片
<el-form-item label="商品图片" prop="icon"> <imageUpload v-model="form.icon" :limit="1" /> el-form-item>- 1
- 2
- 3
3.ImagePreview组件回显图片,得到的却是OSS回传的oss_id 值,所以在 image-preview 组件不回显图片,需要拿到图片的url地址才是回显图片。
<el-table-column label="商品图片" align="center" prop="icon" :show-overflow-tooltip="true" > <template slot-scope="scope"> <ImagePreview :src="scope.row.icon" /> template> el-table-column>- 1
- 2
- 3
- 4
- 5
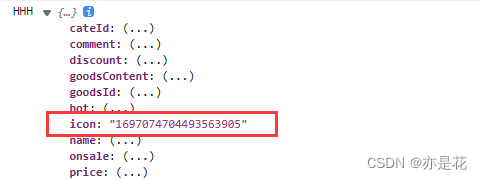
console.log("HHH",this.form)- 1
- 找到ImagePreview组件 查看 上传结束处理方法 uploadedSuccessfully
// 上传结束处理 uploadedSuccessfully() { if (this.number > 0 && this.uploadList.length === this.number) { this.fileList = this.fileList.concat(this.uploadList); this.uploadList = []; this.number = 0; this.$emit("input", this.listToString(this.fileList)); this.$modal.closeLoading(); } },- 1
- 2
- 3
- 4
- 5
- 6
- 7
- 8
- 9
- 10
二 . 解决(添加表字段或者修改回调方法)
1. 添加表字段
1.修改 uploadedSuccessfully 方法
在上传图片的过程中,调用了父子组件 $emit 可以使用 @input 来获取调用该方法,可以直接获取到该图片的信息。//****************修改前*********************** // 上传结束处理 uploadedSuccessfully() { if (this.number > 0 && this.uploadList.length === this.number) { this.fileList = this.fileList.concat(this.uploadList); this.uploadList = []; this.number = 0; this.$emit("input", this.listToString(this.fileList)); this.$modal.closeLoading(); } }, //*****************修改后********************** // 上传结束处理 uploadedSuccessfully() { if (this.number > 0 && this.uploadList.length === this.number) { this.fileList = this.fileList.concat(this.uploadList); this.uploadList = []; this.number = 0; this.$emit("input", this.listToString(this.fileList), this.fileList); this.$modal.closeLoading(); } },- 1
- 2
- 3
- 4
- 5
- 6
- 7
- 8
- 9
- 10
- 11
- 12
- 13
- 14
- 15
- 16
- 17
- 18
- 19
- 20
- 21
- 22

2.添加新字段 url用来存放图片 url, 重新生成代码或者添加url字段代码即可。
<el-form-item label="商品图片" prop="icon"> <imageUpload v-model="form.icon" :limit="1" /> el-form-item> <el-form-item label="商品图片" prop="icon"> <imageUpload v-model="form.icon" @input="getImgUrl" :limit="1" /> el-form-item>- 1
- 2
- 3
- 4
- 5
- 6
- 7
- 8
// 表单重置 reset() { photos:undefined }- 1
- 2
- 3
- 4
- 添加getImgUrl方法
getImgUrl(id,item){ console.log("URLLLL",id,item); this.form.url = item[0].url; },- 1
- 2
- 3
- 4
4.回显,
<el-table-column label="商品图片" align="center" prop="icon" :show-overflow-tooltip="true" > <template slot-scope="scope"> <ImagePreview :src="scope.row.url" /> template> el-table-column>- 1
- 2
- 3
- 4
- 5
- 6

已回显2. 不添加字段
1.修改 uploadedSuccessfully 方法
在上传图片的过程中,调用了父子组件 $emit 可以使用 @input 来获取调用该方法,可以直接获取到该图片的信息。//****************修改前*********************** // 上传结束处理 uploadedSuccessfully() { if (this.number > 0 && this.uploadList.length === this.number) { this.fileList = this.fileList.concat(this.uploadList); this.uploadList = []; this.number = 0; this.$emit("input", this.listToString(this.fileList)); this.$modal.closeLoading(); } }, //*****************修改后********************** // 上传结束处理 uploadedSuccessfully() { if (this.number > 0 && this.uploadList.length === this.number) { this.fileList = this.fileList.concat(this.uploadList); this.uploadList = []; this.number = 0; this.$emit("input", this.listToString(this.fileList), this.fileList); this.$modal.closeLoading(); } },- 1
- 2
- 3
- 4
- 5
- 6
- 7
- 8
- 9
- 10
- 11
- 12
- 13
- 14
- 15
- 16
- 17
- 18
- 19
- 20
- 21
- 22
<el-form-item label="商品图片" prop="icon"> <imageUpload v-model="form.icon" :limit="1" /> el-form-item> <el-form-item label="商品图片" prop="icon"> <imageUpload v-model="form.icon" @input="getImgUrl" :limit="1" /> el-form-item>- 1
- 2
- 3
- 4
- 5
- 6
- 7
- 8
// 表单重置 reset() { photos:undefined }- 1
- 2
- 3
- 4
- 添加getImgUrl方法
getImgUrl(id,item){ console.log("URLLLL",id,item); this.form.icon= item[0].url; },- 1
- 2
- 3
- 4
2.修改监听方法
url已保存到数据库,判断以http开头的直接回显,不查数据库watch: { value: { async handler(val) { if (val) { // 首先将值转为数组 let list; if (Array.isArray(val)) { list = val; } else { if(val.slice(0,4)=="http"){ let time = new Date().getTime() let objArr=[]; objArr.push( { ossId: time, url:val, name: time }) list=objArr }else{ await listByIds(val).then(res => { list = res.data; }) } } console.log("YYYHHH333",list) // 然后将数组转为对象数组 this.fileList = list.map(item => { // 此处name使用ossId 防止删除出现重名 item = { name: item.ossId, url: item.url, ossId: item.ossId }; return item; }); } else { this.fileList = []; return []; } }, deep: true, immediate: true } },- 1
- 2
- 3
- 4
- 5
- 6
- 7
- 8
- 9
- 10
- 11
- 12
- 13
- 14
- 15
- 16
- 17
- 18
- 19
- 20
- 21
- 22
- 23
- 24
- 25
- 26
- 27
- 28
- 29
- 30
- 31
- 32
- 33
- 34
- 35
- 36
- 37
- 38
- 39
- 40
-
相关阅读:
Android 自定义按键关机
小程序首页如何进行装修设置
java 程序CPU过高,问题排查解决
19.EC实战 矩阵键盘控制触摸板开关
ARM的异常处理
医院自助挂号机页面的不好
Java-GUI 编程之 Swing
如何实现多任务管理
面试算法2:二进制加法
2022年软件测试人员必读的经典书籍推荐(附电子版)
- 原文地址:https://blog.csdn.net/qq_41685731/article/details/132597709
