-
Turtlebot2简单控制
遥控
遥控前为了让turtlebot接受命令,需要启动
roslaunch turtlebot_bringup minimal.lauch键盘操作命令:
roslaunch turtlebot_teleop keyboard_teleop.launch简单脚本控制:
首先输入命令
roslaunch turtlebot_bringup minimal.launch然后运行编写的脚本,如直行脚本:goforward.py
python goforward.py其内容如下:
- #!/usr/bin/env python
- '''
- Copyright (c) 2015, Mark Silliman
- All rights reserved.
- Redistribution and use in source and binary forms, with or without modification, are permitted provided that the following conditions are met:
- 1. Redistributions of source code must retain the above copyright notice, this list of conditions and the following disclaimer.
- 2. Redistributions in binary form must reproduce the above copyright notice, this list of conditions and the following disclaimer in the documentation and/or other materials provided with the distribution.
- 3. Neither the name of the copyright holder nor the names of its contributors may be used to endorse or promote products derived from this software without specific prior written permission.
- THIS SOFTWARE IS PROVIDED BY THE COPYRIGHT HOLDERS AND CONTRIBUTORS "AS IS" AND ANY EXPRESS OR IMPLIED WARRANTIES, INCLUDING, BUT NOT LIMITED TO, THE IMPLIED WARRANTIES OF MERCHANTABILITY AND FITNESS FOR A PARTICULAR PURPOSE ARE DISCLAIMED. IN NO EVENT SHALL THE COPYRIGHT HOLDER OR CONTRIBUTORS BE LIABLE FOR ANY DIRECT, INDIRECT, INCIDENTAL, SPECIAL, EXEMPLARY, OR CONSEQUENTIAL DAMAGES (INCLUDING, BUT NOT LIMITED TO, PROCUREMENT OF SUBSTITUTE GOODS OR SERVICES; LOSS OF USE, DATA, OR PROFITS; OR BUSINESS INTERRUPTION) HOWEVER CAUSED AND ON ANY THEORY OF LIABILITY, WHETHER IN CONTRACT, STRICT LIABILITY, OR TORT (INCLUDING NEGLIGENCE OR OTHERWISE) ARISING IN ANY WAY OUT OF THE USE OF THIS SOFTWARE, EVEN IF ADVISED OF THE POSSIBILITY OF SUCH DAMAGE.
- '''
- # A very basic TurtleBot script that moves TurtleBot forward indefinitely. Press CTRL + C to stop. To run:
- # On TurtleBot:
- # roslaunch turtlebot_bringup minimal.launch
- # On work station:
- # python goforward.py
- import rospy
- from geometry_msgs.msg import Twist
- class GoForward():
- def __init__(self):
- # initiliaze
- rospy.init_node('GoForward', anonymous=False)
- # tell user how to stop TurtleBot
- rospy.loginfo("To stop TurtleBot CTRL + C")
- # What function to call when you ctrl + c
- rospy.on_shutdown(self.shutdown)
- # Create a publisher which can "talk" to TurtleBot and tell it to move
- # Tip: You may need to change cmd_vel_mux/input/navi to /cmd_vel if you're not using TurtleBot2
- self.cmd_vel = rospy.Publisher('cmd_vel_mux/input/navi', Twist, queue_size=10)
- #TurtleBot will stop if we don't keep telling it to move. How often should we tell it to move? 10 HZ
- r = rospy.Rate(10);
- # Twist is a datatype for velocity
- move_cmd = Twist()
- # let's go forward at 0.2 m/s
- move_cmd.linear.x = 0.1
- # let's turn at 0 radians/s
- move_cmd.angular.z = 0
- # as long as you haven't ctrl + c keeping doing...
- while not rospy.is_shutdown():
- # publish the velocity
- self.cmd_vel.publish(move_cmd)
- # wait for 0.1 seconds (10 HZ) and publish again
- r.sleep()
- def shutdown(self):
- # stop turtlebot
- rospy.loginfo("Stop TurtleBot")
- # a default Twist has linear.x of 0 and angular.z of 0. So it'll stop TurtleBot
- self.cmd_vel.publish(Twist())
- # sleep just makes sure TurtleBot receives the stop command prior to shutting down the script
- rospy.sleep(1)
- if __name__ == '__main__':
- try:
- GoForward()
- except:
- rospy.loginfo("GoForward node terminated.")
若想要tb2(turtlebot2,下同)走正方形等可自行探索其他脚本:
https://github.com/markwsilliman/turtlebot/注:turtlebot只使用线性的。X和Z值的角,因为它在一个平面作品(2D)的世界,但无人机,海洋机器人与其他机器人占据的三维环境中,线性的。Y,X和Y的角,角的值是可用的。
turtlebot开始在地板上画正方形但你会发现它很快开始漂离出发的路径。这是机器人和计算机的作用非常不同的地方。如果你问一台电脑做2 + 1,你会总是收到1。如果你问一个机器人向前移动1米,它将去大约一米,而不是完全直。知道机器人是(定位)是一个经典的机器人的挑战之一,尤其是在室内环境中,全球定位系统是不可靠的或足够精确。
你可能会认为,因为你可以告诉机器人在0.2米/秒,这将是很容易编程的机器人,使它前进一米,通过发布一个线性的。x = 0.2米/秒5秒。如果机器人是一台计算机,这是完全正确的,但对于机器人,这是非常不准确的,由于打滑,不完善的校准,和其他因素。如果你写一个这样的脚本驱动在一个正方形,并运行10个周期,你会结束一个完全不同的地方,从你开始!幸运的是,令人惊讶的科学家和研究人员正走在我们的前面
创建地图:
- roslaunch turtlebot_bringup minimal.launch
- roslaunch turtlebot_navigation gmapping_demo.launch
- roslaunch turtlebot_rviz_launchers view_navigation.launch
- roslaunch turtlebot_teleop keyboard_teleop.launch
保存地图:
- rosrun map_server map_saver -f /tmp/my_map
- ls /tmp/
现在你可以看到两个文件在/tmp目录my_map.pgm和my_map.yaml。
自主驾驶:
- roslaunch turtlebot_bringup minimal.launch
- roslaunch turtlebot_navigation amcl_demo.launch map_file:=/tmp/my_map.yaml
如果你看到
odom received!说明已经正常运行。问题
如果你收到一个警告:
Waiting on transform...,先重启minimal.launch,重新启动amcl_demo.lauch。您可能需要尝试重新启动几次。同时,关闭Kobuki基站并重开。turtlebot成功运行,在工作站运行:
roslaunch turtlebot_rviz_launchers view_navigation.launch --screen- rviz应该公开展示你的地图。turtlebot不能够估计在启动姿态,尽管它可以在你初始化它的姿态。
-
选择“2D Pose Estimate”在地图上的turtlebot位置点击并按住。当你握着鼠标的时候,一个箭头会出现在鼠标指针的下方,用这个来估计它的方向。
-
设置后估计的姿态,选择“2D Nav Goal”,点击你想让turtlebot去的地方。您还可以指定一个目标方向,使用相同的技术如“2D Pose Estimate”。
-
turtlebot现在应该朝着你的目录自主前进。尝试指定一个目标,并走在前面,看看它如何反应的动态障碍。
编码实现前进与避障
- roslaunch turtlebot_bringup minimal.launch
- python ~/helloworld/goforward.py
tb2会前进,撞到东西,ctrl+c停止;
若要实现避障
- roslaunch turtlebot_bringup minimal.launch
- roslaunch turtlebot_navigation amcl_demo.launch map_file:=/tmp/my_map.yaml
- roslaunch turtlebot_rviz_launchers view_navigation.launch --screen
- python ~/helloworld/goforward_and_avoid_obstacle.py
tb2不能可靠地确定其初始姿态(在哪里)所以我们就把它用“2D Pose Estimate”。选择“2D Pose Estimate”和指定的位置turtlebot。保持rviz打开,我们可以监视它的路径规划。
提示:在你估计tb2的姿势可以可靠地知道它在哪里,甚至在旅行。
当它在驾驶时, 尝试走到机器人的路径,看看它如何响应。
为什么它会在转圈?
turtlebot四处寻找特征,比较他们的地图,以确定它的位置。这个过程被称为本地化。
从代码分析:
请注意,而不是说“向前几秒钟”,我们说:“无论什么路径,我们想在前进3米位置的地方结束”。turtlebot可能需要60秒来试图找到一个路径到这个位置。
定点自导航:
- roslaunch turtlebot_bringup minimal.launch
- roslaunch turtlebot_navigation amcl_demo.launch map_file:=/tmp/my_map.yaml
- roslaunch turtlebot_rviz_launchers view_navigation.launch --screen
在RViz,选择“二维姿态估计”,点击地图约在turtlebot是对准箭头指示方向。
下一步,选择“发布点”,将鼠标悬停在你的地图(但不要点击),你想turtlebot去当你运行你的脚本。在屏幕的左下角旁边“选择这一点”,你会注意到三个数字,当你移动鼠标。这是你的观点,所以写下这些数字吧。
提示:第三个数字是高度。它可能会显示一个数字,不是完美的0,但不管它说什么,使用0。
在一个新的终端窗口运行:
gedit ~/helloworld/go_to_specific_point_on_map.py83行
position = {'x': 1.22, 'y' : 2.56}重写X,Y值与你写下的数字时,做“发布点”。保存和退出。
然后运行:
python ~/helloworld/go_to_specific_point_on_map.py注:如先前看到的,turtlebot会避开障碍物,要计算一个合理的路径,只要
rospy.duration期限没有过期。提示:如果你认为你
amcl_demo.launch终端运行它将显示一个报告,告诉你的时候,TurtleBot已经放弃了试图达成一个目标。查看电池状态:
先启动
roslaunch turtlebot_bringup minimal.launch查看发布的主题
rostopic list其中
- /laptop_charge 是笔记本电量信息
- /mobile_base/sensors/core 是Kobuki底座的电量信息
可直接监听
rostopic echo /laptop_charge或者运行脚本
- cd ~/helloworld/
- python netbook_battery.py
笔记本电池脚本:
rospy.Subscriber("/laptop_charge/",SmartBatteryStatus,self.NetbookPowerEventCallback)这意味着,“每一次新的数据公布在线程/laptop_charge/ 。
self.NetbookPowerEventCallback”SmartBetteryStatus是数据类型的线程包含。此数据类型定义在包含命令(在脚本的顶部附近):
from smart_battery_msgs.msg import SmartBatteryStatus现在让我们看看在功能
NetbookPowerEventCallback。数据传递给功能,组件可以打印这样:print("Percent: " + str(data.percentage))重要提示:稍后我们会检查是否
data.percentage大于50看我们是否需要充电。Python是很严格的时候,比较不同类型的数据,所以总是用int()转换。例子:if (data.percentage < 50):会导致一个错误,但:
if(int(data.percentage) < 50):将工作正常。
底座电池信息:
有多个电池,用于kobuki基地。功率百分比是用在kobuki_battery.py固定kobuki_base_max_charge值计算。
确定你的电池的最大充电到满,让它在停靠站的一段,然后在turtlebot运行:
rostopic echo /mobile_base/sensors/core注意电池的值,和编辑kobuki_battery.py:
gedit kobuki_battery.py修改kobuki_base_max_charge价值。百分比功率现在将正确计算。
按键事件:
- roslaunch turtlebot_bringup minimal.launch
- python kobuki_buttons.py
会提示

跟随实验
- roslaunch turtlebot_bringup minimal.launch
- roslaunch turtlebot_follower follower.launch
参数修改:
- # pre-groovy
- rosrun dynamic_reconfigure reconfigure_gui
- # groovy or later
- rosrun rqt_reconfigure rqt_reconfigure
-
选择 camera/follower
-
移动滑块则Turtlebot的跟随行为就改变
-
Android 客户端
参考Android 配对 通过Android客户端,可以运行跟随演示,开始或停止跟随行为。
全景图实验:
turtlebot3的功能
- roslaunch turtlebot_bringup minimal.launch
- roslaunch turtlebot_panorama panorama.launch
- 创建全景图,有两种方法创建。
- rostopic pub turtlebot_panorama/take_pano std_msgs/Empty
- rosservice call turtlebot_panorama/take_pano 0 360.0 30.0 0.3
2、停止
- rostopic pub turtlebot_panorama/stop_pano std_msgs/Empty
- rosservice call turtlebot_panorama/take_pano 2 360.0 30.0 0.3
配置参数
上面利用rosservice 调用就使用了参数。2(模式) 360.0(角度) 30.0(间隔) 0.3(旋转速度)
- 模式:
- 0 for snap&rotate (i.e. rotate, stop, snapshot, rotate, stop, snapshot, ...)
- 1 for continuous (i.e. keep rotating while taking snapshots)
- 2 to stop an ongoing panorama creation
-
角度
-
创建快照和旋转模式时为角度间隔(度),其他模式为时间间隔(以秒为单位)
-
旋转速度(弧度/秒)
查看结果
- 在工作台上,执行命令:
rosrun image_view image_view image:=/turtlebot_panorama/panorama注意:先执行此命令,在执行创建全景图命令,360度自转完成,即自动生成全景图, 点击图片右键即可自动保存。
cartographer
cartographer是少有的基于优化的开源激光SLAM。因为同通常的scan-to-scan激光匹配会累计误差,所以它引入了Submap这一概念,将原来的scan-to-scan匹配变成了scan-to-map匹配,就是激光先和submap进行匹配。
每次得到一帧激光scan数据之后,cartographer将其与最近的submap去进行匹配,找到一个最优的位姿,将scan插入到submap中,因为在一个较短的时间内,这个匹配过程不会累加什么误差。当submap完成之后,便不会再有任何激光数据插入其中,它就是一个独立的已经完成了子地图,它只参与闭环的匹配了。接下来的工作有点类似与拼图过程,我们通过调整每个submap的位姿,使所有的submap之间互相重叠的部分(即约束)误差最小。
- 需要安装3个软件包,ceres solver、cartographer和cartographer_ros。为了管理方便,建立carto目录来存放ceres solver、cartographer。
- 安装依赖
sudo apt-get install -y google-mock libboost-all-dev libeigen3-dev libgflags-dev libgoogle-glog-dev liblua5.2-dev libprotobuf-dev libsuitesparse-dev libwebp-dev ninja-build protobuf-compiler python-sphinx ros-indigo-tf2-eigen libatlas-base-dev libsuitesparse-dev liblapack-dev- 首先安装ceres solver,选择的版本是1.11
- cd ~/carto
- git clone https://github.com/hitcm/ceres-solver-1.11.0.git
- cd ceres-solver-1.11.0/build #如果build目录不存在,就自己建mkdir build
- cmake ..
- make –j
- sudo make install
- 然后安装 cartographer
- cd ~/carto
- git clone https://github.com/hitcm/cartographer.git
- cd cartographer/build #如果build目录不存在,就自己建mkdir build
- cmake .. -G Ninja #3
- ninja
- ninja test
- sudo ninja install
上述第3步执行错误的同学可以忽略3-6步,改用下面的方法。
- cmake ..
- make
- sudo make install
- 安装cartographer_ros
谷歌官方提供的安装方法比较繁琐,我对原来的文件进行了少许的修改,核心代码不变,只是修改了编译文件
- 下载到catkin_ws下面的src文件夹下面
git clone https://github.com/hitcm/cartographer_ros.git- 然后到catkin_ws下面运行
$ catkin_make- 新包加入环境
- $ source ~/.bashrc
- $ rospack profile
- 数据下载测试, 并上传到carto目录下。
- 2d数据,大概500M,用迅雷下载
https://storage.googleapis.com/cartographer-public-data/bags/backpack_2d/cartographer_paper_deutsches_museum.bag- 3d数据,8G左右,同样用迅雷下载
https://storage.googleapis.com/cartographer-public-data/bags/backpack_3d/cartographer_3d_deutsches_museum.bag- 然后运行launch文件即可。
- roslaunch cartographer_ros demo_backpack_2d.launch bag_filename:={$HOME}/carto/cartographer_paper_deutsches_museum.bag
- roslaunch cartographer_ros demo_backpack_3d.launch bag_filename:={$HOME}/carto/cartographer_3d_deutsches_museum.bag
- 刚开始使用ROS的同学运行下面两句是无法工作的,可能出现的错误如下。
- [demo_backpack_2d.launch] is neither a launch file in package [cartographer_ros] nor is [cartographer_ros] a launch file name
- The traceback for the exception was written to the log file
-
这种错误的主要原因是ros的catkin_ws配置问题,可以运行rospack profile试试。
-
实在不行还有如下所示的两种解决方法。推荐第二种。

最终结果如下图
- 2d效果
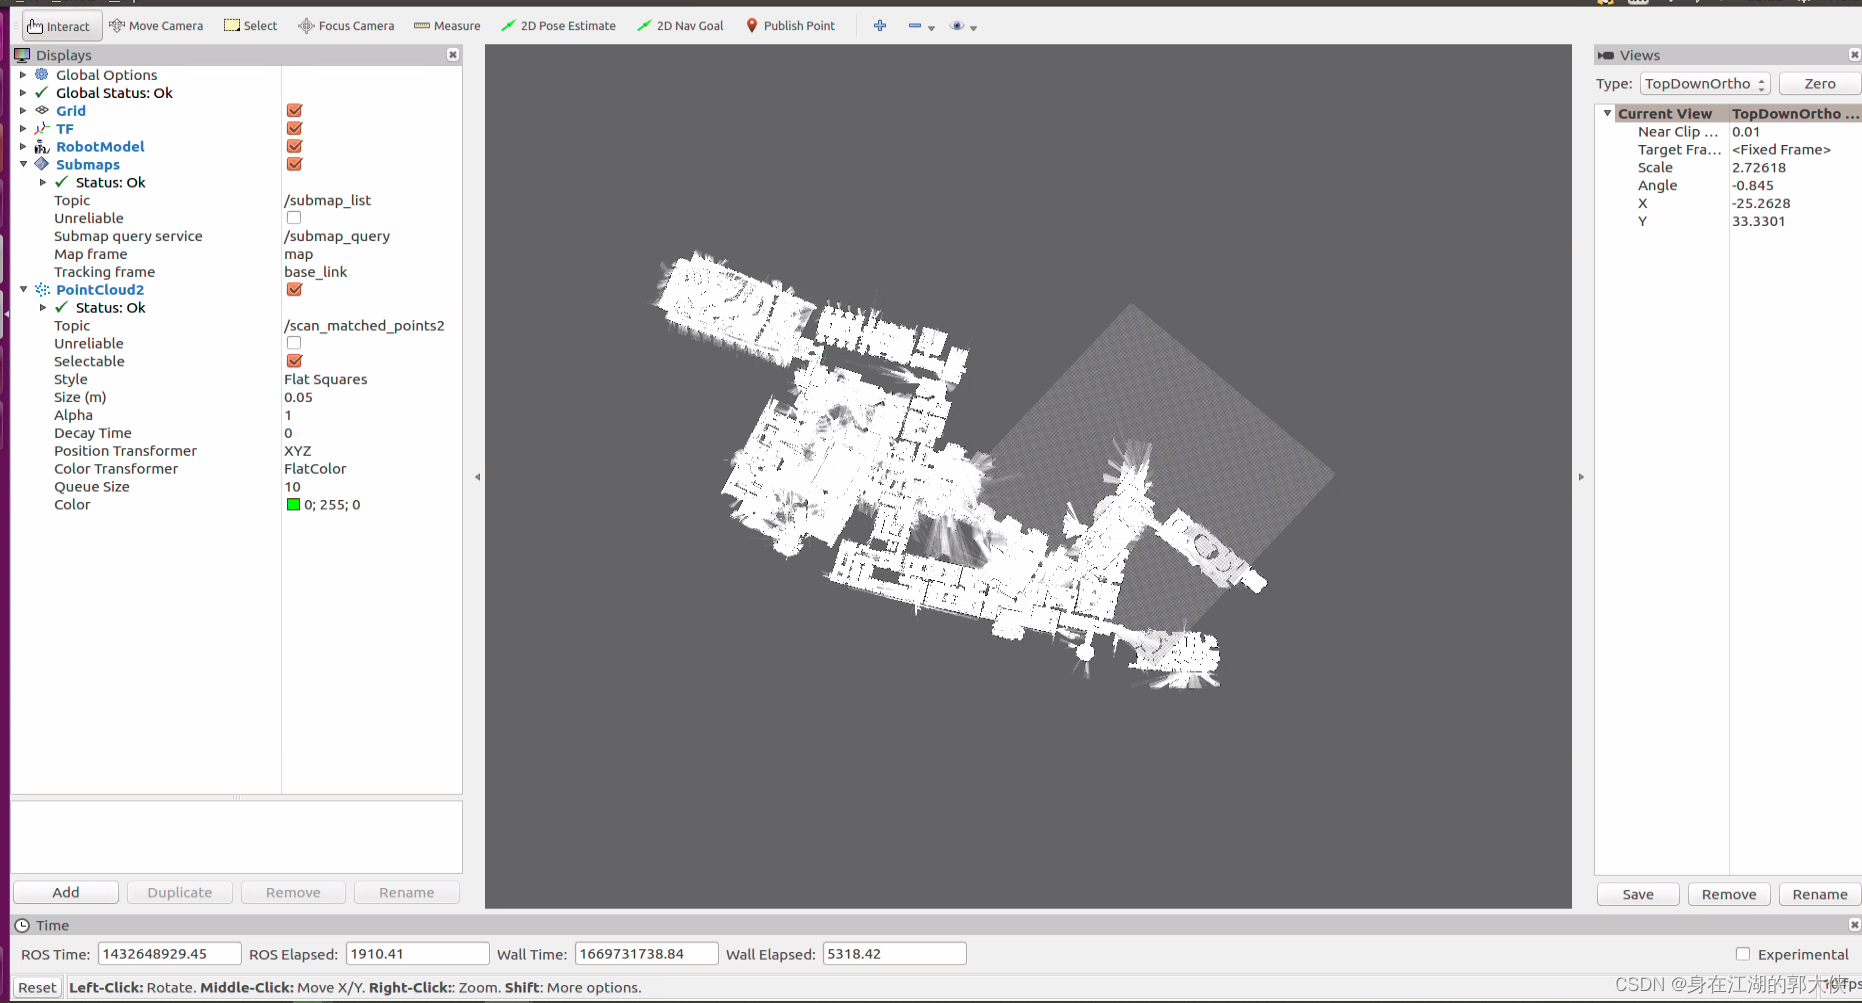
- 3d效果

gmapping建图和amcl导航
建图:
- 我们这里需要一个将深度图转为激光数据的包
- $ cd ~/catkin_ws/src
- $ git clone https://github.com/ros-perception/depthimage_to_laserscan.git
- 我这里新建了一个bringup的包来专门存放launch 文件
- $ cd ~/catkin_ws/src
- $ catkin_create_pkg bringup roscpp
- 在 bringup包内我们新建一个launch文件夹,然后在launch文件夹里添加
kinect2_depthimage_to_laserscan_rviz_view.launch文件
- $ cd ~/catkin_ws/src/bringup
- $ mkdir launch
- $ touch launch/kinect2_depthimage_to_laserscan_rviz_view.launch
- $ vim launch/kinect2_depthimage_to_laserscan_rviz_view.launch
- 内容如下:
- <launch>
- <!-- start sensor-->
- <include file="$(find kinect2_bridge)/launch/kinect2_bridge.launch">
- <arg name="base_name" value="kinect2"/>
- <arg name="sensor" value=""/>
- <arg name="publish_tf" value="true"/>
- <arg name="base_name_tf" value="kinect2"/>
- <arg name="fps_limit" value="-1.0"/>
- <arg name="calib_path" value="$(find kinect2_bridge)/data/"/>
- <arg name="use_png" value="false"/>
- <arg name="jpeg_quality" value="90"/>
- <arg name="png_level" value="1"/>
- <arg name="depth_method" value="default"/>
- <arg name="depth_device" value="-1"/>
- <arg name="reg_method" value="default"/>
- <arg name="reg_device" value="-1"/>
- <arg name="max_depth" value="12.0"/>
- <arg name="min_depth" value="0.1"/>
- <arg name="queue_size" value="5"/>
- <arg name="bilateral_filter" value="true"/>
- <arg name="edge_aware_filter" value="true"/>
- <arg name="worker_threads" value="4"/>
- </include>
- <!-- Run the depthimage_to_laserscan node -->
- <node pkg="depthimage_to_laserscan" type="depthimage_to_laserscan" name="depthimage_to_laserscan" output="screen">
- <!--输入图像-->
- <remap from="image" to="/kinect2/qhd/image_depth_rect"/>
- <!--相关图像的相机信息。通常不需要重新变形,因为camera_info将从与图像相同的命名空间订阅。-->
- <remap from="camera_info" to="/kinect2/qhd/camera_info" />
- <!--输出激光数据的话题-->
- <remap from="scan" to="/scan" />
- <!--激光扫描的帧id。对于来自具有Z向前的“光学”帧的点云,该值应该被设置为具有X向前和Z向上的相应帧。-->
- <param name="output_frame_id" value="/kinect2_depth_frame"/>
- <!--用于生成激光扫描的像素行数。对于每一列,扫描将返回在图像中垂直居中的那些像素的最小值。-->
- <param name="scan_height" value="30"/>
- <!--返回的最小范围(以米为单位)。小于该范围的输出将作为-Inf输出。-->
- <param name="range_min" value="0.45"/>
- <!--返回的最大范围(以米为单位)。大于此范围将输出为+ Inf。-->
- <param name="range_max" value="8.00"/>
- </node>
- <!-- static_transform_publisher x y z yaw pitch roll frame_id child_frame_id period_in_ms -->
- <node pkg="tf" type="static_transform_publisher" name="base_footprint_to_base_link" args="0 0 0.5 0 0 0 base_footprint base_link 50" />
- <node pkg="tf" type="static_transform_publisher" name="base_link_to_laser" args="0 0 0.5 0 0 0 base_link laser 50" />
- <node pkg="tf" type="static_transform_publisher" name="base_link_to_kinect2laser" args="0 0 0.5 0 0 0 base_link kinect2_depth_frame 50" />
- <node pkg="tf" type="static_transform_publisher" name="base_link_to_kinect2_link" args="0 0 0.5 -1.57 0 -1.57 base_link kinect2_link 50" />
- <!--start rviz view -->
- <node name="rviz" pkg="rviz" type="rviz" args="-d $(find bringup)/rviz/kinect2_depthimage_to_laserscan_view.rviz" />
- </launch>
- 在 bringup 包里新建rviz文件夹,然后在rviz文件夹里添加
kinect2_depthimage_to_laserscan_view.rviz文件
- $ cd ~/catkin_ws/src/bringup
- $ mkdir rviz
- $ touch rviz/kinect2_depthimage_to_laserscan_view.rviz
- $ vim rviz/kinect2_depthimage_to_laserscan_view.rviz
- 内容如下:
- Panels:
- - Class: rviz/Displays
- Help Height: 78
- Name: Displays
- Property Tree Widget:
- Expanded:
- - /Global Options1
- - /Status1
- - /LaserScan1
- Splitter Ratio: 0.5
- Tree Height: 566
- - Class: rviz/Selection
- Name: Selection
- - Class: rviz/Tool Properties
- Expanded:
- - /2D Pose Estimate1
- - /2D Nav Goal1
- - /Publish Point1
- Name: Tool Properties
- Splitter Ratio: 0.588679
- - Class: rviz/Views
- Expanded:
- - /Current View1
- Name: Views
- Splitter Ratio: 0.5
- - Class: rviz/Time
- Experimental: false
- Name: Time
- SyncMode: 0
- SyncSource: LaserScan
- Visualization Manager:
- Class: ""
- Displays:
- - Alpha: 0.5
- Cell Size: 1
- Class: rviz/Grid
- Color: 160; 160; 164
- Enabled: true
- Line Style:
- Line Width: 0.03
- Value: Lines
- Name: Grid
- Normal Cell Count: 0
- Offset:
- X: 0
- Y: 0
- Z: 0
- Plane: XY
- Plane Cell Count: 10
- Reference Frame: <Fixed Frame>
- Value: true
- - Alpha: 1
- Autocompute Intensity Bounds: true
- Autocompute Value Bounds:
- Max Value: 0
- Min Value: 0
- Value: true
- Axis: Z
- Channel Name: intensity
- Class: rviz/LaserScan
- Color: 255; 255; 255
- Color Transformer: AxisColor
- Decay Time: 0
- Enabled: true
- Invert Rainbow: false
- Max Color: 255; 255; 255
- Max Intensity: 4096
- Min Color: 0; 0; 0
- Min Intensity: 0
- Name: LaserScan
- Position Transformer: XYZ
- Queue Size: 10
- Selectable: true
- Size (Pixels): 3
- Size (m): 0.01
- Style: Points
- Topic: /scan
- Unreliable: false
- Use Fixed Frame: true
- Use rainbow: true
- Value: true
- - Class: rviz/TF
- Enabled: true
- Frame Timeout: 15
- Frames:
- All Enabled: true
- base_footprint:
- Value: true
- kinect2_depth_frame:
- Value: true
- kinect2_ir_optical_frame:
- Value: true
- kinect2_link:
- Value: true
- kinect2_rgb_optical_frame:
- Value: true
- laser:
- Value: true
- Marker Scale: 1
- Name: TF
- Show Arrows: true
- Show Axes: true
- Show Names: true
- Tree:
- base_footprint:
- kinect2_depth_frame:
- {}
- kinect2_link:
- kinect2_rgb_optical_frame:
- kinect2_ir_optical_frame:
- {}
- laser:
- {}
- Update Interval: 0
- Value: true
- Enabled: true
- Global Options:
- Background Color: 48; 48; 48
- Fixed Frame: laser
- Frame Rate: 30
- Name: root
- Tools:
- - Class: rviz/Interact
- Hide Inactive Objects: true
- - Class: rviz/MoveCamera
- - Class: rviz/Select
- - Class: rviz/FocusCamera
- - Class: rviz/Measure
- - Class: rviz/SetInitialPose
- Topic: /initialpose
- - Class: rviz/SetGoal
- Topic: /move_base_simple/goal
- - Class: rviz/PublishPoint
- Single click: true
- Topic: /clicked_point
- Value: true
- Views:
- Current:
- Class: rviz/Orbit
- Distance: 10
- Enable Stereo Rendering:
- Stereo Eye Separation: 0.06
- Stereo Focal Distance: 1
- Swap Stereo Eyes: false
- Value: false
- Focal Point:
- X: 0
- Y: 0
- Z: 0
- Name: Current View
- Near Clip Distance: 0.01
- Pitch: 0.810398
- Target Frame: <Fixed Frame>
- Value: Orbit (rviz)
- Yaw: 3.2504
- Saved: ~
- Window Geometry:
- Displays:
- collapsed: false
- Height: 846
- Hide Left Dock: false
- Hide Right Dock: true
- QMainWindow State: 000000ff00000000fd00000004000000000000016a000002c4fc0200000008fb0000001200530065006c0065006300740069006f006e00000001e10000009b0000006100fffffffb0000001e0054006f006f006c002000500072006f007000650072007400690065007302000001ed000001df00000185000000a3fb000000120056006900650077007300200054006f006f02000001df000002110000018500000122fb000000200054006f006f006c002000500072006f0070006500720074006900650073003203000002880000011d000002210000017afb000000100044006900730070006c0061007900730100000028000002c4000000d600fffffffb0000002000730065006c0065006300740069006f006e00200062007500660066006500720200000138000000aa0000023a00000294fb00000014005700690064006500530074006500720065006f02000000e6000000d2000003ee0000030bfb0000000c004b0069006e0065006300740200000186000001060000030c00000261000000010000010f000002c4fc0200000003fb0000001e0054006f006f006c002000500072006f00700065007200740069006500730100000041000000780000000000000000fb0000000a005600690065007700730000000028000002c4000000ac00fffffffb0000001200530065006c0065006300740069006f006e010000025a000000b200000000000000000000000200000490000000a9fc0100000001fb0000000a00560069006500770073030000004e00000080000002e10000019700000003000004b00000003efc0100000002fb0000000800540069006d00650100000000000004b0000002f600fffffffb0000000800540069006d0065010000000000000450000000000000000000000340000002c400000004000000040000000800000008fc0000000100000002000000010000000a0054006f006f006c00730100000000ffffffff0000000000000000
- Selection:
- collapsed: false
- Time:
- collapsed: false
- Tool Properties:
- collapsed: false
- Views:
- collapsed: true
- Width: 1200
- X: 50
- Y: 45
- 基本工作我们都做完了,现在我们需要编译一下
- $ cd ~/catkin_ws
- $ catkin_make
- $ rospack profile
- 我们现在可以接上KinectV2(注意!!!接USB3.0口).
测试:
- 新终端,执行
roslaunch bringup kinect2_depthimage_to_laserscan_rviz_view.launch- 效果:

- 查看TF树:文件生成在主文件夹
- cd ~
- rosrun tf view_frames
- 效果:

安装依赖包
- 安装Gmapping包
- $ cd ~/catkin_ws/src
- $ git clone https://github.com/ros-perception/slam_gmapping.git
- $ cd ~/catkin_ws
- $ catkin_make
- $ rospack profile
- 在我们之前的建的bringup/launch/下新建kinect2_gmapping.launch文件
- $ cd ~/catkin_ws/bringup/launch/
- $ touch kinect2_gmapping.launch
- $ vim kinect2_gmapping.launch
- 代码如下:
- <?xml version="1.0"?>
- <launch>
- <!-- start kinect2-->
- <include file="$(find kinect2_bridge)/launch/kinect2_bridge.launch">
- <arg name="base_name" value="kinect2"/>
- <arg name="sensor" value=""/>
- <arg name="publish_tf" value="true"/>
- <arg name="base_name_tf" value="kinect2"/>
- <arg name="fps_limit" value="-1.0"/>
- <arg name="calib_path" value="$(find kinect2_bridge)/data/"/>
- <arg name="use_png" value="false"/>
- <arg name="jpeg_quality" value="90"/>
- <arg name="png_level" value="1"/>
- <arg name="depth_method" value="default"/>
- <arg name="depth_device" value="-1"/>
- <arg name="reg_method" value="default"/>
- <arg name="reg_device" value="-1"/>
- <arg name="max_depth" value="12.0"/>
- <arg name="min_depth" value="0.1"/>
- <arg name="queue_size" value="5"/>
- <arg name="bilateral_filter" value="true"/>
- <arg name="edge_aware_filter" value="true"/>
- <arg name="worker_threads" value="4"/>
- </include>
- <!-- Run the depthimage_to_laserscan node -->
- <node pkg="depthimage_to_laserscan" type="depthimage_to_laserscan" name="depthimage_to_laserscan" output="screen">
- <!--输入图像-->
- <remap from="image" to="/kinect2/qhd/image_depth_rect"/>
- <!--相关图像的相机信息。通常不需要重新变形,因为camera_info将从与图像相同的命名空间订阅。-->
- <remap from="camera_info" to="/kinect2/qhd/camera_info" />
- <!--输出激光数据的话题-->
- <remap from="scan" to="/scan" />
- <!--激光扫描的帧id。对于来自具有Z向前的“光学”帧的点云,该值应该被设置为具有X向前和Z向上的相应帧。-->
- <param name="output_frame_id" value="/kinect2_depth_frame"/>
- <!--用于生成激光扫描的像素行数。对于每一列,扫描将返回在图像中垂直居中的那些像素的最小值。-->
- <param name="scan_height" value="30"/>
- <!--返回的最小范围(以米为单位)。小于该范围的输出将作为-Inf输出。-->
- <param name="range_min" value="0.45"/>
- <!--返回的最大范围(以米为单位)。大于此范围将输出为+ Inf。-->
- <param name="range_max" value="8.00"/>
- </node>
- <!--start gmapping node -->
- <node pkg="gmapping" type="slam_gmapping" name="simple_gmapping" output="screen">
- <param name="map_update_interval" value="5.0"/>
- <param name="maxUrange" value="5.0"/>
- <param name="maxRange" value="6.0"/>
- <param name="sigma" value="0.05"/>
- <param name="kernelSize" value="1"/>
- <param name="lstep" value="0.05"/>
- <param name="astep" value="0.05"/>
- <param name="iterations" value="5"/>
- <param name="lsigma" value="0.075"/>
- <param name="ogain" value="3.0"/>
- <param name="lskip" value="0"/>
- <param name="minimumScore" value="50"/>
- <param name="srr" value="0.1"/>
- <param name="srt" value="0.2"/>
- <param name="str" value="0.1"/>
- <param name="stt" value="0.2"/>
- <param name="linearUpdate" value="1.0"/>
- <param name="angularUpdate" value="0.5"/>
- <param name="temporalUpdate" value="3.0"/>
- <param name="resampleThreshold" value="0.5"/>
- <param name="particles" value="50"/>
- <param name="xmin" value="-5.0"/>
- <param name="ymin" value="-5.0"/>
- <param name="xmax" value="5.0"/>
- <param name="ymax" value="5.0"/>
- <param name="delta" value="0.05"/>
- <param name="llsamplerange" value="0.01"/>
- <param name="llsamplestep" value="0.01"/>
- <param name="lasamplerange" value="0.005"/>
- <param name="lasamplestep" value="0.005"/>
- </node>
- <!--start serial-port and odometry node-->
- <node name="base_controller" pkg="base_controller" type="base_controller"/>
- <!-- static_transform_publisher x y z yaw pitch roll frame_id child_frame_id period_in_ms -->
- <node pkg="tf" type="static_transform_publisher" name="base_footprint_to_base_link" args="0 0 0.5 0 0 0 base_footprint base_link 50" />
- <node pkg="tf" type="static_transform_publisher" name="base_link_to_laser" args="0 0 0.5 0 0 0 base_link laser 50" />
- <node pkg="tf" type="static_transform_publisher" name="base_link_to_kinect2laser" args="0 0 0.5 0 0 0 base_link kinect2_depth_frame 50" />
- <node pkg="tf" type="static_transform_publisher" name="base_link_to_kinect2_link" args="0 0 0.5 -1.57 0 -1.57 base_link kinect2_link 50" />
- </launch>
- 在我们之前的建的bringup/launch/下新建kinect2_gmapping_rviz_view.launch文件
- 我们这里不把启动RVIZ写在kinect2_gmapping.launch里是方便以后的远程启动
- $ cd ~/catkin_ws/bringup/launch/
- $ touch kinect2_gmapping_rviz_view.launch
- $ vim kinect2_gmapping_rviz_view.launch
- 内容如下:
- "1.0"?>
- <launch>
- <node name="rviz" pkg="rviz" type="rviz" args="-d $(find bringup)/rviz/kinect2_gmapping.rviz" />
- launch>
- 还有在新建bringup/rviz/下新建kinect2_gmapping.rviz文件
- $ cd ~/catkin_ws/bringup/rviz/
- $ touch kinect2_gmapping.rviz
- $ vim kinect2_gmapping.rviz
- 代码如下:
- Panels:
- - Class: rviz/Displays
- Help Height: 78
- Name: Displays
- Property Tree Widget:
- Expanded:
- - /Global Options1
- - /Status1
- - /Map1
- Splitter Ratio: 0.5
- Tree Height: 566
- - Class: rviz/Selection
- Name: Selection
- - Class: rviz/Tool Properties
- Expanded:
- - /2D Pose Estimate1
- - /2D Nav Goal1
- - /Publish Point1
- Name: Tool Properties
- Splitter Ratio: 0.588679
- - Class: rviz/Views
- Expanded:
- - /Current View1
- Name: Views
- Splitter Ratio: 0.5
- - Class: rviz/Time
- Experimental: false
- Name: Time
- SyncMode: 0
- SyncSource: LaserScan
- Visualization Manager:
- Class: ""
- Displays:
- - Alpha: 0.5
- Cell Size: 1
- Class: rviz/Grid
- Color: 160; 160; 164
- Enabled: true
- Line Style:
- Line Width: 0.03
- Value: Lines
- Name: Grid
- Normal Cell Count: 0
- Offset:
- X: 0
- Y: 0
- Z: 0
- Plane: XY
- Plane Cell Count: 10
- Reference Frame: <Fixed Frame>
- Value: true
- - Class: rviz/TF
- Enabled: true
- Frame Timeout: 15
- Frames:
- All Enabled: true
- base_footprint:
- Value: true
- base_link:
- Value: true
- kinect2_depth_frame:
- Value: true
- kinect2_ir_optical_frame:
- Value: true
- kinect2_link:
- Value: true
- kinect2_rgb_optical_frame:
- Value: true
- laser:
- Value: true
- map:
- Value: true
- odom:
- Value: true
- Marker Scale: 1
- Name: TF
- Show Arrows: true
- Show Axes: true
- Show Names: true
- Tree:
- map:
- odom:
- base_footprint:
- base_link:
- kinect2_depth_frame:
- {}
- kinect2_link:
- kinect2_rgb_optical_frame:
- kinect2_ir_optical_frame:
- {}
- laser:
- {}
- Update Interval: 0
- Value: true
- - Alpha: 1
- Autocompute Intensity Bounds: true
- Autocompute Value Bounds:
- Max Value: 1
- Min Value: 1
- Value: true
- Axis: Z
- Channel Name: intensity
- Class: rviz/LaserScan
- Color: 255; 255; 255
- Color Transformer: AxisColor
- Decay Time: 0
- Enabled: true
- Invert Rainbow: false
- Max Color: 255; 255; 255
- Max Intensity: 4096
- Min Color: 0; 0; 0
- Min Intensity: 0
- Name: LaserScan
- Position Transformer: XYZ
- Queue Size: 10
- Selectable: true
- Size (Pixels): 3
- Size (m): 0.01
- Style: Flat Squares
- Topic: /scan
- Unreliable: false
- Use Fixed Frame: true
- Use rainbow: true
- Value: true
- - Alpha: 0.7
- Class: rviz/Map
- Color Scheme: map
- Draw Behind: false
- Enabled: true
- Name: Map
- Topic: /map
- Unreliable: false
- Value: true
- Enabled: true
- Global Options:
- Background Color: 48; 48; 48
- Fixed Frame: odom
- Frame Rate: 30
- Name: root
- Tools:
- - Class: rviz/Interact
- Hide Inactive Objects: true
- - Class: rviz/MoveCamera
- - Class: rviz/Select
- - Class: rviz/FocusCamera
- - Class: rviz/Measure
- - Class: rviz/SetInitialPose
- Topic: /initialpose
- - Class: rviz/SetGoal
- Topic: /move_base_simple/goal
- - Class: rviz/PublishPoint
- Single click: true
- Topic: /clicked_point
- Value: true
- Views:
- Current:
- Class: rviz/Orbit
- Distance: 70.1093
- Enable Stereo Rendering:
- Stereo Eye Separation: 0.06
- Stereo Focal Distance: 1
- Swap Stereo Eyes: false
- Value: false
- Focal Point:
- X: 3.9777
- Y: -3.7323
- Z: -7.60875
- Name: Current View
- Near Clip Distance: 0.01
- Pitch: 0.355398
- Target Frame: <Fixed Frame>
- Value: Orbit (rviz)
- Yaw: 0.0404091
- Saved: ~
- Window Geometry:
- Displays:
- collapsed: false
- Height: 846
- Hide Left Dock: false
- Hide Right Dock: true
- QMainWindow State: 000000ff00000000fd00000004000000000000016a000002c4fc0200000008fb0000001200530065006c0065006300740069006f006e00000001e10000009b0000006100fffffffb0000001e0054006f006f006c002000500072006f007000650072007400690065007302000001ed000001df00000185000000a3fb000000120056006900650077007300200054006f006f02000001df000002110000018500000122fb000000200054006f006f006c002000500072006f0070006500720074006900650073003203000002880000011d000002210000017afb000000100044006900730070006c0061007900730100000028000002c4000000d600fffffffb0000002000730065006c0065006300740069006f006e00200062007500660066006500720200000138000000aa0000023a00000294fb00000014005700690064006500530074006500720065006f02000000e6000000d2000003ee0000030bfb0000000c004b0069006e0065006300740200000186000001060000030c00000261000000010000010f000002c4fc0200000003fb0000001e0054006f006f006c002000500072006f00700065007200740069006500730100000041000000780000000000000000fb0000000a005600690065007700730000000028000002c4000000ac00fffffffb0000001200530065006c0065006300740069006f006e010000025a000000b200000000000000000000000200000490000000a9fc0100000001fb0000000a00560069006500770073030000004e00000080000002e10000019700000003000004b00000003efc0100000002fb0000000800540069006d00650100000000000004b0000002f600fffffffb0000000800540069006d0065010000000000000450000000000000000000000340000002c400000004000000040000000800000008fc0000000100000002000000010000000a0054006f006f006c00730100000000ffffffff0000000000000000
- Selection:
- collapsed: false
- Time:
- collapsed: false
- Tool Properties:
- collapsed: false
- Views:
- collapsed: true
- Width: 1200
- X: 50
- Y: 45
- 最后我们依次启动我们的launch文件便可
- $ roslaunch kinect2_gmapping.launch
- $ roslaunch kinect2_gmapping_rviz_view.launch
- $ rosrun teleop_twist_keyboard teleop_twist_keyboard.py
- 这样子我们就可以愉快的控制小车移动来建图了,当你建好图后运行一下指令就可以保存地图:
rosrun map_server map_saver -f mymap-
地图保存在主文件夹,两个文件,mymap.pgm 和 mymap.yaml
-
效果:

- TF树:
- $ cd ~
- $ rosrun tf view_frames
- 效果:

AMCL导航 :
- 安装一下所需的包
- $ cd ~/catkin_ws/src
- $ git clone -b indigo-devel https://github.com/ros-planning/navigation
- $ cd ~/catkin_ws
- $ catkin_make
- $ rospack profile
- 在我们之前的建的bringup/下,新建nav_config文件夹,然后新建四个文件
- $ cd ~/catkin_ws/bringup/
- $ mkdir nav_config
- $ touch base_local_planner_params.yaml
- $ touch costmap_common_params.yaml
- $ touch global_costmap_params.yaml
- $ touch local_costmap_params.yaml
- 这四个文件主要用于导航配置
(1)base_local_planner_params.yaml文件内容:
- controller_frequency: 2.0
- recovery_behavior_enabled: false
- clearing_rotation_allowed: false
- TrajectoryPlannerROS:
- max_vel_x: 0.3
- min_vel_x: 0.05
- max_vel_y: 0.0 # zero for a differential drive robot
- min_vel_y: 0.0
- min_in_place_vel_theta: 0.5
- escape_vel: -0.1
- acc_lim_x: 2.5
- acc_lim_y: 0.0 # zero for a differential drive robot
- acc_lim_theta: 3.2
- holonomic_robot: false
- yaw_goal_tolerance: 0.1 # about 6 degrees
- xy_goal_tolerance: 0.15 # 10 cm
- latch_xy_goal_tolerance: false
- pdist_scale: 0.8
- gdist_scale: 0.6
- meter_scoring: true
- heading_lookahead: 0.325
- heading_scoring: false
- heading_scoring_timestep: 0.8
- occdist_scale: 0.1
- oscillation_reset_dist: 0.05
- publish_cost_grid_pc: false
- prune_plan: true
- sim_time: 2.5
- sim_granularity: 0.025
- angular_sim_granularity: 0.025
- vx_samples: 8
- vy_samples: 0 # zero for a differential drive robot
- vtheta_samples: 20
- dwa: true
- simple_attractor: false
(2)costmap_common_params.yaml文件
- obstacle_range: 2.5
- raytrace_range: 3.0
- robot_radius: 0.30
- inflation_radius: 0.15
- max_obstacle_height: 0.6
- min_obstacle_height: 0.0
- observation_sources: scan
- scan: {data_type: LaserScan, topic: /scan, marking: true, clearing: true, expected_update_rate: 0}
(3)global_costmap_params.yaml文件
- global_costmap:
- global_frame: /map
- robot_base_frame: /base_link
- update_frequency: 1.0
- publish_frequency: 0
- static_map: true
- rolling_window: false
- resolution: 0.01
- transform_tolerance: 0.5
- map_type: costmap
(4)local_costmap_params.yaml文件
- local_costmap:
- global_frame: /odom
- robot_base_frame: /base_link
- update_frequency: 1.0
- publish_frequency: 1.0
- static_map: false
- rolling_window: true
- width: 6.0
- height: 6.0
- resolution: 0.01
- transform_tolerance: 0.5
- map_type: costmap
- 在我们之前的建的bringup/下,新建map文件夹
- 然后将之前建图生成的两个文件 mymap.pgm 和 mymap.yaml 移到map文件夹里
- 然后修改 mymap.yaml ,做如下修改:将image这一行的改为你的mymap.pgm文件所在路径,如
image: /home/forrest/catkin_ws/src/bringup/map/mymap.pgm- 在我们之前的建的bringup/launch/下新建kinect2_nav.launch文件
- $ cd ~/catkin_ws/src/bringup/launch/
- $ touch kinect2_nav.launch
- $ vim kinect2_nav.launch
- 代码如下:
- <launch>
- <!-- ×××××××××××××××××××××××××××××××××××××××××××× 华丽分割线 ×××××××××××××××××××××××××××××××××××××××××××××××××××××××××××××× -->
- <param name="use_sim_time" value="false" />
- <!-- ×××××××××××××××××××××××××××××××××××××××××××× 华丽分割线 ×××××××××××××××××××××××××××××××××××××××××××××××××××××××××××××× -->
- <!-- 启动kinect2驱动节点 -->
- <include file="$(find kinect2_bridge)/launch/kinect2_bridge.launch">
- <arg name="base_name" value="kinect2"/>
- <arg name="sensor" value=""/>
- <arg name="publish_tf" value="true"/>
- <arg name="base_name_tf" value="kinect2"/>
- <arg name="fps_limit" value="-1.0"/>
- <arg name="calib_path" value="$(find kinect2_bridge)/data/"/>
- <arg name="use_png" value="false"/>
- <arg name="jpeg_quality" value="90"/>
- <arg name="png_level" value="1"/>
- <arg name="depth_method" value="default"/>
- <arg name="depth_device" value="-1"/>
- <arg name="reg_method" value="default"/>
- <arg name="reg_device" value="-1"/>
- <arg name="max_depth" value="12.0"/>
- <arg name="min_depth" value="0.1"/>
- <arg name="queue_size" value="5"/>
- <arg name="bilateral_filter" value="true"/>
- <arg name="edge_aware_filter" value="true"/>
- <arg name="worker_threads" value="4"/>
- </include>
- <!-- 启动深度图转换激光数据节点 -->
- <node pkg="depthimage_to_laserscan" type="depthimage_to_laserscan" name="depthimage_to_laserscan" output="screen">
- <!--输入图像-->
- <remap from="image" to="/kinect2/qhd/image_depth_rect"/>
- <!--相关图像的相机信息。通常不需要重新变形,因为camera_info将从与图像相同的命名空间订阅。-->
- <remap from="camera_info" to="/kinect2/qhd/camera_info" />
- <!--输出激光数据的话题-->
- <remap from="scan" to="/scan" />
- <!--激光扫描的帧id。对于来自具有Z向前的“光学”帧的点云,该值应该被设置为具有X向前和Z向上的相应帧。-->
- <param name="output_frame_id" value="/kinect2_depth_frame"/>
- <!--用于生成激光扫描的像素行数。对于每一列,扫描将返回在图像中垂直居中的那些像素的最小值。-->
- <param name="scan_height" value="30"/>
- <!--返回的最小范围(以米为单位)。小于该范围的输出将作为-Inf输出。-->
- <param name="range_min" value="0.45"/>
- <!--返回的最大范围(以米为单位)。大于此范围将输出为+ Inf。-->
- <param name="range_max" value="8.00"/>
- </node>
- <!-- ×××××××××××××××××××××××××××××××××××××××××××× 华丽分割线 ×××××××××××××××××××××××××××××××××××××××××××××××××××××××××××××× -->
- <!-- 启动地图服务器载入地图 -->
- <node name="map_server" pkg="map_server" type="map_server" args="$(find bringup)/map/mymap.yaml"/>
- <!-- ×××××××××××××××××××××××××××××××××××××××××××× 华丽分割线 ×××××××××××××××××××××××××××××××××××××××××××××××××××××××××××××× -->
- <!-- 启动 move_base 节点 -->
- <node pkg="move_base" type="move_base" respawn="false" name="move_base" output="screen" clear_params="true">
- <rosparam file="$(find bringup)/nav_config/costmap_common_params.yaml" command="load" ns="global_costmap" />
- <rosparam file="$(find bringup)/nav_config/costmap_common_params.yaml" command="load" ns="local_costmap" />
- <rosparam file="$(find bringup)/nav_config/local_costmap_params.yaml" command="load" />
- <rosparam file="$(find bringup)/nav_config/global_costmap_params.yaml" command="load" />
- <rosparam file="$(find bringup)/nav_config/base_local_planner_params.yaml" command="load" />
- <!-- <rosparam file="$(find odom_tf_package)/config/nav_obstacles_params.yaml" command="load" /> -->
- </node>
- <!-- ×××××××××××××××××××××××××××××××××××××××××××× 华丽分割线 ×××××××××××××××××××××××××××××××××××××××××××××××××××××××××××××× -->
- <!-- 启动 AMCL 节点 -->
- <node pkg="amcl" type="amcl" name="amcl" clear_params="true">
- <param name="use_map_topic" value="false"/>
- <!-- Publish scans from best pose at a max of 10 Hz -->
- <param name="odom_model_type" value="diff"/>
- <param name="odom_alpha5" value="0.1"/>
- <param name="gui_publish_rate" value="10.0"/>
- <param name="laser_max_beams" value="60"/>
- <param name="laser_max_range" value="12.0"/>
- <param name="min_particles" value="500"/>
- <param name="max_particles" value="2000"/>
- <param name="kld_err" value="0.05"/>
- <param name="kld_z" value="0.99"/>
- <param name="odom_alpha1" value="0.2"/>
- <param name="odom_alpha2" value="0.2"/>
- <!-- translation std dev, m -->
- <param name="odom_alpha3" value="0.2"/>
- <param name="odom_alpha4" value="0.2"/>
- <param name="laser_z_hit" value="0.5"/>
- <param name="laser_z_short" value="0.05"/>
- <param name="laser_z_max" value="0.05"/>
- <param name="laser_z_rand" value="0.5"/>
- <param name="laser_sigma_hit" value="0.2"/>
- <param name="laser_lambda_short" value="0.1"/>
- <param name="laser_model_type" value="likelihood_field"/>
- <!-- <param name="laser_model_type" value="beam"/> -->
- <param name="laser_likelihood_max_dist" value="2.0"/>
- <param name="update_min_d" value="0.25"/>
- <param name="update_min_a" value="0.2"/>
- <param name="odom_frame_id" value="odom"/>
- <param name="resample_interval" value="1"/>
- <!-- Increase tolerance because the computer can get quite busy -->
- <param name="transform_tolerance" value="1.0"/>
- <param name="recovery_alpha_slow" value="0.0"/>
- <param name="recovery_alpha_fast" value="0.0"/>
- <!-- scan topic -->
- <remap from="scan" to="scan"/>
- </node>
- <!-- ×××××××××××××××××××××××××××××××××××××××××××× 华丽分割线 ×××××××××××××××××××××××××××××××××××××××××××××××××××××××××××××× -->
- <!-- 启动基础控制器节点:发布里程计,控制小车 -->
- <node name="base_controller" pkg="base_controller" type="base_controller"/>
- <!-- ×××××××××××××××××××××××××××××××××××××××××××× 华丽分割线 ×××××××××××××××××××××××××××××××××××××××××××××××××××××××××××××× -->
- <!-- tf 转换 -->
- <!-- static_transform_publisher x y z yaw pitch roll frame_id child_frame_id period_in_ms -->
- <node pkg="tf" type="static_transform_publisher" name="base_footprint_to_base_link" args="0 0 0.5 0 0 0 base_footprint base_link 50" />
- <node pkg="tf" type="static_transform_publisher" name="base_link_to_laser" args="0 0 0.5 0 0 0 base_link laser 50" />
- <node pkg="tf" type="static_transform_publisher" name="base_link_to_kinect2laser" args="0 0 0.5 0 0 0 base_link kinect2_depth_frame 50" />
- <node pkg="tf" type="static_transform_publisher" name="base_link_to_kinect2_link" args="0 0 0.5 -1.57 0 -1.57 base_link kinect2_link 50" />
- <!-- ×××××××××××××××××××××××××××××××××××××××××××× 华丽分割线 ×××××××××××××××××××××××××××××××××××××××××××××××××××××××××××××× -->
- </launch>
- 在我们之前的建的bringup/launch/下新建kinect2_nav_rviz_view.launch文件
- $ cd ~/catkin_ws/src/bringup/launch/
- $ touch kinect2_nav_rviz_view.launch
- $ vim kinect2_nav_rviz_view.launch
- 代码如下:
- "1.0"?>
- <launch>
- <node name="rviz" pkg="rviz" type="rviz" args="-d $(find bringup)/rviz/kinect2_nav.rviz" />
- launch>
- 还有在新建bringup/rviz/下新建kinect2_nav.rviz文件
- $ cd ~/catkin_ws/src/bringup/rviz
- $ touch kinect2_nav.rviz
- $ vim kinect2_nav.rviz
- 代码如下:
- Panels:
- - Class: rviz/Displays
- Help Height: 78
- Name: Displays
- Property Tree Widget:
- Expanded:
- - /Global Options1
- - /Odometry1
- - /RobotModel1/Links1/base_footprint1
- - /Marker1/Namespaces1
- Splitter Ratio: 0.652661
- Tree Height: 457
- - Class: rviz/Selection
- Name: Selection
- - Class: rviz/Tool Properties
- Expanded:
- - /2D Pose Estimate1
- - /2D Nav Goal1
- Name: Tool Properties
- Splitter Ratio: 0.428571
- - Class: rviz/Views
- Expanded:
- - /Current View1
- Name: Views
- Splitter Ratio: 0.5
- - Class: rviz/Time
- Experimental: false
- Name: Time
- SyncMode: 0
- SyncSource: ""
- Visualization Manager:
- Class: ""
- Displays:
- - Alpha: 0.5
- Cell Size: 0.5
- Class: rviz/Grid
- Color: 160; 160; 164
- Enabled: true
- Line Style:
- Line Width: 0.03
- Value: Lines
- Name: Grid
- Normal Cell Count: 0
- Offset:
- X: 0
- Y: 0
- Z: 0
- Plane: XY
- Plane Cell Count: 80
- Reference Frame: odom
- Value: true
- - Angle Tolerance: 0.1
- Class: rviz/Odometry
- Color: 221; 200; 14
- Enabled: true
- Keep: 100
- Length: 0.6
- Name: Odometry
- Position Tolerance: 0.1
- Topic: /odom
- Value: true
- - Angle Tolerance: 0.1
- Class: rviz/Odometry
- Color: 255; 85; 0
- Enabled: false
- Keep: 100
- Length: 0.6
- Name: Odometry EKF
- Position Tolerance: 0.1
- Topic: /odom_ekf
- Value: false
- - Alpha: 1
- Class: rviz/RobotModel
- Collision Enabled: false
- Enabled: true
- Links:
- All Links Enabled: true
- Expand Joint Details: false
- Expand Link Details: false
- Expand Tree: false
- Link Tree Style: Links in Alphabetic Order
- base_footprint:
- Alpha: 1
- Show Axes: false
- Show Trail: false
- Value: true
- base_link:
- Alpha: 1
- Show Axes: false
- Show Trail: false
- Value: true
- camera_depth_frame:
- Alpha: 1
- Show Axes: false
- Show Trail: false
- camera_depth_optical_frame:
- Alpha: 1
- Show Axes: false
- Show Trail: false
- camera_link:
- Alpha: 1
- Show Axes: false
- Show Trail: false
- Value: true
- camera_rgb_frame:
- Alpha: 1
- Show Axes: false
- Show Trail: false
- camera_rgb_optical_frame:
- Alpha: 1
- Show Axes: false
- Show Trail: false
- front_wheel_link:
- Alpha: 1
- Show Axes: false
- Show Trail: false
- Value: true
- gyro_link:
- Alpha: 1
- Show Axes: false
- Show Trail: false
- laser:
- Alpha: 1
- Show Axes: false
- Show Trail: false
- Value: true
- left_cliff_sensor_link:
- Alpha: 1
- Show Axes: false
- Show Trail: false
- left_wheel_link:
- Alpha: 1
- Show Axes: false
- Show Trail: false
- Value: true
- leftfront_cliff_sensor_link:
- Alpha: 1
- Show Axes: false
- Show Trail: false
- plate_0_link:
- Alpha: 1
- Show Axes: false
- Show Trail: false
- Value: true
- plate_1_link:
- Alpha: 1
- Show Axes: false
- Show Trail: false
- Value: true
- plate_2_link:
- Alpha: 1
- Show Axes: false
- Show Trail: false
- Value: true
- plate_3_link:
- Alpha: 1
- Show Axes: false
- Show Trail: false
- Value: true
- rear_wheel_link:
- Alpha: 1
- Show Axes: false
- Show Trail: false
- Value: true
- right_cliff_sensor_link:
- Alpha: 1
- Show Axes: false
- Show Trail: false
- right_wheel_link:
- Alpha: 1
- Show Axes: false
- Show Trail: false
- Value: true
- rightfront_cliff_sensor_link:
- Alpha: 1
- Show Axes: false
- Show Trail: false
- spacer_0_link:
- Alpha: 1
- Show Axes: false
- Show Trail: false
- Value: true
- spacer_1_link:
- Alpha: 1
- Show Axes: false
- Show Trail: false
- Value: true
- spacer_2_link:
- Alpha: 1
- Show Axes: false
- Show Trail: false
- Value: true
- spacer_3_link:
- Alpha: 1
- Show Axes: false
- Show Trail: false
- Value: true
- standoff_2in_0_link:
- Alpha: 1
- Show Axes: false
- Show Trail: false
- Value: true
- standoff_2in_1_link:
- Alpha: 1
- Show Axes: false
- Show Trail: false
- Value: true
- standoff_2in_2_link:
- Alpha: 1
- Show Axes: false
- Show Trail: false
- Value: true
- standoff_2in_3_link:
- Alpha: 1
- Show Axes: false
- Show Trail: false
- Value: true
- standoff_2in_4_link:
- Alpha: 1
- Show Axes: false
- Show Trail: false
- Value: true
- standoff_2in_5_link:
- Alpha: 1
- Show Axes: false
- Show Trail: false
- Value: true
- standoff_2in_6_link:
- Alpha: 1
- Show Axes: false
- Show Trail: false
- Value: true
- standoff_2in_7_link:
- Alpha: 1
- Show Axes: false
- Show Trail: false
- Value: true
- standoff_8in_0_link:
- Alpha: 1
- Show Axes: false
- Show Trail: false
- Value: true
- standoff_8in_1_link:
- Alpha: 1
- Show Axes: false
- Show Trail: false
- Value: true
- standoff_8in_2_link:
- Alpha: 1
- Show Axes: false
- Show Trail: false
- Value: true
- standoff_8in_3_link:
- Alpha: 1
- Show Axes: false
- Show Trail: false
- Value: true
- standoff_kinect_0_link:
- Alpha: 1
- Show Axes: false
- Show Trail: false
- Value: true
- standoff_kinect_1_link:
- Alpha: 1
- Show Axes: false
- Show Trail: false
- Value: true
- wall_sensor_link:
- Alpha: 1
- Show Axes: false
- Show Trail: false
- Name: RobotModel
- Robot Description: robot_description
- TF Prefix: ""
- Update Interval: 0
- Value: true
- Visual Enabled: true
- - Alpha: 0.2
- Class: rviz/Map
- Color Scheme: map
- Draw Behind: true
- Enabled: true
- Name: Map
- Topic: /map
- Value: true
- - Alpha: 1
- Buffer Length: 1
- Class: rviz/Path
- Color: 255; 0; 0
- Enabled: true
- Name: Local Plan
- Topic: /move_base/TrajectoryPlannerROS/local_plan
- Value: true
- - Alpha: 1
- Buffer Length: 1
- Class: rviz/Path
- Color: 0; 213; 0
- Enabled: true
- Name: Global Plan
- Topic: /move_base/TrajectoryPlannerROS/global_plan
- Value: true
- - Class: rviz/Marker
- Enabled: true
- Marker Topic: /waypoint_markers
- Name: Marker
- Namespaces:
- {}
- Queue Size: 100
- Value: true
- - Alpha: 1
- Autocompute Intensity Bounds: true
- Autocompute Value Bounds:
- Max Value: 0.304
- Min Value: 0.304
- Value: true
- Axis: Z
- Channel Name: intensity
- Class: rviz/LaserScan
- Color: 255; 255; 255
- Color Transformer: FlatColor
- Decay Time: 0
- Enabled: true
- Invert Rainbow: false
- Max Color: 255; 255; 255
- Max Intensity: 4096
- Min Color: 0; 0; 0
- Min Intensity: 0
- Name: LaserScan
- Position Transformer: XYZ
- Queue Size: 10
- Selectable: true
- Size (Pixels): 3
- Size (m): 0.01
- Style: Spheres
- Topic: /scan
- Use Fixed Frame: true
- Use rainbow: true
- Value: true
- - Alpha: 1
- Axes Length: 1
- Axes Radius: 0.1
- Class: rviz/Pose
- Color: 0; 255; 0
- Enabled: true
- Head Length: 0.1
- Head Radius: 0.15
- Name: Mouse Goal
- Shaft Length: 0.5
- Shaft Radius: 0.03
- Shape: Arrow
- Topic: /move_base/current_goal
- Value: true
- - Alpha: 1
- Axes Length: 1
- Axes Radius: 0.1
- Class: rviz/Pose
- Color: 0; 255; 0
- Enabled: true
- Head Length: 0.1
- Head Radius: 0.15
- Name: Goal Pose
- Shaft Length: 0.5
- Shaft Radius: 0.03
- Shape: Arrow
- Topic: /move_base_simple/goal
- Value: true
- - Arrow Length: 0.3
- Class: rviz/PoseArray
- Color: 255; 25; 0
- Enabled: false
- Name: Pose Array
- Topic: ""
- Value: false
- Enabled: true
- Global Options:
- Background Color: 0; 0; 0
- Fixed Frame: map
- Frame Rate: 30
- Name: root
- Tools:
- - Class: rviz/MoveCamera
- - Class: rviz/Interact
- Hide Inactive Objects: true
- - Class: rviz/Select
- - Class: rviz/SetInitialPose
- Topic: /initialpose
- - Class: rviz/SetGoal
- Topic: /move_base_simple/goal
- Value: true
- Views:
- Current:
- Angle: -1.57
- Class: rviz/TopDownOrtho
- Name: Current View
- Near Clip Distance: 0.01
- Scale: 205.257
- Target Frame: <Fixed Frame>
- Value: TopDownOrtho (rviz)
- X: 0.755064
- Y: 0.634474
- Saved: ~
- Window Geometry:
- Displays:
- collapsed: false
- Height: 695
- Hide Left Dock: false
- Hide Right Dock: false
- QMainWindow State: 000000ff00000000fd00000004000000000000012d00000258fc0200000005fb0000001200530065006c0065006300740069006f006e00000001e10000009b0000006400fffffffb0000001e0054006f006f006c002000500072006f007000650072007400690065007302000001ed000001df00000198000000a3fb000000120056006900650077007300200054006f006f02000001df000002110000018500000122fb000000200054006f006f006c002000500072006f0070006500720074006900650073003203000002880000011d000002210000017afb000000100044006900730070006c006100790073010000004100000258000000dd00ffffff000000010000010f00000270fc0200000003fb0000001e0054006f006f006c002000500072006f00700065007200740069006500730100000041000000780000000000000000fb0000000a00560069006500770073000000002800000270000000b000fffffffb0000001200530065006c0065006300740069006f006e010000025a000000b200000000000000000000000200000490000000a9fc0100000001fb0000000a00560069006500770073030000004e00000080000002e10000019700000003000004a00000003efc0100000002fb0000000800540069006d00650000000000000004a0000002f600fffffffb0000000800540069006d00650100000000000004500000000000000000000002b80000025800000004000000040000000800000008fc0000000100000002000000010000000a0054006f006f006c00730100000000ffffffff0000000000000000
- Selection:
- collapsed: false
- Time:
- collapsed: false
- Tool Properties:
- collapsed: false
- Views:
- collapsed: false
- Width: 1003
- X: 787
- Y: 348
测试
-
最后我们依次启动我们的launch文件便可进行导航
-
新终端,执行roscore
$ roscore- 新终端,执行:
roslaunch kinect2_nav.launch- 新终端,执行:
roslaunch kinect2_nav_rviz_view.launch- 启动成功的话会看到一下画面:

如果你看到 odom received! 说明已经正常运行。
rviz会展现出已经保存的地图。turtlebot不能够估计启动时的姿态。我们可以通过“2D Pose Estimate”来进行位姿的初始化。
选择“2D Pose Estimate”,在地图上的turtlebot位置点击并按住。当你握着鼠标的时候,一个箭头会出现在鼠标指针的下方,用这个来估计它的方向。
设置后估计的姿态,选择“2D Nav Goal”,点击你想让turtlebot去的地方。您还可以指定一个目标方向,使用相同的技术如“2D Pose Estimate”。
turtlebot现在应该朝着你的目录自主前进。尝试指定一个目标,并走在前面,看看它如何反应的动态障碍。
-
相关阅读:
【Java笔试强训】Day1(100449-组队竞赛 、OR63 删除公共字符)
【爬虫】第二部分 urllib_handler处理器
Redis3.2.1如何设置远程连接?允许局域网访问
(三)使用 Vue 脚手架
carrier开利触摸屏ICVC控制面板维修CEPL130445
状态栏QStatusBar
AI高考志愿填报:大厂神仙打架,考生付费围观
JavaScript从入门到精通|函数
(十五)IO 流
kubernetes集群配置默认存储类(nfs)
- 原文地址:https://blog.csdn.net/qqGHJ/article/details/128087091
