-
Spring Boot与Shiro实现权限管理04
1.实现用户管理
1.1 用户列表
首先创建dto,用于请求与响应数据的传输。在common包下创建dto包,在该包下创建UserDto.java类。
@Data @AllArgsConstructor @NoArgsConstructor public class UserDto implements Serializable { private Integer id; private String username; }- 1
- 2
- 3
- 4
- 5
- 6
- 7
- 8
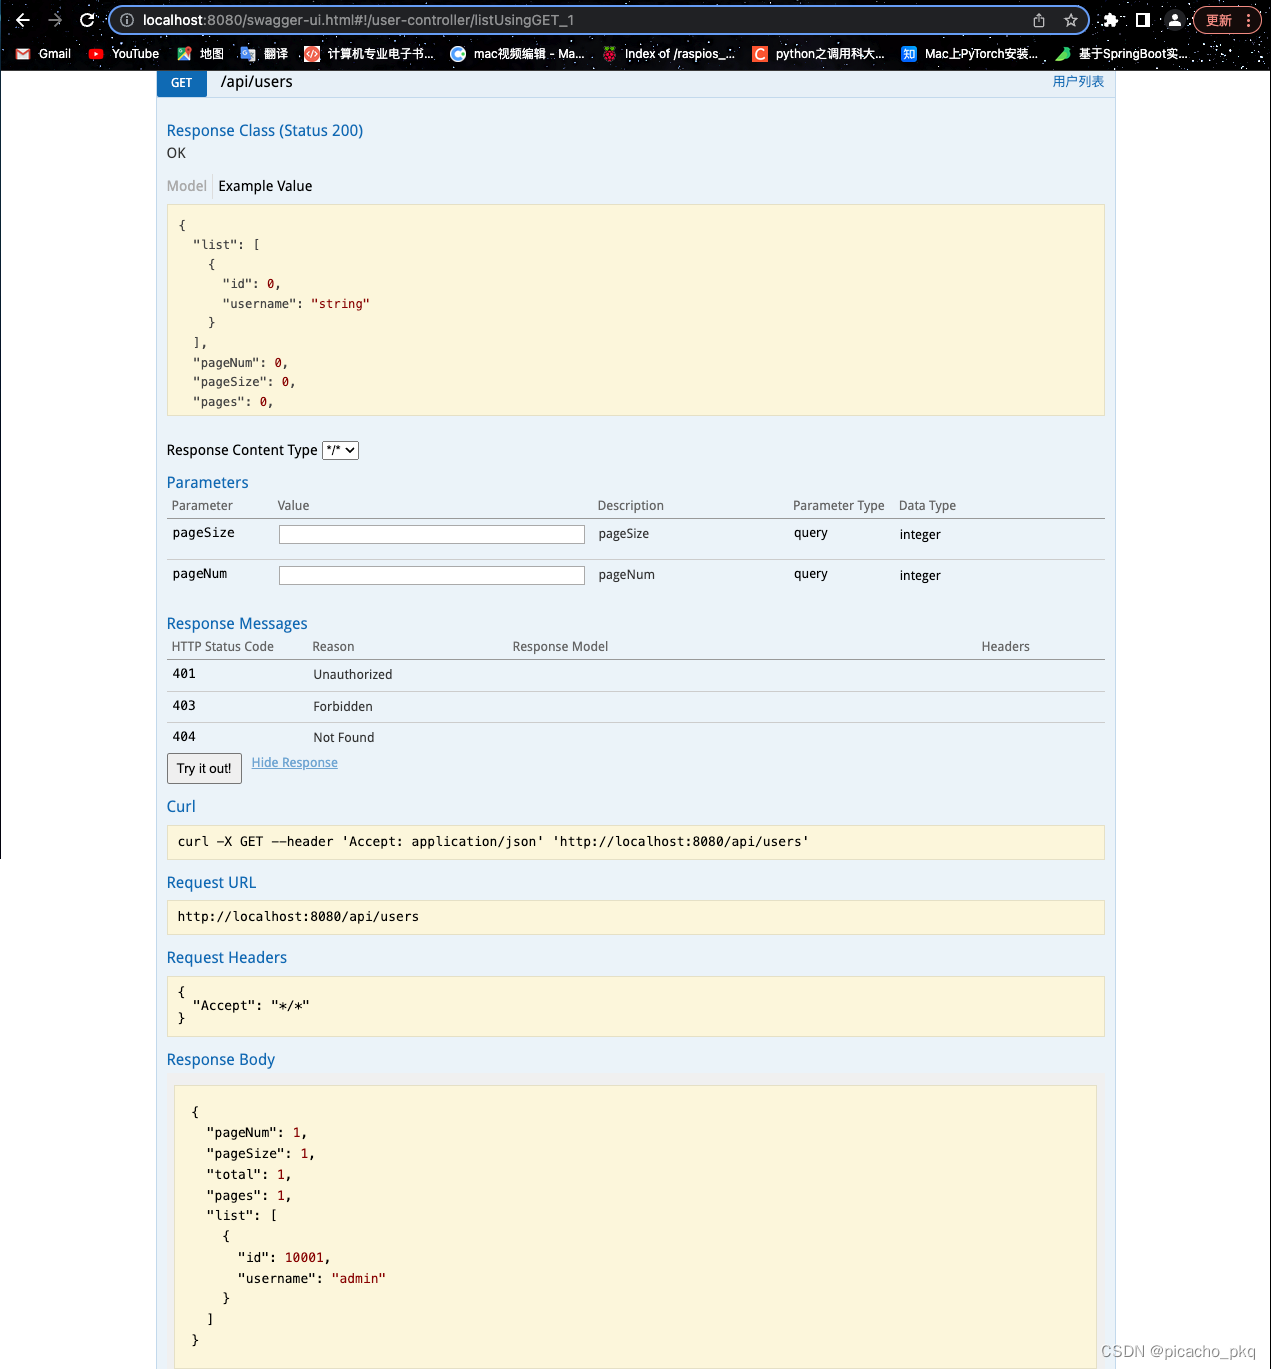
创建Controller层
在controller包下的UserController.java类添加用户查询控制器。
@RestController @RequestMapping("/api") public class UserController { @Autowired private UserService userService; @RequiresPermissions("user:list") @ApiOperation("用户列表") @GetMapping("/users") public ResponseEntity<PageModel<UserDto>> list(@RequestParam(required = false) Integer pageSize, @RequestParam(required = false) Integer pageNum) { PageCondition pc = new PageCondition(pageNum, pageSize); PageModel<UserDto> pageModel = userService.listAllUser(pc); return Results.success(pageModel); } }- 1
- 2
- 3
- 4
- 5
- 6
- 7
- 8
- 9
- 10
- 11
- 12
- 13
- 14
- 15
- 16
- 17
- 18
创建Service层
在service包下的UserService.java类添加查询用户列表方法。
/** * 查询用户列表 * @param condition * @return */ PageModel<UserDto> listAllUser(PageCondition condition);- 1
- 2
- 3
- 4
- 5
- 6
@Override public PageModel<UserDto> listAllUser(PageCondition condition) { PageHelper.startPage(condition.getPageNum(), condition.getPageSize()); PageInfo<UserDto> pageInfo = new PageInfo<>(sysUserMapper.findAll()); return Results.pageModel(pageInfo); }- 1
- 2
- 3
- 4
- 5
- 6
创建Mapper层
/** * 查询用户列表 * @return */ List<UserDto> findAll();- 1
- 2
- 3
- 4
- 5
<select id="findAll" resultType="com.picacho.springbootshiro.common.dto.UserDto"> select id, username from sys_user select>- 1
- 2
- 3
- 4
- 5
- 6
测试一下
后面对用户的新增,删除和修改等功能,其实现方式和流程与上面的流程基本一致,这里就不一一详细介绍了。2.实现用户角色分配
前面已经创建了一个新的角色:“角色分配管理员A”,同时这个角色已经被分配了三个权限,接着在用户管理模块创建picachoA用户,为这个用户指定角色,角色被分配了一组权限,这就决定了这个用户访问系统时拥有这组权限。
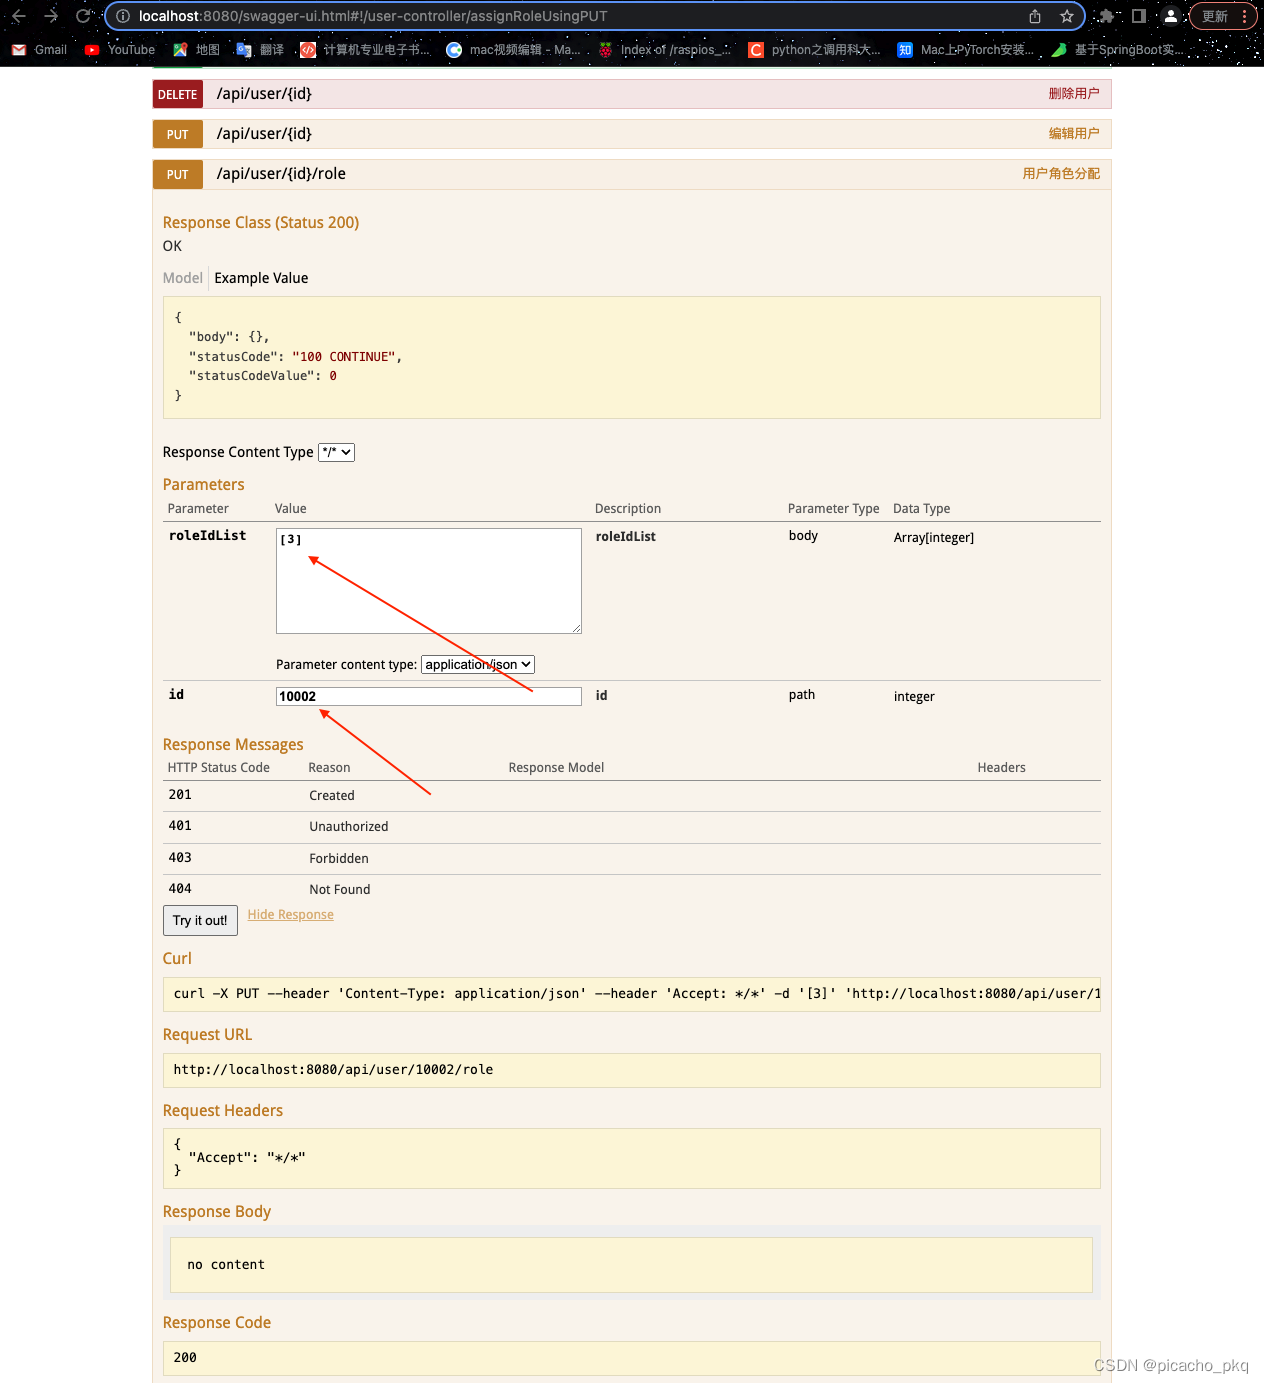
完成Controller层
@RequiresPermissions("user:assign-role") @ApiOperation("用户角色分配") @PutMapping("/user/{id}/role") public ResponseEntity assignRole(@RequestBody List<Integer> roleIdList, @PathVariable Integer id) { userService.assignRole(id, roleIdList); return Results.success(); }- 1
- 2
- 3
- 4
- 5
- 6
- 7
完成Service层
/** * 用户角色分配 * @param id * @param roleIdList */ void assignRole(Integer id, List<Integer> roleIdList);- 1
- 2
- 3
- 4
- 5
- 6
@Transactional @Override public void assignRole(Integer userId, List<Integer> roleIdList) { if (sysUserMapper.find(userId) == null) { throw Errors.badRequest("用户不存在"); } if (!CollectionUtils.isEmpty(roleIdList)) { int count = sysRoleMapper.countByIds(roleIdList); if (count != roleIdList.size()) { throw Errors.badRequest("角色不存在"); } } sysUserRoleMapper.deleteByUserId(userId); if (!CollectionUtils.isEmpty(roleIdList)) { List<SysUserRole> rps = roleIdList.stream().map(p -> { SysUserRole rp = new SysUserRole(); rp.setRoleId(p); rp.setUserId(userId); return rp; }).collect(Collectors.toList()); if (sysUserRoleMapper.insertBatch(rps) != roleIdList.size()) { throw Errors.db(); } } }- 1
- 2
- 3
- 4
- 5
- 6
- 7
- 8
- 9
- 10
- 11
- 12
- 13
- 14
- 15
- 16
- 17
- 18
- 19
- 20
- 21
- 22
- 23
- 24
- 25
完成mapper层
SysRoleMapper
int countByIds(@Param("roleIdList") List<Integer> roleIdList);- 1
<select id="countByIds" resultType="java.lang.Integer"> select COUNT(*) FROM sys_role sp WHERE sp.id IN <foreach collection="roleIdList" item="k" open="(" separator="," close=")">#{k}foreach> select>- 1
- 2
- 3
- 4
- 5
- 6
SysUserRoleMapper
void deleteByUserId(Integer userId); int insertBatch(@Param("rps") List<SysUserRole> rps);- 1
- 2
- 3
<delete id="deleteByUserId"> delete from sys_user_role where user_id = #{userId} delete> <insert id="insertBatch"> insert into sys_user_role (role_id, user_id) values <foreach collection="rps" item="t" separator=","> (#{t.roleId},#{t.userId}) foreach> insert>- 1
- 2
- 3
- 4
- 5
- 6
- 7
- 8
- 9
- 10
- 11
- 12
- 13
测试一下
登陆超级管理员为用户picachoA分配角色分配管理员A,接着使用用户picachoA登陆查看其拥有的权限。
首先给超级管理员添加用户角色分配权限。
INSERT INTO `sys_permission`(id, permission_code, permission_name) VALUE (901, 'user:assign-role', '用户角色分配'); INSERT INTO `sys_role_permission`(role_id, permission_id) VALUES (1, 901);- 1
- 2
- 3
- 4
- 5
此时为picachoA用户添加了“角色分配管理员A”的角色,这个用户就拥有了这个角色对应的权限了。3.实现通知
3.1 实现新建通知
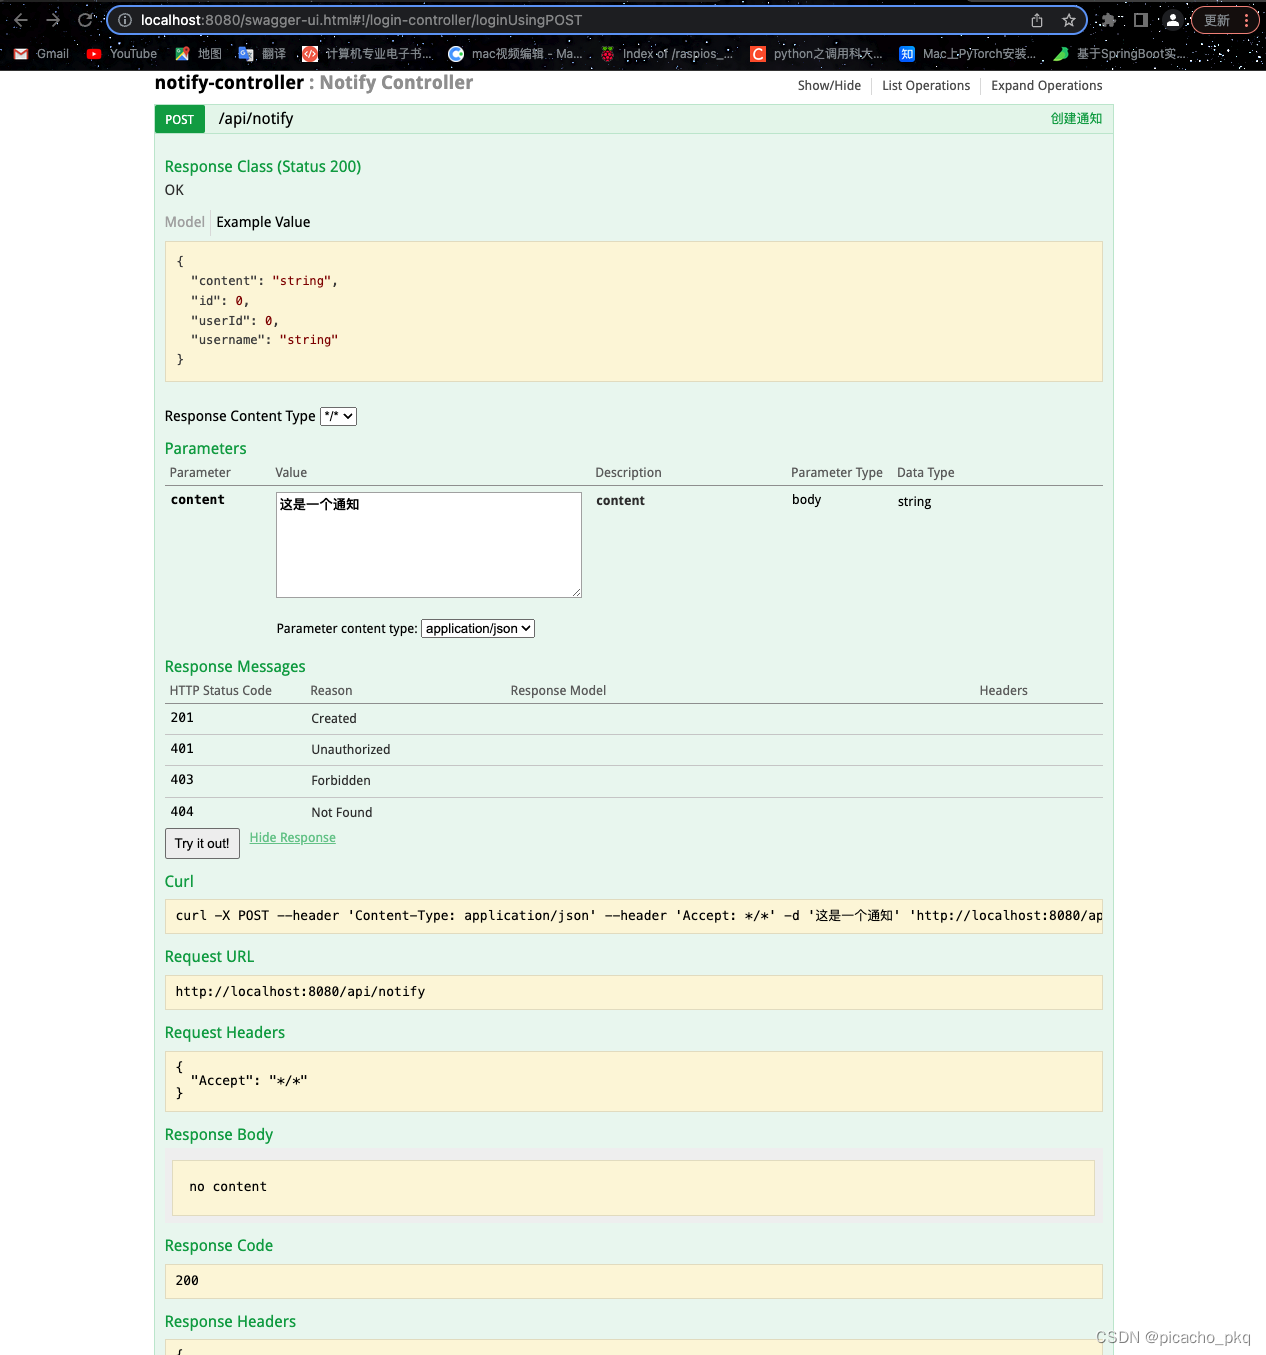
完成Controller层
在controller包下创建NotifyController.java类。
@RestController @RequestMapping("api") public class NotifyController { @Autowired private NotifyService notifyService; @Autowired private UserService userService; @RequiresPermissions("notify:add") @ApiOperation("创建通知") @PostMapping("/notify") public ResponseEntity<NotifyDto> add(@RequestBody String content) { if (StringUtils.isBlank(content)) { return Results.userInputError("通知内容不能为空"); } String username = (String) SecurityUtils.getSubject().getPrincipal(); Integer userID = userService.findUserID(username); NotifyDto dto = notifyService.create(userID, content); return Results.success(dto); } }- 1
- 2
- 3
- 4
- 5
- 6
- 7
- 8
- 9
- 10
- 11
- 12
- 13
- 14
- 15
- 16
- 17
- 18
- 19
- 20
- 21
- 22
- 23
- 24
- 25
完成Service层
UserService
/** * 查询用户 * @param username * @return */ Integer findUserID(String username);- 1
- 2
- 3
- 4
- 5
- 6
@Override public Integer findUserID(String username) { SysUser user = sysUserMapper.findByUsername(username); if (user == null) { return null; } return user.getId(); }- 1
- 2
- 3
- 4
- 5
- 6
- 7
- 8
- 9
NotifyService
public interface NotifyService { NotifyDto create(Integer userId, String content); }- 1
- 2
- 3
- 4
- 5
@Service public class NotifyServiceImpl implements NotifyService { @Autowired private NotifyMapper notifyMapper; @Autowired private SysUserMapper sysUserMapper; @Transactional @Override public NotifyDto create(Integer userId, String content) { if (sysUserMapper.find(userId) == null) { throw Errors.badRequest("用户不存在"); } Notify sr = new Notify(); sr.setUserId(userId); sr.setContent(content); if (1 != notifyMapper.insert(sr)) { throw new ServiceException("无法新增通知记录到数据库"); } return notifyMapper.findById(sr.getId()); } }- 1
- 2
- 3
- 4
- 5
- 6
- 7
- 8
- 9
- 10
- 11
- 12
- 13
- 14
- 15
- 16
- 17
- 18
- 19
- 20
- 21
- 22
- 23
- 24
- 25
- 26
- 27
完成mapper层
NotifyDto findById(Integer id);- 1
<select id="findById" resultType="com.picacho.springbootshiro.common.dto.NotifyDto"> select n.id, su.id as userId, su.username, n.content from notify n left join sys_user su on su.id = n.user_id where n.id = #{id} select>- 1
- 2
- 3
- 4
- 5
- 6
测试一下
添加一个通知管理员用户
INSERT INTO `sys_role`(id, role_name) VALUE (3, '通知管理员'); INSERT INTO `sys_role_permission`(role_id, permission_id) VALUES (3, 101), (3, 102), (3, 103), (3, 104); INSERT INTO `sys_user`(id, username, password) VALUE (10003, 'picacho', '123456'); INSERT INTO `sys_user_role`(user_id, role_id) VALUE (10003, 3);- 1
- 2
- 3
- 4
- 5
- 6
- 7
- 8
- 9
- 10
- 11
- 12
- 13
- 14
还有通知的查询,编辑,删除就不一一实现,这个demo项目到这里就基本结束了。
源码下载地址:源码下载 -
相关阅读:
Semantic Kernel 入门系列:🪄LLM的魔法
C#实现简单人机交互
velero 迁移k8s集群资源
8–9月,Sui Move智能合约工作坊将在台北+线上举行
借助Numpy,优化Pandas的条件检索代码
vue3在父组件的jsx代码中使用具名插槽
查询或解析solidity智能合约事件event或logs日志
计算机网络---UDP协议
项目中注解的使用
Python3操作MongoDB数据库
- 原文地址:https://blog.csdn.net/pikcacho_pkq/article/details/127815647
